Shortly after finishing my TinyCLR OS V1 LoRa Library port GHI Electronics started talking publicly about their new SITCore hardware and updated TinyCLR.
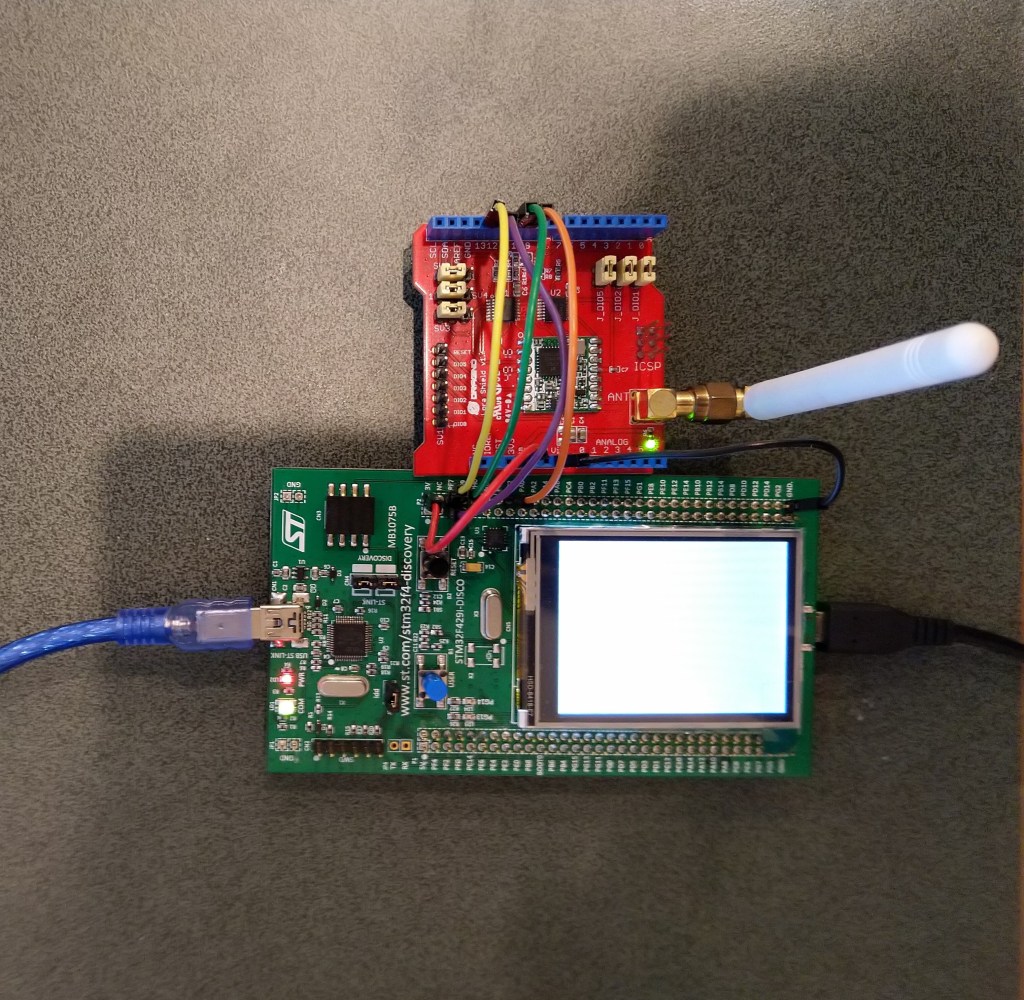
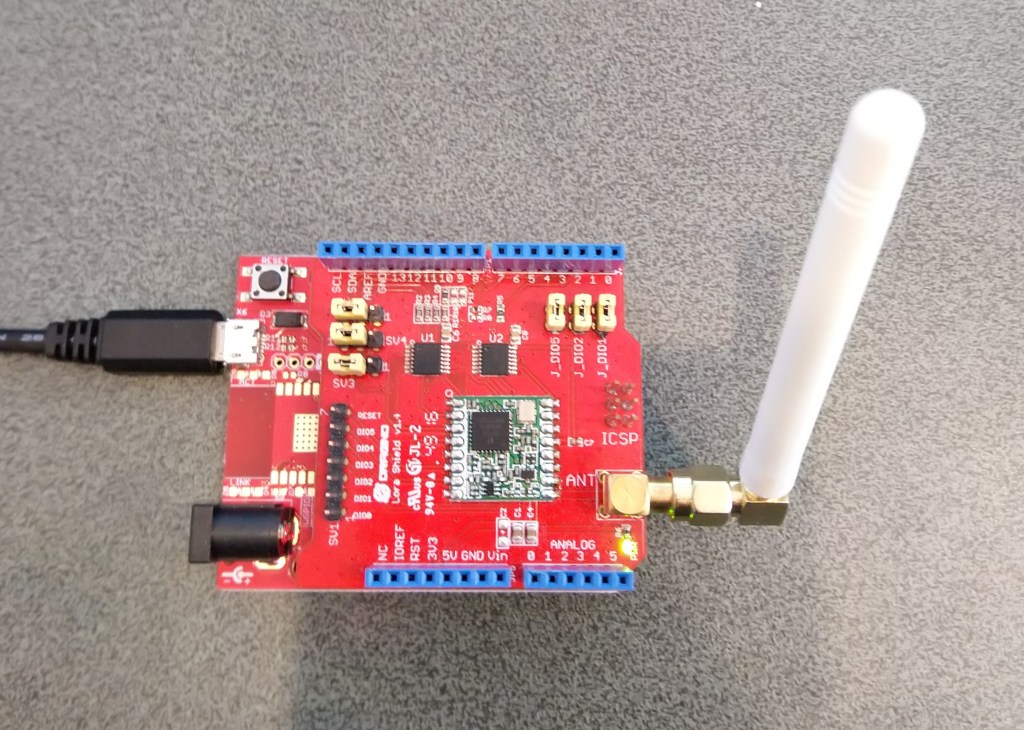
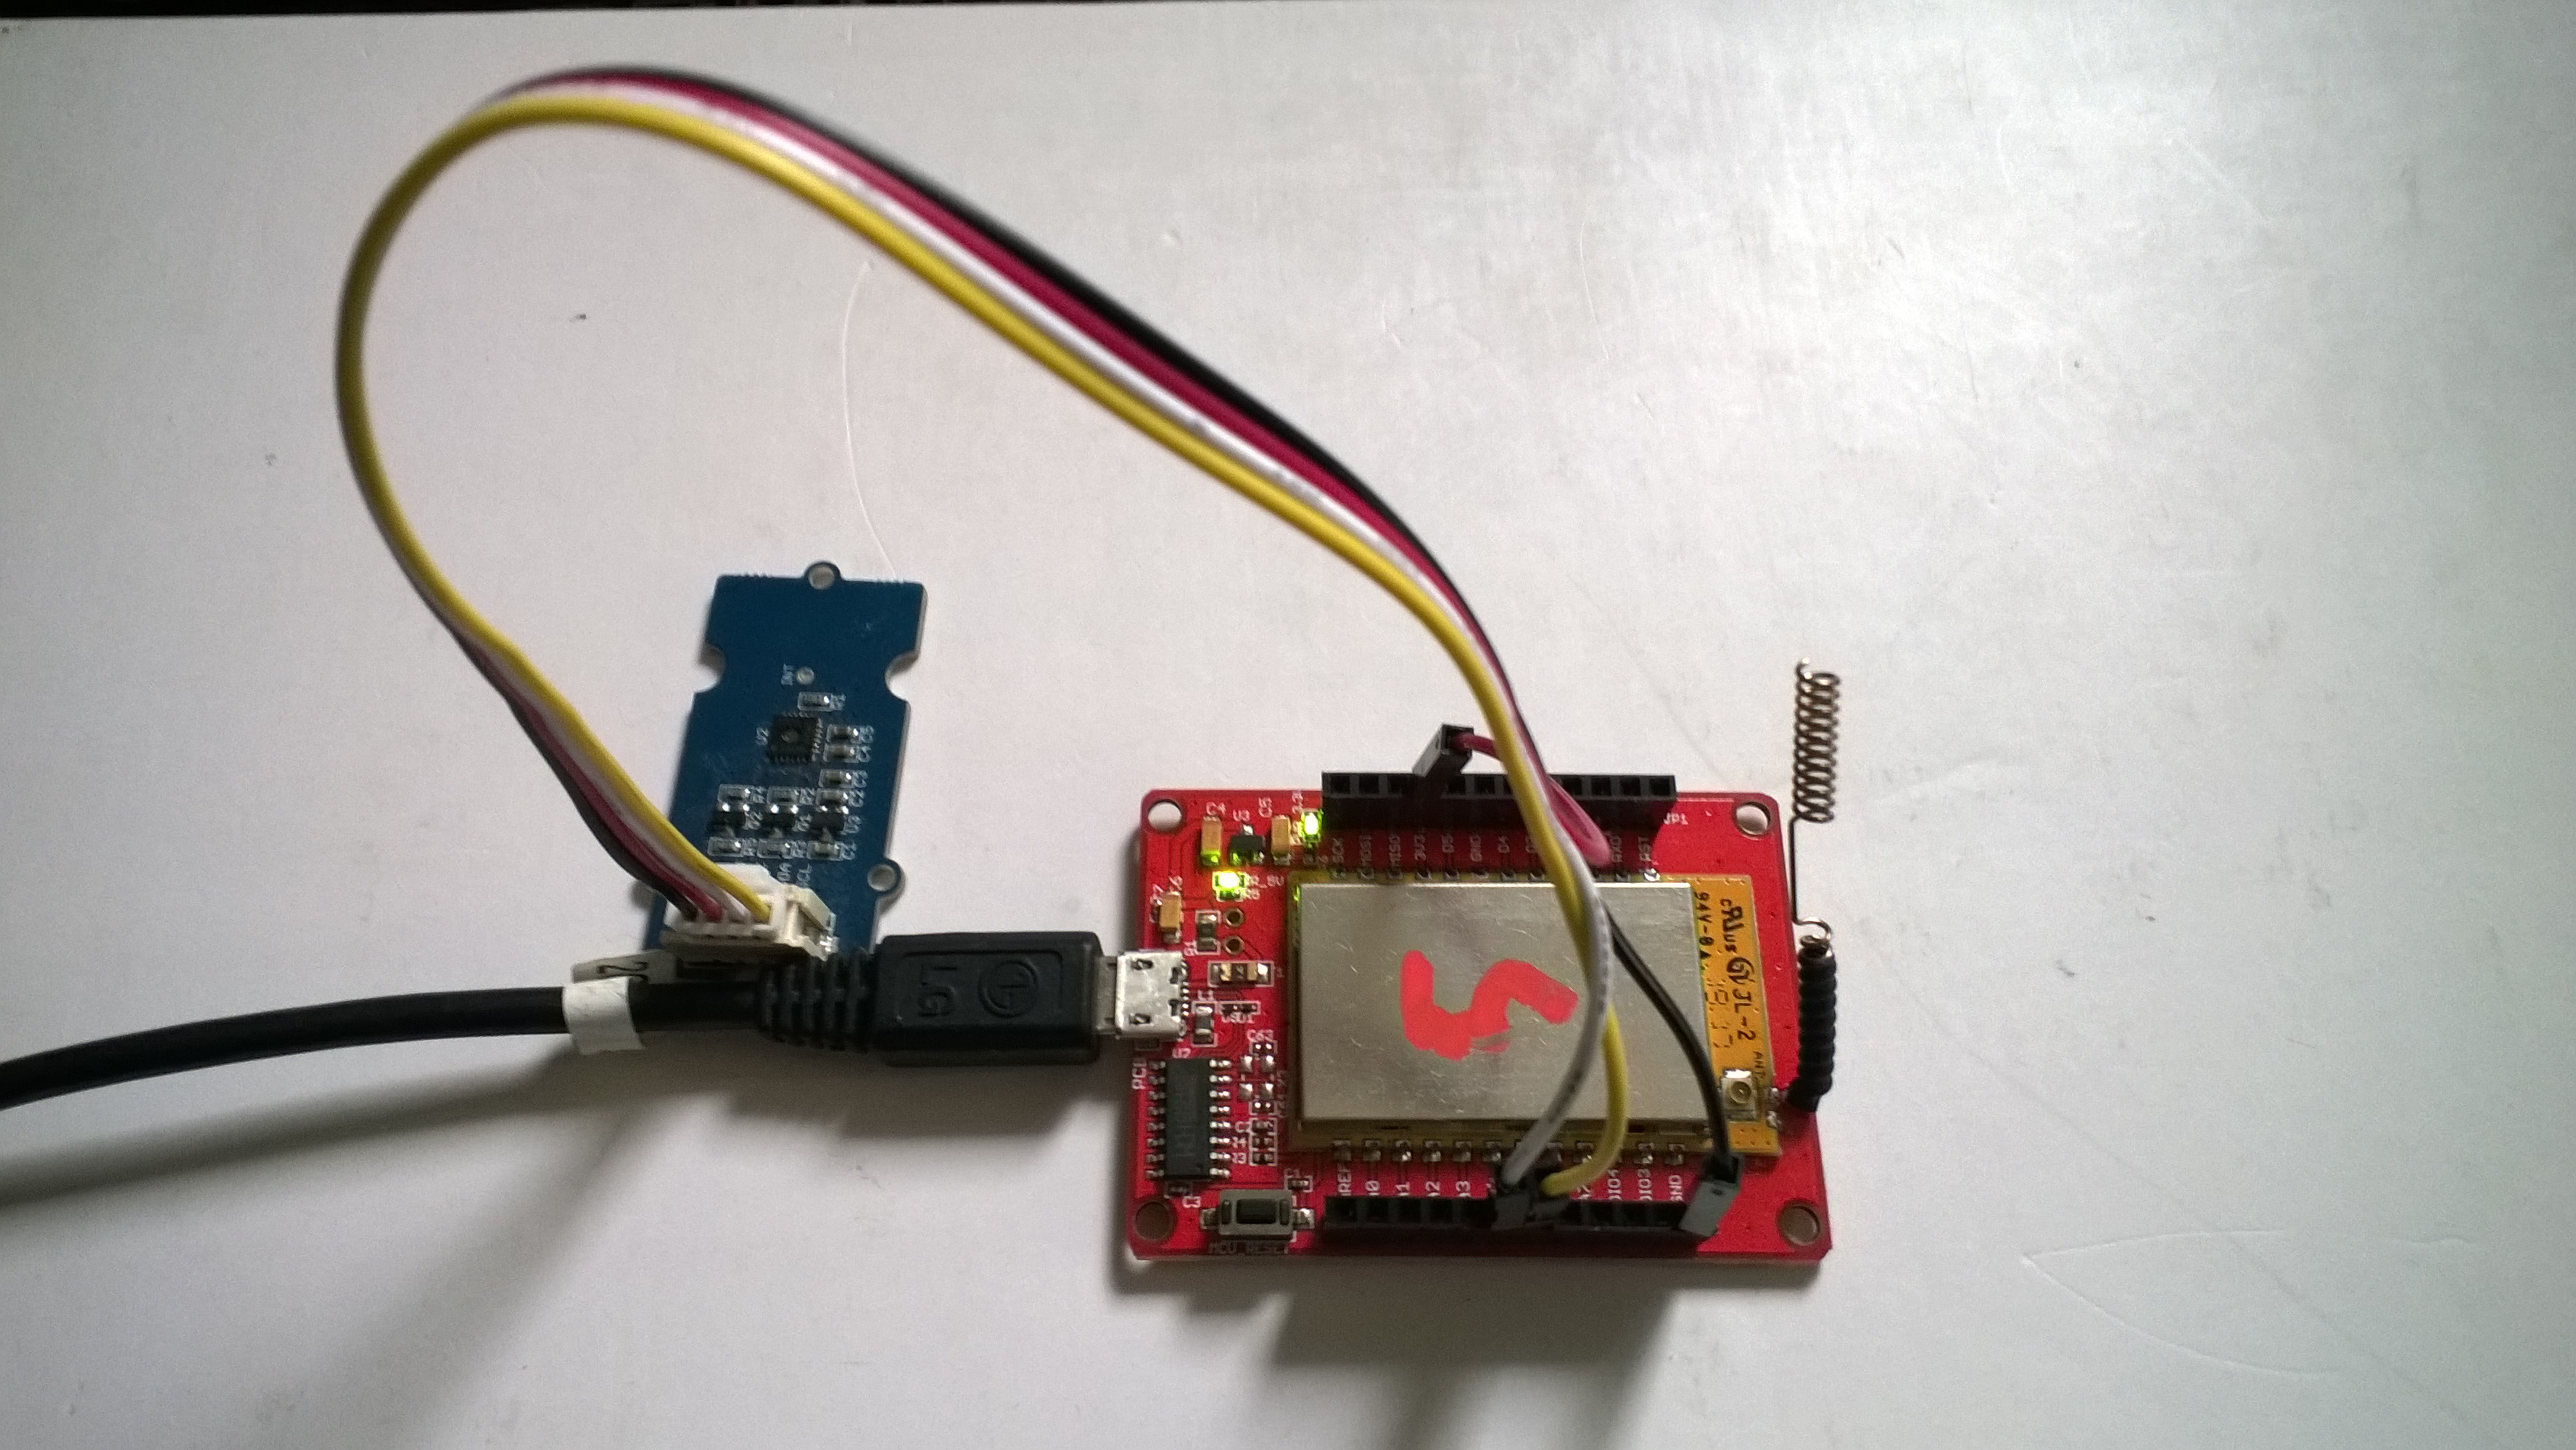
To get started I used a Dragino LoRa shield for Arduino and some jumper leads to connect it to the SC20100 device I had been sent
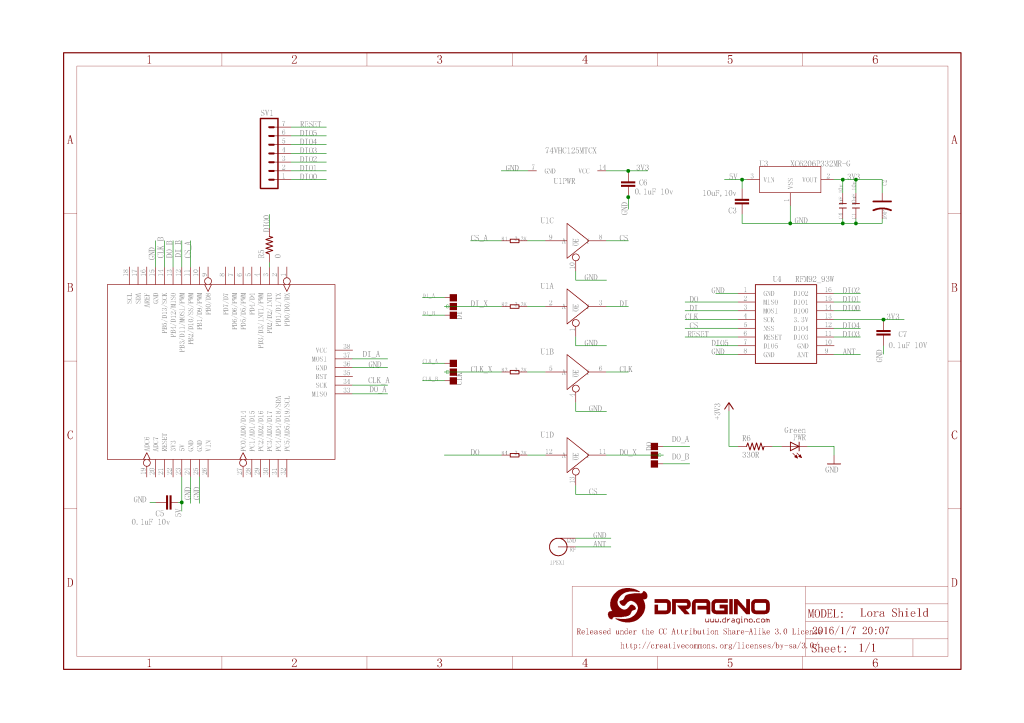
The shield uses D10 for chip select, D2 for RFM9X DI0 interrupt and D9 for Reset. The shield ships with the SPI lines configured for ICSP so the three jumpers diagonally across the shield from the antenna connector need to be swapped to the side closest to the edge of the shield.

First step was to confirm I could (using the TinyCLR SPI NuGet library) read a couple of the Semtech SX1276 registers.
namespace devMobile.IoT.Rfm9x.ShieldSpi
{
   using System;
   using System.Diagnostics;

   using System.Threading;
   using GHIElectronics.TinyCLR.Devices.Spi;
   using GHIElectronics.TinyCLR.Pins;

   class Program
   {
      static void Main()
      {
         var settings = new SpiConnectionSettings()
         {
            ChipSelectType = SpiChipSelectType.Gpio,
            //ChipSelectLine = FEZ.GpioPin.D10,
            ChipSelectLine = GHIElectronics.TinyCLR.Devices.Gpio.GpioController.GetDefault().OpenPin(SC20100.GpioPin.PA13),
            Mode = SpiMode.Mode0,
            //Mode = SpiMode.Mode1,
            //Mode = SpiMode.Mode2,
            //Mode = SpiMode.Mode3,
            ClockFrequency = 500000,
            //DataBitLength = 8, Removed as part of TiyCLR V2 Upgrade
            //ChipSelectActiveState = true
            ChipSelectActiveState = false,
            //ChipSelectHoldTime = new TimeSpan(0, 0, 0, 0, 500),
            //ChipSelectSetupTime = new TimeSpan(0, 0, 0, 0, 500),
         };

         //var controller = SpiController.FromName(FEZ.SpiBus.Spi1);
         var controller = SpiController.FromName(SC20100.SpiBus.Spi3);
         var device = controller.GetDevice(settings);

         Thread.Sleep(500);

         while (true)
         {
            byte register;
            byte[] writeBuffer;
            byte[] readBuffer;

            // Silicon Version info
            register = 0x42; // RegVersion expecting 0x12

            // Frequency
            //register = 0x06; // RegFrfMsb expecting 0x6C
            //register = 0x07; // RegFrfMid expecting 0x80
            //register = 0x08; // RegFrfLsb expecting 0x00

            //register = 0x17; //RegPayoadLength expecting 0x47

            // Preamble length
            //register = 0x18; // RegPreambleMsb expecting 0x32
            //register = 0x19; // RegPreambleLsb expecting 0x3E

            //register <<= 1;
            //register |= 0x80;

            //writeBuffer = new byte[] { register };
            writeBuffer = new byte[] { register, 0x0 };
            //writeBuffer = new byte[] {register, 0x0, 0x0};
            //writeBuffer = new byte[] {register, 0x0, 0x0, 0x0};

            readBuffer = new byte[writeBuffer.Length];

            //device.TransferSequential(writeBuffer, readBuffer);
            device.TransferFullDuplex(writeBuffer, readBuffer);

            Debug.WriteLine("Value = 0x" + BytesToHexString(readBuffer));

            Thread.Sleep(1000);
         }
      }

      private static string BytesToHexString(byte[] bytes)
      {
         string hexString = string.Empty;

         // Loop through the bytes.
         for (byte b = 0; b < bytes.Length; b++)
         {
            if (b > 0)
               hexString += "-";

            hexString += bytes[b].ToString("x2");
         }

         return hexString;
      }
   }
}
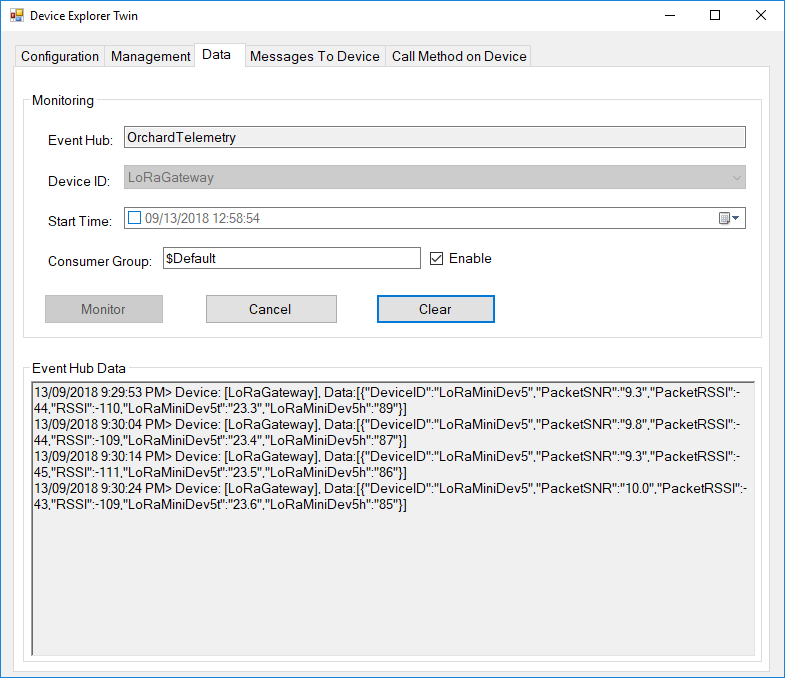
After updating the way the chip select line was configured I could successfully read the RegVersion and default frequency values
'GHIElectronics.TinyCLR.VisualStudio.ProjectSystem.dll' (Managed): Loaded 'C:\Users\BrynLewis\source\repos\RFM9X.TinyCLR\ShieldSPI\bin\Debug\pe\..\GHIElectronics.TinyCLR.Native.dll'
'GHIElectronics.TinyCLR.VisualStudio.ProjectSystem.dll' (Managed): Loaded 'C:\Users\BrynLewis\source\repos\RFM9X.TinyCLR\ShieldSPI\bin\Debug\pe\..\GHIElectronics.TinyCLR.Devices.Gpio.dll'
'GHIElectronics.TinyCLR.VisualStudio.ProjectSystem.dll' (Managed): Loaded 'C:\Users\BrynLewis\source\repos\RFM9X.TinyCLR\ShieldSPI\bin\Debug\pe\..\GHIElectronics.TinyCLR.Devices.Spi.dll'
'GHIElectronics.TinyCLR.VisualStudio.ProjectSystem.dll' (Managed): Loaded 'C:\Users\BrynLewis\source\repos\RFM9X.TinyCLR\ShieldSPI\bin\Debug\pe\..\ShieldSPI.exe', Symbols loaded.
The thread '<No Name>' (0x2) has exited with code 0 (0x0).
Value = 0x00-12
Value = 0x00-12
Value = 0x00-12
Value = 0x00-12
Value = 0x00-12
I also updated the BytesToHexString method to use the byte.ToString( string format) overload which is implemented by the TinyCLR runtime.