This post covers change point detection, which is better suited for identifying persistent shifts in behaviour rather than momentary spikes. Specifically, comparing the two approaches available in ML.NET: Independent and identically distributed (IID) and Singular Spectrum Analysis (SSA) Change Point Detection
Change point detection is useful because IoT devices don’t always fail dramatically. Often, there’s a gradual or sustained change:
- Temperature sensor starts reading consistently higher
- A vibration sensor baseline shifts due to wear
- Power consumption increases due to cooling issues
The sample application implements IID detection using DetectIidChangePoint and SSA with DetectChangePointBySsa.
IID assumes that: Incoming data points are independent and drawn from the same distribution. When the statistical properties shift (mean, variance), a change point is flagged.
| Algorithm | Limitations | Best for |
| IID | Doesn’t account for trends or seasonality Sensitive to noise | Fast detection Simple signals Low computational overhead |
| SSA | Computationally expensive Requires tuning | Signals with trends or seasonality Noisy real-world IoT data More robust long-term monitoring |
SSA assumes that: The observed time‑series can be decomposed into a combination of trend, periodic components(seasonality), and noise. A change point is flagged when these components no longer match the historical structure of the series
| Behaviour | IID | SSA |
| Initial sensitivity | High | Moderate |
| Long-term behaviour | Always sensitive | Adapts |
| Noise tolerance | Poor | Good |
| Drift detection | Keeps firing | Fires once, then stops |
In the application’s program.cs roughly the first 90 lines discusses changes to configuration to tune the models
var changePointEngine = _changePointEngines.GetOrAdd(subscribedTopic, _ =>
new Lazy<TimeSeriesPredictionEngine<Model.TimeSeriesData, Model.ChangePointPrediction>>(() =>
{
try
{
switch (subscribedTopicSettings.DetectionMode)
{
case Model.DetectionMode.IID:
var empty = _MLContext.Data.LoadFromEnumerable(new List<Model.TimeSeriesData>());
IidChangePointEstimator iidPipe = _MLContext.Transforms.DetectIidChangePoint(
outputColumnName: nameof(Model.ChangePointPrediction.Prediction),
inputColumnName: nameof(Model.TimeSeriesData.Value),
confidence: subscribedTopicSettings.IIDSettings.Confidence,
changeHistoryLength: subscribedTopicSettings.IIDSettings.ChangeHistoryLength);
var iidModel = iidPipe.Fit(empty);
var iidEngine = iidModel.CreateTimeSeriesEngine<Model.TimeSeriesData, Model.ChangePointPrediction>(_MLContext);
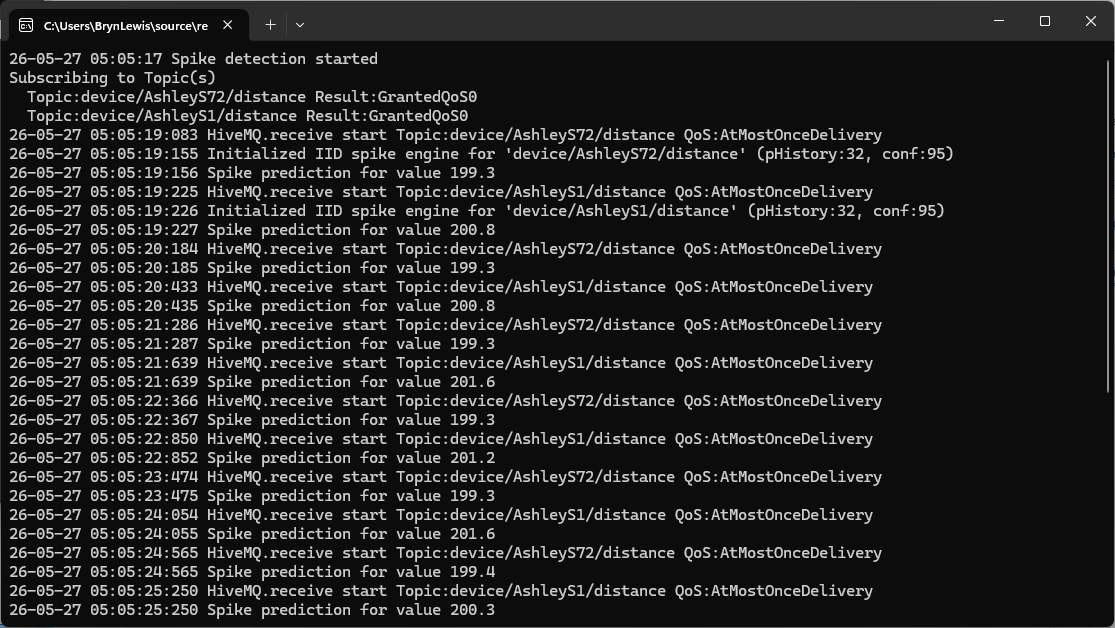
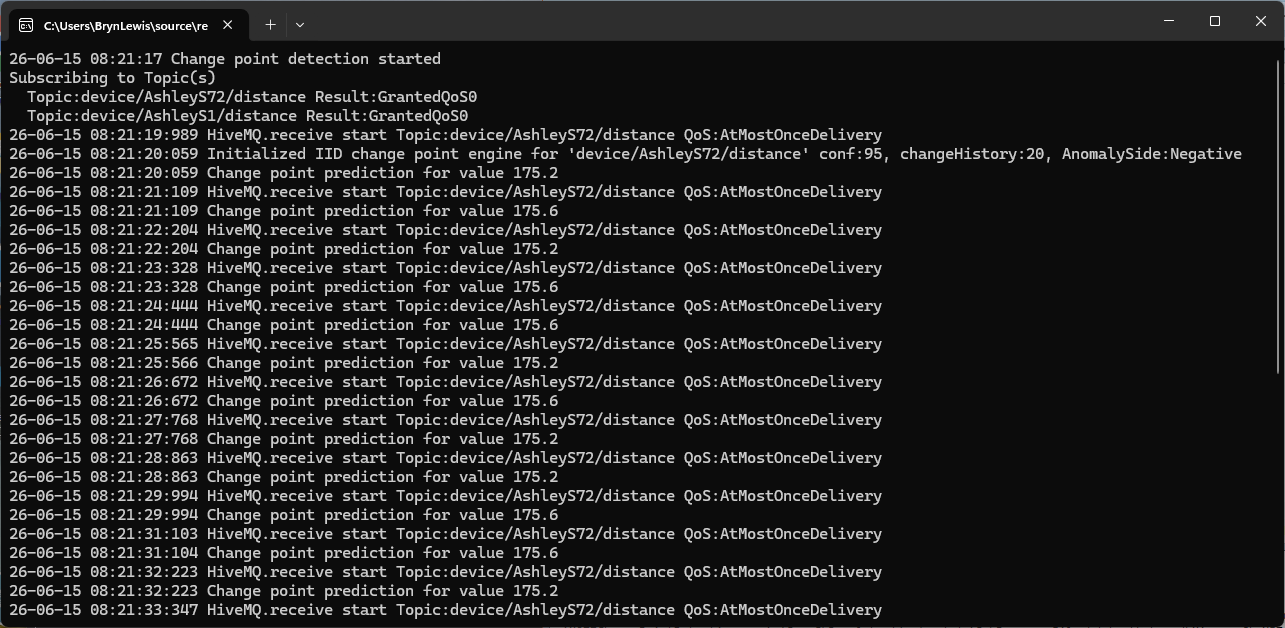
Console.WriteLine($"{DateTime.UtcNow:yy-MM-dd HH:mm:ss:fff} Initialized IID change point engine for '{subscribedTopic}' conf:{subscribedTopicSettings.IIDSettings.Confidence}, changeHistory:{subscribedTopicSettings.IIDSettings.ChangeHistoryLength}, AnomalySide:{subscribedTopicSettings.IIDSettings.AnomalySide}");
return iidEngine;
case Model.DetectionMode.SSA:
SsaChangePointEstimator ssaPipe = _MLContext.Transforms.DetectChangePointBySsa(
outputColumnName: nameof(Model.ChangePointPrediction.Prediction),
inputColumnName: nameof(Model.TimeSeriesData.Value),
confidence: subscribedTopicSettings.SSASettings.Confidence,
changeHistoryLength: subscribedTopicSettings.SSASettings.ChangeHistoryLength,
trainingWindowSize: subscribedTopicSettings.SSASettings.TrainingWindowSize,
seasonalityWindowSize: subscribedTopicSettings.SSASettings.SeasonalityWindowSize);
var dataView = _MLContext.Data.LoadFromEnumerable(new List<Model.TimeSeriesData>());
var ssaModel = ssaPipe.Fit(dataView);
var ssaEngine = ssaModel.CreateTimeSeriesEngine<Model.TimeSeriesData, Model.ChangePointPrediction>(_MLContext);
Console.WriteLine($"{DateTime.UtcNow:yy-MM-dd HH:mm:ss:fff} Initialized SSA change point engine for '{subscribedTopic}' conf:{subscribedTopicSettings.SSASettings.Confidence}, changeHistory:{subscribedTopicSettings.SSASettings.ChangeHistoryLength}, trainingWindow:{subscribedTopicSettings.SSASettings.TrainingWindowSize}, seasonalityWindow:{subscribedTopicSettings.SSASettings.SeasonalityWindowSize}, AnomalySide:{subscribedTopicSettings.SSASettings.AnomalySide}");
return ssaEngine;
default:
throw new NotSupportedException($"Detection mode {subscribedTopicSettings.DetectionMode} is not supported.");
}
As part of a refactoring of configuration settings post my Real-time IoT Spike and Change Point Detection with ML.NET post the IID and SSA parameters have been split into separate classes
{
   "ApplicationSettings": {
      /*   */
      "SubscribedTopics": {
         "device/AshleyS1/distance": {
            "InputQualityOfService": 0,
            "OutputTopic": "alerts,ashley/changepoint",
            "OutputQualityOfService": 1,
            "ContentType": "application/json",
            "InputMessageTransformFile": "Transforms/InputSKU101991042.cs",
            "OutputMessageTransformFile": "Transforms/ChangePointOutput.cs",

            "DetectionMode": "IID", // IID or SSA
            "IIDSettings": {
               "Confidence": 95.0,
               "ChangeHistoryLength": 20,
               "AnomalySide": "TwoSided" //Positive, Negative,TwoSided
            },
            "SSASettings": {
               "Confidence": 95.0,
               "ChangeHistoryLength": 20,
               "SeasonalityWindowSize": 1,
               "TrainingWindowSize": 800,
               "AnomalySide": "TwoSided" //Positive, Negative,TwoSided
            }
         },
         "device/AshleyS72/distance": {
            "InputQualityOfService": 0,
            "OutputTopic": "alerts,ashley/changepoint",
            "OutputQualityOfService": 1,
            "ContentType": "application/json",
            "InputMessageTransformFile": "Transforms/InputSKU101991042.cs",
            "OutputMessageTransformFile": "Transforms/ChangePointOutput.cs",

            "DetectionMode": "IID",
            "IIDSettings": {
               "Confidence": 55.0,
               "ChangeHistoryLength": 10,
               "AnomalySide": "Negative" //Positive, Negative,TwoSided
            },
            "SSASettings": {
               "Confidence": 95.0,
               "ChangeHistoryLength": 20,
               "SeasonalityWindowSize": 2,
               "TrainingWindowSize": 300,
               "AnomalySide": "TwoSided" //Positive, Negative,TwoSided
            }
         }
      }
   }
}
In ML.NET time-series detectors (SSA and IID), the model doesn’t start detecting immediately. They first need to observe enough data to establish what “normal” looks like.
| Parameter | Description | Typical IoT Values |
changeHistoryLength | Number of points to evaluate stability | 30-100 |
trainingWindowSize | Historical learning window (SSA) | 100-500 |
seasonalWindowSize | Historical learning window (SSA) | depends on cycle |
confidence | Sensitivity threshold | 90-99 |
AnomalySide | Statistically unusual signal | Positive, Negative, TwoSided |
SSA requires a training window: trainingWindowSize: 200, this means the model needs roughly 200 samples before it is stable and before that predictions are unreliable and should be ignored. IID uses changeHistoryLength: 50 this means roughly 50 points are used to estimate the distribution and this is effectively the minimum history needed.
Warmup Matters: In the early stages the model is very sensitive as it has little context, and the baseline is weak which results in lots of detections and false positives (the detection below was after trainingWindowSize values). In the middle stage i.e. after enough samples the noise characteristics have been learned and patterns recognised. In the late stage after the model has been running for a long time it is very stable and less sensitive to change which can be an issue.

To cope with this (in a production system), I would ignore early predictions, for IID: changeHistoryLength and for SSA: trainingWindowSize + changeHistoryLength. To improve startup time preloading and SSA model with historical data or a synthetic base line is worth considering.
If an SSA model has been running for a longtime, or after a major change, reset the model to restore sensitivity. If sensitivity reduces over time it maybe worth considering “Dual Detectors: SSA for long-term structure, and IID for short-term sensitivity.
//---------------------------------------------------------------------------------
// Copyright (c) May 2026, devMobile Software
//
using System.Text.Json;
using System.Text.Json.Serialization; // Do not remove this using directive as it is required for the JsonIgnoreCondition

using devMobile.IoT.MqttTransformers;

public class ChangePointOutputTransformer : IChangePointOutputMessageTransformer
{
   private static readonly JsonSerializerOptions _serializerOptions = new() { DefaultIgnoreCondition = JsonIgnoreCondition.WhenWritingNull };

   public byte[] Transform(string sourceTopic, double value, double rawScore, double pValue, double martingale)
   {
      var obj = new
      {
         DetectionType = "ChangePoint",
         Value = value,
         SourceTopic = sourceTopic,
         RawScore = rawScore,
         PValue = pValue,
         Martingale = martingale,
      };

      string payload = JsonSerializer.Serialize(obj, _serializerOptions);

      return System.Text.Encoding.UTF8.GetBytes(payload);
   }
}
In the most recent version of the output transform ChangePoint = true was changed to DetectionType = “ChangePoint” to make it easier to identify change point messages for processing.
NOTE: SSA will not reliably detect slow, continuous movement – even if the total change is large
I was “tripped up” by this, it is not a bug, it’s an algorithm design choice to optimise for detecting regime changes, not motion. SSA is excellent at detecting when a system changes, but once it has adapted, it will treat that new state as completely normal.”