Azure Event Grid MQTT-With HiveMQ & MQTTnet Clients

Most of the examples of connecting to Azure Event Grid’s MQTT broker use MQTTnet so for a bit of variety I started with a hivemq-mqtt-client-dotnet based client. (A customer had been evaluating HiveMQ for a project which was later cancelled)

BEWARE – ClientID parameter is case sensitive.

The HiveMQ client was “inspired” by the How to Guides > Custom Client Certificates documentation.

class Program
{
   private static Model.ApplicationSettings _applicationSettings;
   private static HiveMQClient _client;
   private static bool _publisherBusy = false;

   static async Task Main()
   {
      Console.WriteLine($"{DateTime.UtcNow:yy-MM-dd HH:mm:ss} Hive MQ client starting");

      try
      {
         // load the app settings into configuration
         var configuration = new ConfigurationBuilder()
               .AddJsonFile("appsettings.json", false, true)
               .AddUserSecrets<Program>()
         .Build();

         _applicationSettings = configuration.GetSection("ApplicationSettings").Get<Model.ApplicationSettings>();

         var optionsBuilder = new HiveMQClientOptionsBuilder();

         optionsBuilder
            .WithClientId(_applicationSettings.ClientId)
            .WithBroker(_applicationSettings.Host)
            .WithPort(_applicationSettings.Port)
            .WithUserName(_applicationSettings.UserName)
            .WithCleanStart(_applicationSettings.CleanStart)
            .WithClientCertificate(_applicationSettings.ClientCertificateFileName, _applicationSettings.ClientCertificatePassword)
            .WithUseTls(true);

         using (_client = new HiveMQClient(optionsBuilder.Build()))
         {
            _client.OnMessageReceived += OnMessageReceived;

            var connectResult = await _client.ConnectAsync();
            if (connectResult.ReasonCode != ConnAckReasonCode.Success)
            {
               throw new Exception($"Failed to connect: {connectResult.ReasonString}");
            }

            Console.WriteLine($"Subscribed to Topic");
            foreach (string topic in _applicationSettings.SubscribeTopics.Split(',', StringSplitOptions.RemoveEmptyEntries | StringSplitOptions.TrimEntries))
            {
               var subscribeResult = await _client.SubscribeAsync(topic, _applicationSettings.SubscribeQualityOfService);

               Console.WriteLine($" Topic:{topic} Result:{subscribeResult.Subscriptions[0].SubscribeReasonCode}");
            }
   }
//...
}
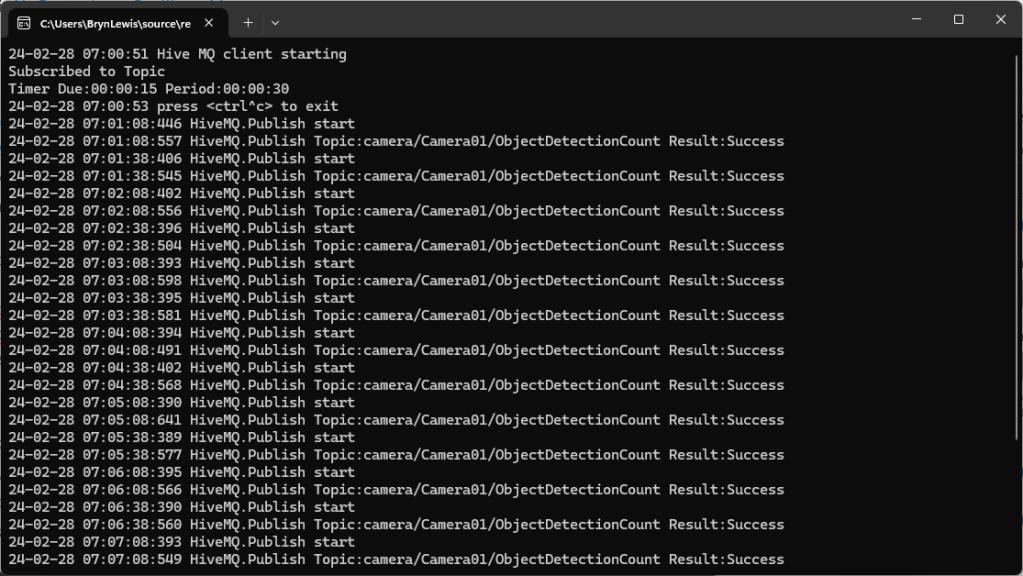
HiveMQ Client console application output

The MQTTnet client was “inspired” by the Azure MQTT .NET Application sample

class Program
{
   private static Model.ApplicationSettings _applicationSettings;
   private static IMqttClient _client;
   private static bool _publisherBusy = false;

   static async Task Main()
   {
      Console.WriteLine($"{DateTime.UtcNow:yy-MM-dd HH:mm:ss} MQTTNet client starting");

      try
      {
         // load the app settings into configuration
         var configuration = new ConfigurationBuilder()
               .AddJsonFile("appsettings.json", false, true)
               .AddUserSecrets<Program>()
         .Build();

         _applicationSettings = configuration.GetSection("ApplicationSettings").Get<Model.ApplicationSettings>();

         var mqttFactory = new MqttFactory();

         using (_client = mqttFactory.CreateMqttClient())
         {
            // Certificate based authentication
            List<X509Certificate2> certificates = new List<X509Certificate2>
            {
               new X509Certificate2(_applicationSettings.ClientCertificateFileName, _applicationSettings.ClientCertificatePassword)
            };

            var tlsOptions = new MqttClientTlsOptionsBuilder()
                  .WithClientCertificates(certificates)
                  .WithSslProtocols(System.Security.Authentication.SslProtocols.Tls12)
                  .UseTls(true)
                  .Build();

            MqttClientOptions mqttClientOptions = new MqttClientOptionsBuilder()
                     .WithClientId(_applicationSettings.ClientId)
                     .WithTcpServer(_applicationSettings.Host, _applicationSettings.Port)
                     .WithCredentials(_applicationSettings.UserName, _applicationSettings.Password)
                     .WithCleanStart(_applicationSettings.CleanStart)
                     .WithTlsOptions(tlsOptions)
                     .Build();

            var connectResult = await _client.ConnectAsync(mqttClientOptions);
            if (connectResult.ResultCode != MqttClientConnectResultCode.Success)
            {
               throw new Exception($"Failed to connect: {connectResult.ReasonString}");
            }

            _client.ApplicationMessageReceivedAsync += OnApplicationMessageReceivedAsync;

            Console.WriteLine($"Subscribed to Topic");
            foreach (string topic in _applicationSettings.SubscribeTopics.Split(',', StringSplitOptions.RemoveEmptyEntries | StringSplitOptions.TrimEntries))
            {
               var subscribeResult = await _client.SubscribeAsync(topic, _applicationSettings.SubscribeQualityOfService);

               Console.WriteLine($" {topic} Result:{subscribeResult.Items.First().ResultCode}");
            }
      }
//...
}
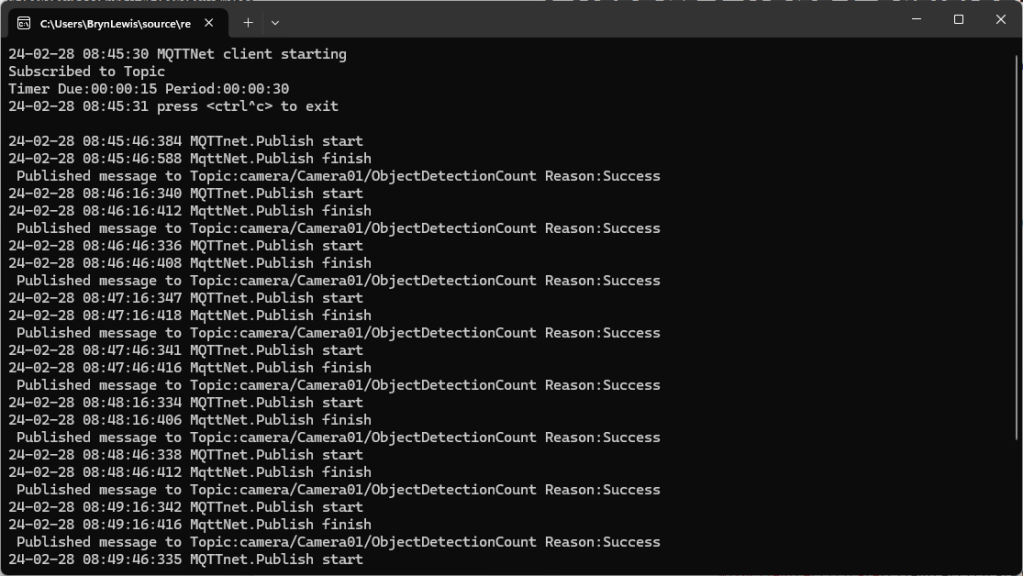
MQTTnet client console application output

The design of the MQTT protocol means that the hivemq-mqtt-client-dotnet and MQTTnet implementations are similar. Having used both I personally prefer the HiveMQ client library.
Azure Event Grid MQTT-Certificates

When configuring Root, Intermediate and Device certificates for my Azure Event Grid Devices using the smallstep step-ca or OpenSSL I made mistakes/typos which broke my deployment and in the end I was copying and pasting commands from Windows Notepad.

For one test deployment it took me an hour to generate the Root, Intermediate and a number of Devices certificates which was a waste of time. At this point I decided investigate writing some applications to simplify the process.

After some searching I stumbled across CREATING CERTIFICATES FOR X.509 SECURITY IN AZURE IOT HUB USING .NET CORE by Damien Bod which showed how to generate certificates for Azure IoT Hub solutions using his NuGet package Certificate Manager.

The AzureIoTHubDps repository had a sample showing how to generate the certificate chain for Azure IoT Hub devices. It worked really well but I accidentally overwrote my Root and Intermediate certificates, there were some “magic numbers” and hard coded passwords (it was a sample) so I decided to “chop” the sample up into three command line applications.

static void Main(string[] args)
{
   var serviceProvider = new ServiceCollection()
         .AddCertificateManager()
         .BuildServiceProvider();

   // load the app settings into configuration
   var configuration = new ConfigurationBuilder()
         .AddJsonFile("appsettings.json", false, true)
         .AddUserSecrets<Program>()
   .Build();

   _applicationSettings = configuration.GetSection("ApplicationSettings").Get<Model.ApplicationSettings>();
//------
   Console.WriteLine($"validFrom:{validFrom} ValidTo:{validTo}");

   var serverRootCertificate = serviceProvider.GetService<CreateCertificatesClientServerAuth>();

   var root = serverRootCertificate.NewRootCertificate(
         new DistinguishedName { 
               CommonName = _applicationSettings.CommonName,
               Organisation = _applicationSettings.Organisation,
               OrganisationUnit = _applicationSettings.OrganisationUnit,
               Locality = _applicationSettings.Locality,
               StateProvince  = _applicationSettings.StateProvince,
               Country = _applicationSettings.Country
         },
         new ValidityPeriod { 
         ValidFrom = validFrom,
         ValidTo = validTo,
         },
         _applicationSettings.PathLengthConstraint,
         _applicationSettings.DnsName);
   root.FriendlyName = _applicationSettings.FriendlyName;

   Console.Write("PFX Password:");
   string password = Console.ReadLine();
   if ( String.IsNullOrEmpty(password))
   {
      Console.WriteLine("PFX Password invalid");
      return;
   }

   var exportCertificate = serviceProvider.GetService<ImportExportCertificate>();

   var rootCertificatePfxBytes = exportCertificate.ExportRootPfx(password, root);
   File.WriteAllBytes(_applicationSettings.RootCertificateFilePath, rootCertificatePfxBytes);

   Console.WriteLine($"Root certificate file:{_applicationSettings.RootCertificateFilePath}");
   Console.WriteLine("press enter to exit");
   Console.ReadLine();
}

The application’s configuration was split between application settings file(certificate file paths, validity periods, Organisation etc.) or entered at runtime ( certificate filenames, passwords etc.) The first application generates a Root Certificate using the distinguished name information from the application settings, plus file names and passwords entered by the user.

Root Certificate generation application output

The second application generates an Intermediate Certificate using the Root Certificate, the distinguished name information from the application settings, plus file names and passwords entered by the user.

static void Main(string[] args)
{
   var serviceProvider = new ServiceCollection()
         .AddCertificateManager()
         .BuildServiceProvider();

   // load the app settings into configuration
   var configuration = new ConfigurationBuilder()
         .AddJsonFile("appsettings.json", false, true)
         .AddUserSecrets<Program>()
   .Build();

   _applicationSettings = configuration.GetSection("ApplicationSettings").Get<Model.ApplicationSettings>();
//------
   Console.WriteLine($"validFrom:{validFrom} be after ValidTo:{validTo}");

   Console.WriteLine($"Root Certificate file:{_applicationSettings.RootCertificateFilePath}");

   Console.Write("Root Certificate Password:");
   string rootPassword = Console.ReadLine();
   if (String.IsNullOrEmpty(rootPassword))
   {
      Console.WriteLine("Fail");
      return;
   }
   var rootCertificate = new X509Certificate2(_applicationSettings.RootCertificateFilePath, rootPassword);

   var intermediateCertificateCreate = serviceProvider.GetService<CreateCertificatesClientServerAuth>();

   var intermediateCertificate = intermediateCertificateCreate.NewIntermediateChainedCertificate(
         new DistinguishedName
         {
            CommonName = _applicationSettings.CommonName,
            Organisation = _applicationSettings.Organisation,
            OrganisationUnit = _applicationSettings.OrganisationUnit,
            Locality = _applicationSettings.Locality,
            StateProvince = _applicationSettings.StateProvince,
            Country = _applicationSettings.Country
         },
      new ValidityPeriod
      {
         ValidFrom = validFrom,
         ValidTo = validTo,
      },
            _applicationSettings.PathLengthConstraint,
            _applicationSettings.DnsName, rootCertificate);
      intermediateCertificate.FriendlyName = _applicationSettings.FriendlyName;

   Console.Write("Intermediate certificate Password:");
   string intermediatePassword = Console.ReadLine();
   if (String.IsNullOrEmpty(intermediatePassword))
   {
      Console.WriteLine("Fail");
      return;
   }

   var importExportCertificate = serviceProvider.GetService<ImportExportCertificate>();

   Console.WriteLine($"Intermediate PFX file:{_applicationSettings.IntermediateCertificatePfxFilePath}");
   var intermediateCertificatePfxBtyes = importExportCertificate.ExportChainedCertificatePfx(intermediatePassword, intermediateCertificate, rootCertificate);
   File.WriteAllBytes(_applicationSettings.IntermediateCertificatePfxFilePath, intermediateCertificatePfxBtyes);

   Console.WriteLine($"Intermediate CER file:{_applicationSettings.IntermediateCertificateCerFilePath}");
   var intermediateCertificatePemText = importExportCertificate.PemExportPublicKeyCertificate(intermediateCertificate);
   File.WriteAllText(_applicationSettings.IntermediateCertificateCerFilePath, intermediateCertificatePemText);

   Console.WriteLine("press enter to exit");
   Console.ReadLine();
}
Intermediate Certificate generation application output
Uploading the Intermediate certificate to Azure Event Grid

The third application generates Device Certificates using the Intermediate Certificate, distinguished name information from the application settings, plus device id, file names and passwords entered by the user.

static void Main(string[] args)
{
   var serviceProvider = new ServiceCollection()
         .AddCertificateManager()
         .BuildServiceProvider();

   // load the app settings into configuration
   var configuration = new ConfigurationBuilder()
         .AddJsonFile("appsettings.json", false, true)
         .AddUserSecrets<Program>()
   .Build();

   _applicationSettings = configuration.GetSection("ApplicationSettings").Get<Model.ApplicationSettings>();
//------
   Console.WriteLine($"validFrom:{validFrom} ValidTo:{validTo}");

   Console.WriteLine($"Intermediate PFX file:{_applicationSettings.IntermediateCertificateFilePath}");

   Console.Write("Intermediate PFX Password:");
   string intermediatePassword = Console.ReadLine();
   if (String.IsNullOrEmpty(intermediatePassword))
   {
      Console.WriteLine("Intermediate PFX Password invalid");
      return;
   }
   var intermediate = new X509Certificate2(_applicationSettings.IntermediateCertificateFilePath, intermediatePassword);

   Console.Write("Device ID:");
   string deviceId = Console.ReadLine();
   if (String.IsNullOrEmpty(deviceId))
   {
      Console.WriteLine("Device ID invalid");
      return;
   }

   var createClientServerAuthCerts = serviceProvider.GetService<CreateCertificatesClientServerAuth>();

   var device = createClientServerAuthCerts.NewDeviceChainedCertificate(
         new DistinguishedName
         {
            CommonName = deviceId,
            Organisation = _applicationSettings.Organisation,
            OrganisationUnit = _applicationSettings.OrganisationUnit,
            Locality = _applicationSettings.Locality,
            StateProvince = _applicationSettings.StateProvince,
            Country = _applicationSettings.Country
         },
      new ValidityPeriod
      {
         ValidFrom = validFrom,
         ValidTo = validTo,
      },
      deviceId, intermediate);
   device.FriendlyName = deviceId;

   Console.Write("Device PFX Password:");
   string devicePassword = Console.ReadLine();
   if (String.IsNullOrEmpty(devicePassword))
   {
      Console.WriteLine("Fail");
      return;
   }

   var importExportCertificate = serviceProvider.GetService<ImportExportCertificate>();

   string devicePfxPath = string.Format(_applicationSettings.DeviceCertificatePfxFilePath, deviceId);

   Console.WriteLine($"Device PFX file:{devicePfxPath}");
   var deviceCertificatePath = importExportCertificate.ExportChainedCertificatePfx(devicePassword, device, intermediate);
   File.WriteAllBytes(devicePfxPath,  deviceCertificatePath);

   Console.WriteLine("press enter to exit");
   Console.ReadLine();
}
Device Certificate generation application output
Uploading the Intermediate certificate to Azure Event Grid

These applications wouldn’t have been possible without Damien Bod’s CREATING CERTIFICATES FOR X.509 SECURITY IN AZURE IOT HUB USING .NET CORE blog post, and his Certificate Manager NuGet package.

Azure IoT Hub, Event Grid to Application Insights

For a second Proof of Concept (PoC) I wanted to upload sensor data from my MQTT LoRa Telemetry Field Gateway to an Azure IoT Hub, then using Azure EventGrid subscribe to the stream of telemetry data events, logging the payloads in Azure Application Insights (the aim was minimal code so no database etc.).

The first step was to create and deploy a simple Azure Function for unpacking the telemetry event payload.

Azure IoT Hub Azure Function Handler

Then wire the Azure function to the Microsoft.Devices.Device.Telemetry Event Type

Azure IoT Hub Event Metrics

On the Windows 10 IoT Core device in the Event Tracing Window(ETW) logging on the device I could see LoRa messages arriving and being unpacked.

Windows 10 Device ETW showing message payload

Then in Application Insights after some mucking around with code I could see in a series of Trace statements the event payload as it was unpacked.

{"id":"29108ebf-e5d5-7b95-e739-7d9048209d53","topic":"/SUBSCRIPTIONS/12345678-9012-3456-7890-123456789012/RESOURCEGROUPS/AZUREIOTHUBEVENTGRIDAZUREFUNCTION/PROVIDERS/MICROSOFT.DEVICES/IOTHUBS/FIELDGATEWAYHUB",
"subject":"devices/MQTTNetClient",
"eventType":"Microsoft.Devices.DeviceTelemetry",
"eventTime":"2020-02-01T04:30:51.427Z",
"data":
{
 "properties":{},
"systemProperties":{"iothub-connection-device-id":"MQTTNetClient","iothub-connection-auth-method":"{\"scope\":\"device\",\"type\":\"sas\",\"issuer\":\"iothub\",\"acceptingIpFilterRule\":null}",
"iothub-connection-auth-generation-id":"637149890997219611",
"iothub-enqueuedtime":"2020-02-01T04:30:51.427Z",
"iothub-message-source":"Telemetry"
},
"body":"eyJPZmZpY2VUZW1wZXJhdHVyZSI6IjIyLjUiLCJPZmZpY2VIdW1pZGl0eSI6IjkyIn0="
},
"dataVersion":"",
"metadataVersion":"1"
}
Application Insights logging with message unpacking
Application Insights logging message payload

Then in the last log entry the decoded message payload

/*
    Copyright ® 2020 Feb devMobile Software, All Rights Reserved
 
    MIT License

    Permission is hereby granted, free of charge, to any person obtaining a copy
    of this software and associated documentation files (the "Software"), to deal
    in the Software without restriction, including without limitation the rights
    to use, copy, modify, merge, publish, distribute, sublicense, and/or sell
    copies of the Software, and to permit persons to whom the Software is
    furnished to do so, subject to the following conditions:

    The above copyright notice and this permission notice shall be included in all
    copies or substantial portions of the Software.

    THE SOFTWARE IS PROVIDED "AS IS", WITHOUT WARRANTY OF ANY KIND, EXPRESS OR
    IMPLIED, INCLUDING BUT NOT LIMITED TO THE WARRANTIES OF MERCHANTABILITY,
    FITNESS FOR A PARTICULAR PURPOSE AND NONINFRINGEMENT. IN NO EVENT SHALL THE
    AUTHORS OR COPYRIGHT HOLDERS BE LIABLE FOR ANY CLAIM, DAMAGES OR OTHER
    LIABILITY, WHETHER IN AN ACTION OF CONTRACT, TORT OR OTHERWISE, ARISING FROM,
    OUT OF OR IN CONNECTION WITH THE SOFTWARE OR THE USE OR OTHER DEALINGS IN THE
    SOFTWARE

    Default URL for triggering event grid function in the local environment.
    http://localhost:7071/runtime/webhooks/EventGrid?functionName=functionname
 */
namespace EventGridProcessorAzureIotHub
{
   using System;
   using System.IO;
   using System.Reflection;

   using Microsoft.Azure.WebJobs;
   using Microsoft.Azure.EventGrid.Models;
   using Microsoft.Azure.WebJobs.Extensions.EventGrid;

   using log4net;
   using log4net.Config;
   using Newtonsoft.Json;

   public static class Telemetry
    {
        [FunctionName("Telemetry")]
        public static void Run([EventGridTrigger]Microsoft.Azure.EventGrid.Models.EventGridEvent eventGridEvent, ExecutionContext executionContext )//, TelemetryClient telemetryClient)
        {
			ILog log = log4net.LogManager.GetLogger(System.Reflection.MethodBase.GetCurrentMethod().DeclaringType);

		   var logRepository = LogManager.GetRepository(Assembly.GetEntryAssembly());
			XmlConfigurator.Configure(logRepository, new FileInfo(Path.Combine(executionContext.FunctionAppDirectory, "log4net.config")));

         log.Info($"eventGridEvent.Data-{eventGridEvent}");

         log.Info($"eventGridEvent.Data.ToString()-{eventGridEvent.Data.ToString()}");

        IotHubDeviceTelemetryEventData iOThubDeviceTelemetryEventData = (IotHubDeviceTelemetryEventData)JsonConvert.DeserializeObject(eventGridEvent.Data.ToString(), typeof(IotHubDeviceTelemetryEventData));

         log.Info($"iOThubDeviceTelemetryEventData.Body.ToString()-{iOThubDeviceTelemetryEventData.Body.ToString()}");

         byte[] base64EncodedBytes = System.Convert.FromBase64String(iOThubDeviceTelemetryEventData.Body.ToString());

         log.Info($"System.Text.Encoding.UTF8.GetString(-{System.Text.Encoding.UTF8.GetString(base64EncodedBytes)}");
      }
	}
}

Overall it took roughly half a page of code (mainly generated by a tool) to unpack and log the contents of an Azure IoT Hub EventGrid payload to Application Insights.

Azure IoT Hub SAS Tokens revisited again

This post has been edited (2019-11-24) my original assumption about how DateTime.Kind unspecified was handled were incorrect.

As I was testing my Azure MQTT Test Client I noticed some oddness with MQTT connection timeouts and this got me wondering about token expiry times. So, I went searching again and found this Azure IoT Hub specific sample code

public static string generateSasToken(string resourceUri, string key, string policyName, int expiryInSeconds = 3600)
{
    TimeSpan fromEpochStart = DateTime.UtcNow - new DateTime(1970, 1, 1);
    string expiry = Convert.ToString((int)fromEpochStart.TotalSeconds + expiryInSeconds);

    string stringToSign = WebUtility.UrlEncode(resourceUri) + "\n" + expiry;

    HMACSHA256 hmac = new HMACSHA256(Convert.FromBase64String(key));
    string signature = Convert.ToBase64String(hmac.ComputeHash(Encoding.UTF8.GetBytes(stringToSign)));

    string token = String.Format(CultureInfo.InvariantCulture, "SharedAccessSignature sr={0}&sig={1}&se={2}", WebUtility.UrlEncode(resourceUri), WebUtility.UrlEncode(signature), expiry);

    if (!String.IsNullOrEmpty(policyName))
    {
        token += "&skn=" + policyName;
    }

    return token;
}

This code worked first time and was more flexible than mine which was a bonus. Though while running my MQTTNet based client I noticed the connection would drop after approximately 10mins (EDIT this was probably an unrelated networking issue).

A long time ago (25 years) I had issues sharing a Unix time value between an applications written with Borland C and Microsoft Visual C which made me wonder about Unix epoch base offsets.

So to test my theory I built a Unix epoch test harness console application

using System;

namespace UnixEpocTest
{
   class Program
   {
      static void Main(string[] args)
      {
         TimeSpan ttl = new TimeSpan(0, 0, 0);

         Console.WriteLine("Current time");
         Console.WriteLine($"Local     {DateTime.Now} {DateTime.Now.Kind}");
         Console.WriteLine($"UTC       {DateTime.UtcNow} {DateTime.UtcNow.Kind}");
         Console.WriteLine($"Unix DIY  {new DateTime(1970, 1, 1)} {new DateTime(1970, 1, 1).Kind}");
         Console.WriteLine($"Unix DIY+ {new DateTime(1970, 1, 1).ToUniversalTime()} {new DateTime(1970, 1, 1).ToUniversalTime().Kind}");
         Console.WriteLine($"Unix DIY  {new DateTime(1970, 1, 1, 0,0,0, DateTimeKind.Utc)}");
         Console.WriteLine($"Unix      {DateTime.UnixEpoch} {DateTime.UnixEpoch.Kind}");
         Console.WriteLine();

         TimeSpan fromEpochStart = DateTime.UtcNow - new DateTime(1970, 1, 1);
         TimeSpan fromEpochStartUtc = DateTime.UtcNow - new DateTime(1970, 1, 1,0,0,0, DateTimeKind.Utc);
         TimeSpan fromEpochStartUnixEpoch = DateTime.UtcNow - DateTime.UnixEpoch;

         Console.WriteLine("Epoch comparison");
         Console.WriteLine($"Local {fromEpochStart} {fromEpochStart.TotalSeconds.ToString("f0")} sec");
         Console.WriteLine($"UTC   {fromEpochStartUtc} {fromEpochStartUtc.TotalSeconds.ToString("f0")} sec");
         Console.WriteLine($"Epoc  {fromEpochStartUnixEpoch} {fromEpochStartUnixEpoch.TotalSeconds.ToString("f0")} sec");
         Console.WriteLine();

         TimeSpan afterEpoch = DateTime.UtcNow.Add(ttl) - new DateTime(1970, 1, 1);
         TimeSpan afterEpochUtC = DateTime.UtcNow.Add(ttl) - new DateTime(1970, 1, 1).ToUniversalTime();
         TimeSpan afterEpochEpoch = DateTime.UtcNow.Add(ttl) - DateTime.UnixEpoch;

         Console.WriteLine("Epoch calculation");
         Console.WriteLine($"Local {afterEpoch}");
         Console.WriteLine($"UTC   {afterEpochUtC}");
         Console.WriteLine($"Epoch {afterEpochEpoch}");
         Console.WriteLine();

         Console.WriteLine("Epoch DateTime");
         Console.WriteLine($"Local :{new DateTime(1970, 1, 1)}");
         Console.WriteLine($"UTC   :{ new DateTime(1970, 1, 1).ToUniversalTime()}");

         Console.WriteLine("Press ENTER to exit");
         Console.ReadLine();

         Console.WriteLine("Hello World!");
      }
   }
}

EDIT: I now think the UtcNow to “unspecified” kind mathematics was being handled correctly. I have updated the code to use the DateTime.UnixEpoch constant so the code is more readable.

public static string generateSasToken(string resourceUri, string key, string policyName, int expiryInSeconds = 900)
      {
         TimeSpan fromEpochStart = DateTime.UtcNow - DateTime.UnixEpoch;
         string expiry = Convert.ToString((int)fromEpochStart.TotalSeconds + expiryInSeconds);

         string stringToSign = WebUtility.UrlEncode(resourceUri) + "\n" + expiry;

         HMACSHA256 hmac = new HMACSHA256(Convert.FromBase64String(key));
         string signature = Convert.ToBase64String(hmac.ComputeHash(Encoding.UTF8.GetBytes(stringToSign)));

         string token = String.Format(CultureInfo.InvariantCulture, "SharedAccessSignature sr={0}&sig={1}&se={2}", WebUtility.UrlEncode(resourceUri), WebUtility.UrlEncode(signature), expiry);

         if (!String.IsNullOrEmpty(policyName))
         {
            token += "&skn=" + policyName;
         }

         return token;
      }

I need to test the expiry of my SAS Tokens some more especially with the client running on my development machine (NZT which is currently UTC+13) and in Azure (UTC timezone)

Azure IoT Hub SAS Tokens revisited

A long time ago I wrote a post about uploading telemetry data to an Azure Event Hub from a Netduino 3 Wifi using HTTPS. To send messages to the EventHub I had to create a valid SAS Token which took a surprising amount of effort because of the reduced text encoding/decoding and cryptographic functionality available in .NET Micro Framework v4.3 (NetMF)

// Create a SAS token for a specified scope. SAS tokens are described in http://msdn.microsoft.com/en-us/library/windowsazure/dn170477.aspx.
private static string CreateSasToken(string uri, string keyName, string key)
{
   // Set token lifetime to 20 minutes. When supplying a device with a token, you might want to use a longer expiration time.
   uint tokenExpirationTime = GetExpiry(20 * 60);
 
   string stringToSign = HttpUtility.UrlEncode(uri) + "\n" + tokenExpirationTime;
 
   var hmac = SHA.computeHMAC_SHA256(Encoding.UTF8.GetBytes(key), Encoding.UTF8.GetBytes(stringToSign));
   string signature = Convert.ToBase64String(hmac);
 
   signature = Base64NetMf42ToRfc4648(signature);
 
   string token = "SharedAccessSignature sr=" + HttpUtility.UrlEncode(uri) + "&sig=" + HttpUtility.UrlEncode(signature) + "&se=" + tokenExpirationTime.ToString() + "&skn=" + keyName;
 
   return token;
}
 
private static string Base64NetMf42ToRfc4648(string base64netMf)
{
   var base64Rfc = string.Empty;
 
   for (var i = 0; i < base64netMf.Length; i++)
   {
      if (base64netMf[i] == '!')
      {
         base64Rfc += '+';
      }
      else if (base64netMf[i] == '*')
      {
         base64Rfc += '/';
      }
      else
      {
         base64Rfc += base64netMf[i];
      }
   }
   return base64Rfc;
}
 
static uint GetExpiry(uint tokenLifetimeInSeconds)
{
   const long ticksPerSecond = 1000000000 / 100; // 1 tick = 100 nano seconds
 
   DateTime origin = new DateTime(1970, 1, 1, 0, 0, 0, 0);
   TimeSpan diff = DateTime.Now.ToUniversalTime() - origin;
 
   return ((uint)(diff.Ticks / ticksPerSecond)) + tokenLifetimeInSeconds;
}

Initially for testing my Azure MQTT Test Client I manually generated the SAS tokens using Azure Device Explorer but figured it would be better if the application generated them.

An initial search lead to this article about how to generate a SAS token for an Azure Event Hub in multiple languages. For my first attempt I “copied and paste” the code sample for C# (I also wasn’t certain what to put in the KeyName parameter) and it didn’t work.

private static string createToken(string resourceUri, string keyName, string key)
{
    TimeSpan sinceEpoch = DateTime.UtcNow - new DateTime(1970, 1, 1);
    var week = 60 * 60 * 24 * 7;
    var expiry = Convert.ToString((int)sinceEpoch.TotalSeconds + week);
    string stringToSign = HttpUtility.UrlEncode(resourceUri) + "\n" + expiry;
    HMACSHA256 hmac = new HMACSHA256(Encoding.UTF8.GetBytes(key));
    var signature = Convert.ToBase64String(hmac.ComputeHash(Encoding.UTF8.GetBytes(stringToSign)));
    var sasToken = String.Format(CultureInfo.InvariantCulture, "SharedAccessSignature sr={0}&sig={1}&se={2}&skn={3}", HttpUtility.UrlEncode(resourceUri), HttpUtility.UrlEncode(signature), expiry, keyName);
    return sasToken;
}

By comparing the Device Explorer and C# generated SAS keys I worked out the keyName parameter was unnecessary so I removed.

private static string createToken(string resourceUri, string key)
{
    TimeSpan sinceEpoch = DateTime.UtcNow - new DateTime(1970, 1, 1);
    var week = 60 * 60 * 24 * 7;
    var expiry = Convert.ToString((int)sinceEpoch.TotalSeconds + week);
    string stringToSign = HttpUtility.UrlEncode(resourceUri) + "\n" + expiry;
    HMACSHA256 hmac = new HMACSHA256(Encoding.UTF8.GetBytes(key));
    var signature = Convert.ToBase64String(hmac.ComputeHash(Encoding.UTF8.GetBytes(stringToSign)));
    var sasToken = String.Format(CultureInfo.InvariantCulture, "SharedAccessSignature sr={0}&sig={1}&se={2}", HttpUtility.UrlEncode(resourceUri), HttpUtility.UrlEncode(signature), expiry);
    return sasToken;
}

The shared SAS token now looked closer to what I was expecting but the MQTTNet ConnectAsync was failing with an authentication exception. After looking at the Device Explorer SAS Key code, my .NetMF implementation and the code for the IoT Hub SDK I noticed the encoding for the HMAC Key was different. Encoding.UTF8.GetBytes vs. Convert.FromBase64String.

 private static string createToken(string resourceUri,string key, TimeSpan ttl)
      {
         TimeSpan afterEpoch = DateTime.UtcNow.Add( ttl ) - new DateTime(1970, 1, 1);

         string expiry = afterEpoch.TotalSeconds.ToString("F0");
         string stringToSign = HttpUtility.UrlEncode(resourceUri) + "\n" + expiry;
         HMACSHA256 hmac = new HMACSHA256(Convert.FromBase64String(key));
         string signature = Convert.ToBase64String(hmac.ComputeHash(Encoding.UTF8.GetBytes(stringToSign)));
         return  String.Format(CultureInfo.InvariantCulture, "SharedAccessSignature sr={0}&sig={1}&se={2}", HttpUtility.UrlEncode(resourceUri), HttpUtility.UrlEncode(signature), expiry);
      }

This approach appears to work reliably in my test harness.

MQTTnet client with new SAS Key Generator

User beware DIY Crypto often ends badly

nRF24L01 Raspberry PI Gateway Hardware

For those who came to my MS Ignite AU Intelligent Cloud booth session

Building Wireless Field Gateways

Connecting wireless sensor nodes to the cloud is not the mission it used to be, because the Azure team (and many OS projects) have developed tooling which can help hobbyist and professional developers build solutions. How could you build a home scale robust, reliable and secure solution with off the shelf kit without blowing the budget?

Sparkfun nRF24L01 module &Adafruit perma proto hat

NRF24L01 Raspberry PI DIY Gateway Hardware

BoM (all prices as at Feb 2016)

You will also need some short lengths of wire and a soldering iron.

For those who want an “off the shelf” solution (still requires a minor modification for interrupt support) I have used the Raspberry Pi to NRF24l01+ Shield USD9.90

2015-09-25t072754-447z-20150925_091942-855x570_q85_pad_rcrop

Instructions for modifications and software to follow.

Netduino 3 Wifi Queued Azure Event Hub Field Gateway V1.0

My ADSL connection had been a bit flaky which had meant I had lost some sensor data with my initial Azure Event Hub gateway. In attempt make the solution more robust this version of the gateway queues unsent messages using the on-board MicroSD card support.

The code assumes that a file move is an “atomic operation”, so it streams the events received from the devices into a temporary directory (configurable) then moves them to the upload directory (configurable).

This code is proof of concept and needs to be soak tested, improved error handling and some additional multi threading locking added plus the magic constants refactored.

This code is called in the nRF24 receive messages handler

private void OnReceive(byte[] data)
{
   activityLed.Write(!activityLed.Read());

   // Ensure that we have a payload
   if (data.Length < 1 )
   {
      Debug.Print( "ERROR - Message has no payload" ) ;
      return ;
   }

   string message = new String(Encoding.UTF8.GetChars(data));
   Debug.Print("+" + DateTime.UtcNow.ToString("HH:mm:ss") + " L=" + data.Length + " M=" + message);

   string filename = DateTime.UtcNow.ToString("yyyyMMddhhmmssff") + ".txt";

   string tempDirectory = Path.Combine("\\sd", "temp");
   string tempFilePath = Path.Combine(tempDirectory, filename);

   string queueDirectory = Path.Combine("\\sd", "data");
   string queueFilePath = Path.Combine(queueDirectory, filename);

   File.WriteAllBytes(tempFilePath, data);

   File.Move(tempFilePath, queueFilePath);

   new Microsoft.SPOT.IO.VolumeInfo("\\sd").FlushAll();
}

A timer initiates the upload process which uses the AMQPNetlite library

bool UploadInProgress = false;

      
void uploaderCallback(object state)
{
   Debug.Print("uploaderCallback - start");

   if (UploadInProgress)
   {
      return;
   }
   UploadInProgress = true;

   string[] eventFilesToSend = Directory.GetFiles(Path.Combine("\\sd", "data")) ;

   if ( eventFilesToSend.Length == 0 )
   {
      Debug.Print("uploaderCallback - no files");
      UploadInProgress = false;
      return ;
   }

   try
   {
      Debug.Print("uploaderCallback - Connect");
      Connection connection = new Connection(new Address(serviceBusHost, serviceBusPort, serviceBusSasKeyName, serviceBusSasKey));

      Session session = new Session(connection);

      SenderLink sender = new SenderLink(session, "send-link", eventHubName);

      for (int index = 0; index < System.Math.Min(eventUploadBatchSizeMaximum, eventFilesToSend.Length); index++)
      {
         string eventFile = eventFilesToSend[ index ] ;

         Debug.Print("-" + DateTime.UtcNow.ToString("HH:mm:ss") + " " + eventFile ); ;

         Message message = new Message()
         {
            BodySection = new Data()
            {
               Binary = File.ReadAllBytes(eventFile),
            },
         ApplicationProperties = new Amqp.Framing.ApplicationProperties(),
         };

         FileInfo fileInfo = new FileInfo(eventFile);

         message.ApplicationProperties["AcquiredAtUtc"] = fileInfo.CreationTimeUtc;
         message.ApplicationProperties["UploadedAtUtc"] = DateTime.UtcNow;
         message.ApplicationProperties["GatewayId"] = gatewayId;
         message.ApplicationProperties["DeviceId"] = deviceId;
         message.ApplicationProperties["EventId"] = Guid.NewGuid();

         sender.Send(message);

         File.Delete(eventFile);

         new Microsoft.SPOT.IO.VolumeInfo("\\sd").FlushAll();
      }

      sender.Close();
      session.Close();
      connection.Close();
   }
   catch (Exception ex)
   {
      Debug.Print("ERROR: Upload failed with error: " + ex.Message);
   }
   finally
   {
      Debug.Print("uploaderCallback - finally");
      UploadInProgress = false;
   }
}

The timer period and number of files uploaded in each batch is configurable. I need to test the application to see how it handles power outages and MicroSD card corruption. The source is Netduino NRF24L01 AMQPNetLite Queued Azure EventHub Gatewaywith all the usual caveats.

This project wouldn’t have been possible without

Netduino 3 Wifi pollution Sensor Part 1

I am working on a Netduino 3 Wifi based version for my original concept as a STEM project for high school students. I wanted to be able to upload data to a Microsoft Azure Eventhub or other HTTPS secured RESTful endpoint (e.g. xivelyIOT) to show how to build a securable solution. This meant a Netduino 3 Wifi device with the TI C3100 which does all the crypto processing was necessary.

The aim was to (over a number of blog posts) build a plug ‘n play box that initially was for measuring airborne particulates and then overtime add more sensors e.g. atmospheric gas concentrations, (Grove multichannel gas sensor), an accelerometer for earthquake early warning/monitoring (Grove 3-Axis Digital Accelerometer) etc.

Netduino 3 Wifi based pollution sensor

Bill of materials for prototype as at (October 2015)

  • Netduino 3 Wifi USD69.95
  • Seeedstudio Grove base shield V2 USD8.90
  • Seeedstudio Grove smart dust sensor USD16.95
  • Seeedstudio Grove Temperature & Humidity Sensor pro USD14.90
  • Seeedstudio ABS outdoor waterproof case USD1.65
  • Seeedstudio Grove 4 pin female to Grove 4 pin conversion cable USD3.90
  • Seeedstudio Grove 4 pin buckled 5CM cabed USD1.90

After the first assembly I have realised the box is a bit small. There is not a lot of clearance around the Netduino board (largely due to the go!bus connectors on the end making it a bit larger than a standard *duino board) and the space for additional sensors is limited so I will need to source a larger enclosure.

The dust sensor doesn’t come with a cable so I used the conversion cable instead. NOTE – The pins on the sensor are numbered right->Left rather than left->right.

The first step is to get the temperature and humidity sensor working with my driver code, then adapt the Seeedstudio Grove-Dust sensor code for the dual outputs of the SM-PWM-01 device.

According to the SM-PWM-01A device datasheet The P1 output is for small particles < 1uM (smoke) and P2 output is for large particles > 2uM (dust). The temperature & humidity sensor is included in the first iteration as other researchers have indicated that humidity levels can impact on the accuracy of optical particle counters.

Then, once the sensors are working as expected I will integrate a cut back version of the AMQPNetLite code and configuration storage code I wrote for my Netduino 3 wifi Azure EventHub Field Gateway.

Netduino 3 Wifi Azure Event Hub Field Gateway V2.0

After some testing I have improved the error handling and robustness of my Netduino 3 wifi based Azure Eventhub field gateway.

private void OnReceive(byte[] data)
{
   activityLed.Write(!activityLed.Read());

   // Ensure that we have a payload
   if (data.Length < 1 ) { Debug.Print( "ERROR - Message has no payload" ) ; return ; } string message = new String(Encoding.UTF8.GetChars(data)); Debug.Print(DateTime.UtcNow.ToString("HH:mm:ss") + " L=" + data.Length + " M=" + message); Thread thread = new Thread(() => EventHubSendMessage( data));
   thread.Start();
}

private void EventHubSendMessage( byte[] messageBody)
{
   #region Diagnostic assertions
   Debug.Assert(eventHubName != null);
   Debug.Assert(deviceId != null);
   Debug.Assert(gatewayId != null);
   Debug.Assert(messageBody != null);
   Debug.Assert(messageBody.Length > 0);
   #endregion

   if ((connection == null) || (session == null ) || (senderLink == null ))
   {
      lock (lockThis)
      {
         if (connection == null)
         {
            Debug.Print("AMQP Establish connection");
            try
            {
               connection = new Connection(new Address(serviceBusHost, serviceBusPort, serviceBusSasKeyName, serviceBusSasKey));

               connection.Closed = ConnectionClosedCallback;

               Debug.Print("AMQP Establish connection done");
            }
            catch (Exception ex)
            {
               Debug.Print("ERROR: AMQP Establish connection: " + ex.Message);
            }
         }

         if (connection == null)
         {
            return;
         }

         if (session == null)
         {
            Debug.Print("AMQP Establish session");
            try
            {
               session = new Session(connection);

               session.Closed = SessionClosedCallback;

               Debug.Print("AMQP Establish session done");
            }
            catch (Exception ex)
            {
               Debug.Print("ERROR: AMQP Establish session: " + ex.Message);
            }
         }

         if (session == null)
         {
            return;
         }

         if (senderLink == null)
         {
            Debug.Print("AMQP Establish SenderLink");
            try
            {
               senderLink = new SenderLink(session, "send-link", eventHubName);

               senderLink.Closed = SenderLinkClosedCallback;

               Debug.Print("AMQP Establish SenderLink done");
            }
            catch (Exception ex)
            {
               Debug.Print("ERROR: AMQP Establish SenderLink: " + ex.Message);
            }
         }

         if (senderLink == null)
         {
            return;
         }
      }
   }

         
   try
   {
      Debug.Print("AMQP Send start");
      DateTime startAtUtc = DateTime.UtcNow;

      Message message = new Message()
      {
         BodySection = new Data()
         {
            Binary = messageBody
         },
         ApplicationProperties = new Amqp.Framing.ApplicationProperties(),
      };

      message.ApplicationProperties["UploadedAtUtc"] = DateTime.UtcNow;
      message.ApplicationProperties["GatewayId"] = gatewayId;
      message.ApplicationProperties["DeviceId"] = deviceId;
      message.ApplicationProperties["EventId"] = Guid.NewGuid();

      senderLink.Send(message);
      DateTime finishAtUtc = DateTime.UtcNow;
      TimeSpan duration = finishAtUtc - startAtUtc;
      Debug.Print("AMQP Send done duration " + duration.ToString());
   }
   catch (Exception ex)
   {
      Debug.Print("ERROR: Publish failed with error: " + ex.Message);
   }
}

The software is quite reliable, when my internet connection fails it recovers gracefully and resumes uploading events when connectivity is restored.

The only issue is when the wireless access point is restarted, when the device reconnects it locks up and doesn’t recover. I have posted in the Netduino forums and logged at issue at the Github Netduino wifi repository.

I have been exploring rebooting the device in the NetworkChange_NetworkAvailabilityChanged handler when connectivity is restored.

Based on my logging the sending of events is pretty quick and the threads are interleaved

03:20:59 L=25 M={“D”:2,”H”:63.0,”T”:18.8}
AMQP Send start
03:20:59 L=25 M={“D”:1,”H”:54.5,”T”:18.7}
AMQP Send start
03:20:59 L=17 M={“D”:10,”P”:27.9}
AMQP Send start
AMQP Send done duration 00:00:00.2738220
AMQP Send done duration 00:00:00.4709960
AMQP Send done duration 00:00:01.0813910
03:21:01 L=17 M={“D”:10,”P”:27.4}
AMQP Send start
AMQP Send done duration 00:00:00.2820090
03:21:03 L=17 M={“D”:10,”P”:26.9}

Here is the code with usual caveats.

Next steps queuing messages in memory and then on the MicroSD card.

Netduino 3 Wifi Azure Event Hub Field Gateway V1.0

The Netduino 3 Wifi device supports TLS connectivity and looked like it could provide a low power consumption field gateway to an Azure EventHub for my nRF24L01 equipped Netduino, Arduino & devDuino 1.3, 2.0 & 3.0 devices.

Netduino 3 Wifi Azure Event Hub Field Gateway

Netduino 3 Wifi Azure Field Gateway and a selection of arduino & devDuino devices

Bill of materials for field gateway prices as at (Sept 2015)

  • Netduino 3 Wifi USD69.95
  • SeeedStudio Solar Shield USD13.95
  • Lithium Ion 3000mAH battery USD15.00
  • Embedded coolness nRF24L01 shield with high power module USD17.85

The software uses AMQPNetLite which provides a lightweight implementation of the AMQP protocol (on the .Net framework, .Net Compact Framework, .Net Micro Framework, and WindowsPhone platforms) and the Nordic nRF24L01 Net Micro Framework Driver.The first version of the software is a proof of concept and over time I will add functionality and improve the reliability.

On application start up the nRF24L01, Azure Event Hub and network settings are loaded from the built in MicroSD card.

// Write empty template of the configuration settings to the SD card if pin D0 is high
if (!File.Exists(Path.Combine("\\sd", "app.config")))
{
   Debug.Print("Writing template configuration file then stopping");

   ConfigurationFileGenerate();

   Thread.Sleep(Timeout.Infinite);
}
appSettings.Load();

If there is no configuration file on the MicroSD card an empty template is created.

private void ConfigurationFileGenerate()
{
   // Write empty configuration file
   appSettings.SetString(nRF2L01AddressSetting, "Base1");
   appSettings.SetString(nRF2L01ChannelSetting, "10");
   appSettings.SetString(nRF2L01DataRateSetting, "0");

   appSettings.SetString(serviceBusHostSetting, "serviceBusHost");
   appSettings.SetString(serviceBusPortSetting, "5671");
   appSettings.SetString(serviceBusSasKeyNameSetting, "serviceBusSasKeyName");
   appSettings.SetString(serviceBusSasKeySetting, "serviceBusSasKey");
   appSettings.SetString(eventHubNameSetting, "eventHubName");

   appSettings.Save();
}

Once the Wifi connection has been established the device connects to a specified NTP server so any messages have an accurate timestamp and then initiates an AMQP connection.

Debug.Print("Network time");
try
{
   DateTime networkTime = NtpClient.GetNetworkTime(ntpServerHostname);
   Microsoft.SPOT.Hardware.Utility.SetLocalTime(networkTime);
   Debug.Print(networkTime.ToString(" dd-MM-yy HH:mm:ss"));
}
catch (Exception ex)
{
   Debug.Print("ERROR: NtpClient.GetNetworkTime: " + ex.Message);
   Thread.Sleep(Timeout.Infinite);
}
Debug.Print("Network time done");

// Connect to AMQP gateway
Debug.Print("AMQP Establish connection");
try
{
   Address address = new Address(serviceBusHost, serviceBusPort, serviceBusSasKeyName, serviceBusSasKey);
   connection = new Connection(address);
}
catch (Exception ex)
{
   Debug.Print("ERROR: AMQP Establish connection: " + ex.Message);
   Thread.Sleep(Timeout.Infinite);
}
Debug.Print("AMQP Establish connection done");

After the device has network connectivity, downloaded the correct time and connected to AMQP hub the nRF241L01 device is initialised.

The first version of the software starts a new thread to handle each message and handles connectivity failures badly. These issues and features like local queuing of messages will be added in future iterations.

private void OnReceive(byte[] data)
{
   activityLed.Write(!activityLed.Read());

   // Ensure that we have a payload
   if (data.Length < 1 ) { Debug.Print( "ERROR - Message has no payload" ) ; return ; } string message = new String(Encoding.UTF8.GetChars(data)); Debug.Print(DateTime.UtcNow.ToString("HH:mm:ss") + " " + gatewayId + " " + data.Length + " " + message); Thread thread = new Thread(() => EventHubSendMessage(connection, eventHubName, deviceId, gatewayId, data));
   thread.Start();
}


private void EventHubSendMessage(Connection connection, string eventHubName, string deviceId, string gatewayId, byte[] messageBody)
{
   try
   {
      Session session = new Session(connection);
      SenderLink sender = new SenderLink(session, "send-link", eventHubName);

      Message message = new Message()
      {
         BodySection = new Data()
         {
            Binary = messageBody
         },
         ApplicationProperties = new Amqp.Framing.ApplicationProperties(),
      };

      message.ApplicationProperties["UploadedAtUtc"] = DateTime.UtcNow;
      message.ApplicationProperties["GatewayId"] = gatewayId;
      message.ApplicationProperties["DeviceId"] = deviceId;
      message.ApplicationProperties["EventId"] = Guid.NewGuid().ToString();

      sender.Send(message);

      sender.Close();
      session.Close();
      }
   catch (Exception ex)
   {
      Debug.Print("ERROR: Publish failed with error: " + ex.Message);
   }
}

Initially the devices send events with a JSON payload.

ServiceBus Explorer

JSON Event messages displayed in ServiceBus Explorer

The code is available NetduinoNRF24L01AMQPNetLiteAzureEventHubGatewayV1.0 and when I have a spare afternoon I will upload to github.