Random wanderings through Microsoft Azure esp. PaaS plumbing, the IoT bits, AI on Micro controllers, AI on Edge Devices, .NET nanoFramework, .NET Core on *nix and ML.NET+ONNX
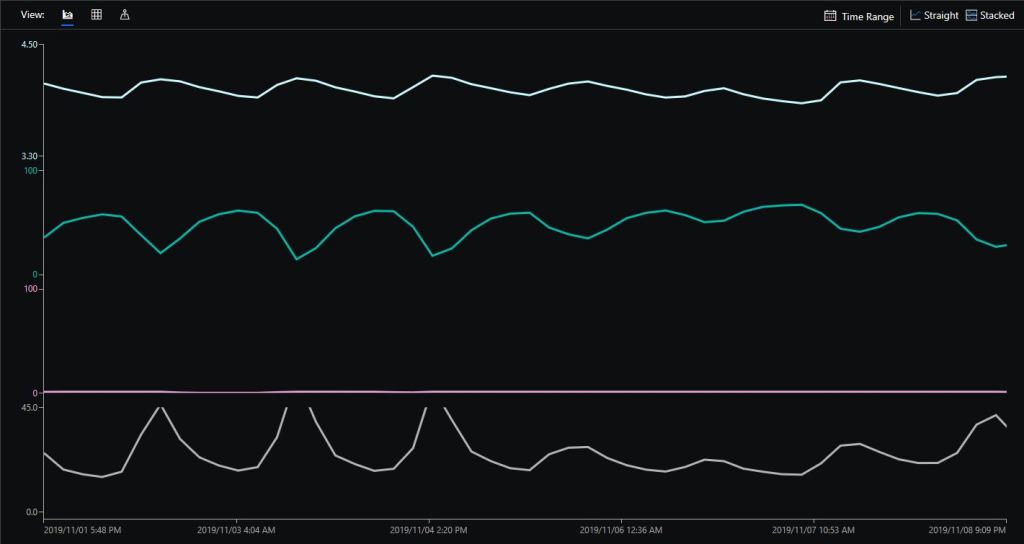
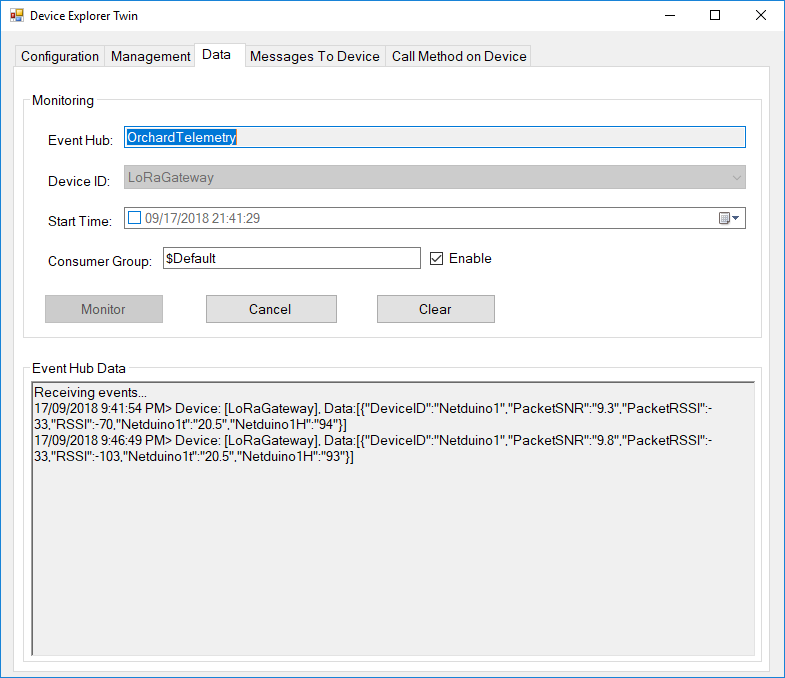
Sample hardwareAzure IoT Central data visualisation
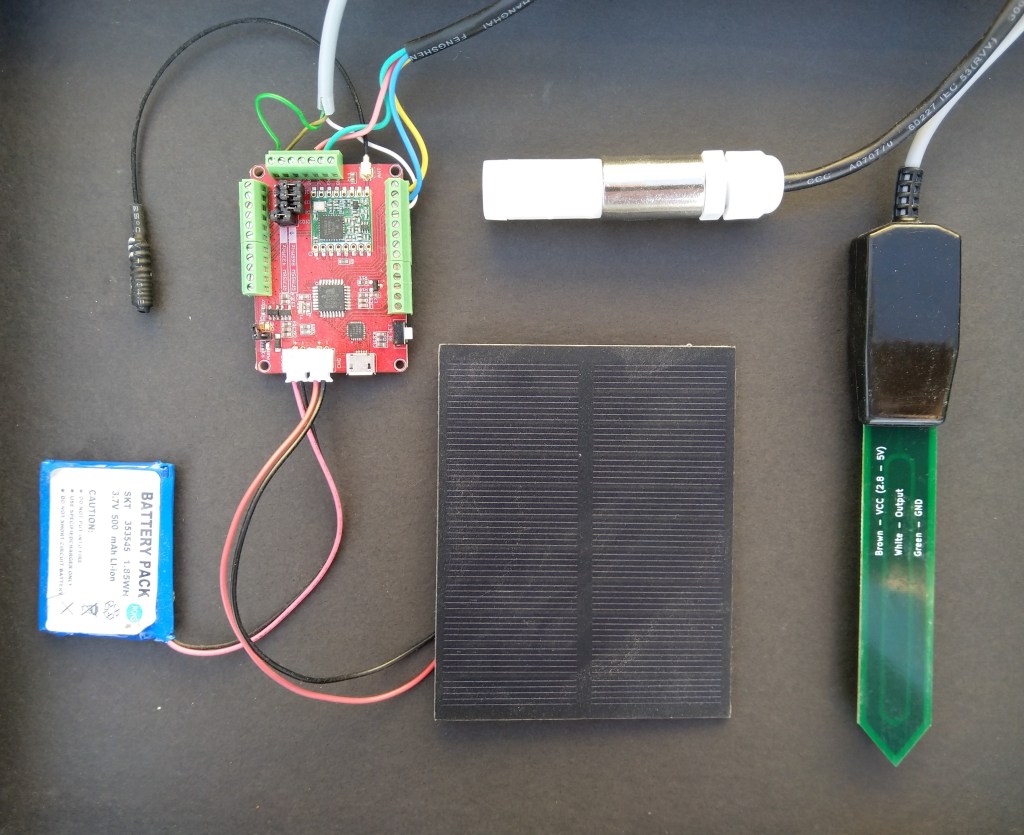
The Maduino device in the picture is a custom version with an onboard Microchip ATSHA204 crypto and authentication chip (currently only use for the unique 72 bit serial number) and a voltage divider connected to the analog pin A6 to monitor the battery voltage.
There are compile time options ATSHA204 & BATTERY_VOLTAGE_MONITOR which can be used to selectively enable this functionality.
I use the Arduino lowpower library to aggressively sleep the device between measurements
// Adjust the delay so period is close to desired sec as possible, first do 8sec chunks.
  int delayCounter = SensorUploadDelay / 8 ;
  for( int i = 0 ; i < delayCounter ; i++ )
  {
     LowPower.powerDown(SLEEP_8S, ADC_OFF, BOD_OFF);
  }

  // Then to 4 sec chunk
  delayCounter =  ( SensorUploadDelay % 8 ) / 4;
  for( int i = 0 ; i < delayCounter ; i++ )
  {
     LowPower.powerDown(SLEEP_4S, ADC_OFF, BOD_OFF);
  }

  // Then to 2 sec chunk
  delayCounter =  ( SensorUploadDelay % 4 ) / 2 ;
  for( int i = 0 ; i < delayCounter ; i++ )
  {
     LowPower.powerDown(SLEEP_2S, ADC_OFF, BOD_OFF);
  }

  // Then to 1 sec chunk
  delayCounter =  ( SensorUploadDelay % 2 ) ;
  for( int i = 0 ; i < delayCounter ; i++ )
  {
     LowPower.powerDown(SLEEP_1S, ADC_OFF, BOD_OFF);
  }
}
I use a spare digital PIN for powering the soil moisture probe so it can be powered down when not in use. I have included a short delay after powering up the device to allow the reading to settle.
  // Turn on soil mosture sensor, take reading then turn off to save power
  digitalWrite(SoilMoistureSensorEnablePin, HIGH);
  delay(SoilMoistureSensorEnableDelay);
  int soilMoistureADCValue = analogRead(SoilMoistureSensorPin);
  digitalWrite(SoilMoistureSensorEnablePin, LOW);
  int soilMoisture = map(soilMoistureADCValue,SoilMoistureSensorMinimum,SoilMoistureSensorMaximum, SoilMoistureValueMinimum, SoilMoistureValueMaximum);
  PayloadAdd( "s", soilMoisture, false);
//---------------------------------------------------------------------------------
// Copyright (c) 2017, devMobile Software
//
// Licensed under the Apache License, Version 2.0 (the "License");
// you may not use this file except in compliance with the License.
// You may obtain a copy of the License at
//
//     http://www.apache.org/licenses/LICENSE-2.0
//
// Unless required by applicable law or agreed to in writing, software
// distributed under the License is distributed on an "AS IS" BASIS,
// WITHOUT WARRANTIES OR CONDITIONS OF ANY KIND, either express or implied.
// See the License for the specific language governing permissions and
// limitations under the License.
//---------------------------------------------------------------------------------
namespace devMobile.IoT.Netduino.FieldGateway
{
   using System;
   using System.Text;
   using System.Threading;
   using Microsoft.SPOT;
   using Microsoft.SPOT.Hardware;
   using SecretLabs.NETMF.Hardware.Netduino;
   using devMobile.IoT.NetMF.ISM;
   using devMobile.NetMF.Sensor;

   class NetduinoClient
   {
      Rfm9XDevice rfm9XDevice;
      private readonly TimeSpan dueTime = new TimeSpan(0, 0, 15);
      private readonly TimeSpan periodTime = new TimeSpan(0, 0, 300);
      private readonly SiliconLabsSI7005 sensor = new SiliconLabsSI7005();
      private readonly OutputPort _led = new OutputPort(Pins.ONBOARD_LED, false);
      private readonly byte[] fieldGatewayAddress = Encoding.UTF8.GetBytes("LoRaIoT1");
      private readonly byte[] deviceAddress = Encoding.UTF8.GetBytes("Netduino1");

      public NetduinoClient()
      {
         rfm9XDevice = new Rfm9XDevice(Pins.GPIO_PIN_D10, Pins.GPIO_PIN_D9, Pins.GPIO_PIN_D2);
      }

      public void Run()
      {
         //rfm9XDevice.Initialise(frequency: 915000000, paBoost: true, rxPayloadCrcOn: true);
         rfm9XDevice.Initialise(frequency: 433000000, paBoost: true, rxPayloadCrcOn: true);
         rfm9XDevice.Receive(deviceAddress);

         rfm9XDevice.OnDataReceived += rfm9XDevice_OnDataReceived;
         rfm9XDevice.OnTransmit += rfm9XDevice_OnTransmit;

         Timer humidityAndtemperatureUpdates = new Timer(HumidityAndTemperatureTimerProc, null, dueTime, periodTime);

         Thread.Sleep(Timeout.Infinite);
      }

      private void HumidityAndTemperatureTimerProc(object state)
      {
         _led.Write(true);

         double humidity = sensor.Humidity();
         double temperature = sensor.Temperature();

         Debug.Print(DateTime.UtcNow.ToString("hh:mm:ss") + " H:" + humidity.ToString("F1") + " T:" + temperature.ToString("F1"));

         rfm9XDevice.Send(fieldGatewayAddress, Encoding.UTF8.GetBytes( "t " + temperature.ToString("F1") + ",H " + humidity.ToString("F0")));

         _led.Write(true);
      }

      void rfm9XDevice_OnTransmit()
      {
         Debug.Print("Transmit-Done");
         _led.Write(false);
      }

      void rfm9XDevice_OnDataReceived(byte[] address, float packetSnr, int packetRssi, int rssi, byte[] data)
      {
         try
         {
            string messageText = new string(UTF8Encoding.UTF8.GetChars(data));
            string addressText = new string(UTF8Encoding.UTF8.GetChars(address));

            Debug.Print(DateTime.UtcNow.ToString("HH:MM:ss") + "-Rfm9X PacketSnr " + packetSnr.ToString("F1") + " Packet RSSI " + packetRssi + "dBm RSSI " + rssi + "dBm = " + data.Length + " byte message " + @"""" + messageText + @"""");
         }
         catch (Exception ex)
         {
            Debug.Print(ex.Message);
         }
      }
   }
}
The code is available on GitHub
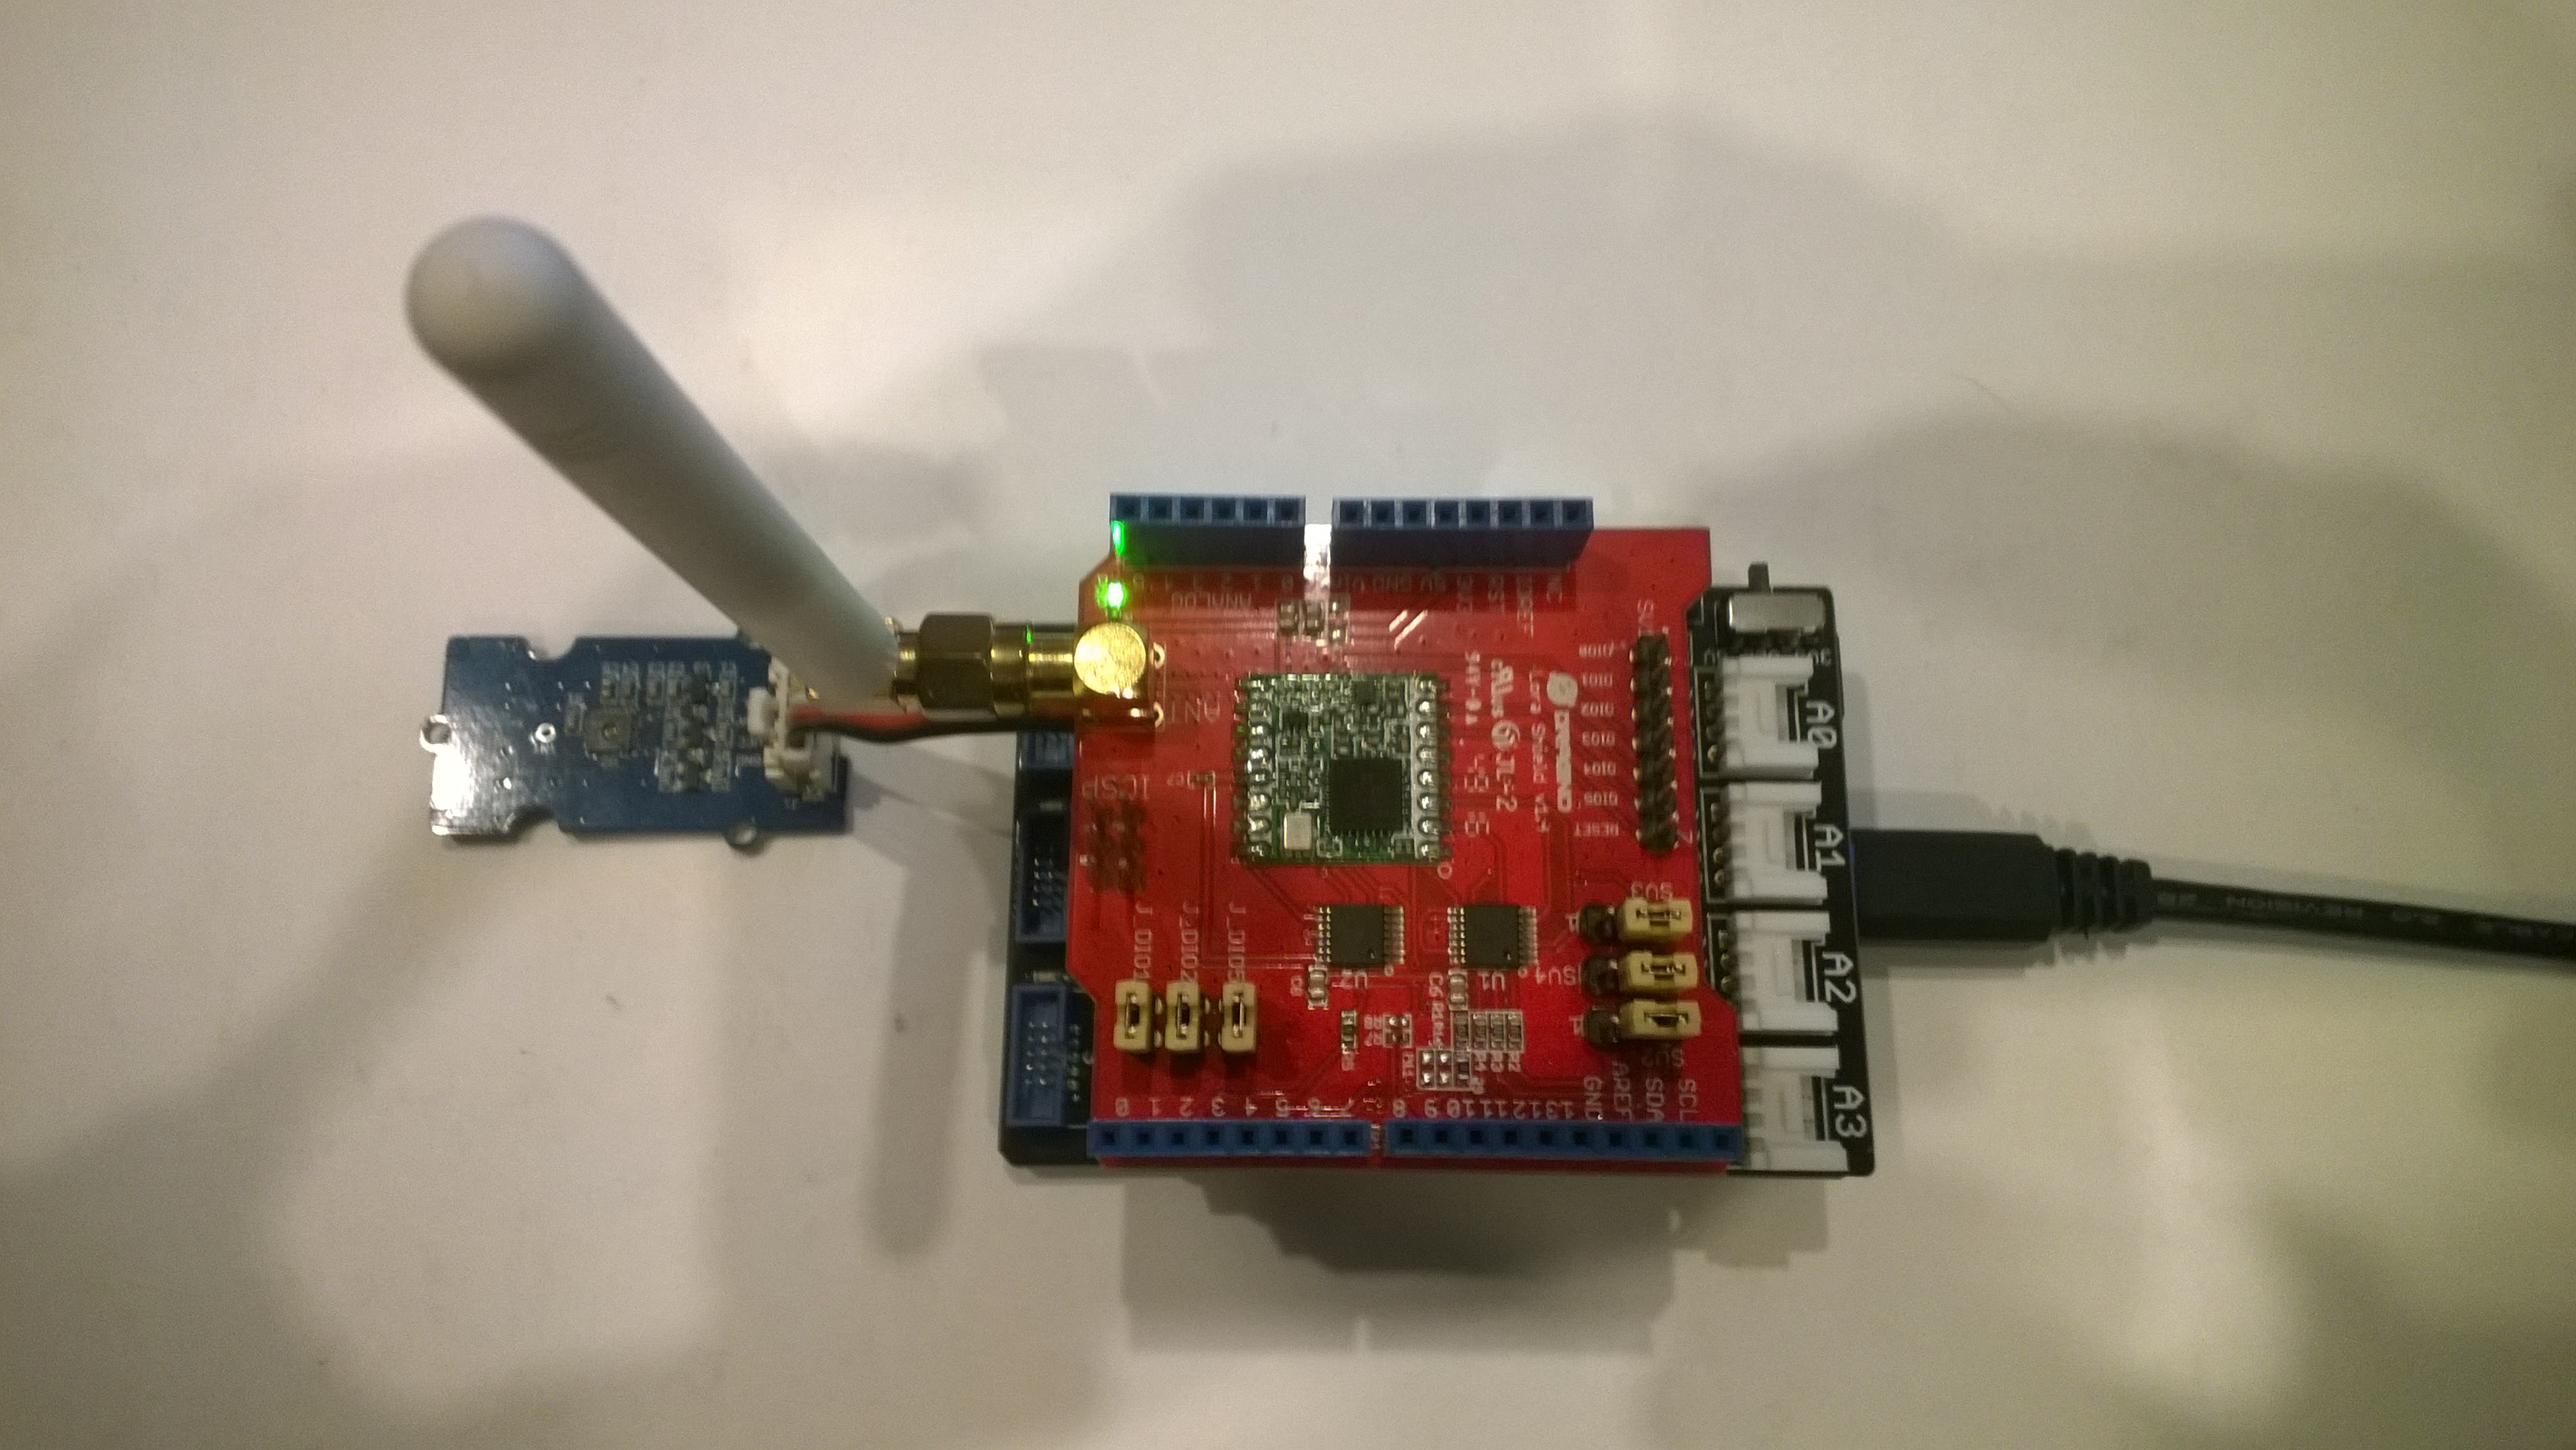
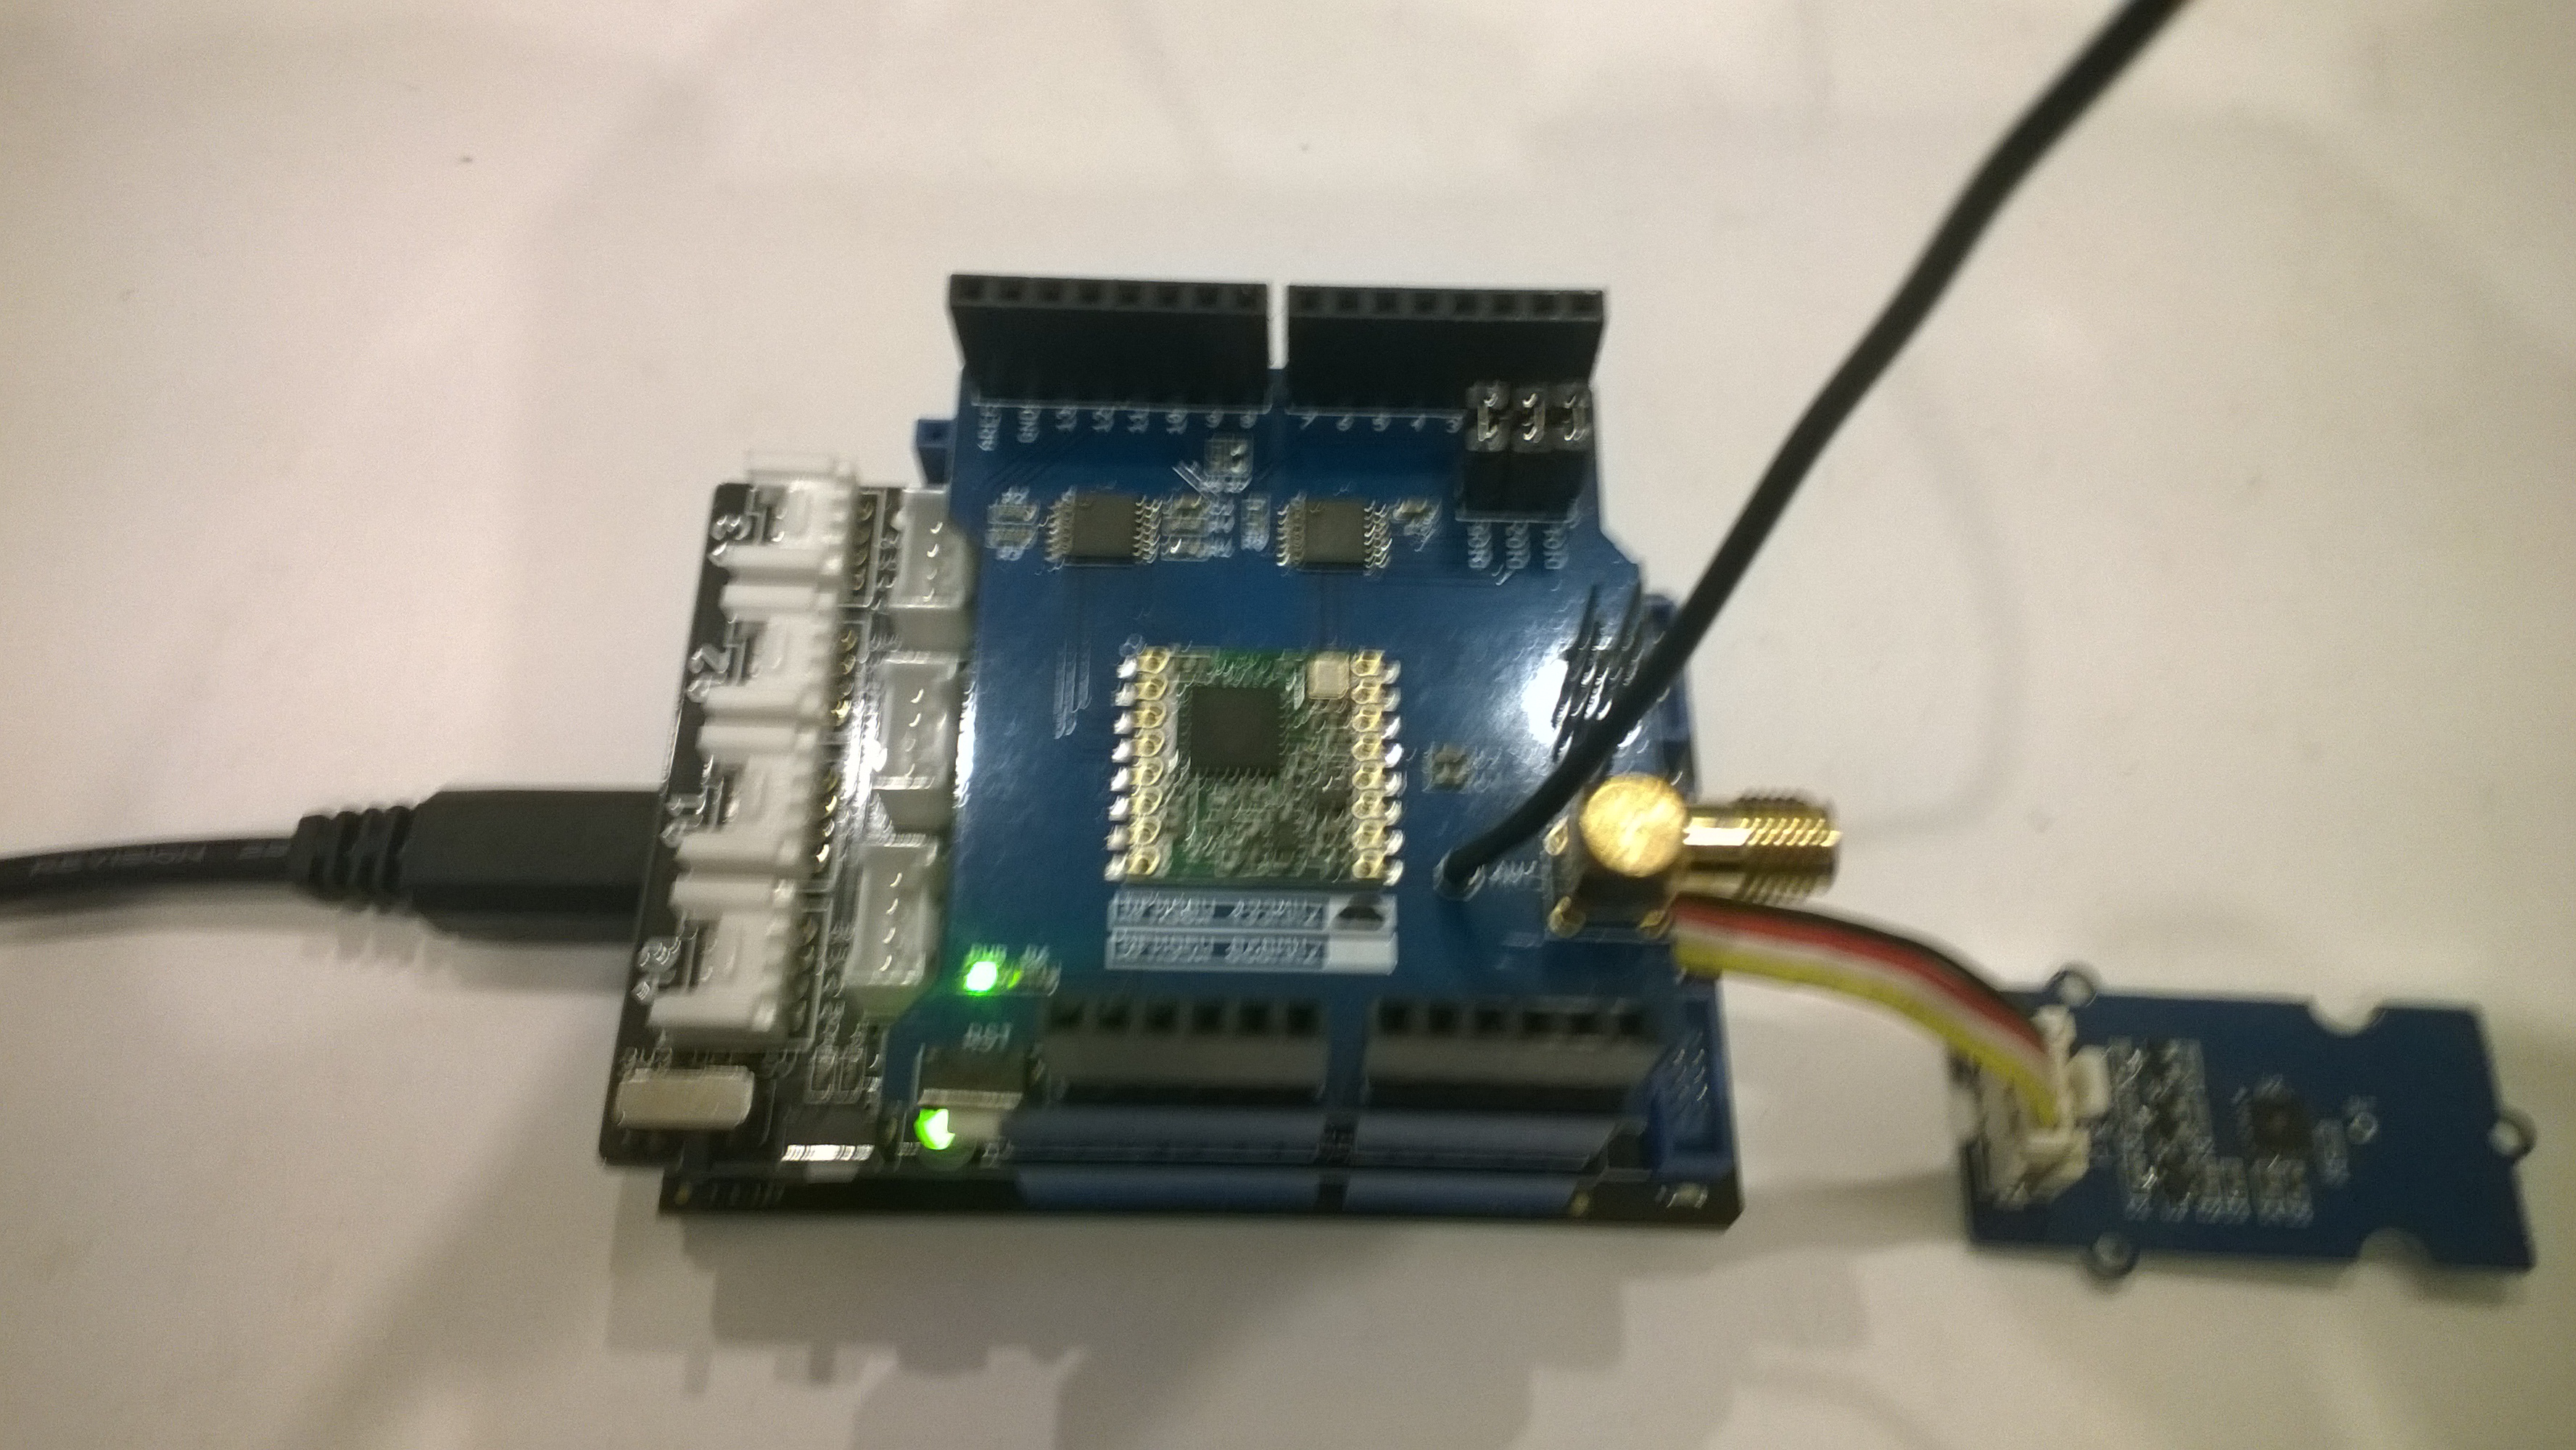
Elecrow shield
Dragino shield
MakerFabs shield
Net Micro Framework debug output from device
The thread '' (0x2) has exited with code 0 (0x0).
12:00:18 H:96.9 T:19.6
Transmit-Done
12:05:17 H:95.1 T:20.1
Transmit-Done
.Net Framework debug output Field Gateway
The thread 0x1550 has exited with code 0 (0x0).
21:21:49-RX From Netduino1 PacketSnr 9.5 Packet RSSI -40dBm RSSI -107dBm = 11 byte message "t 19.6,H 97"
 Sensor Netduino1t Value 19.6
 Sensor Netduino1H Value 97
 AzureIoTHubClient SendEventAsync start
 AzureIoTHubClient SendEventAsync finish
...
21:26:49-RX From Netduino1 PacketSnr 9.5 Packet RSSI -33dBm RSSI -103dBm = 11 byte message "t 20.1,H 95"
 Sensor Netduino1t Value 20.1
 Sensor Netduino1H Value 95
 AzureIoTHubClient SendEventAsync start
 AzureIoTHubClient SendEventAsync finish
The thread 0xfbc has exited with code 0 (0x0).
There is also a 433MHz version available at the same price
The code is pretty basic, it shows how to pack the payload and set the necessary RFM9X/SX127XLoRa module configuration, has no power conservation, advanced wireless configuration etc.
The onboard sockets for battery and charging make the device easier to package and power in the field.
The Grove 4 pin Female Jumper to Grove 4 pin Conversion Cable was a quick & convenient way to get the I2C Grove temperature and humidity sensor connected up.