Random wanderings through Microsoft Azure esp. PaaS plumbing, the IoT bits, AI on Micro controllers, AI on Edge Devices, .NET nanoFramework, .NET Core on *nix and ML.NET+ONNX
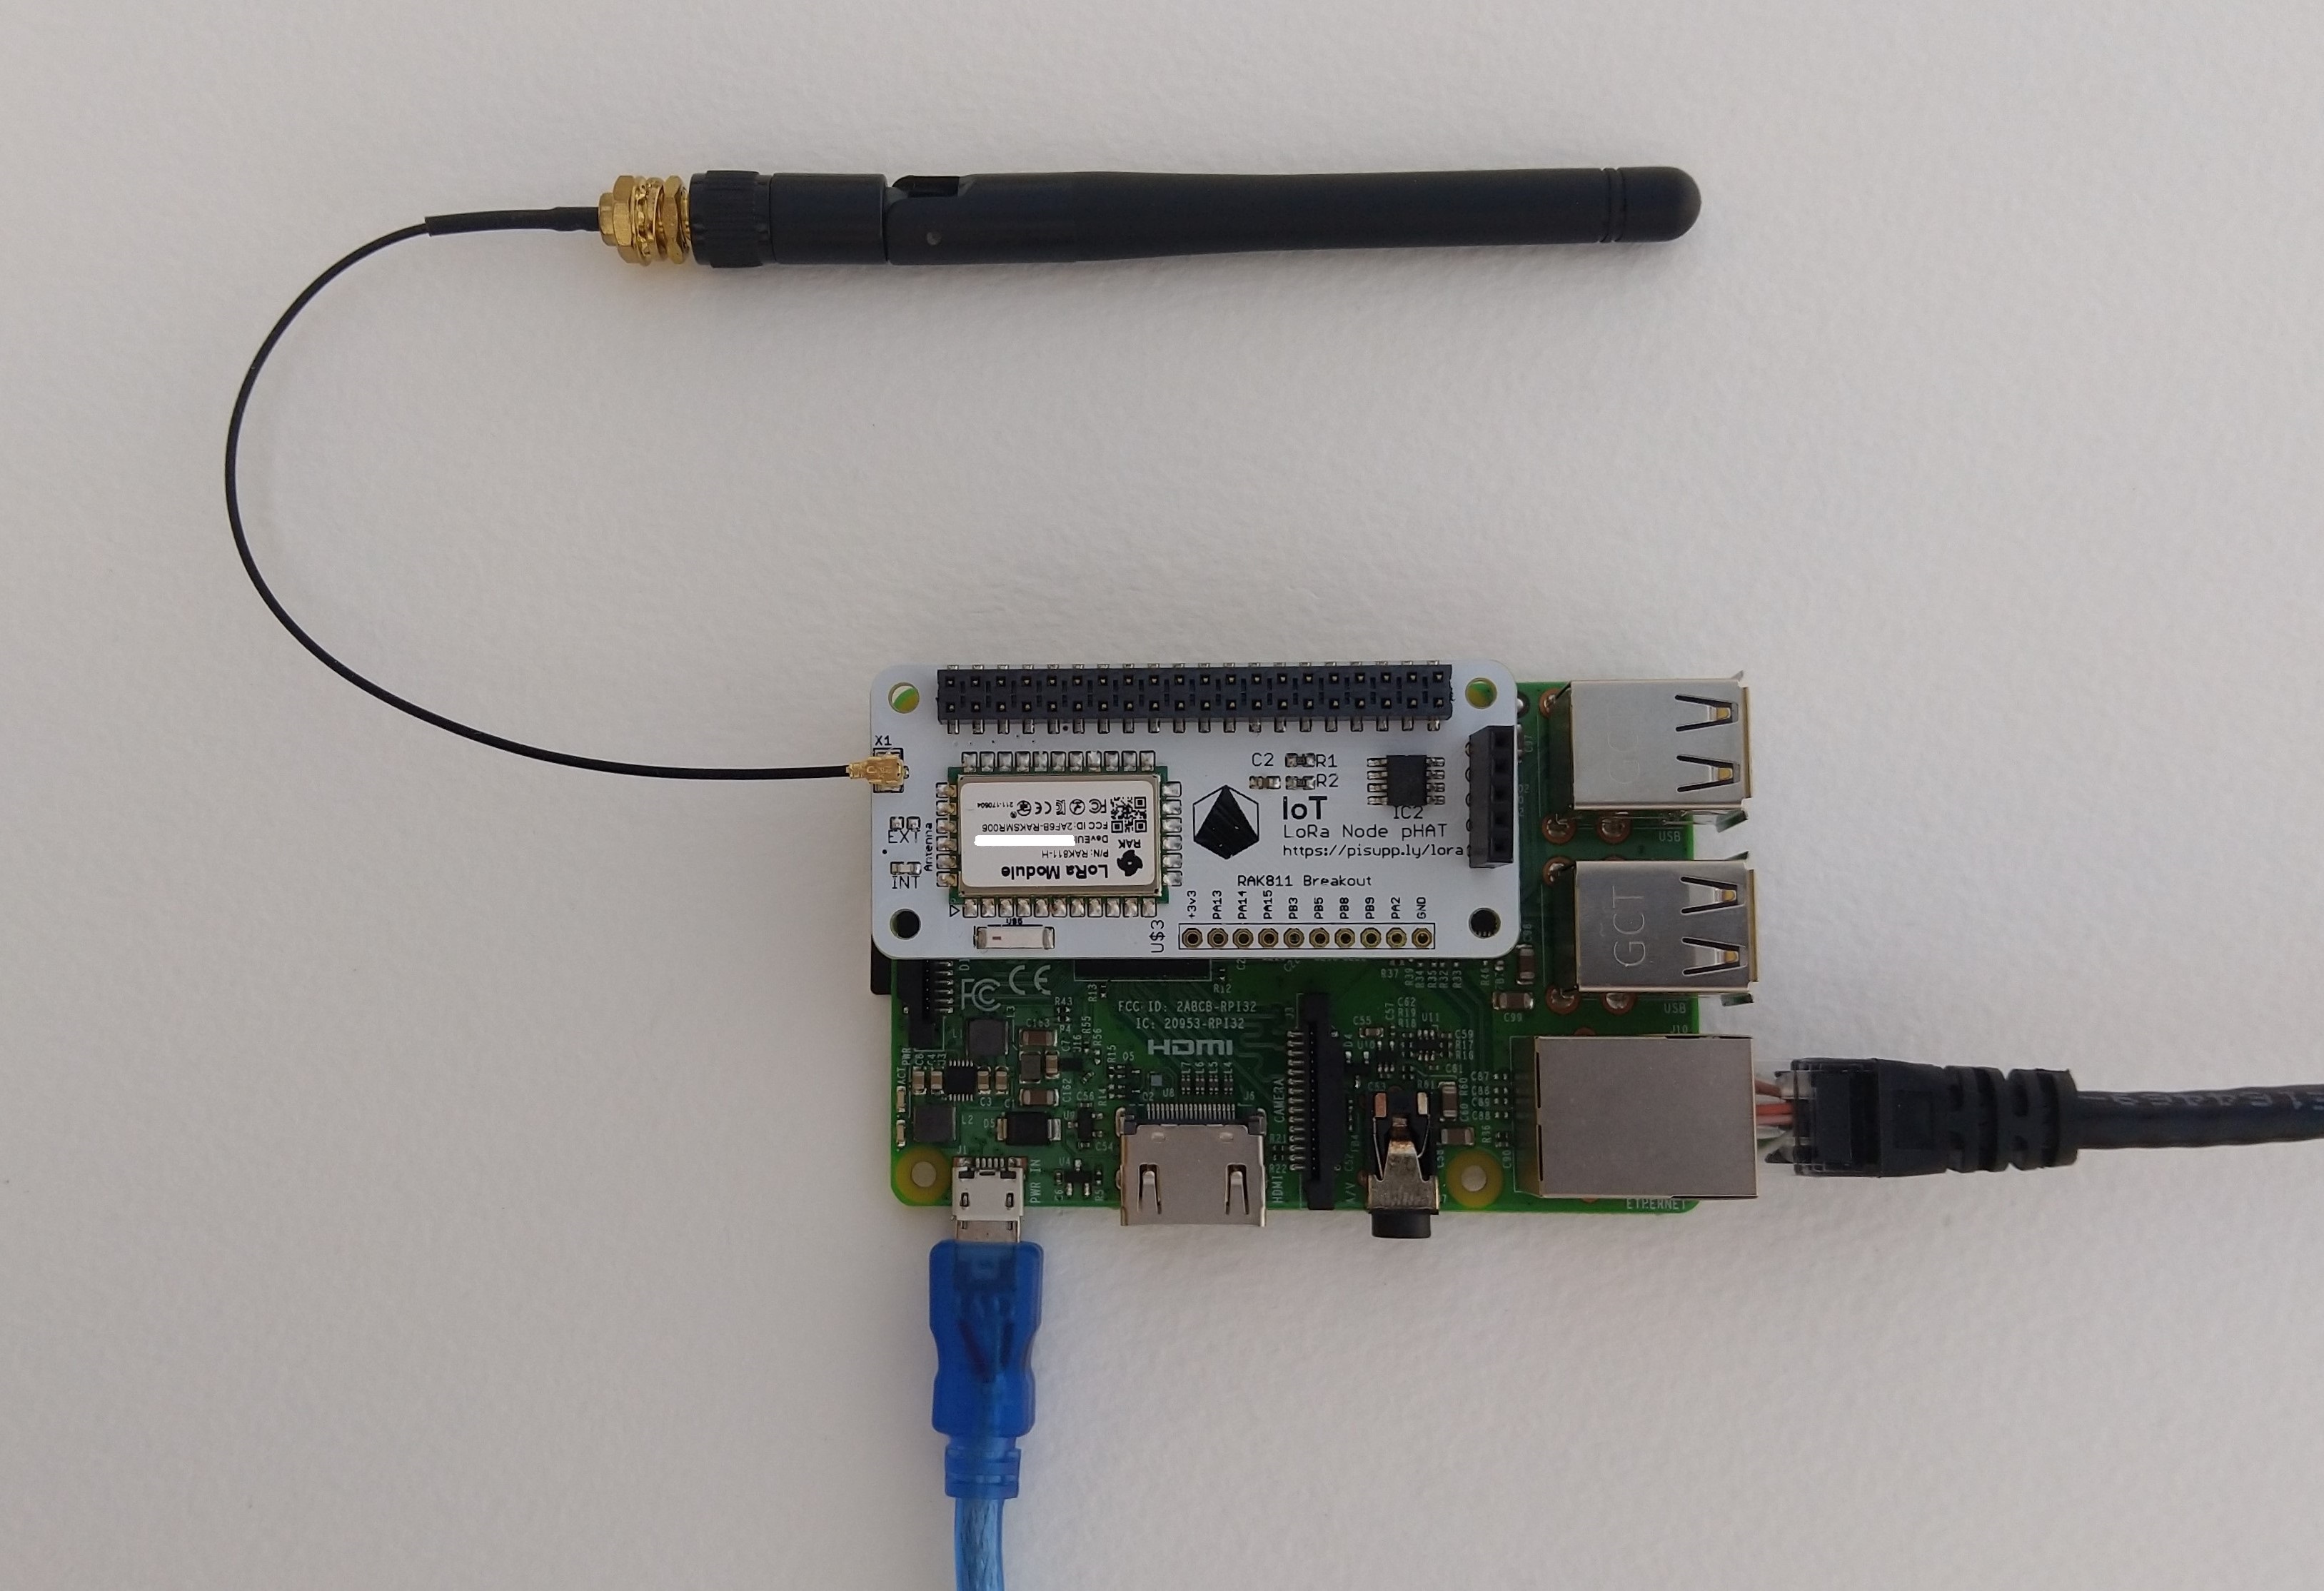
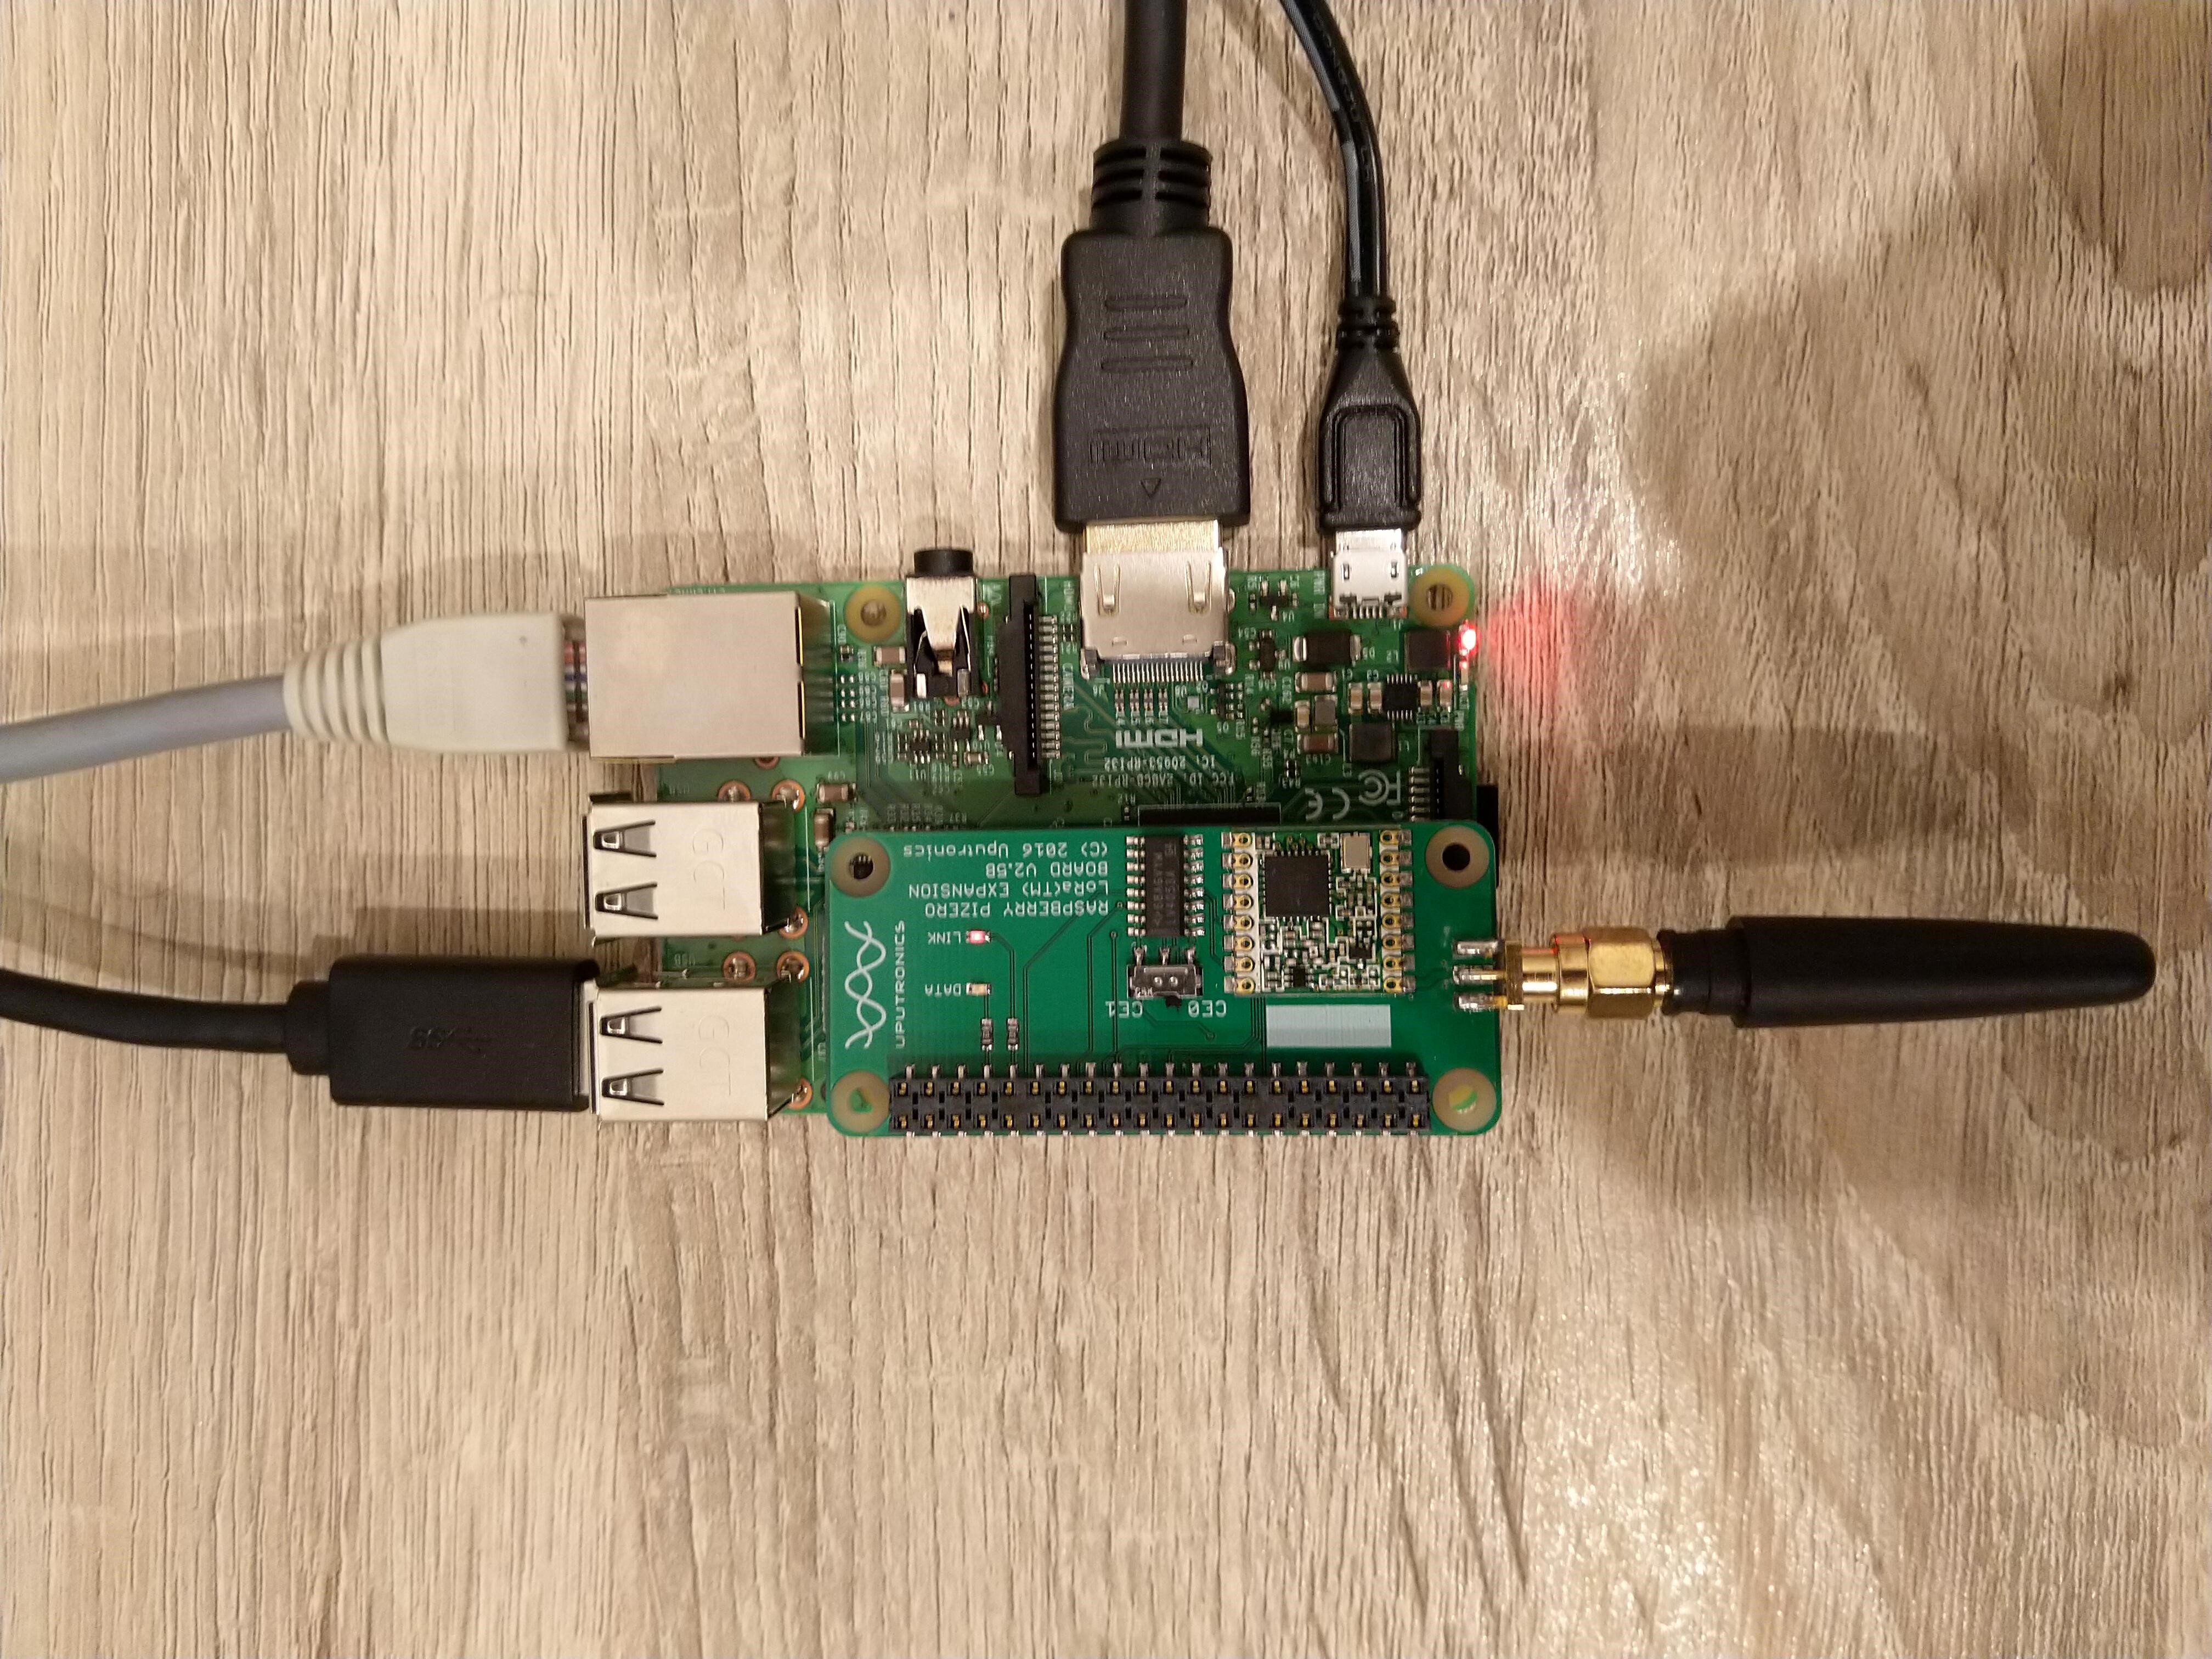
IoT LoRa Node pHAT for Raspberry Pi mounted on a Raspberry PI3
My Over the Air Activation (OTAA) implementation is very “nasty” I have assumed that there would be no timeouts or failures and I only send one BCD message “48656c6c6f204c6f526157414e” which is “hello LoRaWAN”.
The code just sequentially steps through the necessary configuration to join the TTN network with a suitable delay after each command is sent. I had some problems with re-opening the serial port if my application had previously failed with an uncaught exception. After some experimentation I added some code to ensure the port was closed when an exception occurred.
//---------------------------------------------------------------------------------
// Copyright (c) September 2021, devMobile Software
//
// Licensed under the Apache License, Version 2.0 (the "License");
// you may not use this file except in compliance with the License.
// You may obtain a copy of the License at
//
//     http://www.apache.org/licenses/LICENSE-2.0
//
// Unless required by applicable law or agreed to in writing, software
// distributed under the License is distributed on an "AS IS" BASIS,
// WITHOUT WARRANTIES OR CONDITIONS OF ANY KIND, either express or implied.
// See the License for the specific language governing permissions and
// limitations under the License.
//
//---------------------------------------------------------------------------------
namespace devMobile.IoT.NetCore.Rak811.NetworkJoinOTAA
{
	using System;
	using System.Diagnostics;
	using System.IO.Ports;
	using System.Threading;

	public class Program
	{
		private const string SerialPortId = "/dev/ttyS0";
		private const string AppEui = "...";
		private const string AppKey = "...";
		private const byte MessagePort = 1;
		private const string Payload = "A0EEE456D02AFF4AB8BAFD58101D2A2A"; // Hello LoRaWAN

		public static void Main()
		{
			string response;

			Debug.WriteLine("devMobile.IoT.NetCore.Rak811.NetworkJoinOTAA starting");

			Debug.WriteLine(String.Join(",", SerialPort.GetPortNames()));

			try
			{
				using (SerialPort serialPort = new SerialPort(SerialPortId))
				{
					// set parameters
					serialPort.BaudRate = 9600;
					serialPort.DataBits = 8;
					serialPort.Parity = Parity.None;
					serialPort.StopBits = StopBits.One;
					serialPort.Handshake = Handshake.None;

					serialPort.ReadTimeout = 5000;

					serialPort.NewLine = "\r\n";

					serialPort.Open();

					// clear out the RX buffer
					response = serialPort.ReadExisting();
					Debug.WriteLine($"RX :{response.Trim()} bytes:{response.Length}");
					Thread.Sleep(500);

					// Set the Working mode to LoRaWAN
					Console.WriteLine("Set Work mode");
					serialPort.WriteLine("at+set_config=lora:work_mode:0");
					Thread.Sleep(5000);
					response = serialPort.ReadExisting();
					response = response.Trim('\0');
					Debug.WriteLine($"RX :{response.Trim()} bytes:{response.Length}");

					// Set the Region to AS923
					Console.WriteLine("Set Region");
					serialPort.WriteLine("at+set_config=lora:region:AS923");
					response = serialPort.ReadLine();
					Debug.WriteLine($"RX :{response.Trim()} bytes:{response.Length}");

					// Set the JoinMode
					Console.WriteLine("Set Join mode");
					serialPort.WriteLine("at+set_config=lora:join_mode:0");
					response = serialPort.ReadLine();
					Debug.WriteLine($"RX :{response.Trim()} bytes:{response.Length}");

					// Set the appEUI
					Console.WriteLine("Set App Eui");
					serialPort.WriteLine($"at+set_config=lora:app_eui:{AppEui}");
					response = serialPort.ReadLine();
					Debug.WriteLine($"RX :{response.Trim()} bytes:{response.Length}");

					// Set the appKey
					Console.WriteLine("Set App Key");
					serialPort.WriteLine($"at+set_config=lora:app_key:{AppKey}");
					response = serialPort.ReadLine();
					Debug.WriteLine($"RX :{response.Trim()} bytes:{response.Length}");

					// Set the Confirm flag
					Console.WriteLine("Set Confirm off");
					serialPort.WriteLine("at+set_config=lora:confirm:0");
					response = serialPort.ReadLine();
					Debug.WriteLine($"RX :{response.Trim()} bytes:{response.Length}");

					// Join the network
					Console.WriteLine("Start Join");
					serialPort.WriteLine("at+join");
					Thread.Sleep(10000);
					response = serialPort.ReadLine();
					Debug.WriteLine($"RX :{response.Trim()} bytes:{response.Length}");

					while (true)
					{
						Console.WriteLine("Sending");
						serialPort.WriteLine($"at+send=lora:{MessagePort}:{Payload}");
						Thread.Sleep(1000);

						// The OK
						Console.WriteLine("Send result");
						response = serialPort.ReadLine();
						Debug.WriteLine($"RX :{response.Trim()} bytes:{response.Length}");

						// The Signal strength information etc.
						Console.WriteLine("Network confirmation");
						response = serialPort.ReadLine();
						Debug.WriteLine($"RX :{response.Trim()} bytes:{response.Length}");

						Thread.Sleep(20000);
					}
				}
			}
			catch (Exception ex)
			{
				Debug.WriteLine(ex.Message);
			}
		}
	}
}
The code is not suitable for production but it confirmed my software and hardware configuration worked.
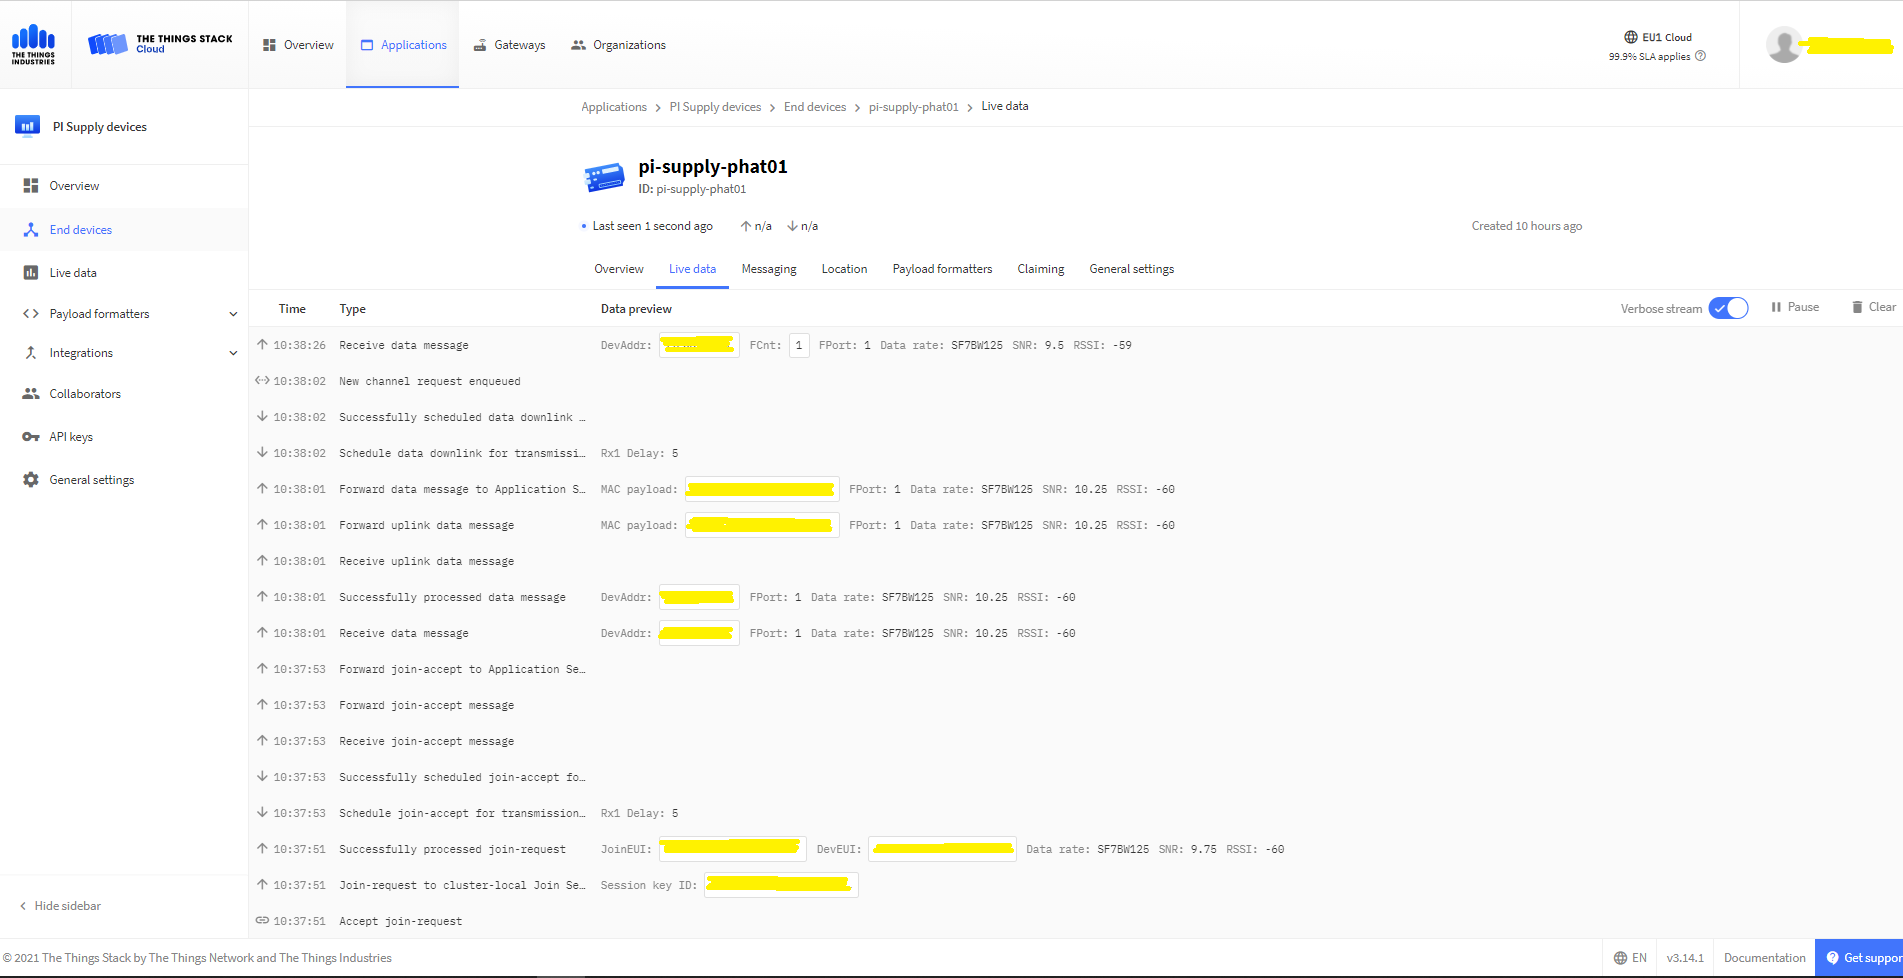
In the Visual Studio 2019 debug output I could see messages getting sent and then after a short delay they were visible in the TTN console.
The Things Industries Live Data Tab showing my device connecting and sending messages
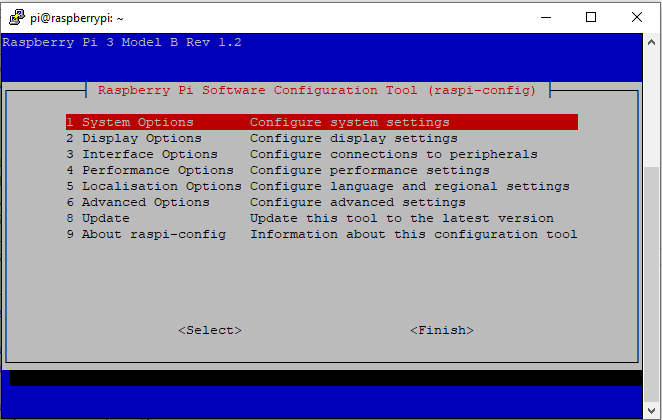
RaspberyPI OS Software Configuration tool mains screen
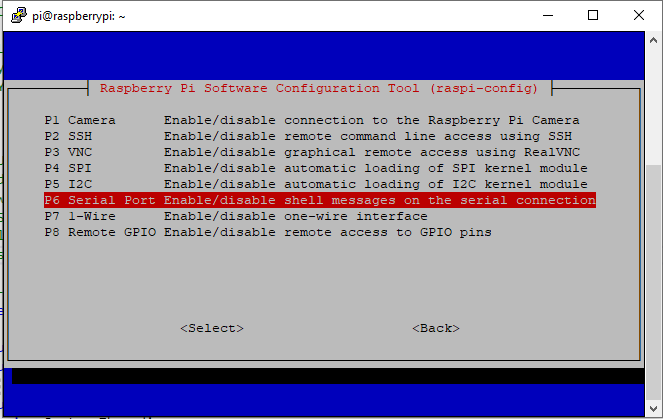
RaspberryPI OS IO Serial Port configuration
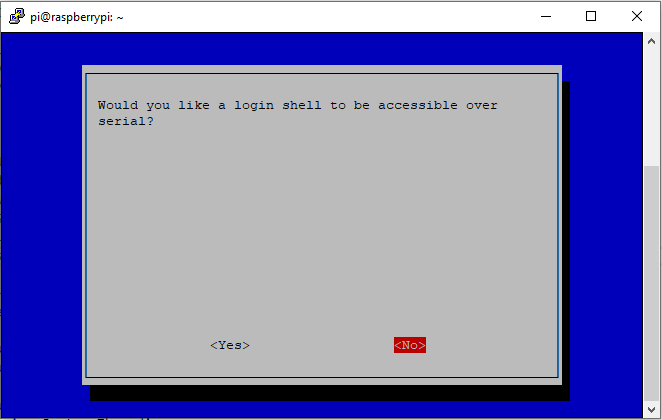
Raspberry PI OS disabling remote serial login shell
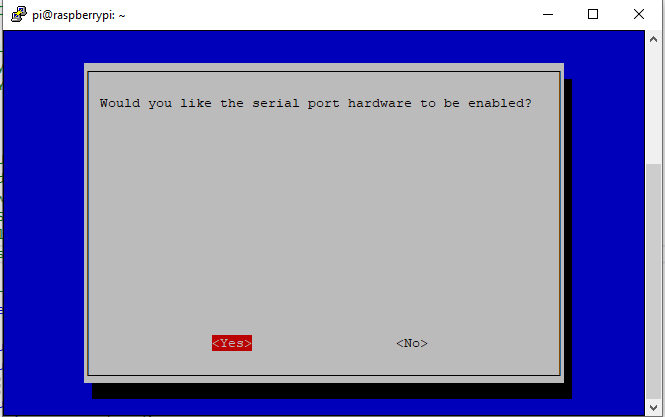
RaspberryPI OS enabling serial port access
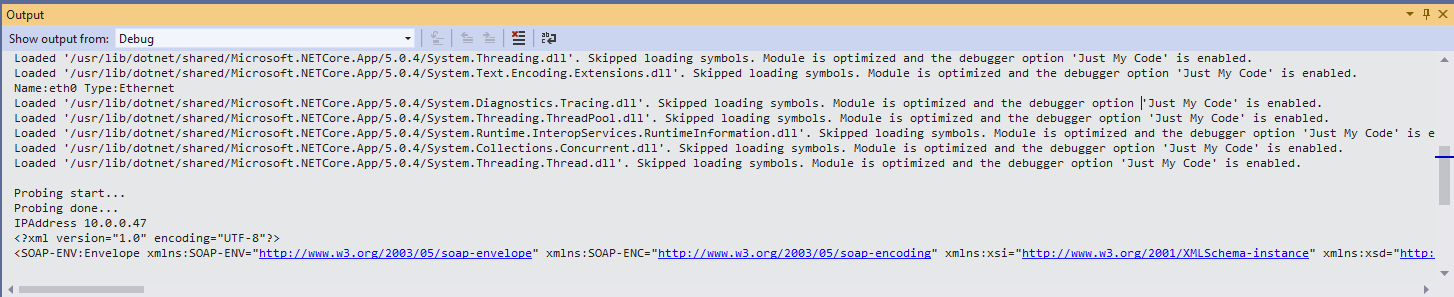
Once serial port access was enabled I could enumerate them with SerialPort.GetPortNames() which is in the System.IO.PortsNuGet package. The code has compile time options for synchronous and asynchronous operation.
//---------------------------------------------------------------------------------
// Copyright (c) September 2021, devMobile Software
//
// Licensed under the Apache License, Version 2.0 (the "License");
// you may not use this file except in compliance with the License.
// You may obtain a copy of the License at
//
//     http://www.apache.org/licenses/LICENSE-2.0
//
// Unless required by applicable law or agreed to in writing, software
// distributed under the License is distributed on an "AS IS" BASIS,
// WITHOUT WARRANTIES OR CONDITIONS OF ANY KIND, either express or implied.
// See the License for the specific language governing permissions and
// limitations under the License.
//
//---------------------------------------------------------------------------------
namespace devMobile.IoT.NetCore.Rak811.pHatSerial
{
	using System;
	using System.Diagnostics;

	using System.IO.Ports;
	using System.Threading;

	public class Program
	{
		private const string SerialPortId = "/dev/ttyS0";

		public static void Main()
		{
			SerialPort serialPort;

			Debug.WriteLine("devMobile.IoT.NetCore.Rak811.pHatSerial starting");

			Debug.WriteLine(String.Join(",", SerialPort.GetPortNames()));

			try
			{
				serialPort = new SerialPort(SerialPortId);

				// set parameters
#if DEFAULT_BAUDRATE
				serialDevice.BaudRate = 115200;
#else
            serialPort.BaudRate = 9600;
#endif
				serialPort.Parity = Parity.None;
				serialPort.DataBits = 8;
				serialPort.StopBits = StopBits.One;
				serialPort.Handshake = Handshake.None;

				serialPort.ReadTimeout = 1000;

				serialPort.NewLine = "\r\n";

				serialPort.Open();

#if DEFAULT_BAUDRATE
				Debug.WriteLine("RAK811 baud rate set to 9600");
				serialDevice.Write("at+set_config=device:uart:1:9600");
#endif

#if SERIAL_ASYNC_READ
				serialPort.DataReceived += SerialDevice_DataReceived;
#endif

				while (true)
				{
					serialPort.WriteLine("at+version");

#if SERIAL_SYNC_READ
					string response = serialPort.ReadLine();

					Debug.WriteLine($"RX:{response.Trim()} bytes:{response.Length}");
#endif

					Thread.Sleep(20000);
				}
			}
			catch (Exception ex)
			{
				Debug.WriteLine(ex.Message);
			}
		}

#if SERIAL_ASYNC_READ
		private static void SerialDevice_DataReceived(object sender, SerialDataReceivedEventArgs e)
		{
			SerialPort serialPort = (SerialPort)sender;

			switch (e.EventType)
			{
				case SerialData.Chars:
					string response = serialPort.ReadExisting();

					Debug.WriteLine($"RX:{response.Trim()} bytes:{response.Length}");
					break;

				case SerialData.Eof:
					Debug.WriteLine("RX :EoF");
					break;
				default:
					Debug.Assert(false, $"e.EventType {e.EventType} unknown");
					break;
			}
		}
#endif
	}
}
The first step was to change the RAK811 serial port speed from 115200 to 9600 baud.
Changing RAK811 serial port from 115200 to 9600 baud
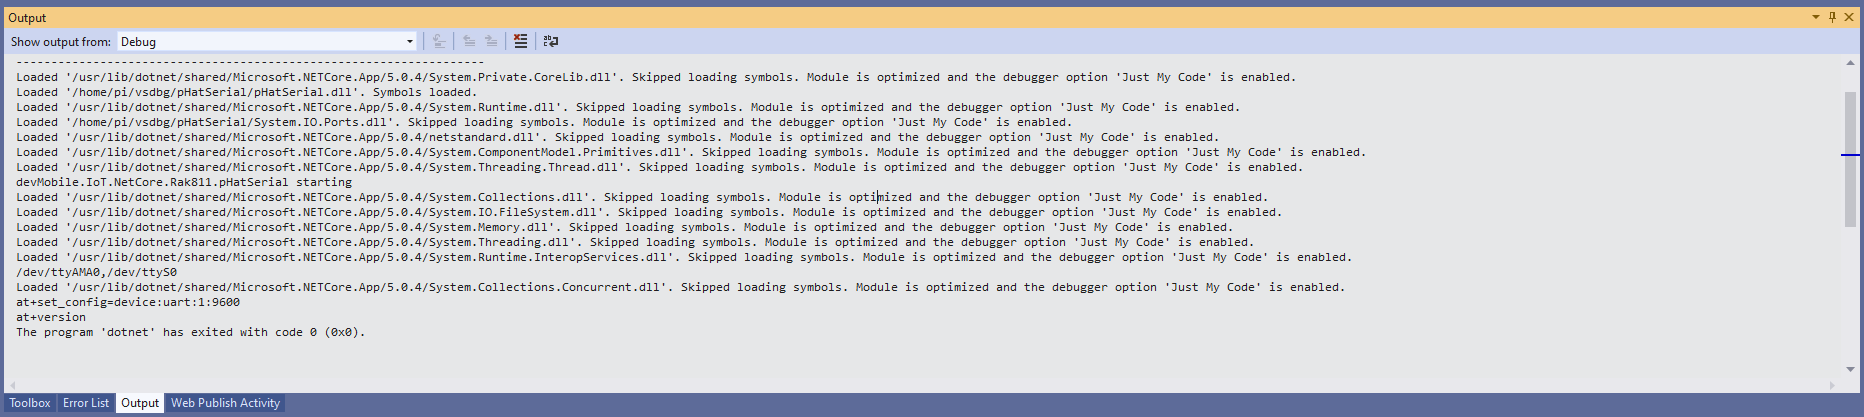
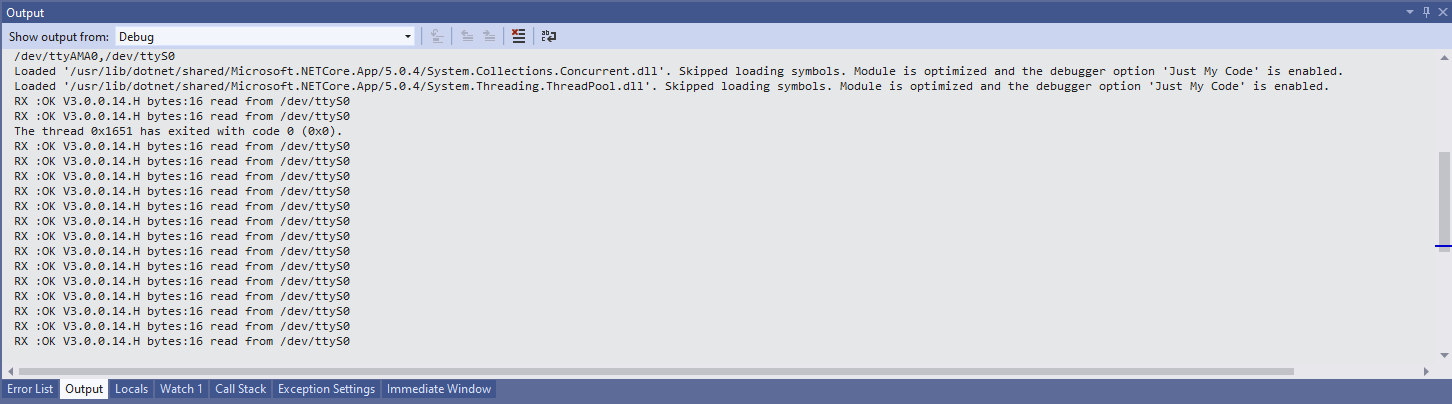
Then I requested the RAK811 version information with the at+version command.
Synchronously reading characters from the RAK811 partial response
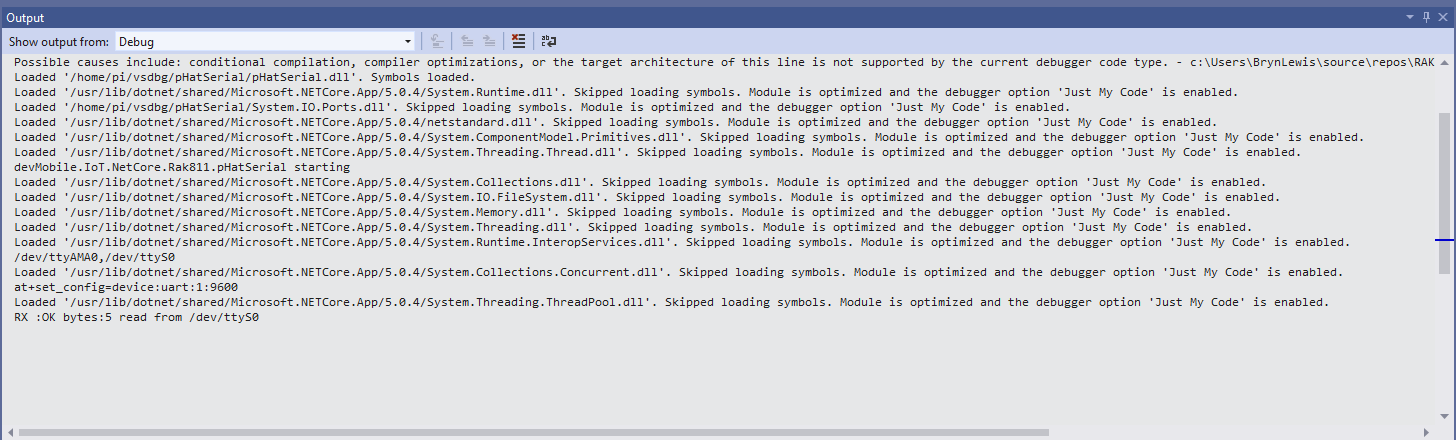
I had to add a short delay between sending the command and reading the response.
Synchronously reading characters from the RAK811 complete command responses
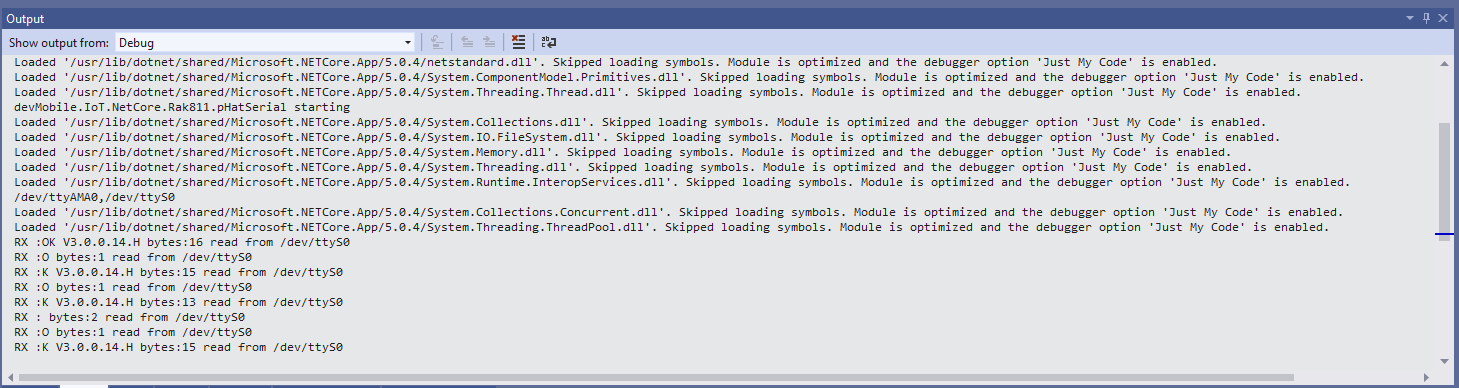
The asynchronous version of the application displays character(s) as they arrive so a response could be split across multiple SerialDataReceived events
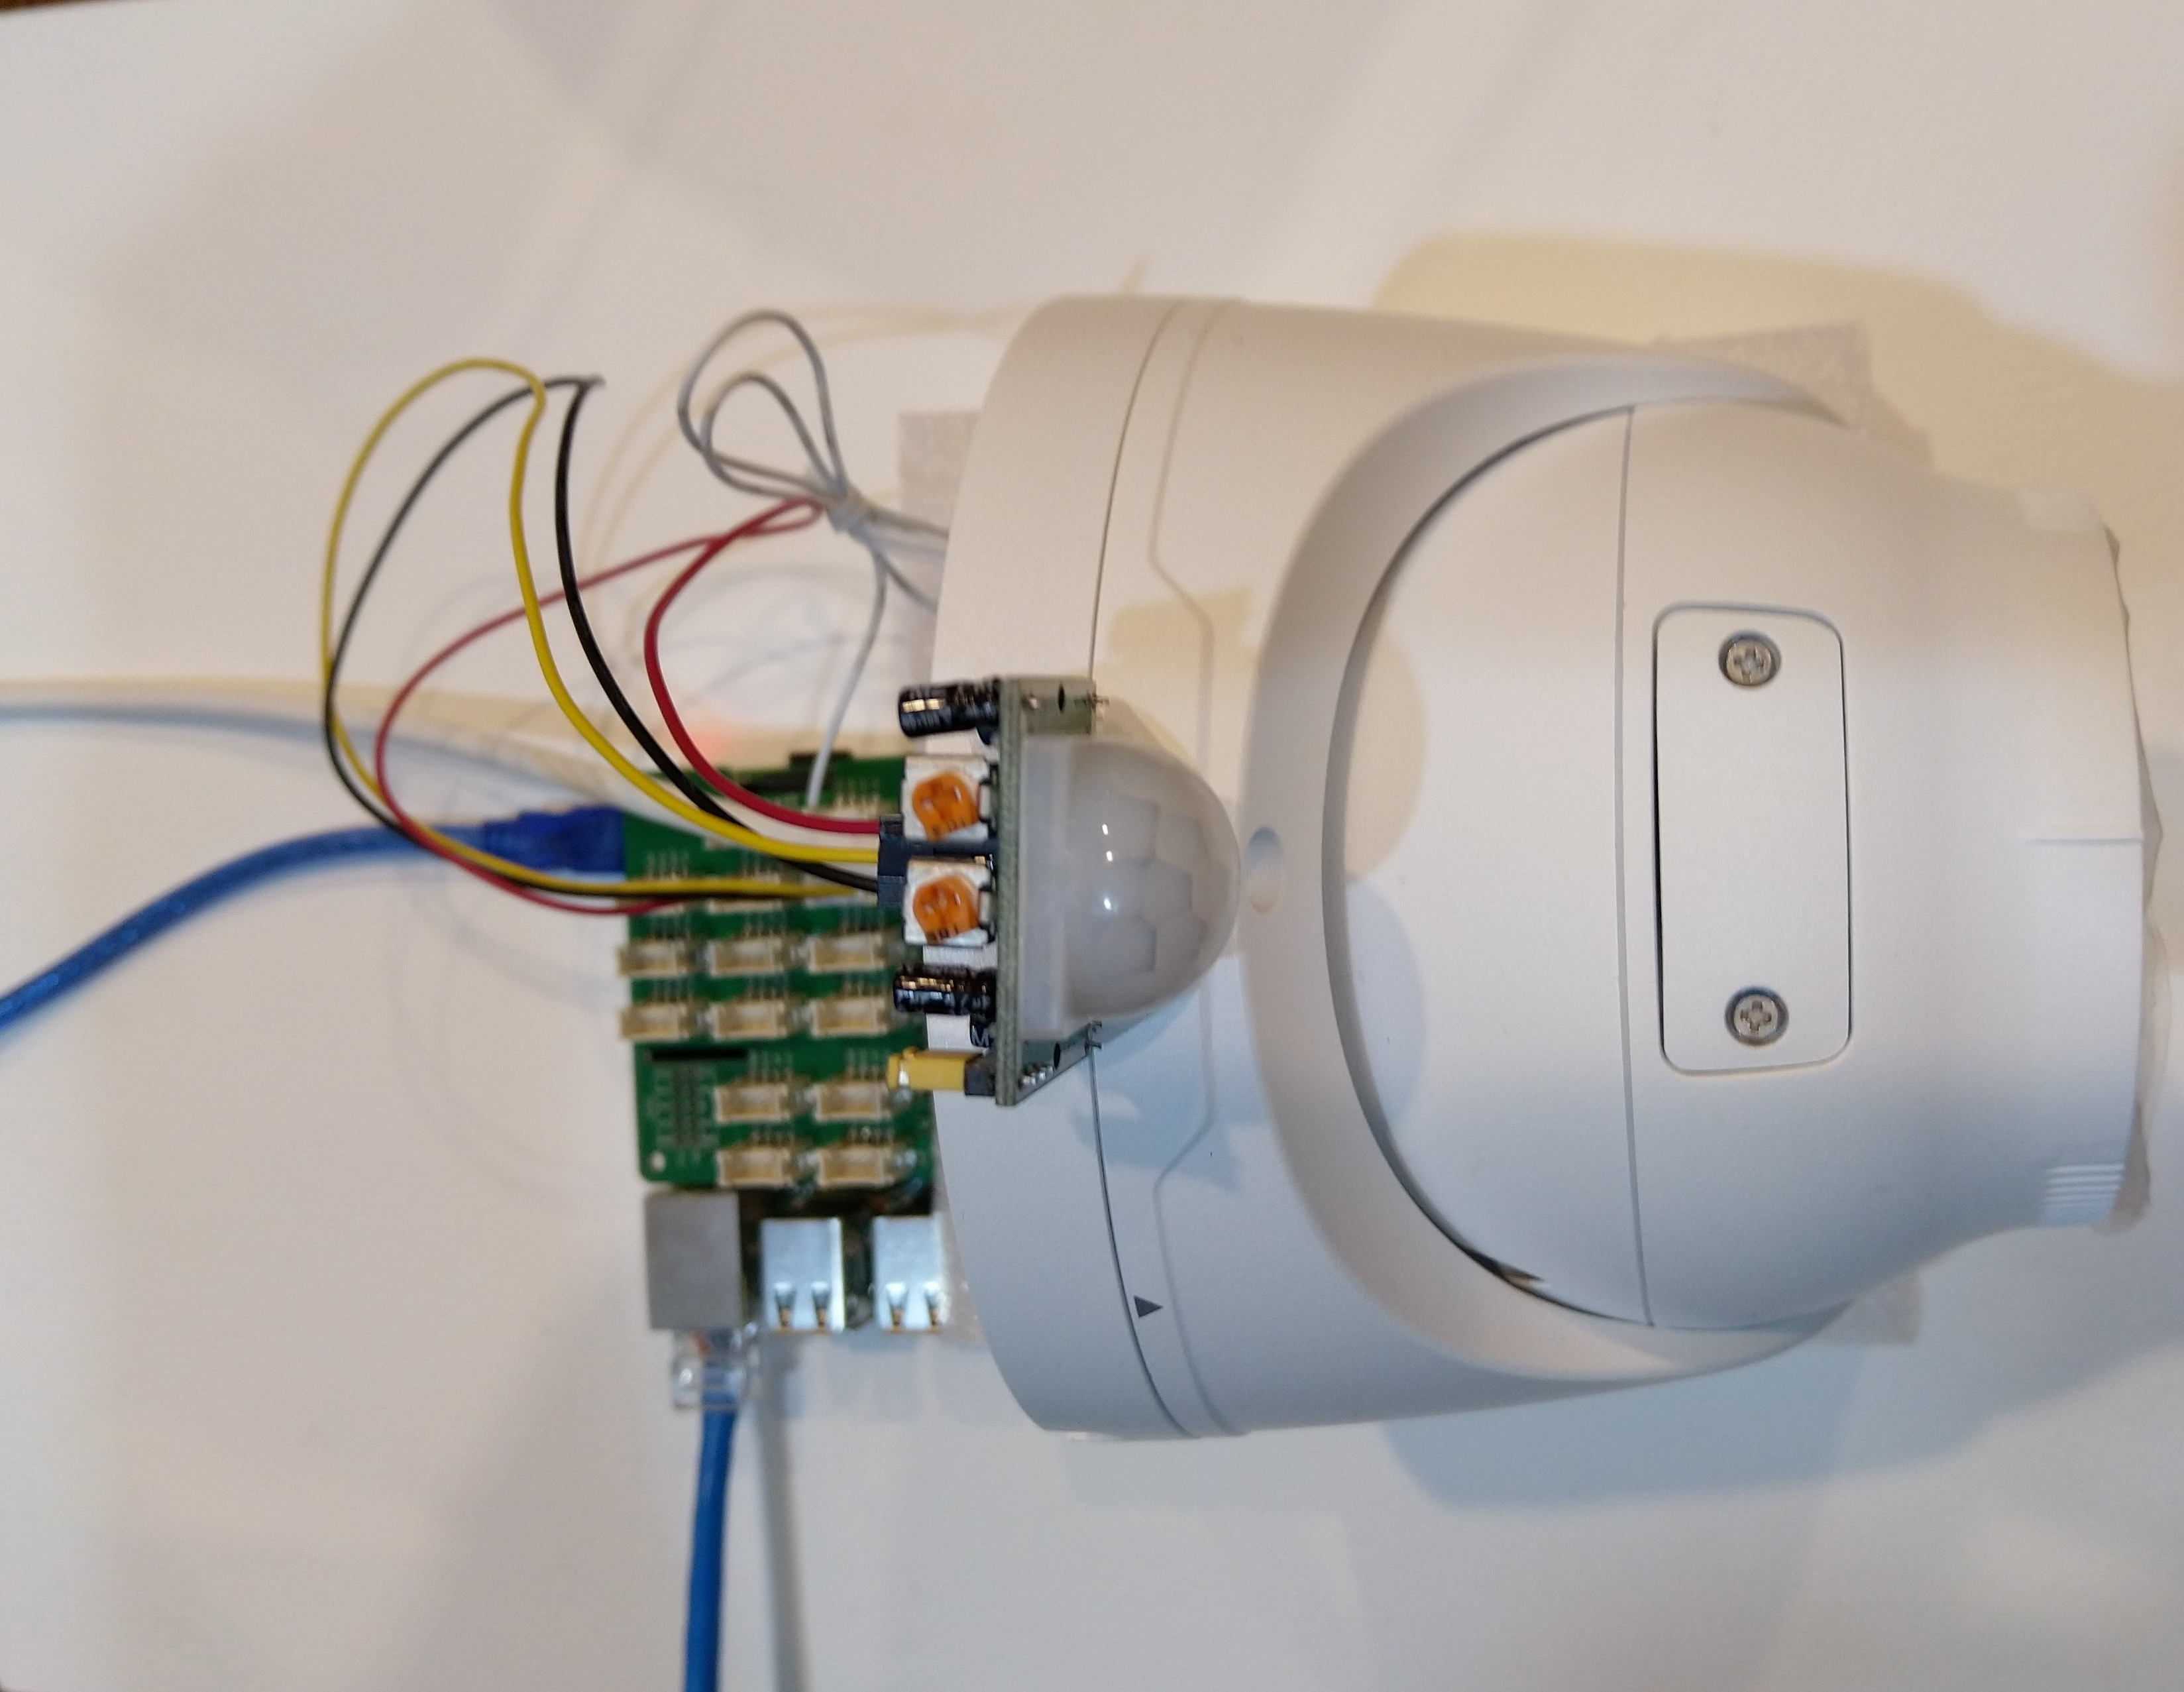
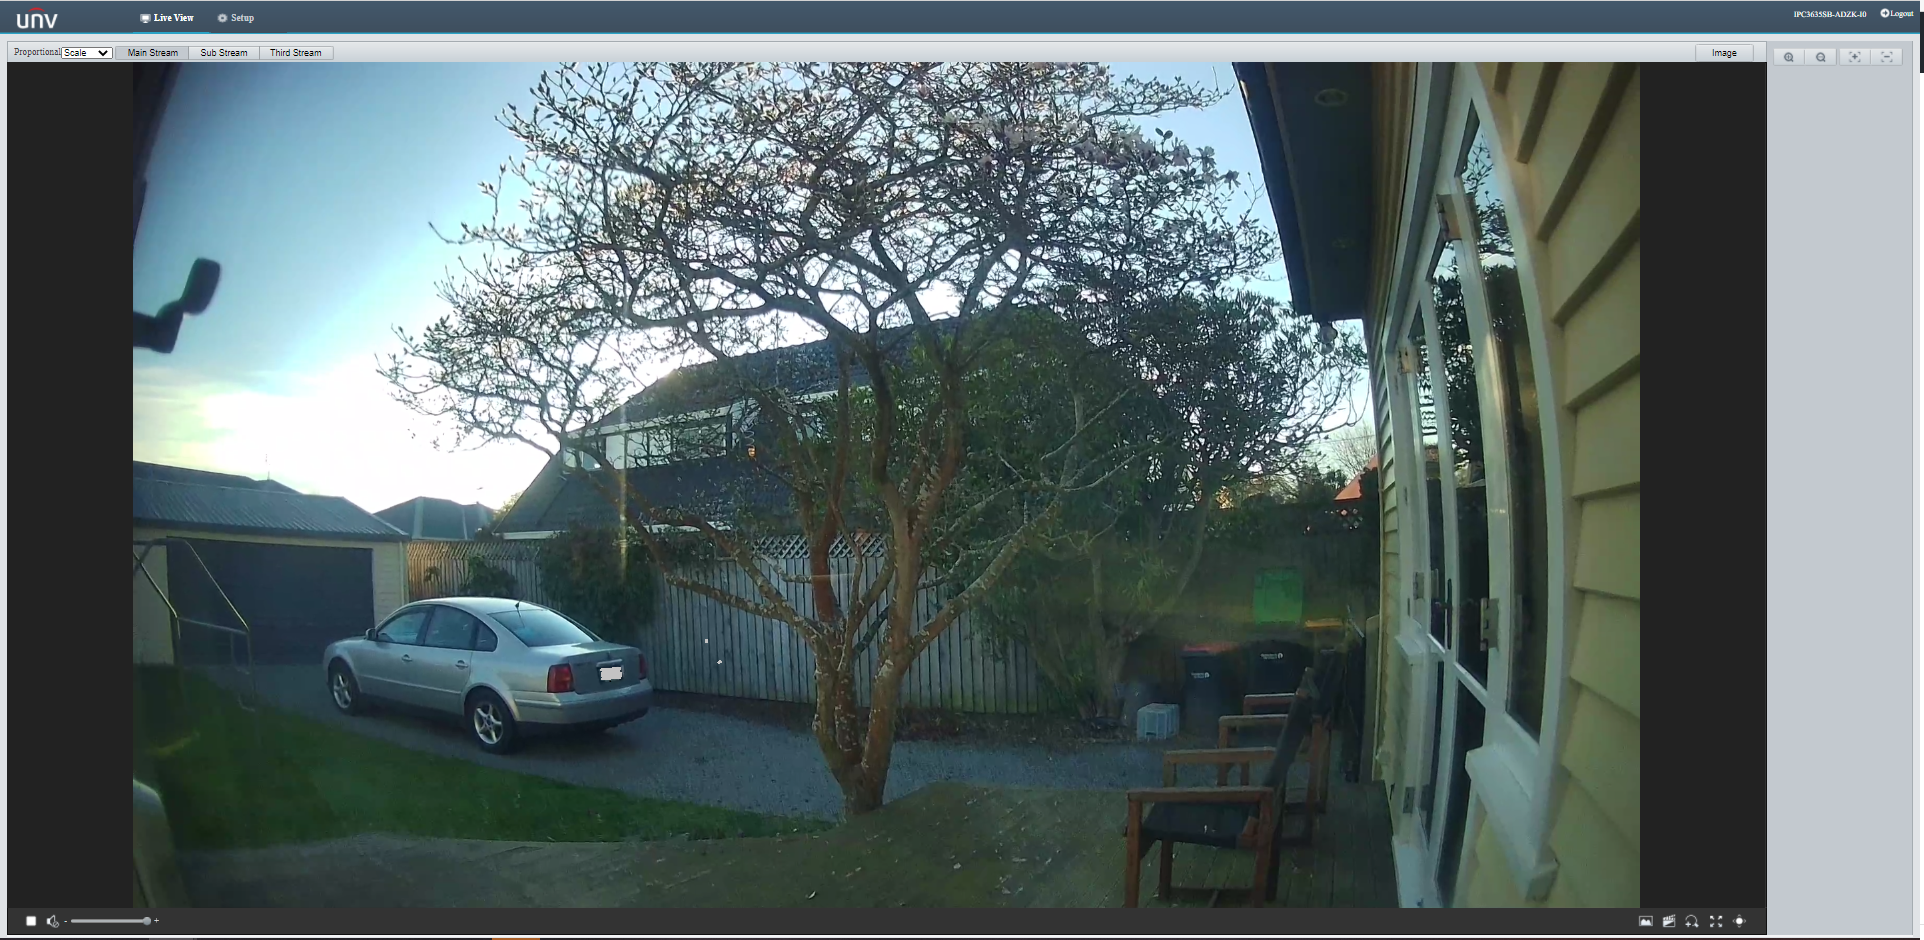
Uniview IPC3635SB-ADZK-I0 Security camera test rig with Raspberry PI and PIR motion detector
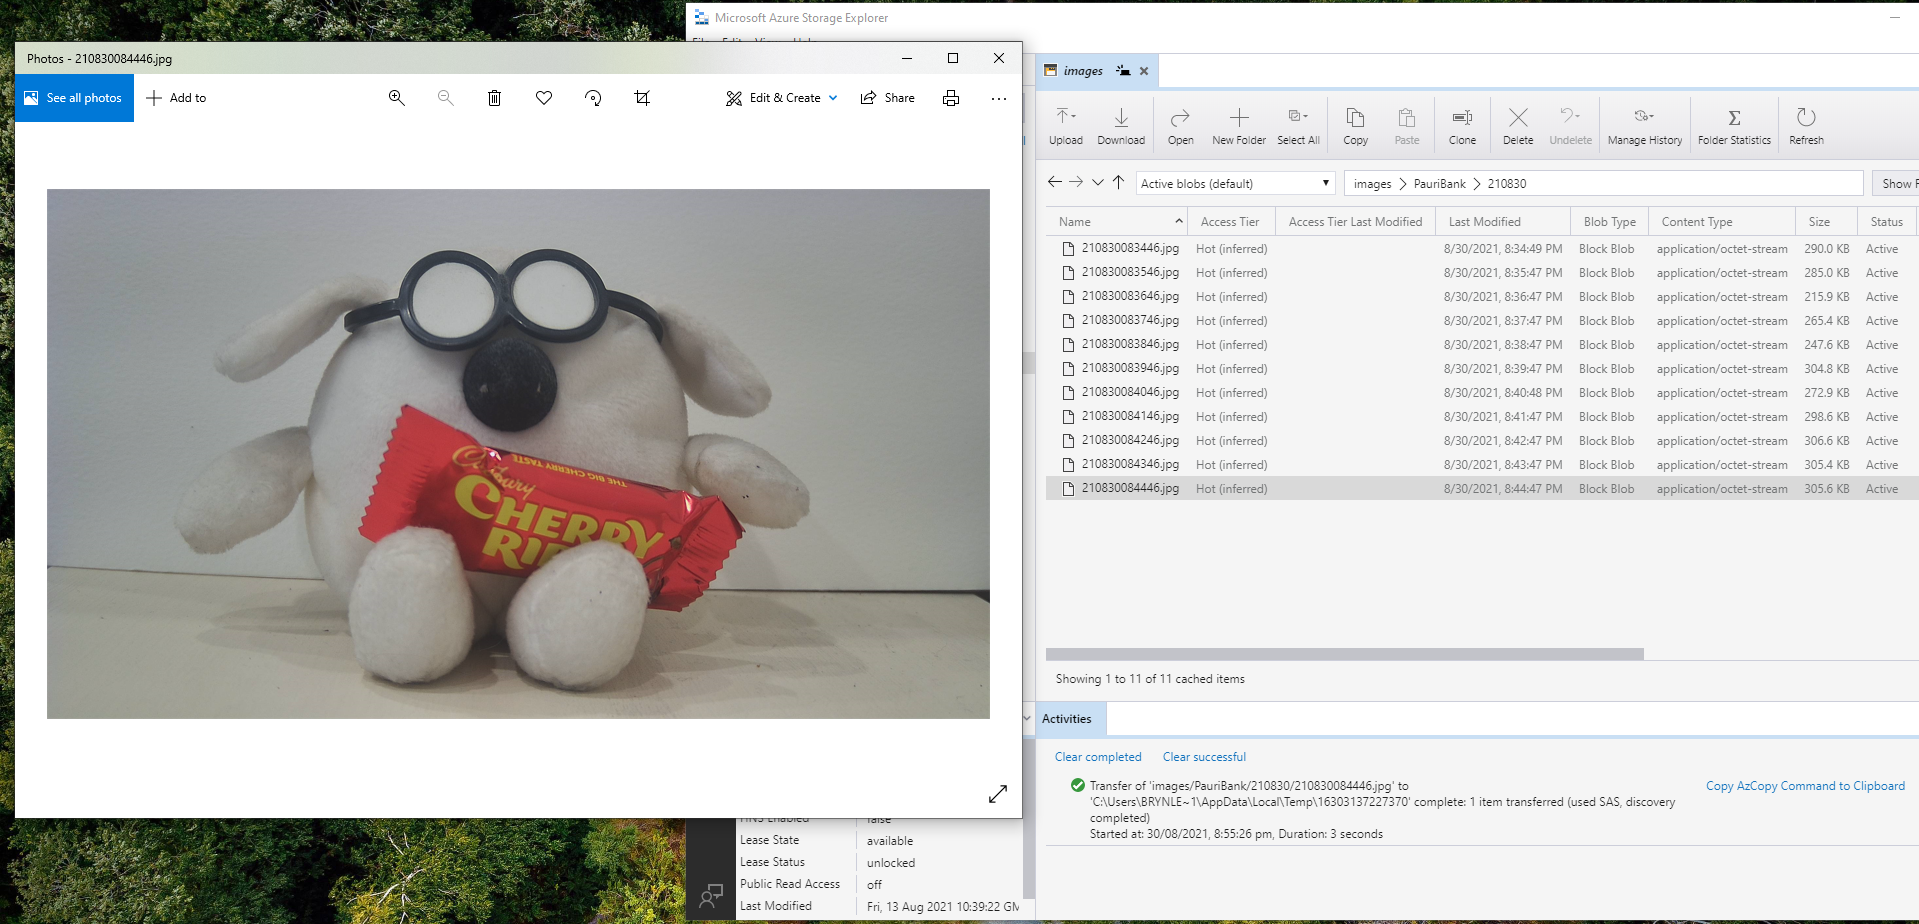
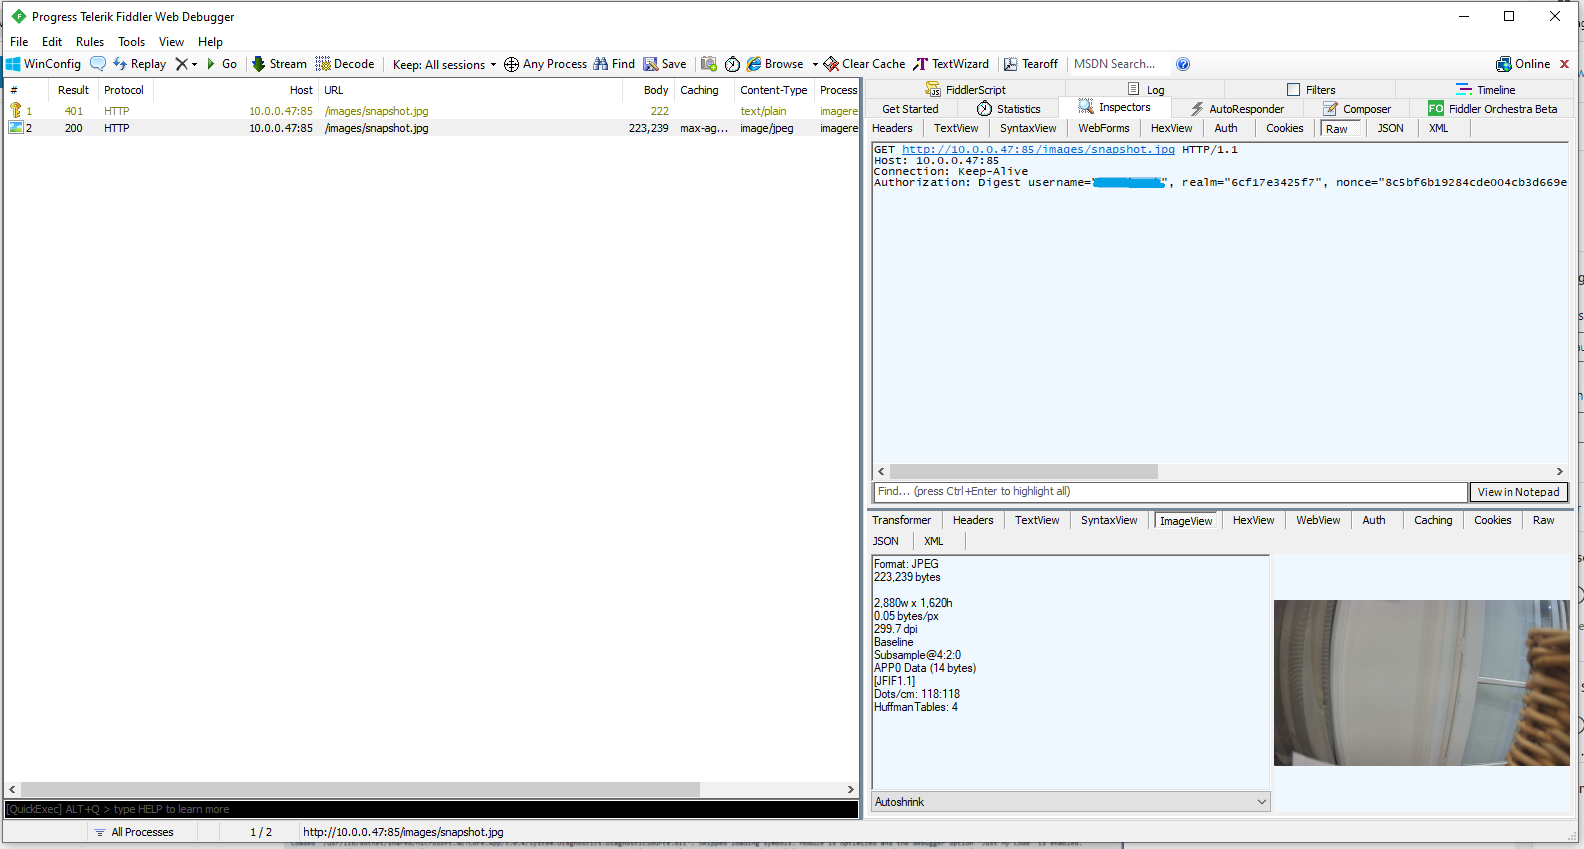
I tried to keep the .Net Core 5 console applications as simple as possible, they download an image from the camera “snapshot” endpoint (In this case http://10.0.0.47:85/images/snapshot.jpg), save it to the local filesystem and then upload it.
The core of the two applications is the “upload” image method, which is called by a timer or GPIO pin EventHandler
private static async void ImageUpdateTimerCallback(object state)
{
CommandLineOptions options = (CommandLineOptions)state;
DateTime requestAtUtc = DateTime.UtcNow;
// Just incase - stop code being called while retrival of the photo already in progress
if (cameraBusy)
{
return;
}
cameraBusy = true;
Console.WriteLine($"{requestAtUtc:yy-MM-dd HH:mm:ss} Image up load start");
try
{
// First go and get the image file from the camera onto local file system
using (var client = new WebClient())
{
NetworkCredential networkCredential = new NetworkCredential()
{
UserName = options.UserName,
Password = options.Password
};
client.Credentials = networkCredential;
await client.DownloadFileTaskAsync(new Uri(options.CameraUrl), options.LocalFilename);
}
// Then open the file ready to stream ito upto storage account associated with Azuure IoT Hub
using (FileStream fileStreamSource = new FileStream(options.LocalFilename, FileMode.Open))
{
var fileUploadSasUriRequest = new FileUploadSasUriRequest
{
BlobName = string.Format("{0:yyMMdd}/{0:yyMMddHHmmss}.jpg", requestAtUtc)
};
// Get the plumbing sorted for where the file is going in Azure Storage
FileUploadSasUriResponse sasUri = await azureIoTCentralClient.GetFileUploadSasUriAsync(fileUploadSasUriRequest);
Uri uploadUri = sasUri.GetBlobUri();
try
{
var blockBlobClient = new BlockBlobClient(uploadUri);
var response = await blockBlobClient.UploadAsync(fileStreamSource, new BlobUploadOptions());
var successfulFileUploadCompletionNotification = new FileUploadCompletionNotification()
{
// Mandatory. Must be the same value as the correlation id returned in the sas uri response
CorrelationId = sasUri.CorrelationId,
// Mandatory. Will be present when service client receives this file upload notification
IsSuccess = true,
// Optional, user defined status code. Will be present when service client receives this file upload notification
StatusCode = 200,
// Optional, user-defined status description. Will be present when service client receives this file upload notification
StatusDescription = "Success"
};
await azureIoTCentralClient.CompleteFileUploadAsync(successfulFileUploadCompletionNotification);
}
catch (Exception ex)
{
Console.WriteLine($"Failed to upload file to Azure Storage using the Azure Storage SDK due to {ex}");
var failedFileUploadCompletionNotification = new FileUploadCompletionNotification
{
// Mandatory. Must be the same value as the correlation id returned in the sas uri response
CorrelationId = sasUri.CorrelationId,
// Mandatory. Will be present when service client receives this file upload notification
IsSuccess = false,
// Optional, user-defined status code. Will be present when service client receives this file upload notification
StatusCode = 500,
// Optional, user defined status description. Will be present when service client receives this file upload notification
StatusDescription = ex.Message
};
await azureIoTCentralClient.CompleteFileUploadAsync(failedFileUploadCompletionNotification);
}
}
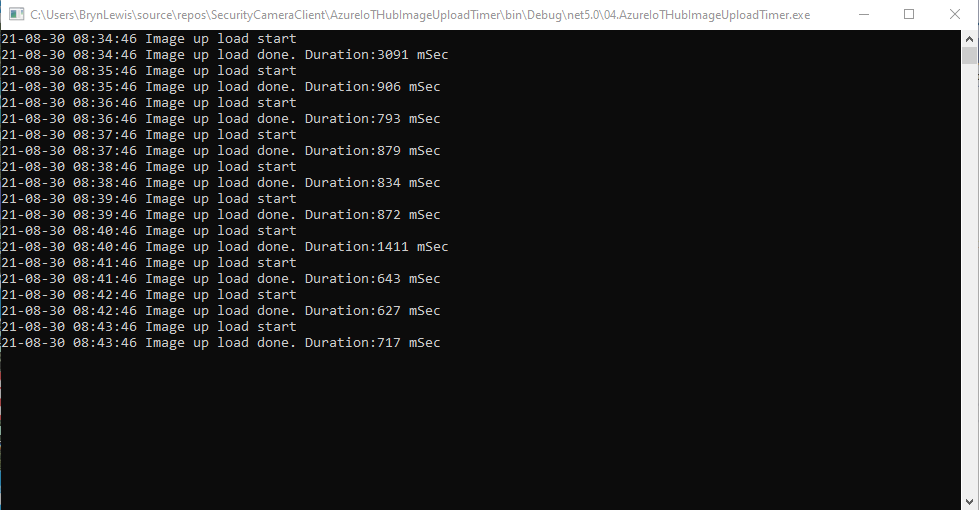
TimeSpan uploadDuration = DateTime.UtcNow - requestAtUtc;
Console.WriteLine($"{requestAtUtc:yy-MM-dd HH:mm:ss} Image up load done. Duration:{uploadDuration.TotalMilliseconds:0.} mSec");
}
catch (Exception ex)
{
Console.WriteLine($"Camera image upload process failed {ex.Message}");
}
finally
{
cameraBusy = false;
}
}
The ONVIFspecification standardises the network interface (the network layer) of network video products. It defines a communication framework based on relevant IETF and Web Services standards including security and IP configuration requirements.
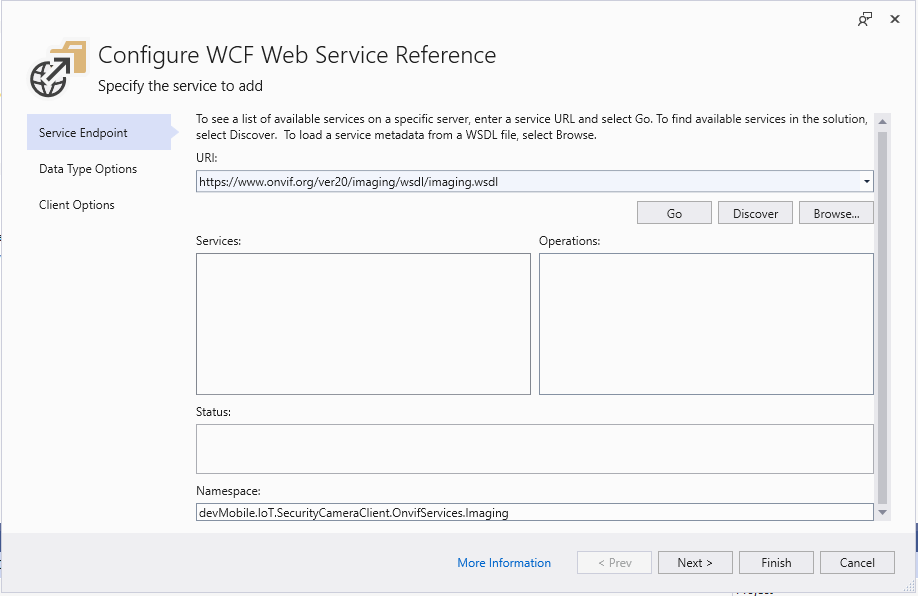
After discovering a device the next step was to query it to determine its capabilities. I had some issues with .Net Core 5 application configuring the Windows Communication Foundation(WCF) to use Digest authentication (RFC2617) credentials on all bar the device management service client.
This .Net Core 5 console application queries the device management service (ONVID application programmers guide) to get the capabilities of the device then calls the media, imaging and pan tilt zoom services and displays the results.
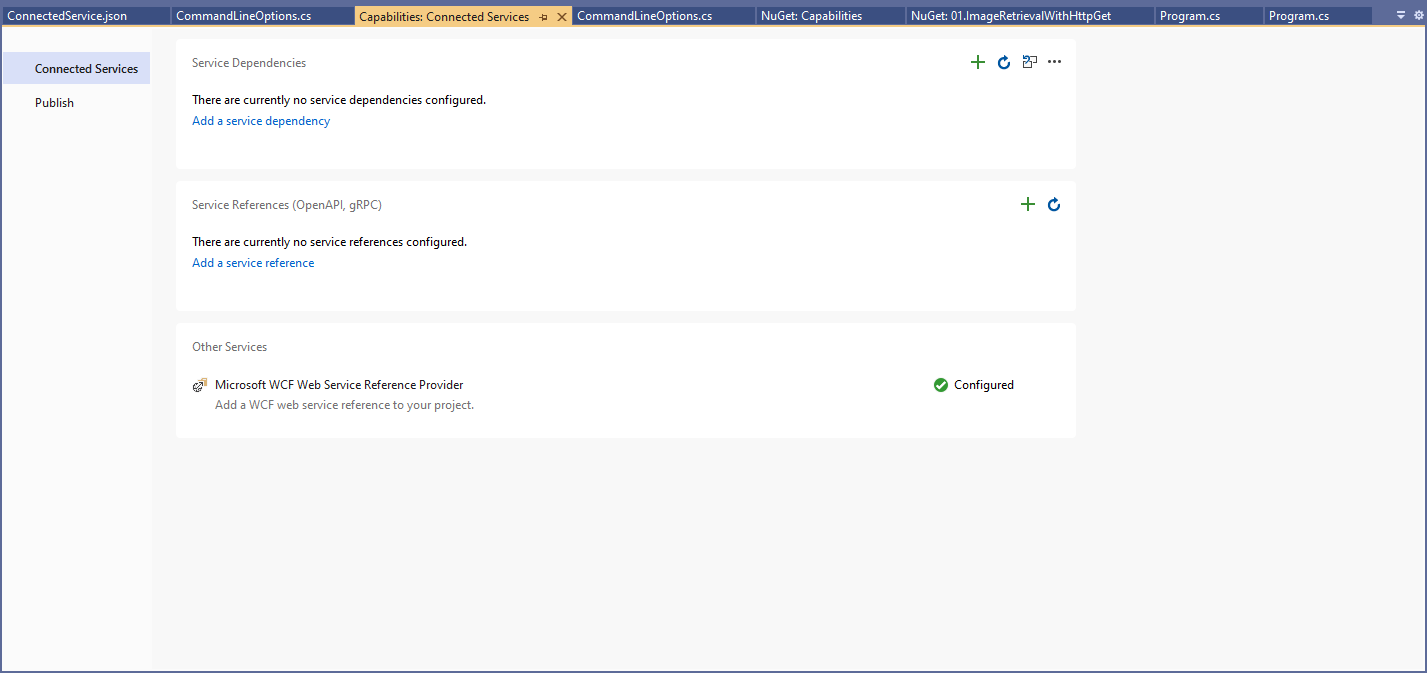
The Uniform Resource Locators(URL) and namespace prefixes for each generated service are configured in the ConnectedService.json file.
First step configuring a WCF Service
Initially I used a devMobile.IoT.SecurityCameraClient prefix but after some experimentation changed to OnvifServices.
Second step configuring a WCF Service
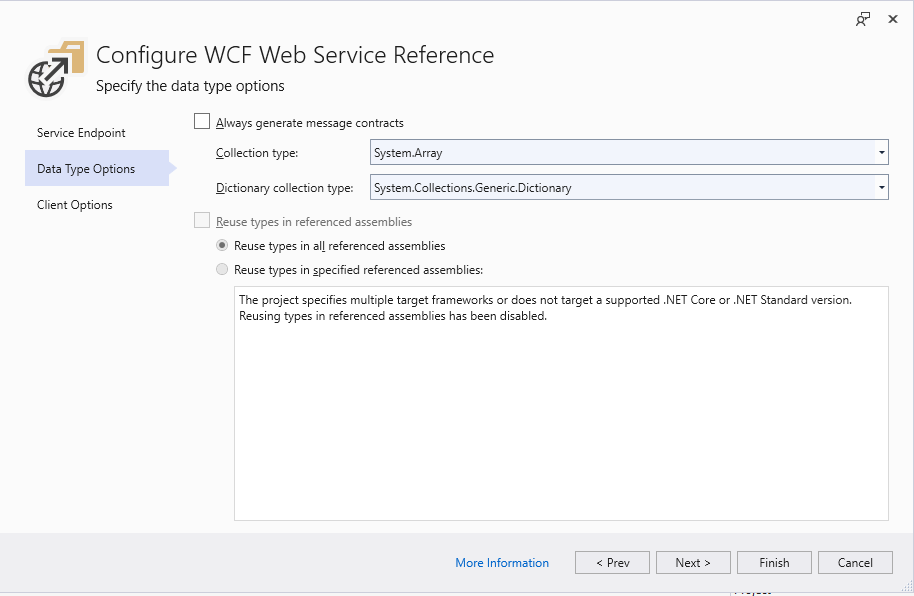
For testing I selected “Generated Synchronous Operations” as they are easier to use in a console application while exploring the available functionality.
Third step configuring a WCF Service
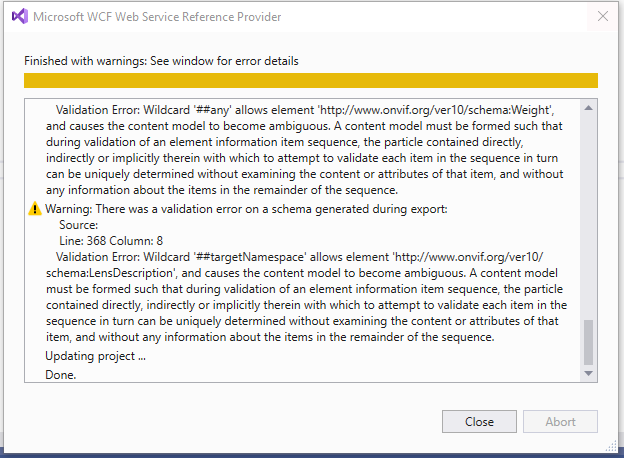
The WSDL generated a number of warnings so I inspected the WSDL to see if the were easy to fix. I did consider copying the WSDL to my development box but it didn’t appear to be worth the effort.
SVCUtil warning messages about invalid Onvif WSDL
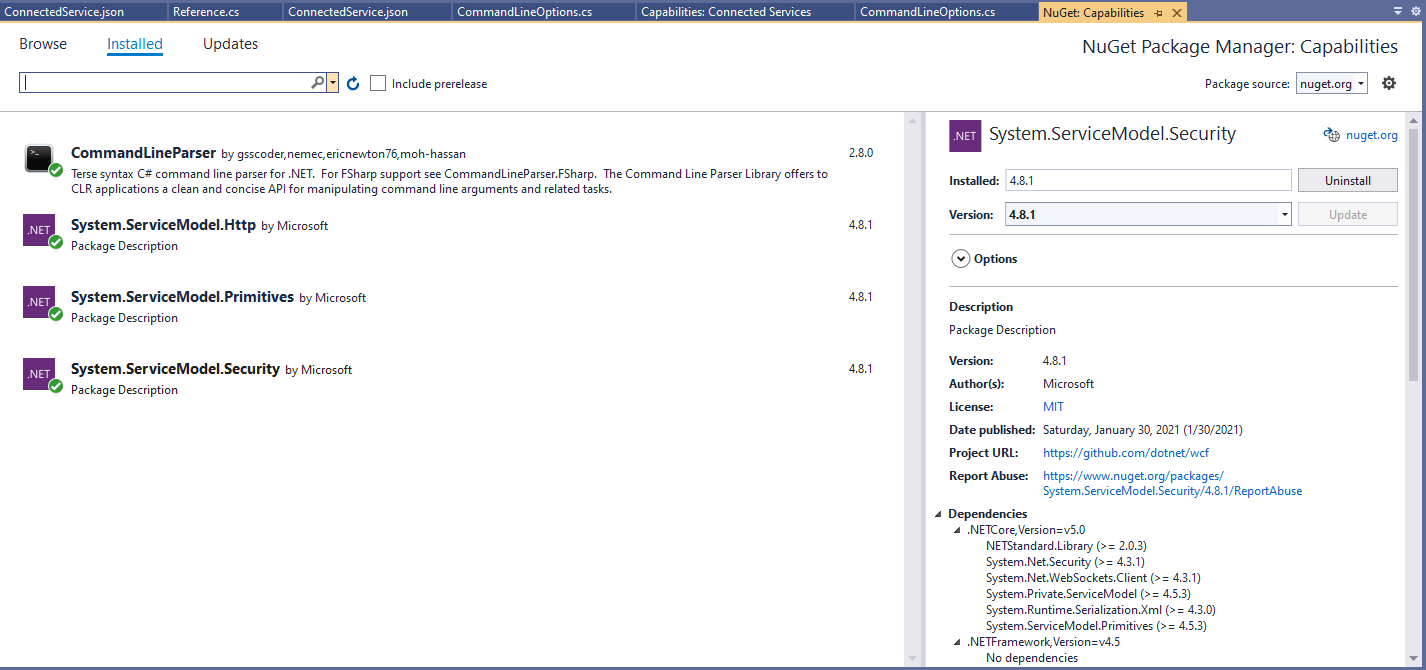
For this application I’m using the CommandLineParser NuGet package to parse and validate the client, username and password configured in the debugger tab.
Required Nuget packages
private static async Task ApplicationCore(CommandLineOptions options)
{
   Device deviceClient;
   ImagingPortClient imagingPortClient;
   MediaClient mediaClient;
   PTZClient panTiltZoomClient;

   var messageElement = new TextMessageEncodingBindingElement()
   {
      MessageVersion = MessageVersion.CreateVersion(EnvelopeVersion.Soap12, AddressingVersion.None),
      WriteEncoding = Encoding.UTF8
    };

    HttpTransportBindingElement httpTransportNoPassword = new HttpTransportBindingElement();
    CustomBinding bindingHttpNoPassword = new CustomBinding(messageElement, httpTransportNoPassword);

    HttpTransportBindingElement httpTransport = new HttpTransportBindingElement()
    {
       AuthenticationScheme = AuthenticationSchemes.Digest
    };
    CustomBinding bindingHttpPassword = new CustomBinding(messageElement, httpTransport);

    try
    {
       // Setup the imaging porting binding, use TLS, and ignore certificate errors
       deviceClient = new DeviceClient(bindingHttpNoPassword, new EndpointAddress($"http://{options.CameraUrl}/onvif/devicemgmt"));

       GetCapabilitiesResponse capabilitiesResponse = await deviceClient.GetCapabilitiesAsync(new GetCapabilitiesRequest(new CapabilityCategory[] { CapabilityCategory.All }));

       Console.WriteLine("Device capabilities");
       Console.WriteLine($"  Device: {capabilitiesResponse.Capabilities.Device.XAddr}");
       Console.WriteLine($"  Events: {capabilitiesResponse.Capabilities.Events.XAddr}"); // Not interested in events for V1
       Console.WriteLine($"  Imaging: {capabilitiesResponse.Capabilities.Imaging.XAddr}");
       Console.WriteLine($"  Media: {capabilitiesResponse.Capabilities.Media.XAddr}");
       Console.WriteLine($"  Pan Tilt Zoom: {capabilitiesResponse.Capabilities.PTZ.XAddr}");
       Console.WriteLine();
       ...
       Console.WriteLine($"Video Source Configuration");
       foreach (OnvifServices.Media.VideoSourceConfiguration videoSourceConfiguration in videoSourceConfigurations.Configurations)
      {
         Console.WriteLine($" Name: {videoSourceConfiguration.Name}");
         Console.WriteLine($" Token: {videoSourceConfiguration.token}");
         Console.WriteLine($" UseCount: {videoSourceConfiguration.UseCount}");
         Console.WriteLine($" Bounds: {videoSourceConfiguration.Bounds.x}:{videoSourceConfiguration.Bounds.y} {videoSourceConfiguration.Bounds.width}:{videoSourceConfiguration.Bounds.height}");
         Console.WriteLine($" View mode: {videoSourceConfiguration.ViewMode}");
      }
   }
   catch (Exception ex)
   {
      Console.WriteLine(ex.Message);
   }

   Console.WriteLine();
   Console.WriteLine("Press <enter> to exit");
   Console.ReadLine();
}
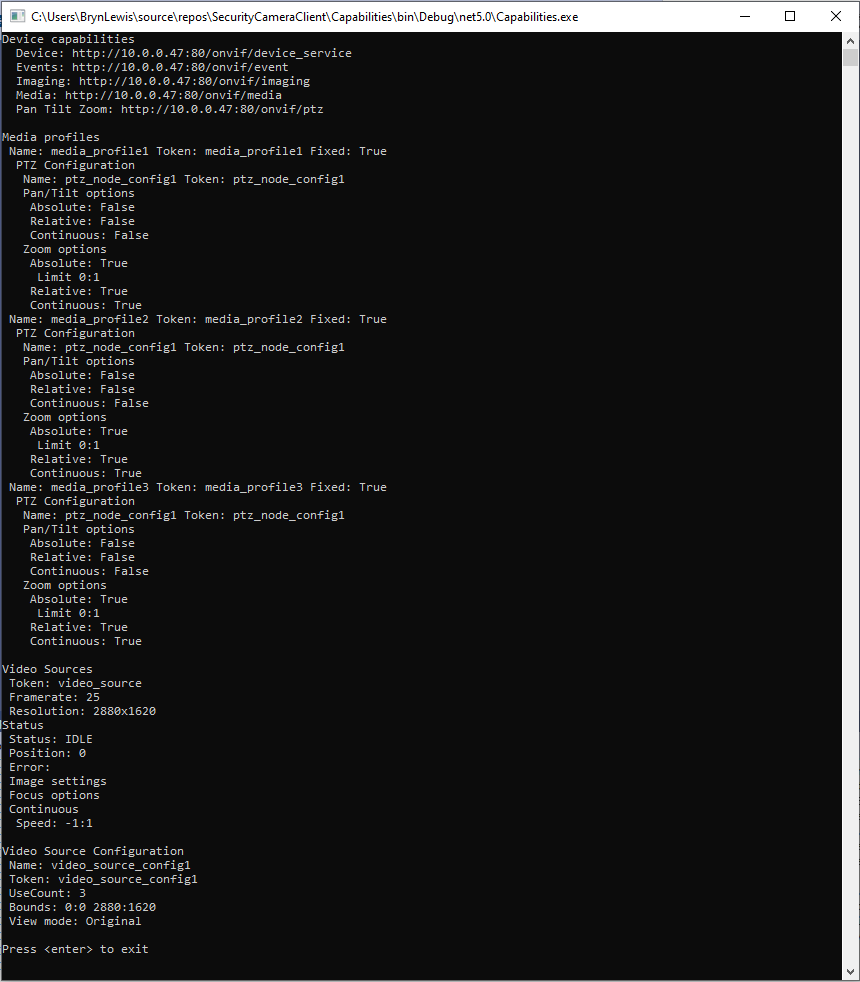
I had to do a bit of “null checking” as often if a feature wasn’t supported the root node was null. I need to get a selection of cameras (especially one with pan/tilt/zoom) to check that I’m processing the responses from the device correctly.
Console application output showing capabilities of Uniview device
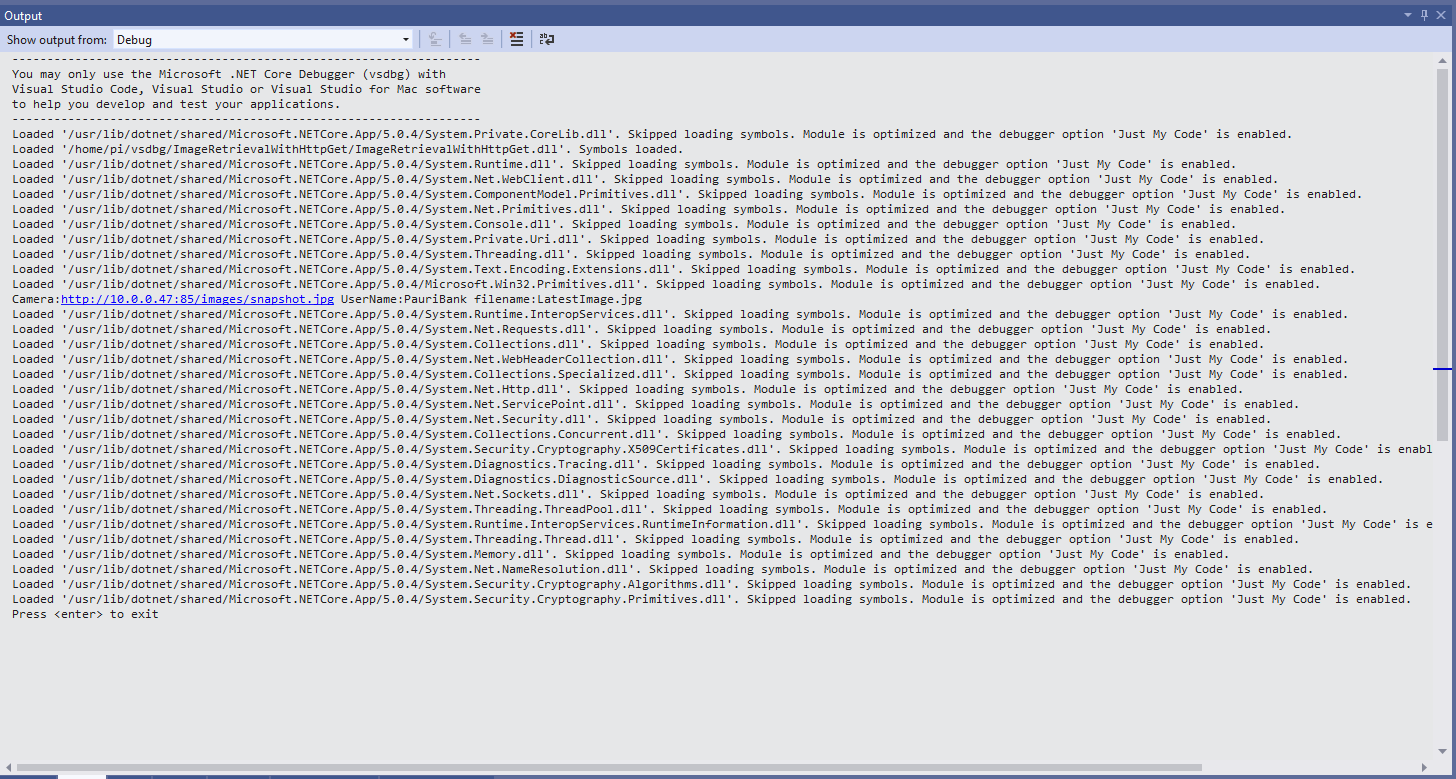
After confirming the program was working on my development box I used the excellent RaspberryDebugger to download the application and run it on a Raspberry PI 3 running the Raspberry PI OS.
The ONVIFspecification standardises the network interface (the network layer) of network video products. It defines a communication framework based on relevant IETF and Web Services standards including security and IP configuration requirements. ONVIF uses Web Services Dynamic Discovery (WS-Discovery) to locate devices on the local network which operates over UDP port 3702 and uses IP multicast address 239.255.255.250.
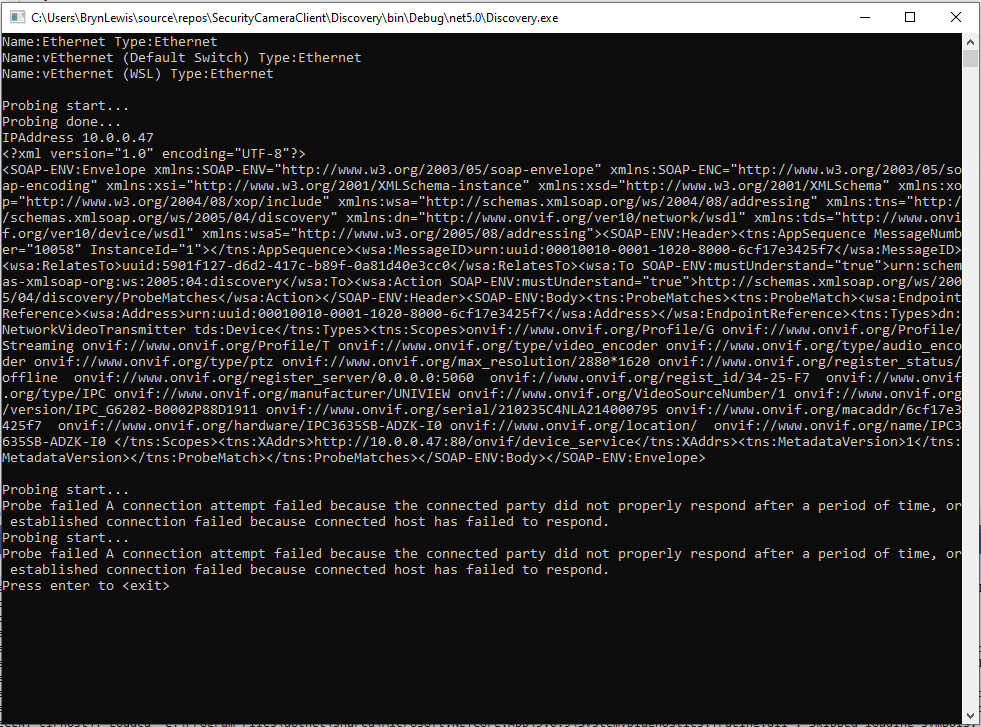
My .Net Core 5 console application enumerates the host device’s network interfaces, then sends a “probe” message and waits for responses. The ONVID application programmers guide specifies the format of the “probe” request and response messages (One of the namespace prefixes in the sample is wrong). The client device can return its name and details of it’s capabilities in the response. Currently I only need the IP addresses of the cameras but if more information was required I would use the XML Serialisation functionality of .Net Core to generate the requests and unpack the responses.
As part of a contract a customer sent me a UniviewIPC3635SB-ADZK-I0 Security camera for a proof of concept(PoC) project. Before the PoC I wanted to explore the camera functionality in more depth, especially how to retrieve individual images from the camera, remotely control it’s zoom, focus, pan, tilt etc.. I’m trying to source a couple of other vendors’ security cameras with remotely controllable pan and tilt for testing.
Uniview IPC3635SB-ADZK-I0 Security camera
It appears that many cameras support retrieving the latest image with an HyperText Transfer Protocol (HTTP) GET so that looked like a good place to start. For the next couple of posts the camera will be sitting on the bookcase in my office looking through the window at the backyard.
My .Net Core 5 console application is as simple possible, it just downloads an image from the camera “snapshot” endpoint (In this case http://10.0.0.47:85/images/snapshot.jpg) and saves it to the local filesystem.
Visual Studio 2019 Debug Output showing application download process
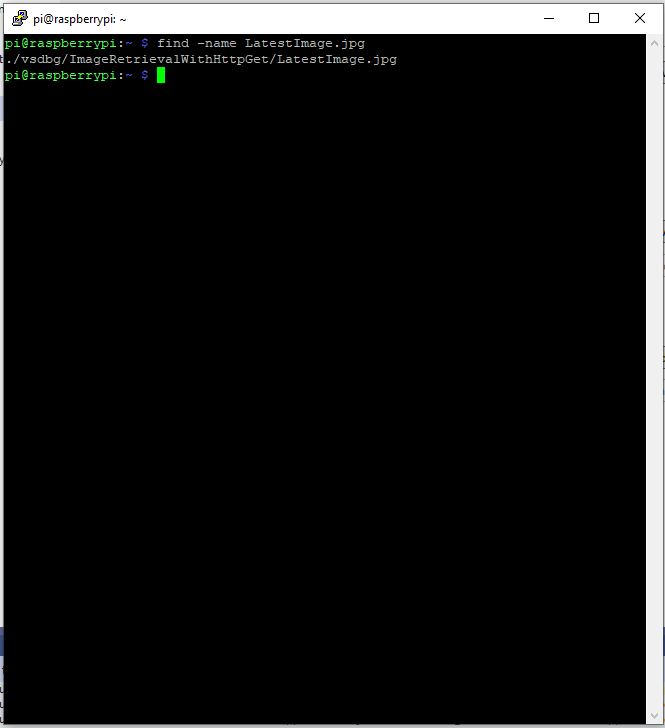
Once the application had finished running on the device I wanted to check that the file was on the local filesystem. I used Putty to connect to the Raspberry PI then searched for LatestImage.jpg.
Linux find utility displaying the location of the downloaded file
This post was about selecting the tooling I’m comfortable with and configuring my development environment so they work well together. The next step will be using Open Network Video Interface Forum (ONVIF) to discover, determine the capabilities of and then control the camera (for this device just zoom and focus).
Uputronics Raspberry PIZero LoRa Expansion board on a Raspberry 3 device
The Uputronics pHat has a pair of Light Emitting Diodes(LEDs) so I adapted some code from a previous post to flash these to confirm the card was working.
static void UputronicsLeds()
{
	const int RedLedPinNumber = 6;
	const int GreenLedPinNumber = 13;

	GpioController controller = new GpioController(PinNumberingScheme.Logical);

	controller.OpenPin(RedLedPinNumber, PinMode.Output);
	controller.OpenPin(GreenLedPinNumber, PinMode.Output);

	while (true)
	{
		if (controller.Read(RedLedPinNumber) == PinValue.Low)
		{
			controller.Write(RedLedPinNumber, PinValue.High);
			controller.Write(GreenLedPinNumber, PinValue.Low);
		}
		else
		{
			controller.Write(RedLedPinNumber, PinValue.Low);
			controller.Write(GreenLedPinNumber, PinValue.High);
		}

		Thread.Sleep(1000);
	}
}
The first Uputronics pHat version using spiDevice.TransferFullDuplex didn’t work. I tried allocating memory for the buffers with new and stackalloc which didn’t seem to make any difference in my trivial example. I tried different Chip Select(CS) pin options, frequencies and modes (the mode used is based on the timings specified in the SX127X datasheet).
static void TransferFullDuplex()
{
	//byte[] writeBuffer = new byte[1]; // Memory allocation didn't seem to make any difference
    //byte[] readBuffer = new byte[1];
	Span<byte> writeBuffer = stackalloc byte[1];
	Span<byte> readBuffer = stackalloc byte[1];

	//var settings = new SpiConnectionSettings(0)
	var settings = new SpiConnectionSettings(0, 0)
	//var settings = new SpiConnectionSettings(0, 1)
	{
		ClockFrequency = 5000000,
		//ClockFrequency = 500000, // Frequency didn't seem to make any difference
		Mode = SpiMode.Mode0,   // From SemTech docs pg 80 CPOL=0, CPHA=0
	};

	SpiDevice spiDevice = SpiDevice.Create(settings);

	Thread.Sleep(500);

	while (true)
	{
		try
		{
			for (byte registerIndex = 0; registerIndex <= 0x42; registerIndex++)
			{
				writeBuffer[0] = registerIndex;
				spiDevice.TransferFullDuplex(writeBuffer, readBuffer);
				//Debug.WriteLine("Register 0x{0:x2} - Value 0X{1:x2} - Bits {2}", writeBuffer[0], readBuffer[0], Convert.ToString(readBuffer[0], 2).PadLeft(8, '0')); // Debug output stopped after roughly 3 times round for loop often debugger would barf as well
				Console.WriteLine("Register 0x{0:x2} - Value 0X{1:x2} - Bits {2}", writeBuffer[0], readBuffer[0], Convert.ToString(readBuffer[0], 2).PadLeft(8, '0'));

				// Would be nice if SpiDevice has a TransferSequential
				/*
				writeBuffer[0] = registerIndex;
				spiDevice.TransferSequential(writeBuffer, readBuffer);
				Console.WriteLine("Register 0x{0:x2} - Value 0X{1:x2} - Bits {2}", writeBuffer[0], readBuffer[0], Convert.ToString(readBuffer[0], 2).PadLeft(8, '0'));
				*/
			}

			Console.WriteLine("");
			Thread.Sleep(5000);
		}
		catch (Exception ex)
		{
			Console.WriteLine(ex.Message);
		}
	}
}
static void ReadWriteChipSelectStandard()
{
	var settings = new SpiConnectionSettings(0) // Doesn't work
	//	var settings = new SpiConnectionSettings(0, 0) // Doesn't work
	//var settings = new SpiConnectionSettings(0, 1) // Doesn't Work
	{
		ClockFrequency = 5000000,
		ChipSelectLineActiveState = PinValue.Low,
		Mode = SpiMode.Mode0,   // From SemTech docs pg 80 CPOL=0, CPHA=0
	};

	SpiDevice spiDevice = SpiDevice.Create(settings);

	Thread.Sleep(500);

	while (true)
	{
		try
		{
			for (byte registerIndex = 0; registerIndex <= 0x42; registerIndex++)
			{
				spiDevice.WriteByte(registerIndex);
				//Thread.Sleep(5); These made no difference
				//Thread.Sleep(10);
				//Thread.Sleep(20);
				//Thread.Sleep(40);
				byte registerValue = spiDevice.ReadByte();

				Console.WriteLine("Register 0x{0:x2} - Value 0X{1:x2} - Bits {2}", registerIndex, registerValue, Convert.ToString(registerValue, 2).PadLeft(8, '0'));
			}
			Console.WriteLine("");

			Thread.Sleep(5000);
		}
		catch (Exception ex)
		{
			Console.WriteLine(ex.Message);
		}
	}
}
The third Uputronics pHat version using spiDevice.ReadByte() and spiDevice.WriteByte() with DIY Chip Select(CS) worked. In previous SPI device libraries I have found that “managing” the CS line in code can be easier to get working The MicroFramework also has more connectionSettings options for better control of CS line timings which reduces the need for DIY.
static void ReadWriteChipSelectDiy()
{
	const int CSPinNumber = 8; // CS0
	//const int CSPinNumber = 7; // CS1

	// DIY CS0 implented with GPIO pin application controls
	GpioController controller = new GpioController(PinNumberingScheme.Logical);

	controller.OpenPin(CSPinNumber, PinMode.Output);
	//controller.Write(CSPinNumber, PinValue.High);

	//var settings = new SpiConnectionSettings(0) // Doesn't work
	var settings = new SpiConnectionSettings(0, 1) // Works, have to point at unused CS1, this could be a problem is other device on CS1
	//var settings = new SpiConnectionSettings(0, 0) // Works, have to point at unused CS0, this could be a problem is other device on CS0
	{
		ClockFrequency = 5000000,
		Mode = SpiMode.Mode0,   // From SemTech docs pg 80 CPOL=0, CPHA=0
	};

	SpiDevice spiDevice = SpiDevice.Create(settings);

	Thread.Sleep(500);

	while (true)
	{
		try
		{
			for (byte registerIndex = 0; registerIndex <= 0x42; registerIndex++)
			{
				controller.Write(CSPinNumber, PinValue.Low);
				spiDevice.WriteByte(registerIndex);
				//Thread.Sleep(2); // This maybe necessary
				byte registerValue = spiDevice.ReadByte();
				controller.Write(CSPinNumber, PinValue.High);

				Console.WriteLine("Register 0x{0:x2} - Value 0X{1:x2} - Bits {2}", registerIndex, registerValue, Convert.ToString(registerValue, 2).PadLeft(8, '0'));
			}
			Console.WriteLine("");

			Thread.Sleep(5000);
		}
		catch (Exception ex)
		{
			Console.WriteLine(ex.Message);
		}
	}
}
The dotNet/IoT doesn’t support (July2021) the option to “exclusively” open a port so there could be issues with other applications assuming they control CS0/CS1.
Loaded '/usr/lib/dotnet/shared/Microsoft.NETCore.App/5.0.4/Microsoft.Win32.Primitives.dll'. Skipped loading symbols. Module is optimized and the debugger option 'Just My Code' is enabled.
Register 0x00 - Value 0X00 - Bits 00000000
Register 0x01 - Value 0X09 - Bits 00001001
Register 0x02 - Value 0X1a - Bits 00011010
Register 0x03 - Value 0X0b - Bits 00001011
Register 0x04 - Value 0X00 - Bits 00000000
Register 0x05 - Value 0X52 - Bits 01010010
Register 0x06 - Value 0X6c - Bits 01101100
Register 0x07 - Value 0X80 - Bits 10000000
Register 0x08 - Value 0X00 - Bits 00000000
Register 0x09 - Value 0X4f - Bits 01001111
Register 0x0a - Value 0X09 - Bits 00001001
Register 0x0b - Value 0X2b - Bits 00101011
Register 0x0c - Value 0X20 - Bits 00100000
Register 0x0d - Value 0X08 - Bits 00001000
Register 0x0e - Value 0X02 - Bits 00000010
Register 0x0f - Value 0X0a - Bits 00001010
Register 0x10 - Value 0Xff - Bits 11111111
Register 0x11 - Value 0X70 - Bits 01110000
Register 0x12 - Value 0X15 - Bits 00010101
Register 0x13 - Value 0X0b - Bits 00001011
Register 0x14 - Value 0X28 - Bits 00101000
Register 0x15 - Value 0X0c - Bits 00001100
Register 0x16 - Value 0X12 - Bits 00010010
Register 0x17 - Value 0X47 - Bits 01000111
Register 0x18 - Value 0X32 - Bits 00110010
Register 0x19 - Value 0X3e - Bits 00111110
Register 0x1a - Value 0X00 - Bits 00000000
Register 0x1b - Value 0X00 - Bits 00000000
Register 0x1c - Value 0X00 - Bits 00000000
Register 0x1d - Value 0X00 - Bits 00000000
Register 0x1e - Value 0X00 - Bits 00000000
Register 0x1f - Value 0X40 - Bits 01000000
Register 0x20 - Value 0X00 - Bits 00000000
Register 0x21 - Value 0X00 - Bits 00000000
Register 0x22 - Value 0X00 - Bits 00000000
Register 0x23 - Value 0X00 - Bits 00000000
Register 0x24 - Value 0X05 - Bits 00000101
Register 0x25 - Value 0X00 - Bits 00000000
Register 0x26 - Value 0X03 - Bits 00000011
Register 0x27 - Value 0X93 - Bits 10010011
Register 0x28 - Value 0X55 - Bits 01010101
Register 0x29 - Value 0X55 - Bits 01010101
Register 0x2a - Value 0X55 - Bits 01010101
Register 0x2b - Value 0X55 - Bits 01010101
Register 0x2c - Value 0X55 - Bits 01010101
Register 0x2d - Value 0X55 - Bits 01010101
Register 0x2e - Value 0X55 - Bits 01010101
Register 0x2f - Value 0X55 - Bits 01010101
Register 0x30 - Value 0X90 - Bits 10010000
Register 0x31 - Value 0X40 - Bits 01000000
Register 0x32 - Value 0X40 - Bits 01000000
Register 0x33 - Value 0X00 - Bits 00000000
Register 0x34 - Value 0X00 - Bits 00000000
Register 0x35 - Value 0X0f - Bits 00001111
Register 0x36 - Value 0X00 - Bits 00000000
Register 0x37 - Value 0X00 - Bits 00000000
Register 0x38 - Value 0X00 - Bits 00000000
Register 0x39 - Value 0Xf5 - Bits 11110101
Register 0x3a - Value 0X20 - Bits 00100000
Register 0x3b - Value 0X82 - Bits 10000010
Register 0x3c - Value 0Xf6 - Bits 11110110
Register 0x3d - Value 0X02 - Bits 00000010
Register 0x3e - Value 0X80 - Bits 10000000
Register 0x3f - Value 0X40 - Bits 01000000
Register 0x40 - Value 0X00 - Bits 00000000
Register 0x41 - Value 0X00 - Bits 00000000
Register 0x42 - Value 0X12 - Bits 00010010
The fourth Uputronics pHat version using spiDevice.TransferFullDuplex with read and write buffers two bytes long and the leading bye of the response ignored worked.
...
while (true)
{
	try
	{
		for (byte registerIndex = 0; registerIndex <= 0x42; registerIndex++)
		{
			// Doesn't work
			writeBuffer[0] = registerIndex;
			spiDevice.TransferFullDuplex(writeBuffer, readBuffer);
			Console.WriteLine("Register 0x{0:x2} - Value 0X{1:x2} - Bits {2}", registerIndex, readBuffer[0], Convert.ToString(readBuffer[0], 2).PadLeft(8, '0'));

			// Does work
			writeBuffer[0] = registerIndex;
			spiDevice.TransferFullDuplex(writeBuffer, readBuffer);
			Console.WriteLine("Register 0x{0:x2} - Value 0X{1:x2} - Bits {2}", registerIndex, readBuffer[1], Convert.ToString(readBuffer[1], 2).PadLeft(8, '0'));

			// Does work
			writeBuffer[1] = registerIndex;
			spiDevice.TransferFullDuplex(writeBuffer, readBuffer);
			Console.WriteLine("Register 0x{0:x2} - Value 0X{1:x2} - Bits {2}", registerIndex, readBuffer[1], Convert.ToString(readBuffer[1], 2).PadLeft(8, '0'));

			Console.WriteLine("");
		}

		Console.WriteLine("");
		Thread.Sleep(5000);
	}
	catch (Exception ex)
	{
		Console.WriteLine(ex.Message);
	}
}
Register 0x00 - Value 0X00 - Bits 00000000
Register 0x00 - Value 0X00 - Bits 00000000
Register 0x00 - Value 0X00 - Bits 00000000

...

Register 0x42 - Value 0X00 - Bits 00000000
Register 0x42 - Value 0X12 - Bits 00010010
Register 0x42 - Value 0X12 - Bits 00010010
M2M Single channel shield on Raspberry Pi 3 Device
The first M2M pHat version using SpiDevice.Read and SpiDevice.Write with a “custom” CS pin worked.
...
// Chip select with pin which isn't CS0 or CS1 needs M2M shield
static void ReadWriteDiyChipSelectNonStandard()
{
	const int CSPinNumber = 25;

	// DIY CS0 implented with GPIO pin application controls
	GpioController controller = new GpioController(PinNumberingScheme.Logical);

	controller.OpenPin(CSPinNumber, PinMode.Output);
	//controller.Write(CSPinNumber, PinValue.High);

	// Work, this could be a problem is other device on CS0/CS1
	var settings = new SpiConnectionSettings(0)
	//var settings = new SpiConnectionSettings(0, 0)
	//var settings = new SpiConnectionSettings(0, 1)
	{
		ClockFrequency = 5000000,
		Mode = SpiMode.Mode0,   // From SemTech docs pg 80 CPOL=0, CPHA=0
	};

	SpiDevice spiDevice = SpiDevice.Create(settings);

	Thread.Sleep(500);

	while (true)
	{
		try
		{
			for (byte registerIndex = 0; registerIndex <= 0x42; registerIndex++)
			{
				controller.Write(CSPinNumber, PinValue.Low);
				spiDevice.WriteByte(registerIndex);
				//Thread.Sleep(2); // This maybe necessary
				byte registerValue = spiDevice.ReadByte();
				controller.Write(CSPinNumber, PinValue.High);

				Console.WriteLine("Register 0x{0:x2} - Value 0X{1:x2} - Bits {2}", registerIndex, registerValue, Convert.ToString(registerValue, 2).PadLeft(8, '0'));
			}
			Console.WriteLine("");

			Thread.Sleep(5000);
		}
		catch (Exception ex)
		{
			Console.WriteLine(ex.Message);
		}
	}
}
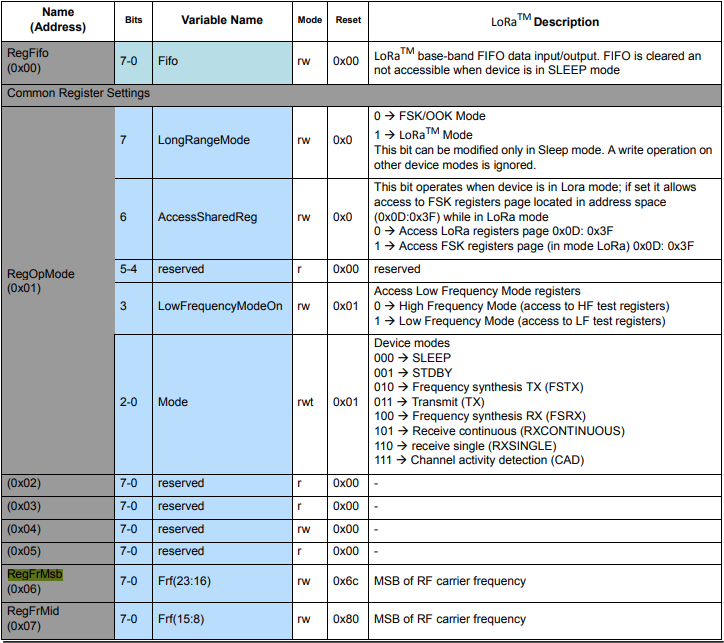
The next step was to read an array of bytes, using spiDevice.TransferFullDuplex. The SX127X transmit/receive frequency is specified in registers 0x06 RegFrMSB, 0x07 RegFrMid, and 0x08 RegFrLsb. The default frequency is 868MHz which is 0xE4, 0xC0, 0x00
static void TransferFullDuplexBufferBytesRead()
{
	const byte length = 3;
	byte[] writeBuffer = new byte[length + 1];
	byte[] readBuffer = new byte[length + 1];

	// Read the frequency which is 3 bytes RegFrMsb 0x6c, RegFrMid 0x80, RegFrLsb 0x00
	writeBuffer[0] = 0x06; //

	// Works, have to point at unused CS0/CS1, others could be a problem is another another SPI device is on on CS0/CS1
	//var settings = new SpiConnectionSettings(0)
	var settings = new SpiConnectionSettings(0, 0)
	//var settings = new SpiConnectionSettings(0, 1)
	{
		ClockFrequency = 5000000,
		Mode = SpiMode.Mode0,   // From SemTech docs pg 80 CPOL=0, CPHA=0
	};

	SpiDevice spiDevice = SpiDevice.Create(settings);

	spiDevice.TransferFullDuplex(writeBuffer, readBuffer);

	Console.WriteLine($"Register 0x06-0x{readBuffer[1]:x2} 0x07-0x{readBuffer[2]:x2} 0x08-0x{readBuffer[3]:x2}");
}
-------------------------------------------------------------------
You may only use the Microsoft .NET Core Debugger (vsdbg) with
Visual Studio Code, Visual Studio or Visual Studio for Mac software
to help you develop and test your applications.
-------------------------------------------------------------------
Loaded '/usr/lib/dotnet/shared/Microsoft.NETCore.App/5.0.4/System.Private.CoreLib.dll'. Skipped loading symbols. Module is optimized and the debugger option 'Just My Code' is enabled.
...
Loaded '/usr/lib/dotnet/shared/Microsoft.NETCore.App/5.0.4/Microsoft.Win32.Primitives.dll'. Skipped loading symbols. Module is optimized and the debugger option 'Just My Code' is enabled.
Register 0x06-0xe4 0x07-0xc0 0x08-0x00
The final step was write an array of bytes, using spiDevice.TransferFullDuplex to change the transmit/receive frequency to 915MHz. To write a value the first bit of the address byte must be set to 1 hence the 0x86 RegFrMsb address.
static void TransferFullDuplexBufferBytesWrite()
{
	const byte length = 3;
	byte[] writeBuffer = new byte[length + 1];
	byte[] readBuffer = new byte[length + 1];

	// Write the frequency which is 3 bytes RegFrMsb 0x6c, RegFrMid 0x80, RegFrLsb or with 0x00 the write mask
	writeBuffer[0] = 0x86 ;

	// Works, have to point at unused CS0/CS1, others could be a problem is another another SPI device is on on CS0/CS1
	//var settings = new SpiConnectionSettings(0)
	var settings = new SpiConnectionSettings(0, 0)
	//var settings = new SpiConnectionSettings(0, 1)
	{
		ClockFrequency = 5000000,
		Mode = SpiMode.Mode0,   // From SemTech docs pg 80 CPOL=0, CPHA=0
	};

	SpiDevice spiDevice = SpiDevice.Create(settings);

	// Set the frequency to 915MHz
	writeBuffer[1] = 0xE4;
	writeBuffer[2] = 0xC0;
	writeBuffer[3] = 0x00;

	spiDevice.TransferFullDuplex(writeBuffer, readBuffer);
}
-------------------------------------------------------------------
You may only use the Microsoft .NET Core Debugger (vsdbg) with
Visual Studio Code, Visual Studio or Visual Studio for Mac software
to help you develop and test your applications.
-------------------------------------------------------------------
Loaded '/usr/lib/dotnet/shared/Microsoft.NETCore.App/5.0.4/System.Private.CoreLib.dll'. Skipped loading symbols. Module is optimized and the debugger option 'Just My Code' is enabled.
...
Loaded '/usr/lib/dotnet/shared/Microsoft.NETCore.App/5.0.4/Microsoft.Win32.Primitives.dll'. Skipped loading symbols. Module is optimized and the debugger option 'Just My Code' is enabled.
Register 0x06-0x6c 0x07-0x80 0x08-0x00
Register 0x06-0xe4 0x07-0xc0 0x08-0x00
The program 'dotnet' has exited with code 0 (0x0).
Summary
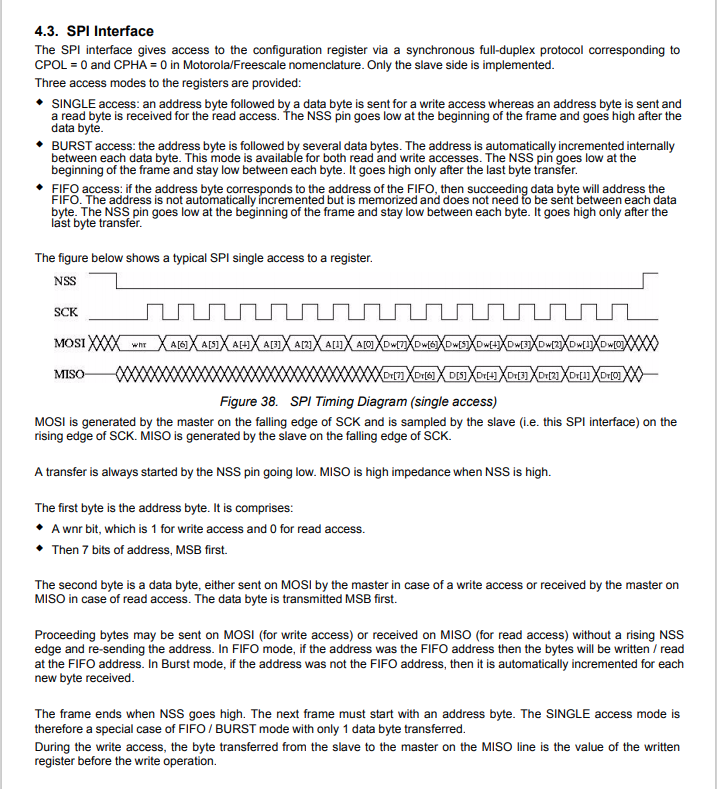
This exceptionally long post was to highlight that with SPI it’s all about timing, first read the datasheet, then build code to validate your understanding.
SX127X SPI interface timing diagram
Some platforms have native TransferSequential implementations but the dotNet/IoT library only has TransferFullDuplex. SPI hardware is always full duplex, if “sequential” is available the implementation will write the provided bytes and then follow them with zeros to read the requested bytes.
-------------------------------------------------------------------
You may only use the Microsoft .NET Core Debugger (vsdbg) with
Visual Studio Code, Visual Studio or Visual Studio for Mac software
to help you develop and test your applications.
-------------------------------------------------------------------
...
Loaded '/usr/lib/dotnet/shared/Microsoft.NETCore.App/5.0.4/Microsoft.Win32.Primitives.dll'. Skipped loading symbols. Module is optimized and the debugger option 'Just My Code' is enabled.
Main thread:1
Doing stuff
Doing stuff
Doing stuff
Doing stuff
Doing stuff
Interrupt Thread:6Doing stuff
Doing stuff
Doing stuff
Interrupt Thread:6Doing stuff
Doing stuff
Interrupt Thread:6Doing stuff
Doing stuff
Doing stuff
Doing stuff
Doing stuff
Doing stuff
The program 'dotnet' has exited with code 0 (0x0).
The ManagedThreadId for the main loop(1) was different to the callback(6) which needs some further investigation.
using System;
using System.Diagnostics;
using System.Threading;

namespace devMobile.NetCore.ConsoleApp
{
	class Program
	{
		static void Main(string[] args)
		{
			while (true)
			{
				Console.WriteLine($"{DateTime.UtcNow:HH:mm:ss} Hello World!");

				Thread.Sleep(1000);
			}
		}
	}
}
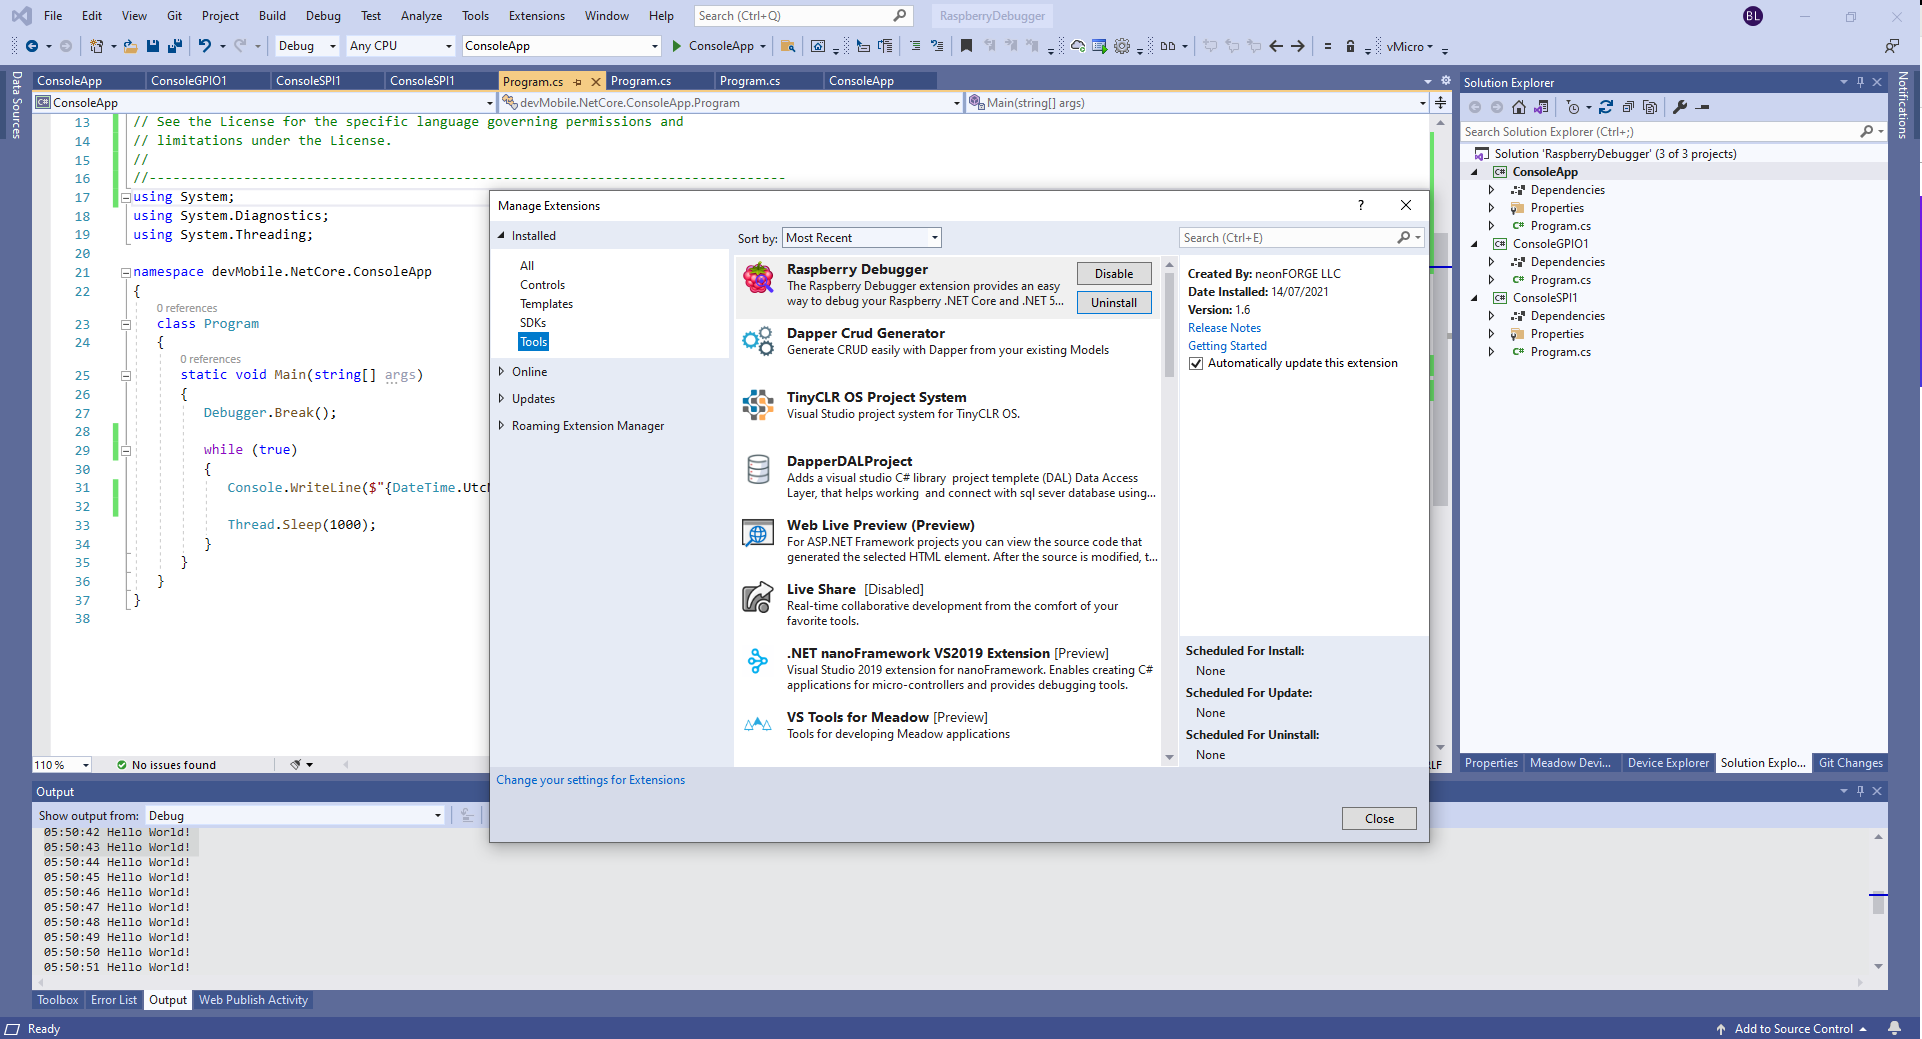
The RaspberryDebugger is really simple to install, and “frictionless” to use. The developers have put a lot of effort into making it easy to deploy and debug a .Net Core application running on a Raspberry PI with Visual Studio. All I had to do was search for, then download and install their Visual Studio Extension(VSIX).
Visual Studio Manage Extensions search
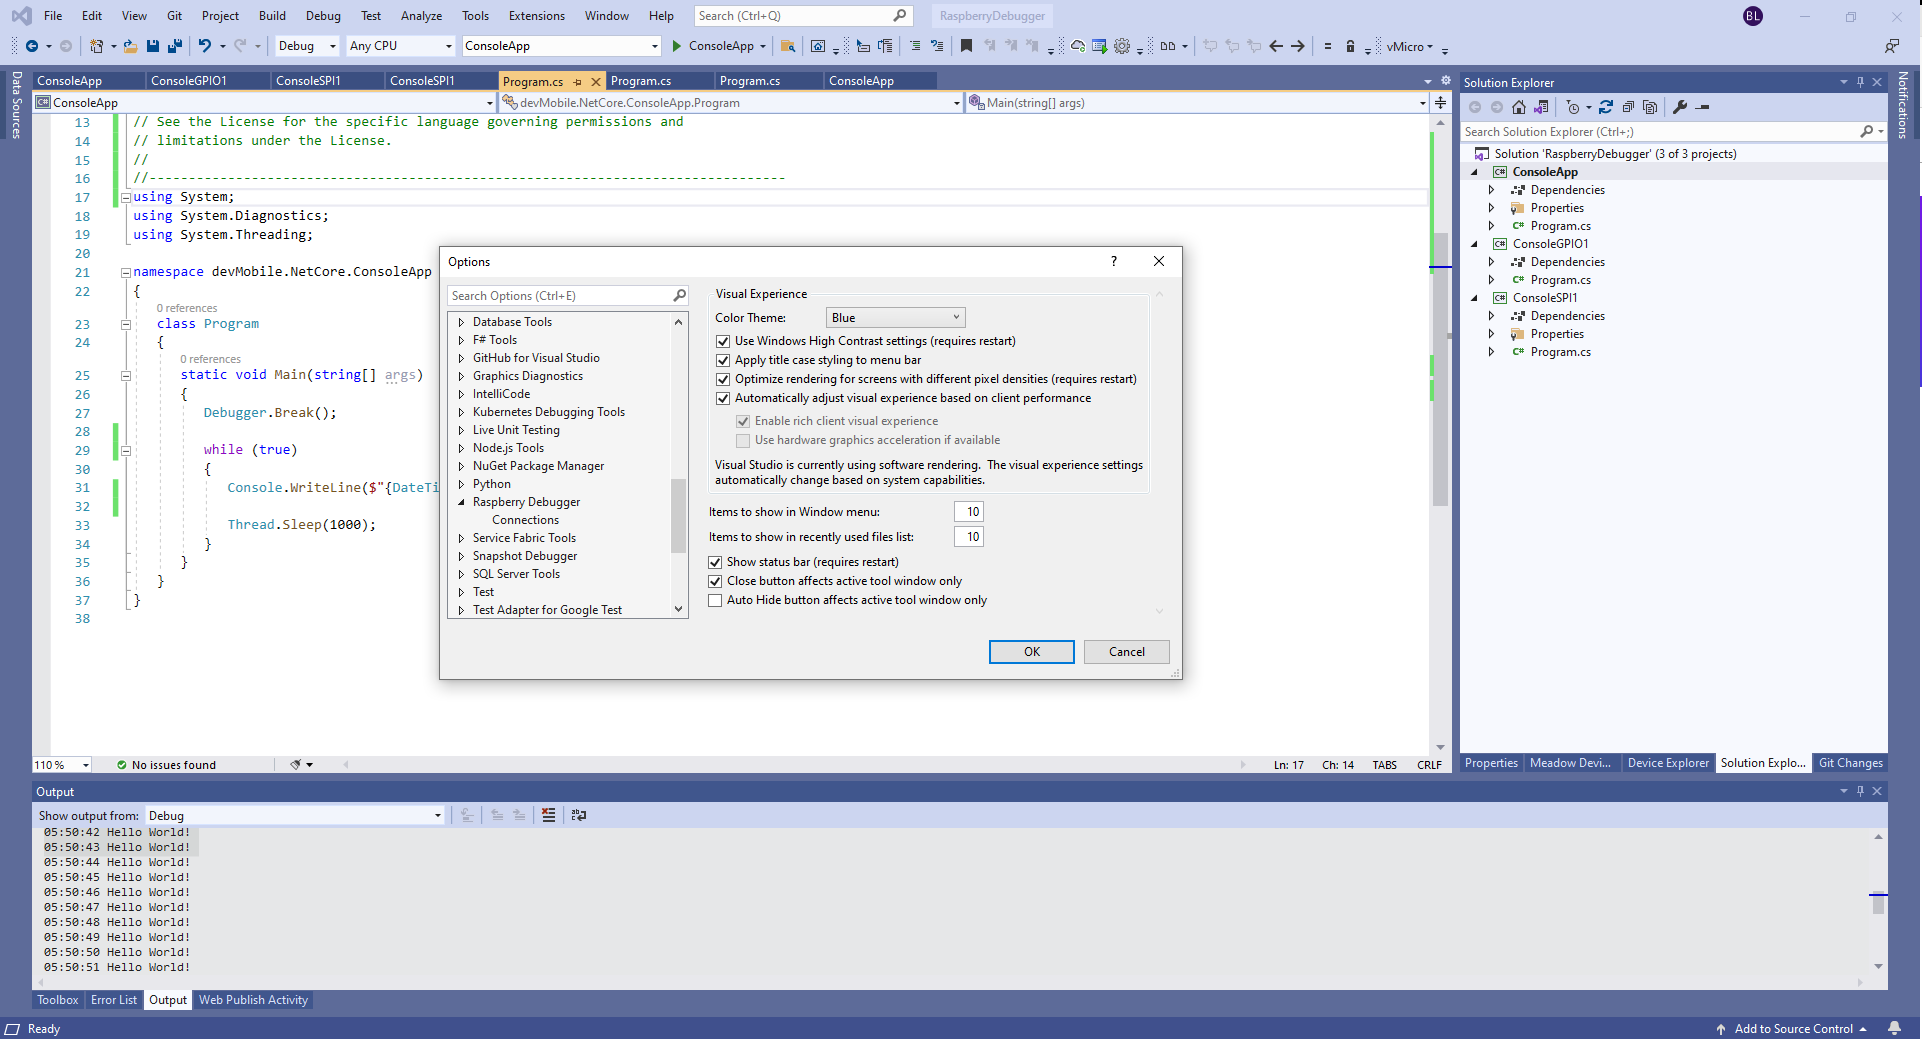
Then configure the connection information for the devices I wanted to use.
Visual Studio Options menu for RaspberryDebugger
On my main development system I was using multiple Raspberry PI devices so it was great to be able to pre-configure several devices.
RaspberryDebugger device(s) configuration)
I had connected to each device with PuTTY to check that connectivity was sorted.
After typing in my “Hello world” application I had to select the device I wanted to use
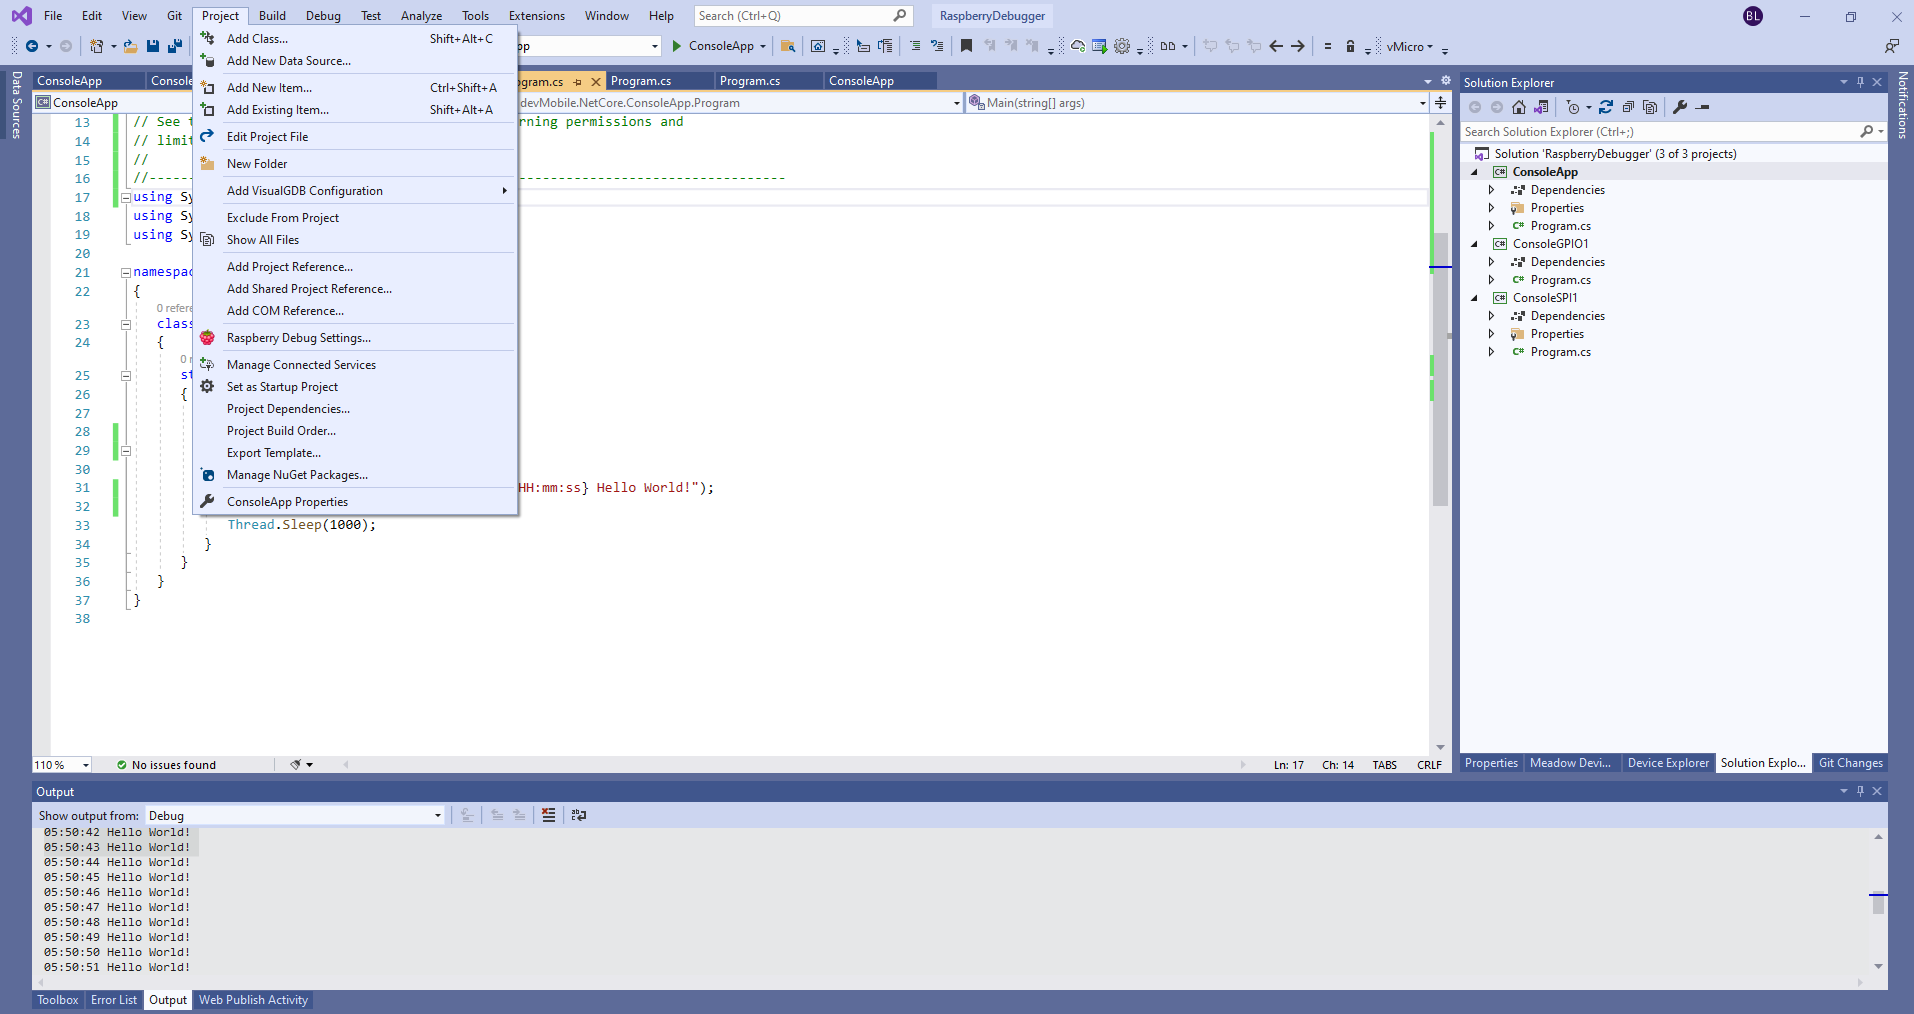
Project menu RaspberryDebugger option
RaspberryDebugger device selection
Then I pressed F5 and it worked! It’s very unusual for things to work first time so I was stunned. The application was “automagically” downloaded and run in the debugger on the device.
-------------------------------------------------------------------
You may only use the Microsoft .NET Core Debugger (vsdbg) with
Visual Studio Code, Visual Studio or Visual Studio for Mac software
to help you develop and test your applications.
-------------------------------------------------------------------
Loaded '/usr/lib/dotnet/shared/Microsoft.NETCore.App/5.0.4/System.Private.CoreLib.dll'. Skipped loading symbols. Module is optimized and the debugger option 'Just My Code' is enabled.
Loaded '/home/pi/vsdbg/ConsoleApp/ConsoleApp.dll'. Symbols loaded.
Loaded '/usr/lib/dotnet/shared/Microsoft.NETCore.App/5.0.4/System.Runtime.dll'. Skipped loading symbols. Module is optimized and the debugger option 'Just My Code' is enabled.
Loaded '/usr/lib/dotnet/shared/Microsoft.NETCore.App/5.0.4/System.Console.dll'. Skipped loading symbols. Module is optimized and the debugger option 'Just My Code' is enabled.
Loaded '/usr/lib/dotnet/shared/Microsoft.NETCore.App/5.0.4/System.Threading.Thread.dll'. Skipped loading symbols. Module is optimized and the debugger option 'Just My Code' is enabled.
Loaded '/usr/lib/dotnet/shared/Microsoft.NETCore.App/5.0.4/System.Threading.dll'. Skipped loading symbols. Module is optimized and the debugger option 'Just My Code' is enabled.
Loaded '/usr/lib/dotnet/shared/Microsoft.NETCore.App/5.0.4/System.Text.Encoding.Extensions.dll'. Skipped loading symbols. Module is optimized and the debugger option 'Just My Code' is enabled.
Loaded '/usr/lib/dotnet/shared/Microsoft.NETCore.App/5.0.4/Microsoft.Win32.Primitives.dll'. Skipped loading symbols. Module is optimized and the debugger option 'Just My Code' is enabled.
05:50:37 Hello World!
05:50:39 Hello World!
05:50:40 Hello World!
05:50:41 Hello World!
05:50:42 Hello World!
05:50:43 Hello World!
...


