Random wanderings through Microsoft Azure esp. PaaS plumbing, the IoT bits, AI on Micro controllers, AI on Edge Devices, .NET nanoFramework, .NET Core on *nix and ML.NET+ONNX
Over the last week or so I have been trying to get an Arduino application working which supports Message Queue Telemetry Transport(MQTT) properties which were added in V5. This specification was released March 2019 so I figured it would be commonly supported. In the Arduino ecosystem I was wrong and there is going to be a series of pastes about my “epic fail”.
The post is not about WolfMQTT but what I learnt about configuring it (and other) libraries for Arduino.
I wanted to set the message properties (for reasons) and in the .NET nanoFramework (and other .NET libraries) it wasn’t a problem.
while (true)
{
Console.WriteLine("MQTT publish message start...");
var payload = new MessagePayload() { ClientID = Secrets.MQTT_CLIENTID, Sequence = sequenceNumber++ };
string jsonPayload = JsonSerializer.SerializeObject(payload);
var result = mqttClient.Publish(topicPublish, Encoding.UTF8.GetBytes(jsonPayload), "application/json; charset=utf-8", null);
Debug.WriteLine($"MQTT published ({result}): {jsonPayload}");
Thread.Sleep(60000);
}
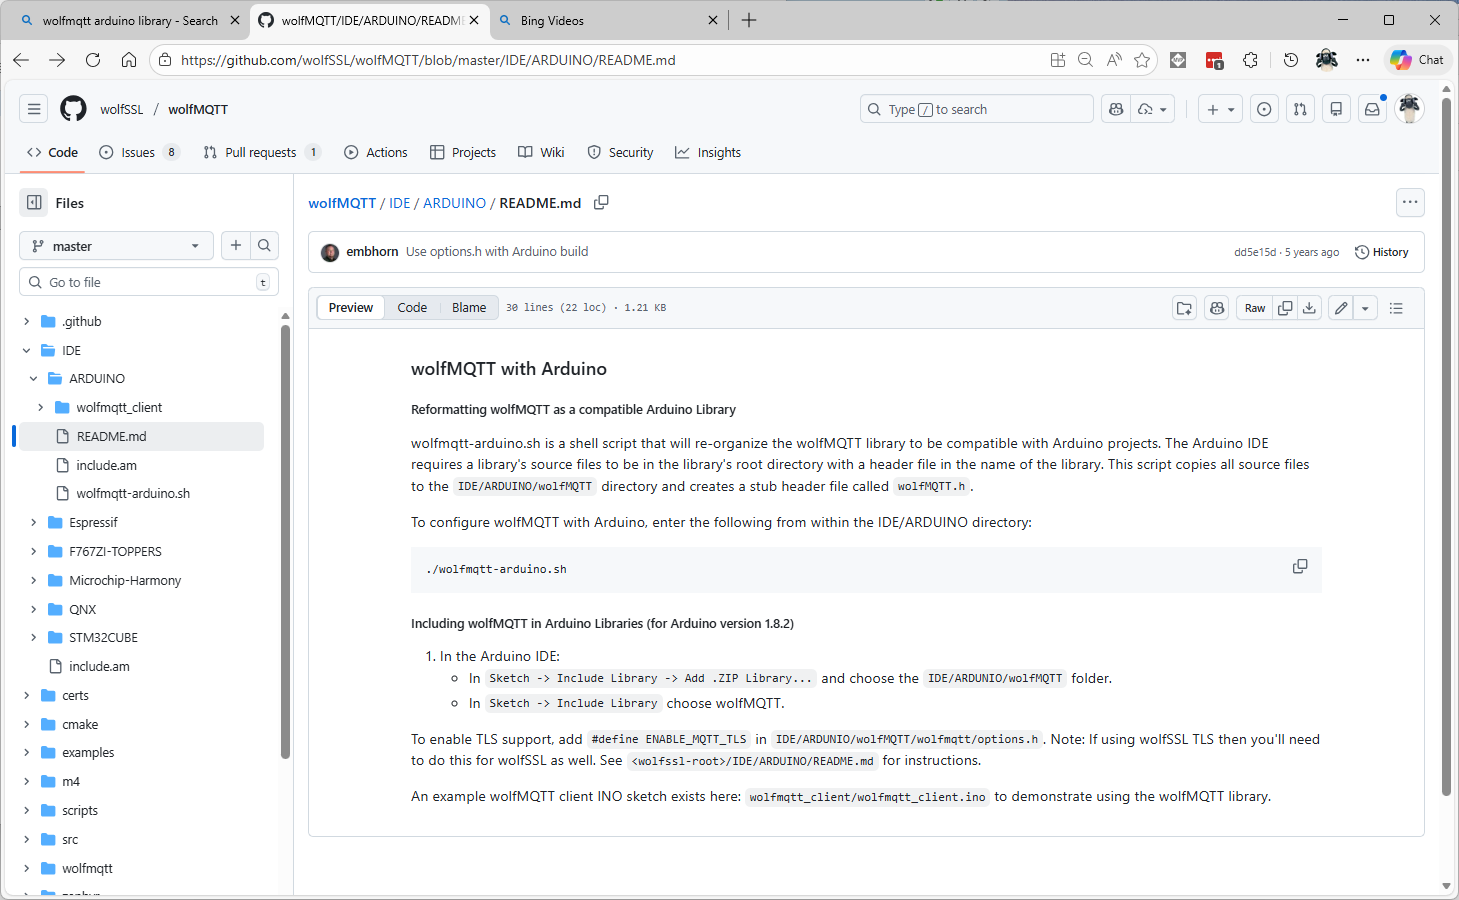
One of the options suggested by copilot was wolfMQTT(which uses an open/closed source model) but I found there was not an Arduino library for of this product. This was not unexpected due to the target audience of their products (but I did find there is a wolfSSL prebuilt library)
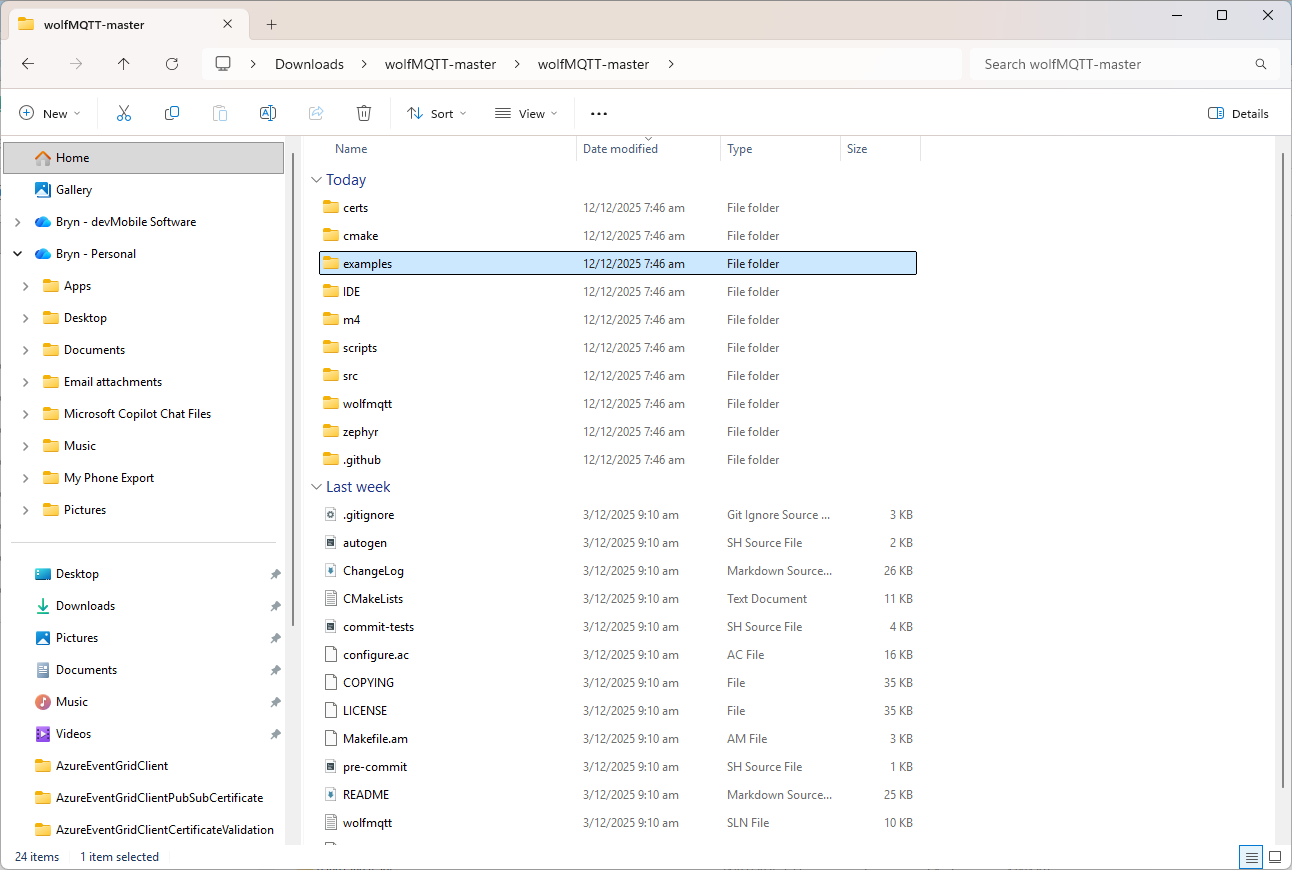
There were instructions on how to “re-organise” the source files into and Arduino friendly library
I don’t have an “easy” way of running bash on my dev box so I tried to do it manually (first of a series of mistakes).
#!/bin/sh
# this script will reformat the wolfSSL source code to be compatible with
# an Arduino project
# run as bash ./wolfssl-arduino.sh
DIR=${PWD##*/}
if [ "$DIR" = "ARDUINO" ]; then
rm -rf wolfMQTT
mkdir wolfMQTT
cp ../../src/*.c ./wolfMQTT
mkdir wolfMQTT/wolfmqtt
cp ../../wolfmqtt/*.h ./wolfMQTT/wolfmqtt
echo "/* Generated wolfMQTT header file for Arduino */" >> ./wolfMQTT/wolfMQTT.h
echo "#include <wolfmqtt/mqtt_client.h>" >> ./wolfMQTT/wolfMQTT.h
else
echo "ERROR: You must be in the IDE/ARDUINO directory to run this script"
fi
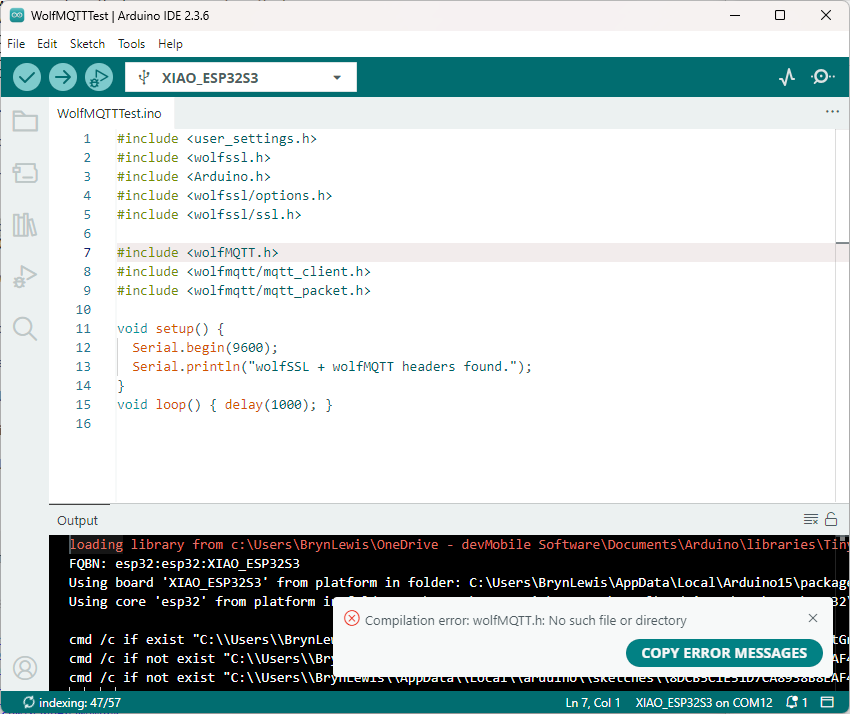
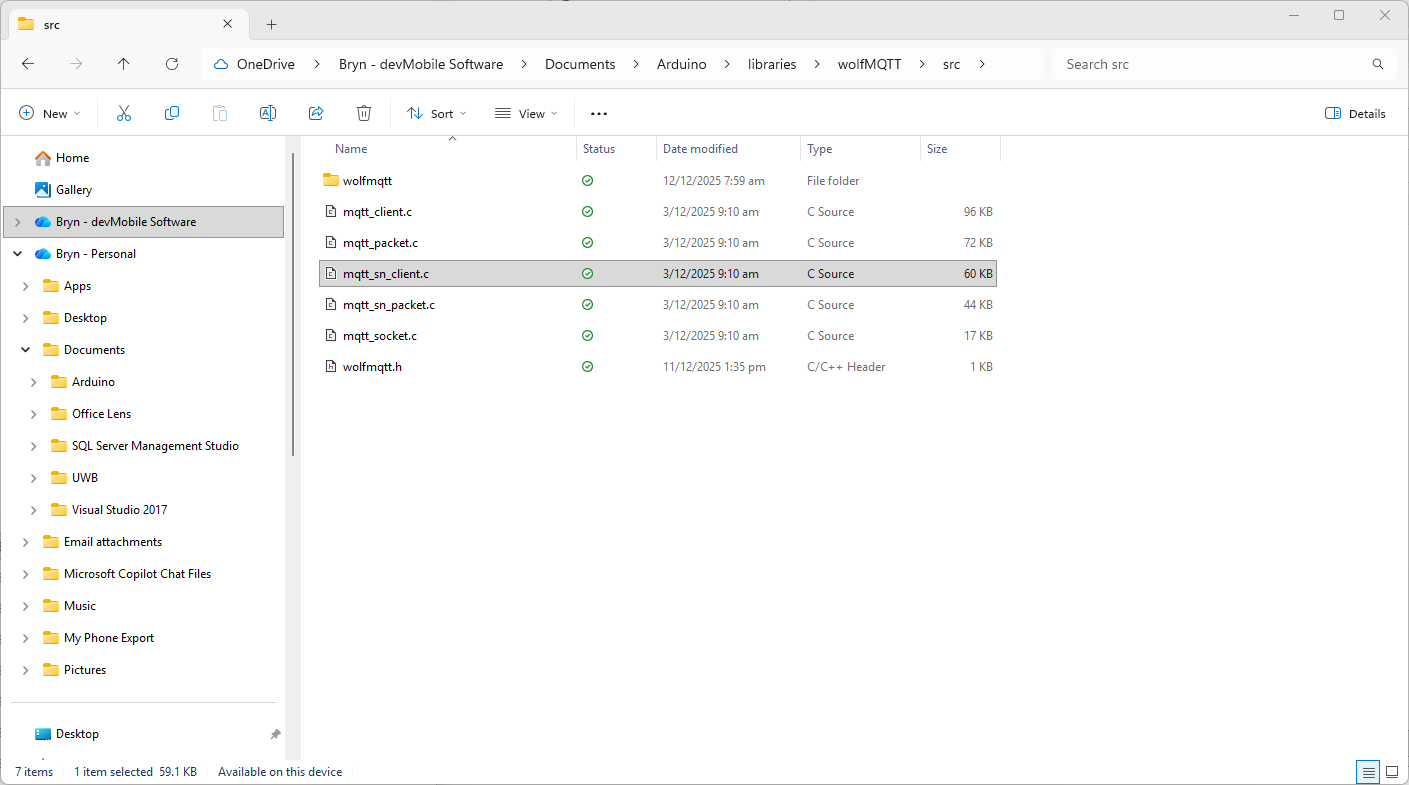
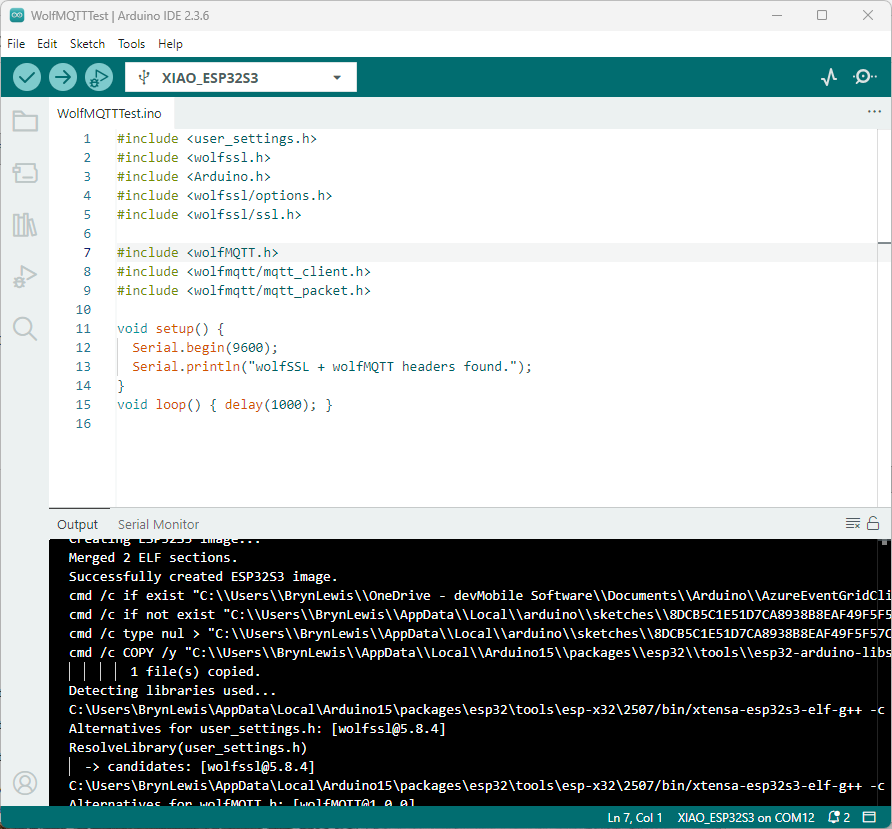
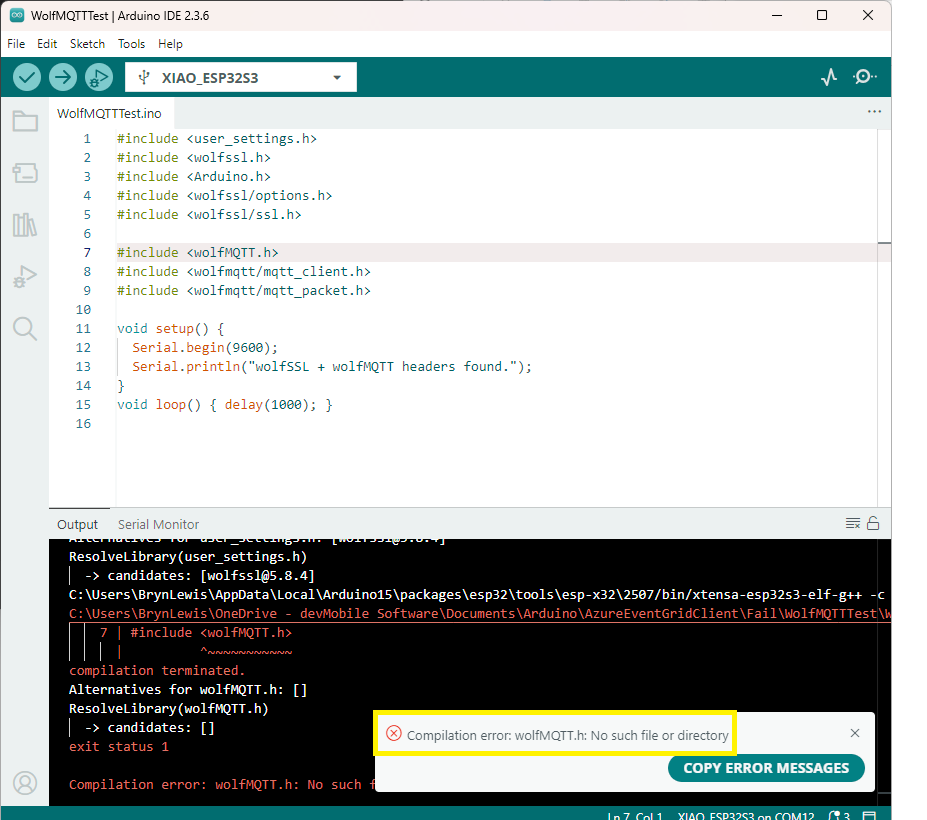
I copied the files into the specified folder tree and my compilation failed. I used a minimalist application to debug the compilation error.
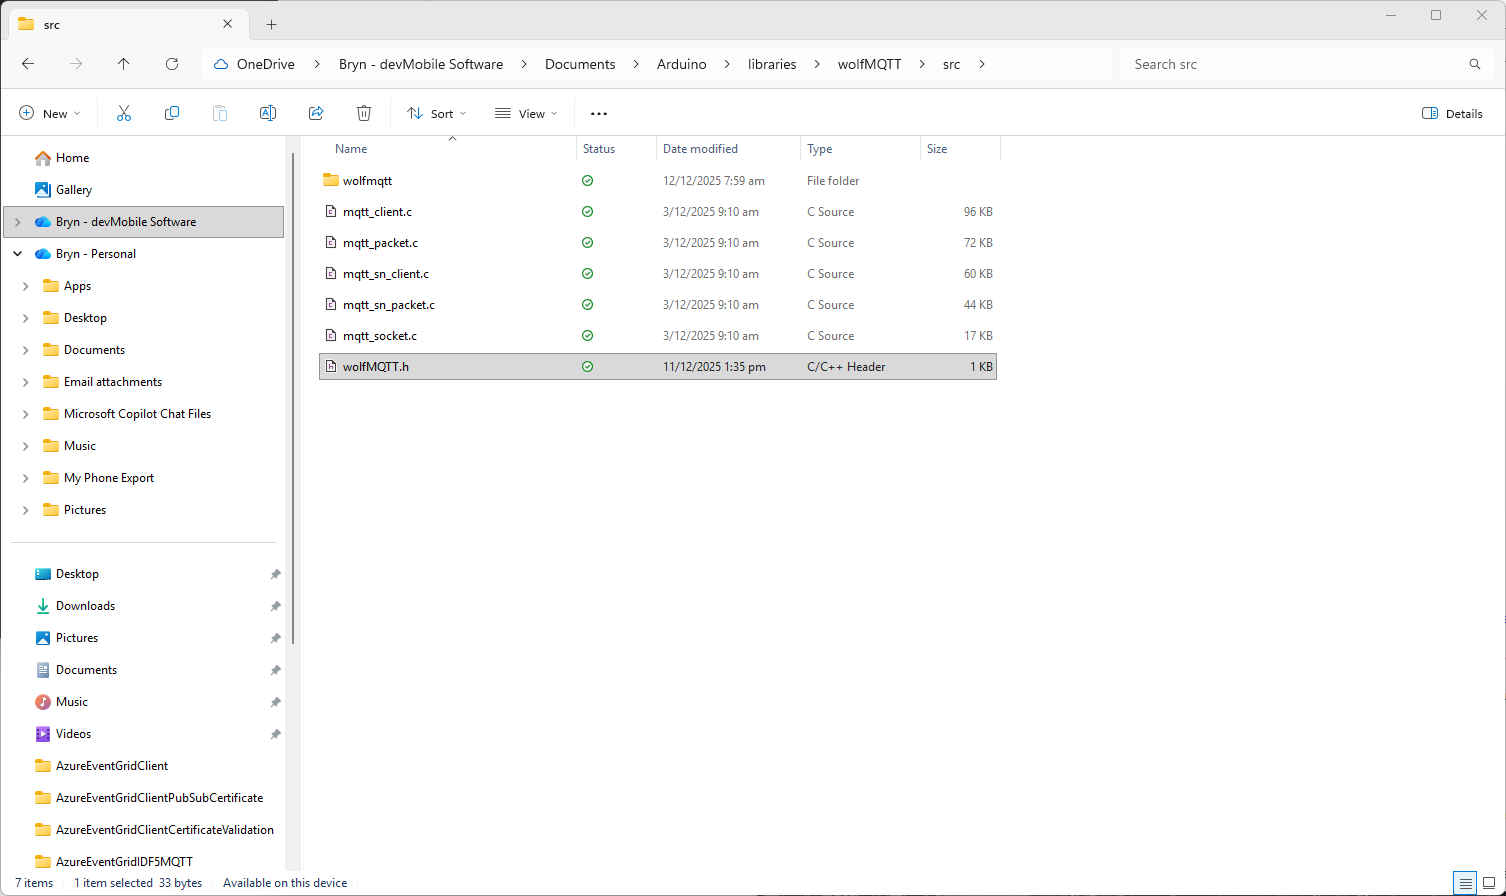
I went back to the script file and realised that has missed creating a header file
I used a text editor to create the file which I saved into the src folder
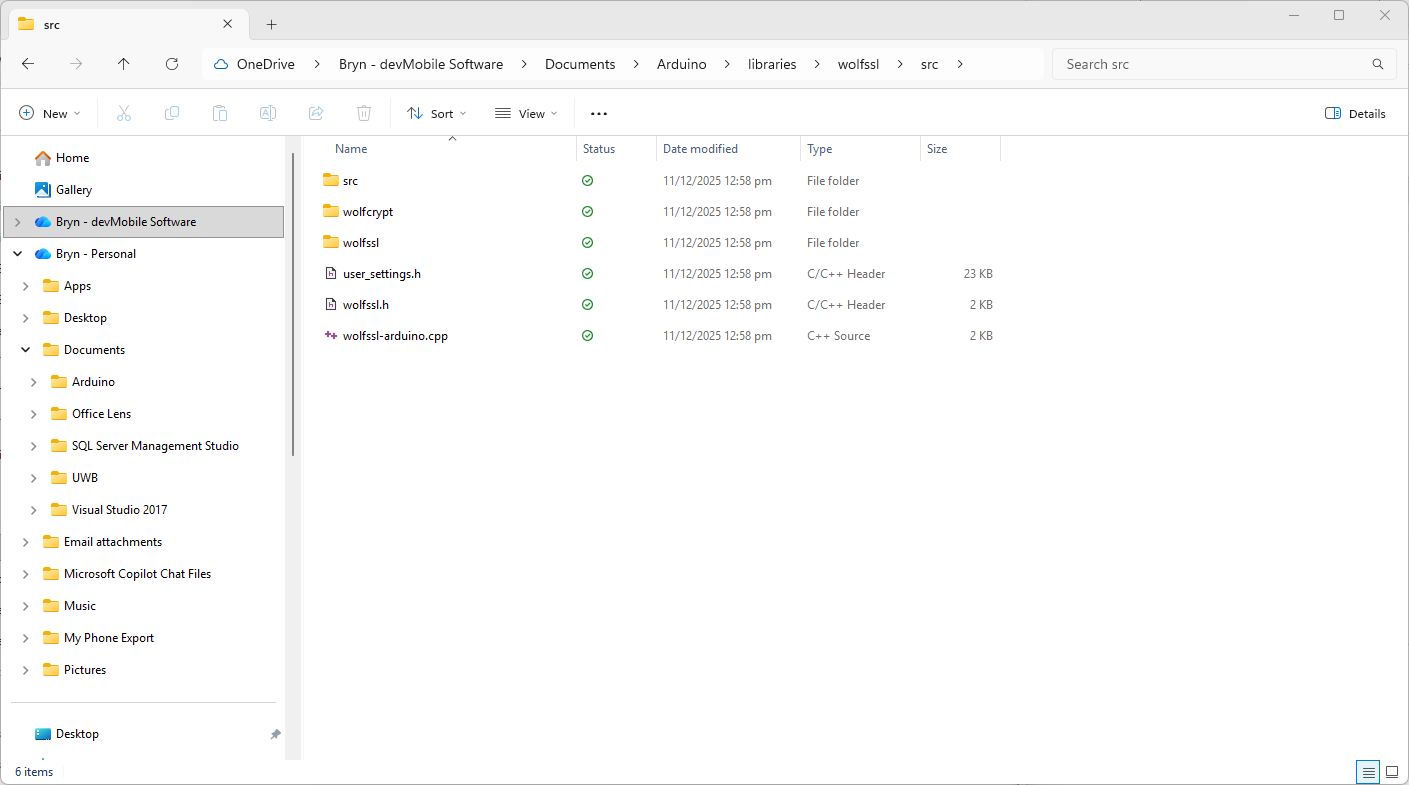
I also checked that I had the same structure as wolfssl
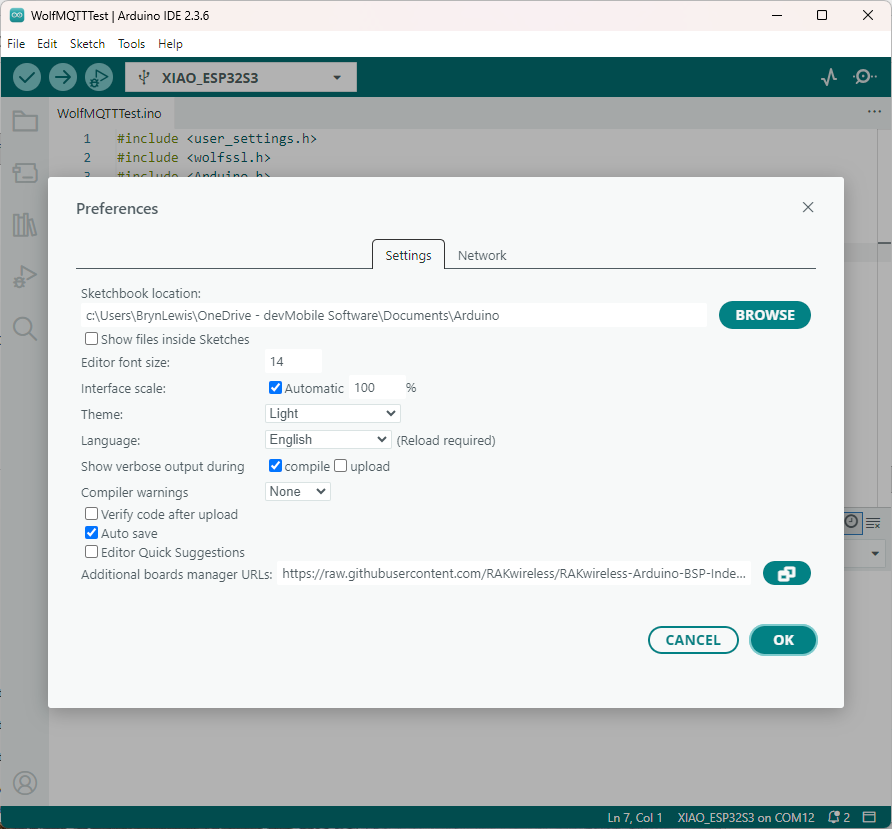
The compilation was still failing so I turned on the Arduino verbose compiler output
After compilations I went back through the compiler output look for clues.
After a couple of failed compilations I paid attention to the error message.
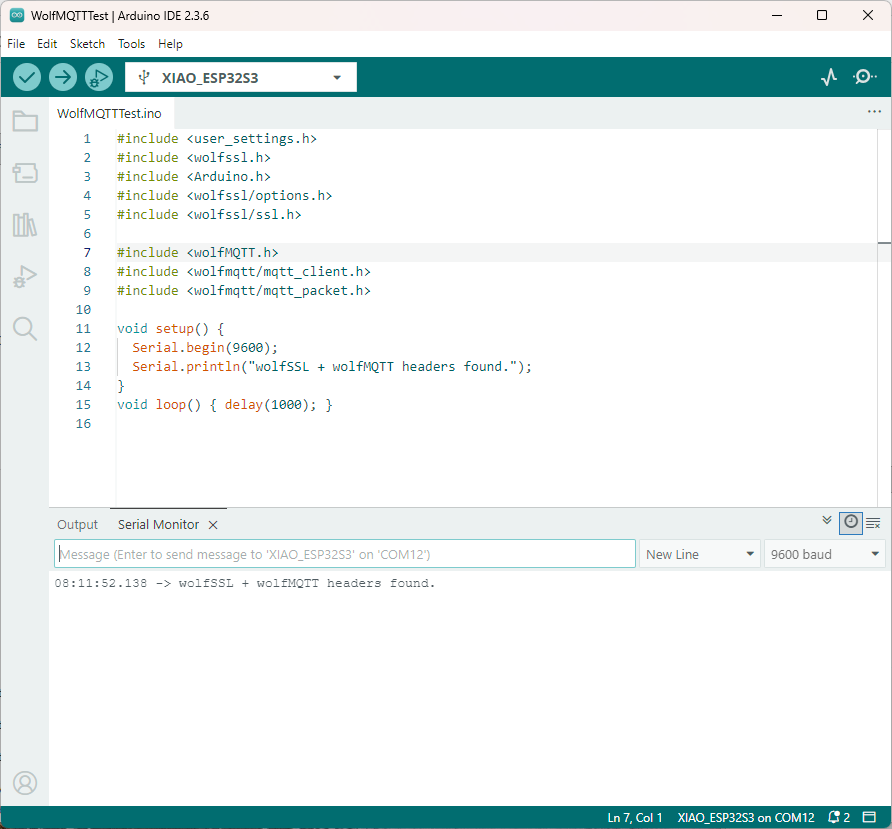
I had the “case” of the header file name wrong, so I changed it to wolfMQTT.h
The compile then worked and the code executed.
After several hours of “fail” I now understand that case is important for header file names in Arduino(maybe due to Unix origins of some of the tools used). The naming of header file is also important so the library can be discovered.
The PEM encoded root CA certificate chain that is used to validate the server
public const string CA_ROOT_PEM = @"-----BEGIN CERTIFICATE-----
CN: CN = Microsoft Azure ECC TLS Issuing CA 03
-----END CERTIFICATE-----
-----BEGIN CERTIFICATE-----
CN: CN = DigiCert Global Root G3
-----END CERTIFICATE-----";
The PEM encoded certificate chain that is used to authenticate the device
public const string CLIENT_CERT_PEM_A = @"-----BEGIN CERTIFICATE-----
-----BEGIN CERTIFICATE-----
CN=Self signed device certificate
-----END CERTIFICATE-----
-----BEGIN CERTIFICATE-----
CN=Self signed Intermediate certificate
-----END CERTIFICATE-----";
The PEM encoded private key of device
public const string CLIENT_KEY_PEM_A = @"-----BEGIN EC PRIVATE KEY-----
-----END EC PRIVATE KEY-----";
For a non-trivial system there should be a number of intermediate certificates. I have tried creating intermediate certificates for a device type, geography, application, customer and combinations of these. The first couple of times got it wrong so start with a field trial so that it isn’t so painful to go back and fix. (beware the sunk cost fallacy)
I found creating an intermediate certificate that could sign device certificates required a conf file for the basicConstraints and keyUsage configuration.
critical-The extension must be understood and processed by any application validating the certificate. If the application does not understand it, the certificate must be rejected.
CA:TRUE-This certificate is allowed to act as a Certificate Authority (CA), meaning it can sign other certificates.
pathlen:0-This CA can only issue end-entity (leaf) certificates and cannot issue further intermediate CA certificates.
keyCertSig- The certificate can be used to sign other certificates (i.e., it’s a CA certificate).
For production systems putting some thought into the Common name(CN), Organizational unit name(OU), Organization name(O), locality name(L), state or province name(S) and Country name(C)
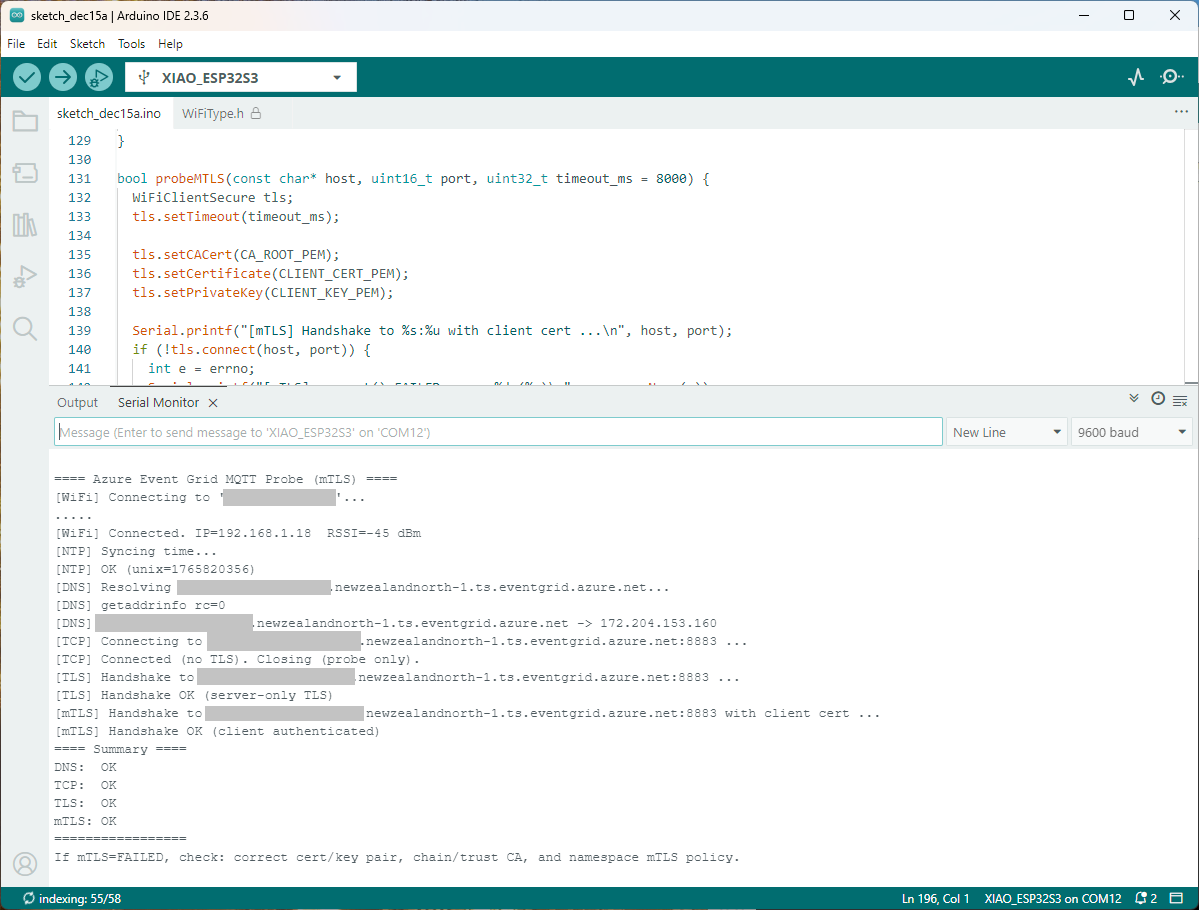
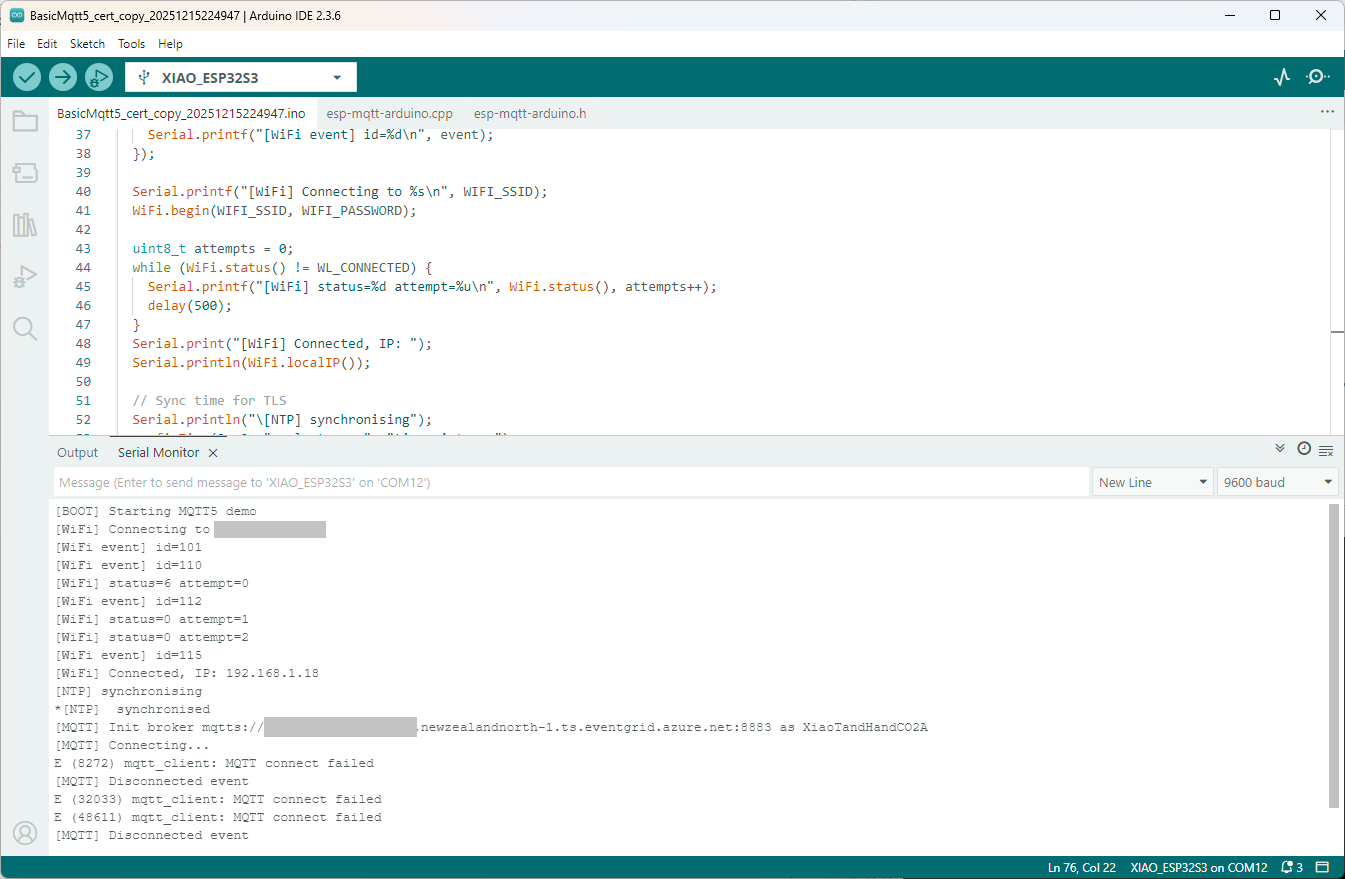
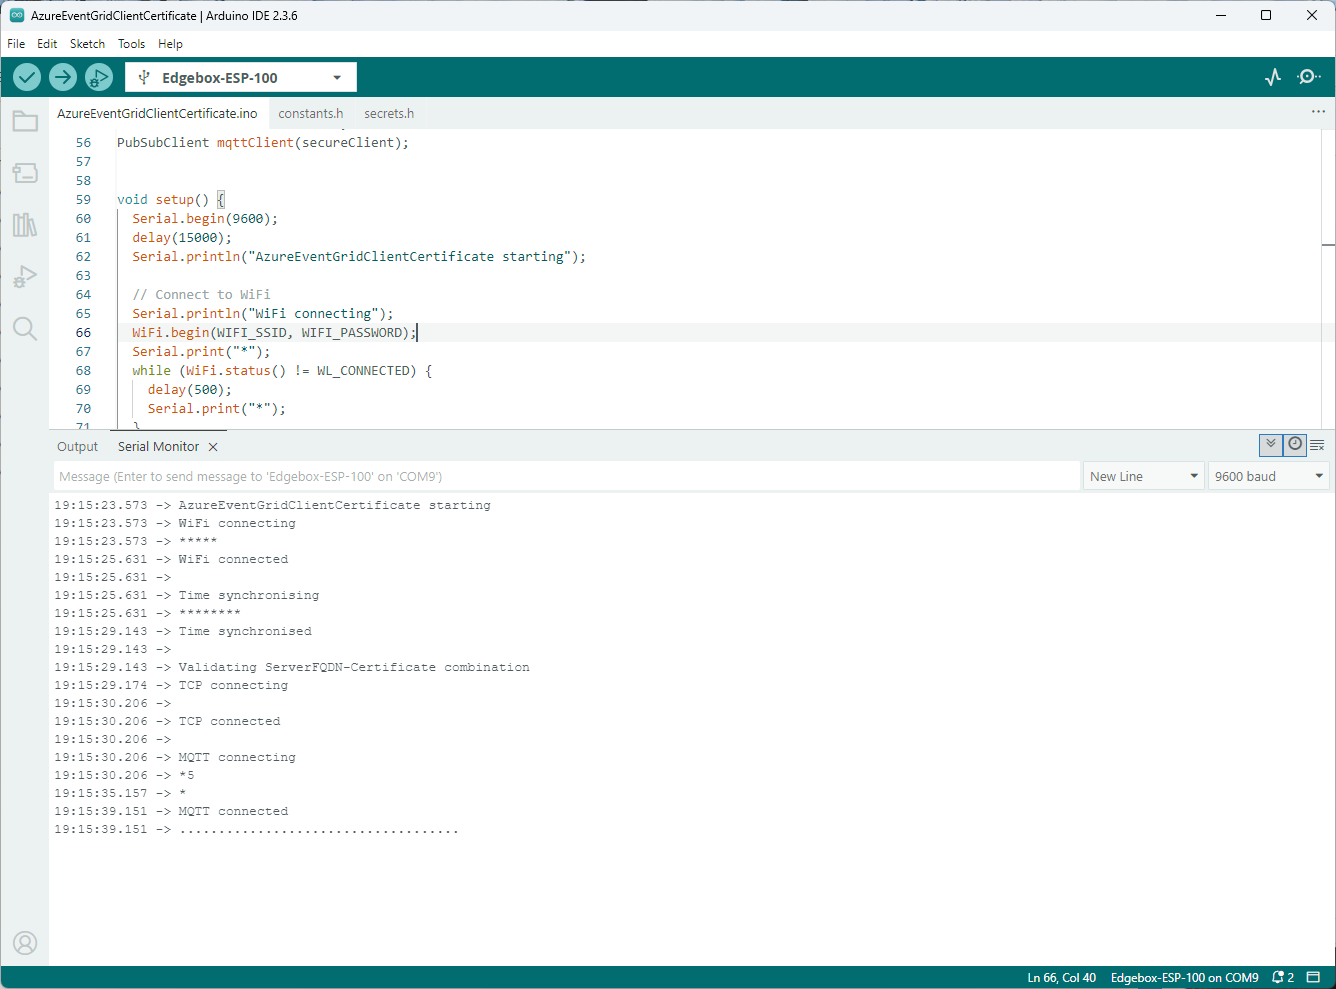
Establishing a connection to the Azure Event Grid MQTT broker often failed which surprised me. Initially I didn’t have any retry logic which meant I wasted quite a bit of time trying to debug failed connections
class Program
{
private static Model.ApplicationSettings _applicationSettings;
private static IMqttClient _client;
private static bool _publisherBusy = false;
static async Task Main()
{
Console.WriteLine($"{DateTime.UtcNow:yy-MM-dd HH:mm:ss} MQTTNet client starting");
try
{
// load the app settings into configuration
var configuration = new ConfigurationBuilder()
.AddJsonFile("appsettings.json", false, true)
.AddUserSecrets<Program>()
.Build();
_applicationSettings = configuration.GetSection("ApplicationSettings").Get<Model.ApplicationSettings>();
var mqttFactory = new MqttFactory();
using (_client = mqttFactory.CreateMqttClient())
{
// Certificate based authentication
List<X509Certificate2> certificates = new List<X509Certificate2>
{
new X509Certificate2(_applicationSettings.ClientCertificateFileName, _applicationSettings.ClientCertificatePassword)
};
var tlsOptions = new MqttClientTlsOptionsBuilder()
.WithClientCertificates(certificates)
.WithSslProtocols(System.Security.Authentication.SslProtocols.Tls12)
.UseTls(true)
.Build();
MqttClientOptions mqttClientOptions = new MqttClientOptionsBuilder()
.WithClientId(_applicationSettings.ClientId)
.WithTcpServer(_applicationSettings.Host, _applicationSettings.Port)
.WithCredentials(_applicationSettings.UserName, _applicationSettings.Password)
.WithCleanStart(_applicationSettings.CleanStart)
.WithTlsOptions(tlsOptions)
.Build();
var connectResult = await _client.ConnectAsync(mqttClientOptions);
if (connectResult.ResultCode != MqttClientConnectResultCode.Success)
{
throw new Exception($"Failed to connect: {connectResult.ReasonString}");
}
_client.ApplicationMessageReceivedAsync += OnApplicationMessageReceivedAsync;
Console.WriteLine($"Subscribed to Topic");
foreach (string topic in _applicationSettings.SubscribeTopics.Split(',', StringSplitOptions.RemoveEmptyEntries | StringSplitOptions.TrimEntries))
{
var subscribeResult = await _client.SubscribeAsync(topic, _applicationSettings.SubscribeQualityOfService);
Console.WriteLine($" {topic} Result:{subscribeResult.Items.First().ResultCode}");
}
}
//...
}
MQTTnet client console application output
The design of the MQTT protocol means that the hivemq-mqtt-client-dotnet and MQTTnet implementations are similar. Having used both I personally prefer the HiveMQ client library.
For one test deployment it took me an hour to generate the Root, Intermediate and a number of Devices certificates which was a waste of time. At this point I decided investigate writing some applications to simplify the process.
static void Main(string[] args)
{
var serviceProvider = new ServiceCollection()
.AddCertificateManager()
.BuildServiceProvider();
// load the app settings into configuration
var configuration = new ConfigurationBuilder()
.AddJsonFile("appsettings.json", false, true)
.AddUserSecrets<Program>()
.Build();
_applicationSettings = configuration.GetSection("ApplicationSettings").Get<Model.ApplicationSettings>();
//------
Console.WriteLine($"validFrom:{validFrom} ValidTo:{validTo}");
var serverRootCertificate = serviceProvider.GetService<CreateCertificatesClientServerAuth>();
var root = serverRootCertificate.NewRootCertificate(
new DistinguishedName {
CommonName = _applicationSettings.CommonName,
Organisation = _applicationSettings.Organisation,
OrganisationUnit = _applicationSettings.OrganisationUnit,
Locality = _applicationSettings.Locality,
StateProvince = _applicationSettings.StateProvince,
Country = _applicationSettings.Country
},
new ValidityPeriod {
ValidFrom = validFrom,
ValidTo = validTo,
},
_applicationSettings.PathLengthConstraint,
_applicationSettings.DnsName);
root.FriendlyName = _applicationSettings.FriendlyName;
Console.Write("PFX Password:");
string password = Console.ReadLine();
if ( String.IsNullOrEmpty(password))
{
Console.WriteLine("PFX Password invalid");
return;
}
var exportCertificate = serviceProvider.GetService<ImportExportCertificate>();
var rootCertificatePfxBytes = exportCertificate.ExportRootPfx(password, root);
File.WriteAllBytes(_applicationSettings.RootCertificateFilePath, rootCertificatePfxBytes);
Console.WriteLine($"Root certificate file:{_applicationSettings.RootCertificateFilePath}");
Console.WriteLine("press enter to exit");
Console.ReadLine();
}
The application’s configuration was split between application settings file(certificate file paths, validity periods, Organisation etc.) or entered at runtime ( certificate filenames, passwords etc.) The first application generates a Root Certificate using the distinguished name information from the application settings, plus file names and passwords entered by the user.
Root Certificate generation application output
The second application generates an Intermediate Certificate using the Root Certificate, the distinguished name information from the application settings, plus file names and passwords entered by the user.
static void Main(string[] args)
{
var serviceProvider = new ServiceCollection()
.AddCertificateManager()
.BuildServiceProvider();
// load the app settings into configuration
var configuration = new ConfigurationBuilder()
.AddJsonFile("appsettings.json", false, true)
.AddUserSecrets<Program>()
.Build();
_applicationSettings = configuration.GetSection("ApplicationSettings").Get<Model.ApplicationSettings>();
//------
Console.WriteLine($"validFrom:{validFrom} be after ValidTo:{validTo}");
Console.WriteLine($"Root Certificate file:{_applicationSettings.RootCertificateFilePath}");
Console.Write("Root Certificate Password:");
string rootPassword = Console.ReadLine();
if (String.IsNullOrEmpty(rootPassword))
{
Console.WriteLine("Fail");
return;
}
var rootCertificate = new X509Certificate2(_applicationSettings.RootCertificateFilePath, rootPassword);
var intermediateCertificateCreate = serviceProvider.GetService<CreateCertificatesClientServerAuth>();
var intermediateCertificate = intermediateCertificateCreate.NewIntermediateChainedCertificate(
new DistinguishedName
{
CommonName = _applicationSettings.CommonName,
Organisation = _applicationSettings.Organisation,
OrganisationUnit = _applicationSettings.OrganisationUnit,
Locality = _applicationSettings.Locality,
StateProvince = _applicationSettings.StateProvince,
Country = _applicationSettings.Country
},
new ValidityPeriod
{
ValidFrom = validFrom,
ValidTo = validTo,
},
_applicationSettings.PathLengthConstraint,
_applicationSettings.DnsName, rootCertificate);
intermediateCertificate.FriendlyName = _applicationSettings.FriendlyName;
Console.Write("Intermediate certificate Password:");
string intermediatePassword = Console.ReadLine();
if (String.IsNullOrEmpty(intermediatePassword))
{
Console.WriteLine("Fail");
return;
}
var importExportCertificate = serviceProvider.GetService<ImportExportCertificate>();
Console.WriteLine($"Intermediate PFX file:{_applicationSettings.IntermediateCertificatePfxFilePath}");
var intermediateCertificatePfxBtyes = importExportCertificate.ExportChainedCertificatePfx(intermediatePassword, intermediateCertificate, rootCertificate);
File.WriteAllBytes(_applicationSettings.IntermediateCertificatePfxFilePath, intermediateCertificatePfxBtyes);
Console.WriteLine($"Intermediate CER file:{_applicationSettings.IntermediateCertificateCerFilePath}");
var intermediateCertificatePemText = importExportCertificate.PemExportPublicKeyCertificate(intermediateCertificate);
File.WriteAllText(_applicationSettings.IntermediateCertificateCerFilePath, intermediateCertificatePemText);
Console.WriteLine("press enter to exit");
Console.ReadLine();
}
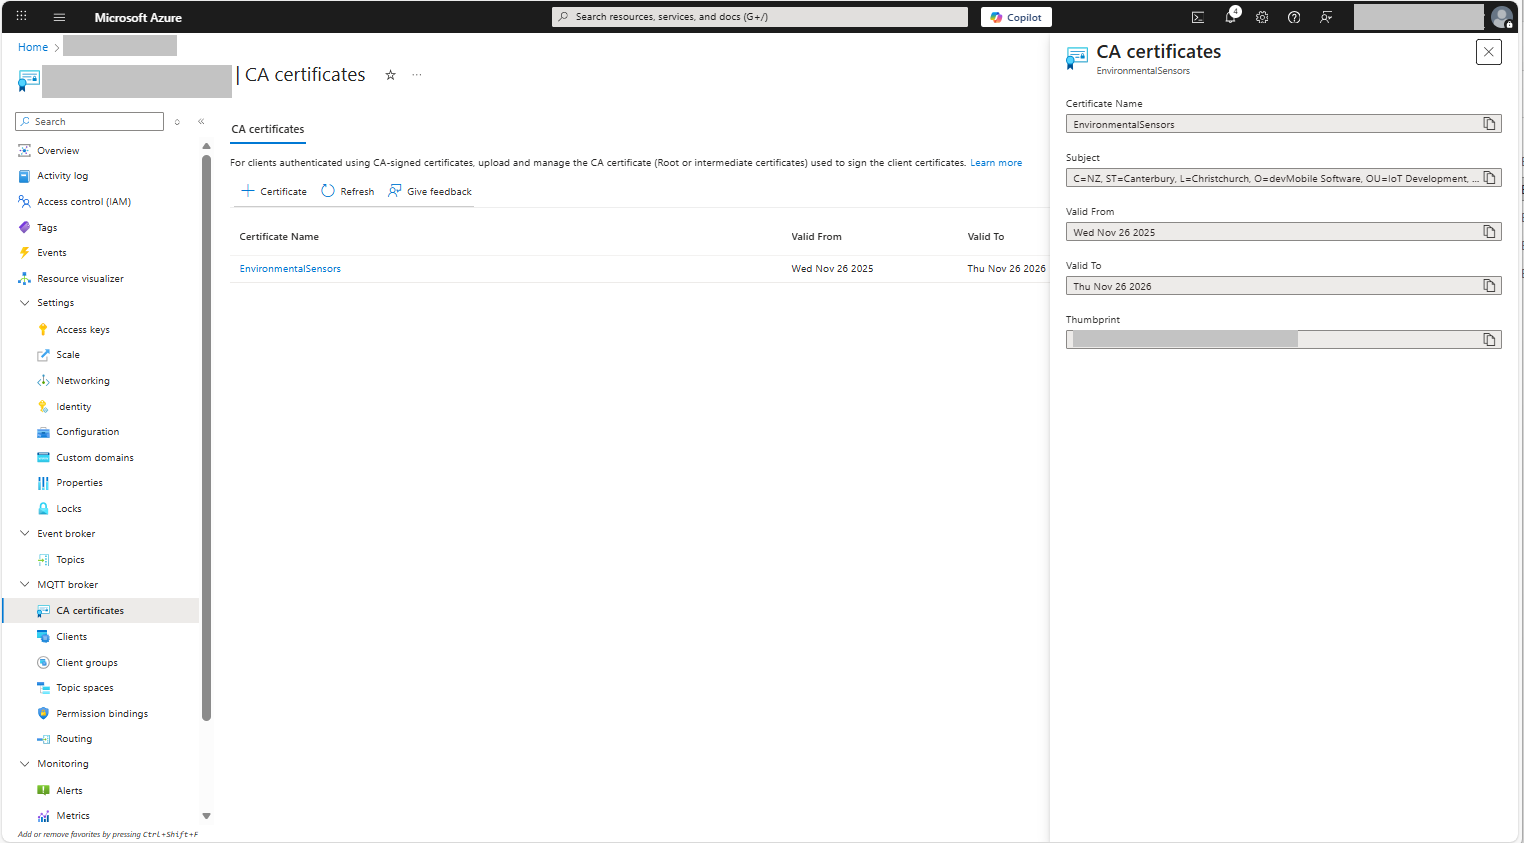
Uploading the Intermediate certificate to Azure Event Grid
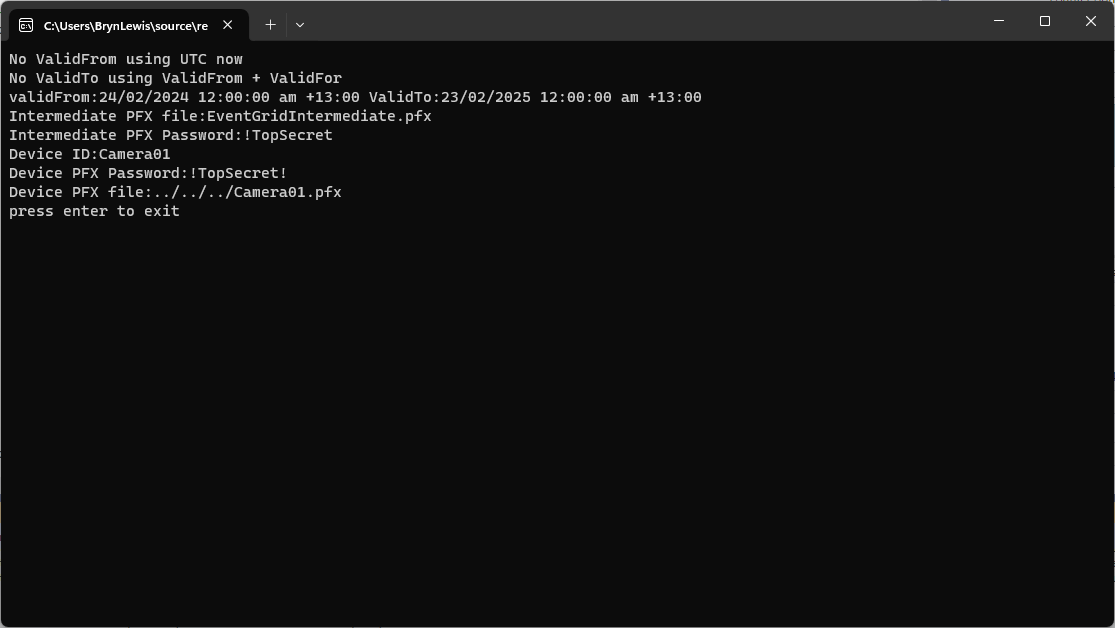
The third application generates Device Certificates using the Intermediate Certificate, distinguished name information from the application settings, plus device id, file names and passwords entered by the user.
static void Main(string[] args)
{
var serviceProvider = new ServiceCollection()
.AddCertificateManager()
.BuildServiceProvider();
// load the app settings into configuration
var configuration = new ConfigurationBuilder()
.AddJsonFile("appsettings.json", false, true)
.AddUserSecrets<Program>()
.Build();
_applicationSettings = configuration.GetSection("ApplicationSettings").Get<Model.ApplicationSettings>();
//------
Console.WriteLine($"validFrom:{validFrom} ValidTo:{validTo}");
Console.WriteLine($"Intermediate PFX file:{_applicationSettings.IntermediateCertificateFilePath}");
Console.Write("Intermediate PFX Password:");
string intermediatePassword = Console.ReadLine();
if (String.IsNullOrEmpty(intermediatePassword))
{
Console.WriteLine("Intermediate PFX Password invalid");
return;
}
var intermediate = new X509Certificate2(_applicationSettings.IntermediateCertificateFilePath, intermediatePassword);
Console.Write("Device ID:");
string deviceId = Console.ReadLine();
if (String.IsNullOrEmpty(deviceId))
{
Console.WriteLine("Device ID invalid");
return;
}
var createClientServerAuthCerts = serviceProvider.GetService<CreateCertificatesClientServerAuth>();
var device = createClientServerAuthCerts.NewDeviceChainedCertificate(
new DistinguishedName
{
CommonName = deviceId,
Organisation = _applicationSettings.Organisation,
OrganisationUnit = _applicationSettings.OrganisationUnit,
Locality = _applicationSettings.Locality,
StateProvince = _applicationSettings.StateProvince,
Country = _applicationSettings.Country
},
new ValidityPeriod
{
ValidFrom = validFrom,
ValidTo = validTo,
},
deviceId, intermediate);
device.FriendlyName = deviceId;
Console.Write("Device PFX Password:");
string devicePassword = Console.ReadLine();
if (String.IsNullOrEmpty(devicePassword))
{
Console.WriteLine("Fail");
return;
}
var importExportCertificate = serviceProvider.GetService<ImportExportCertificate>();
string devicePfxPath = string.Format(_applicationSettings.DeviceCertificatePfxFilePath, deviceId);
Console.WriteLine($"Device PFX file:{devicePfxPath}");
var deviceCertificatePath = importExportCertificate.ExportChainedCertificatePfx(devicePassword, device, intermediate);
File.WriteAllBytes(devicePfxPath, deviceCertificatePath);
Console.WriteLine("press enter to exit");
Console.ReadLine();
}
Device Certificate generation application output
Uploading the Intermediate certificate to Azure Event Grid
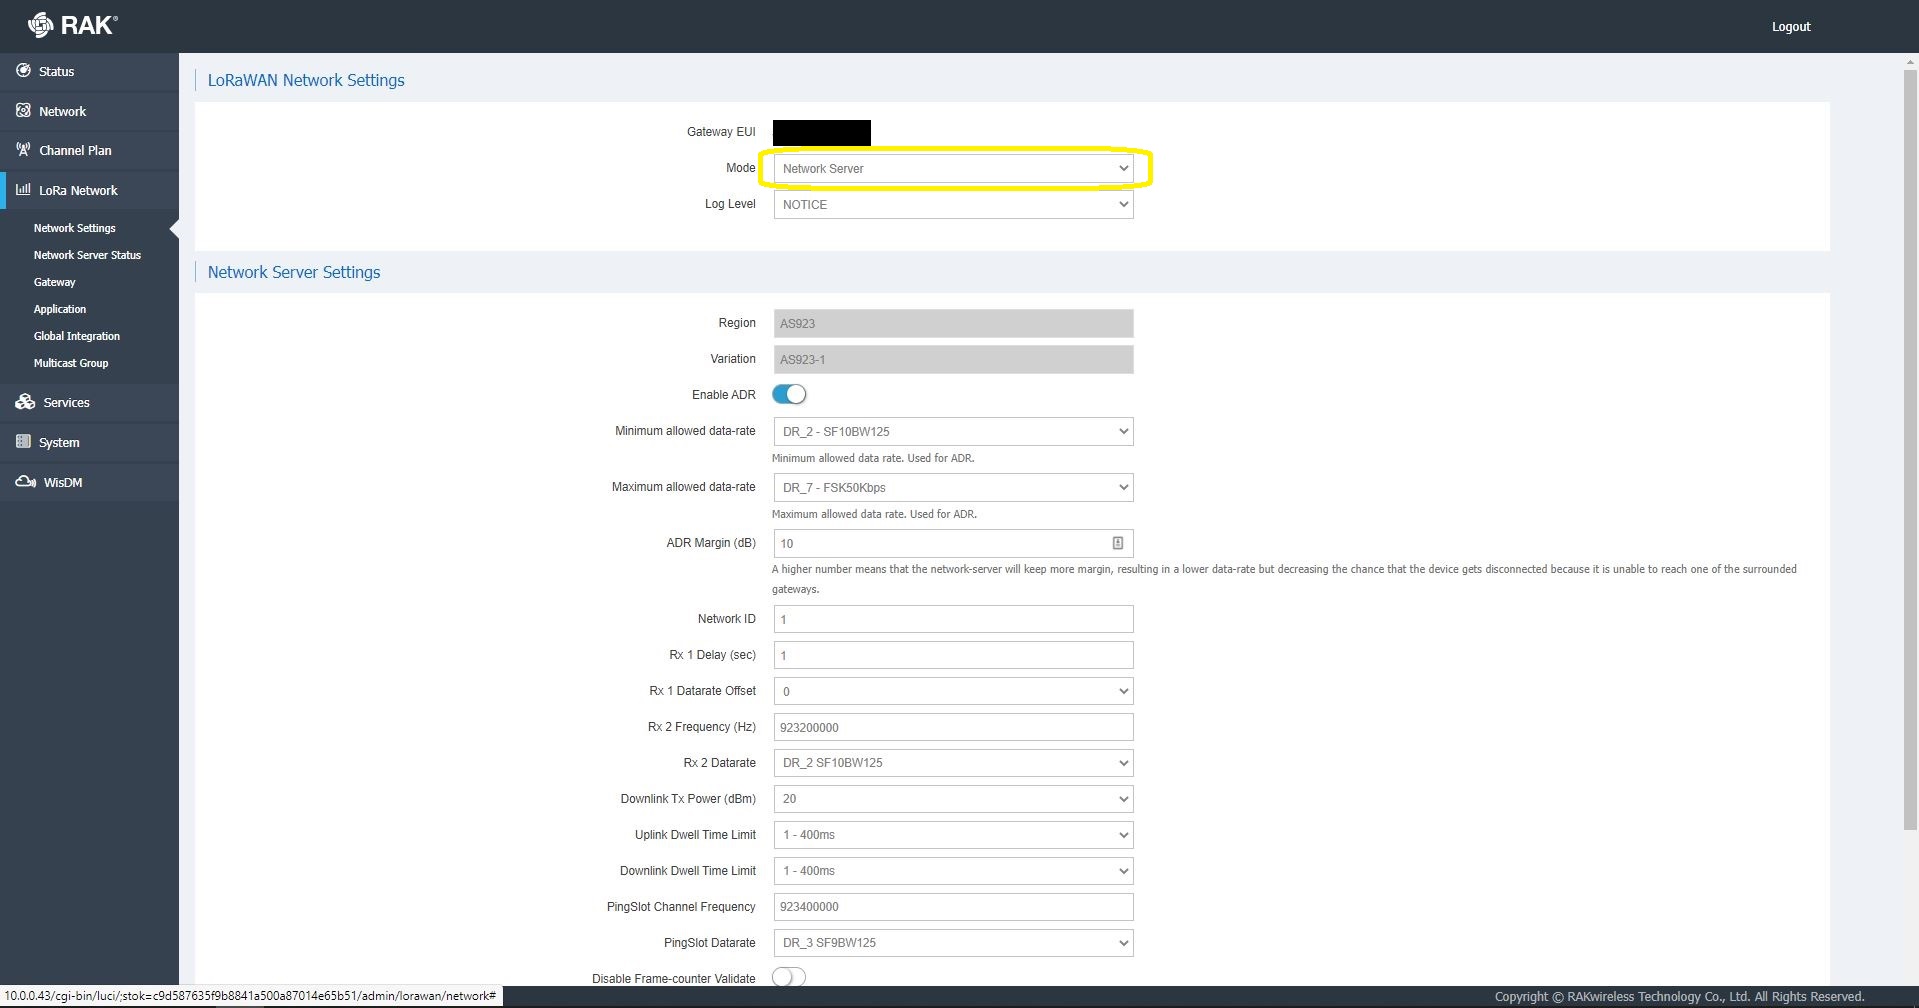
I then started exploring how applications and devices are provisioned in the RAK Network Server.
RAK 7258 Network Server applications list
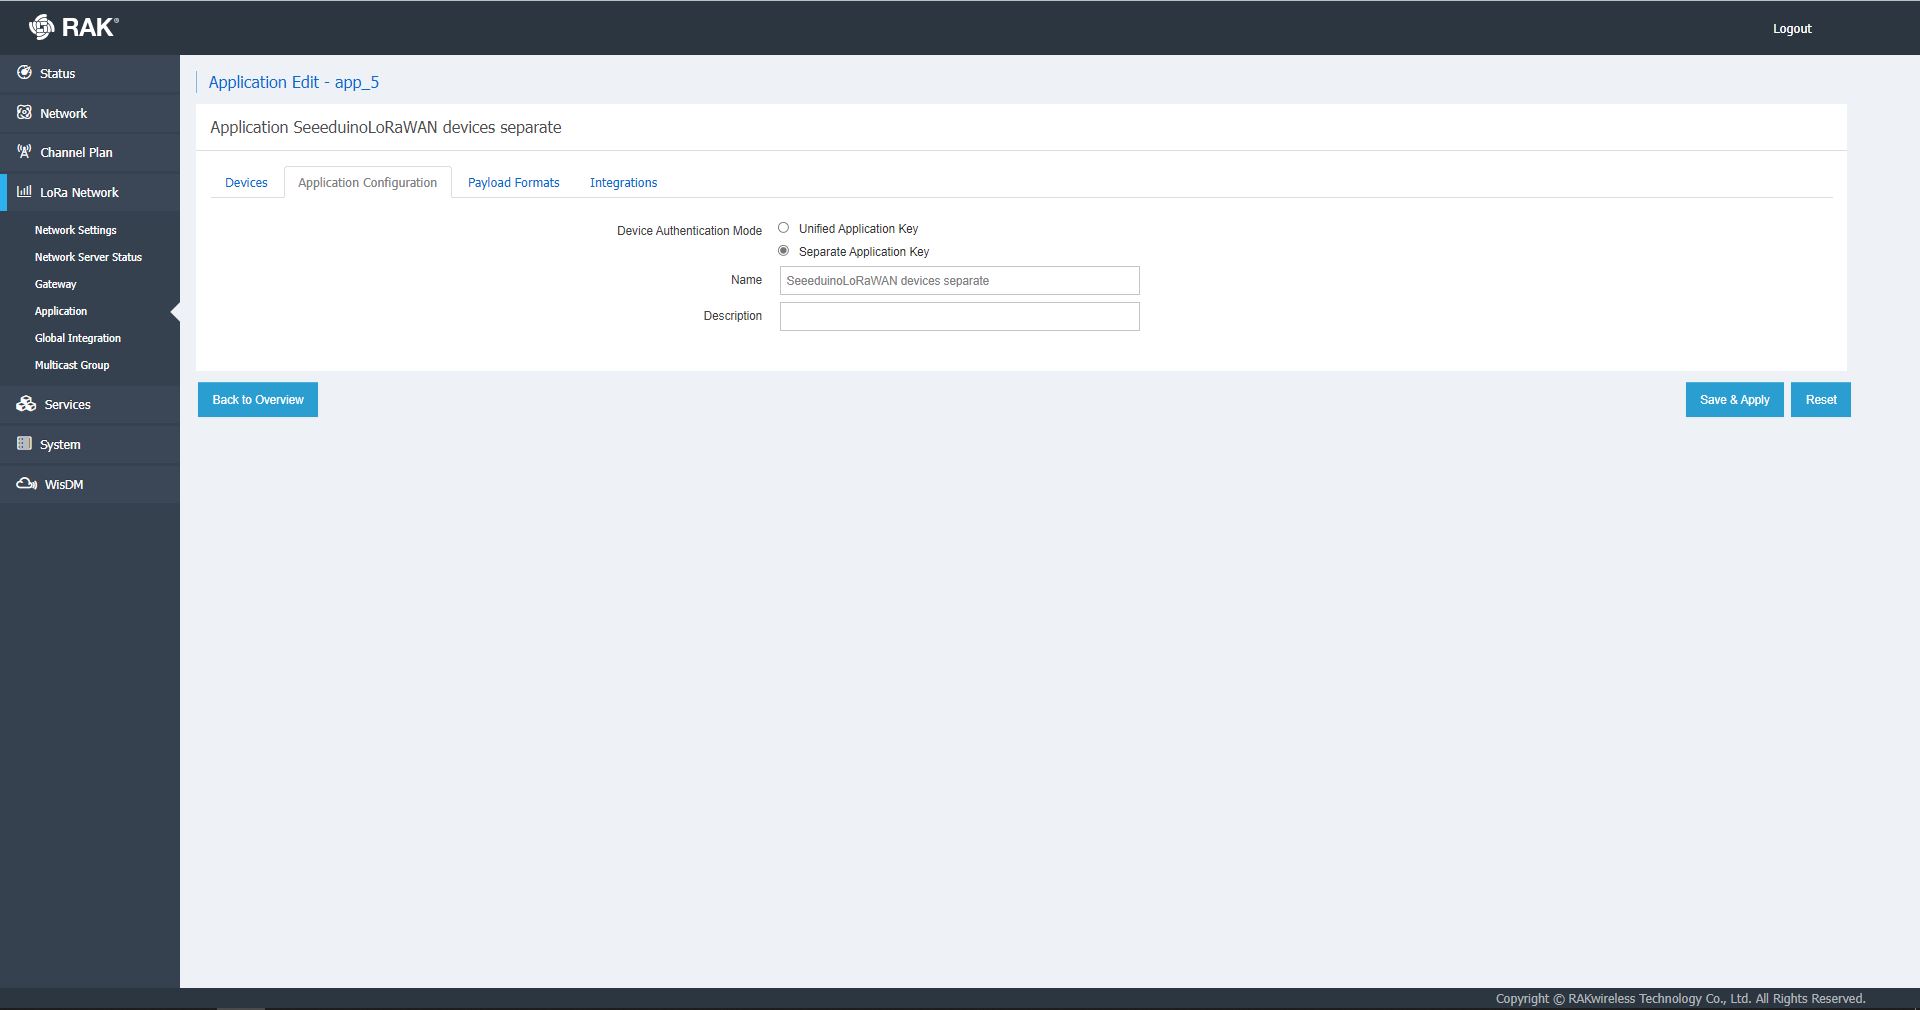
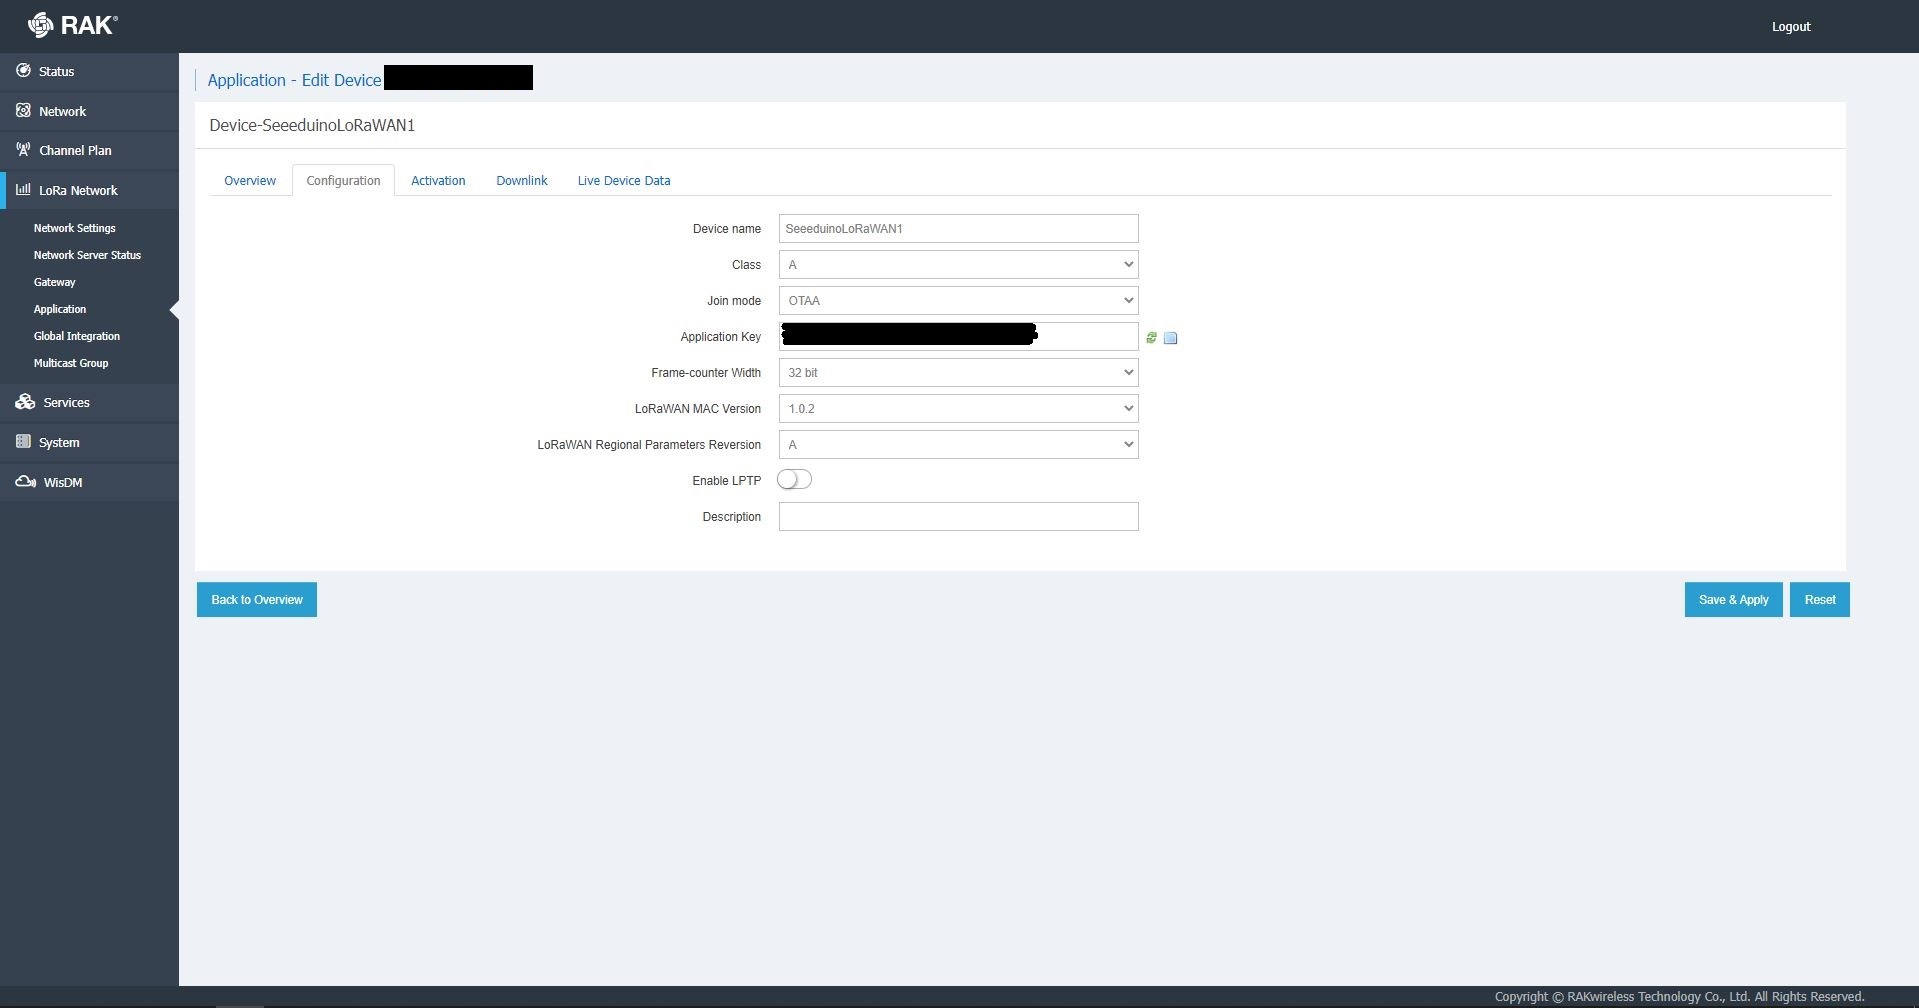
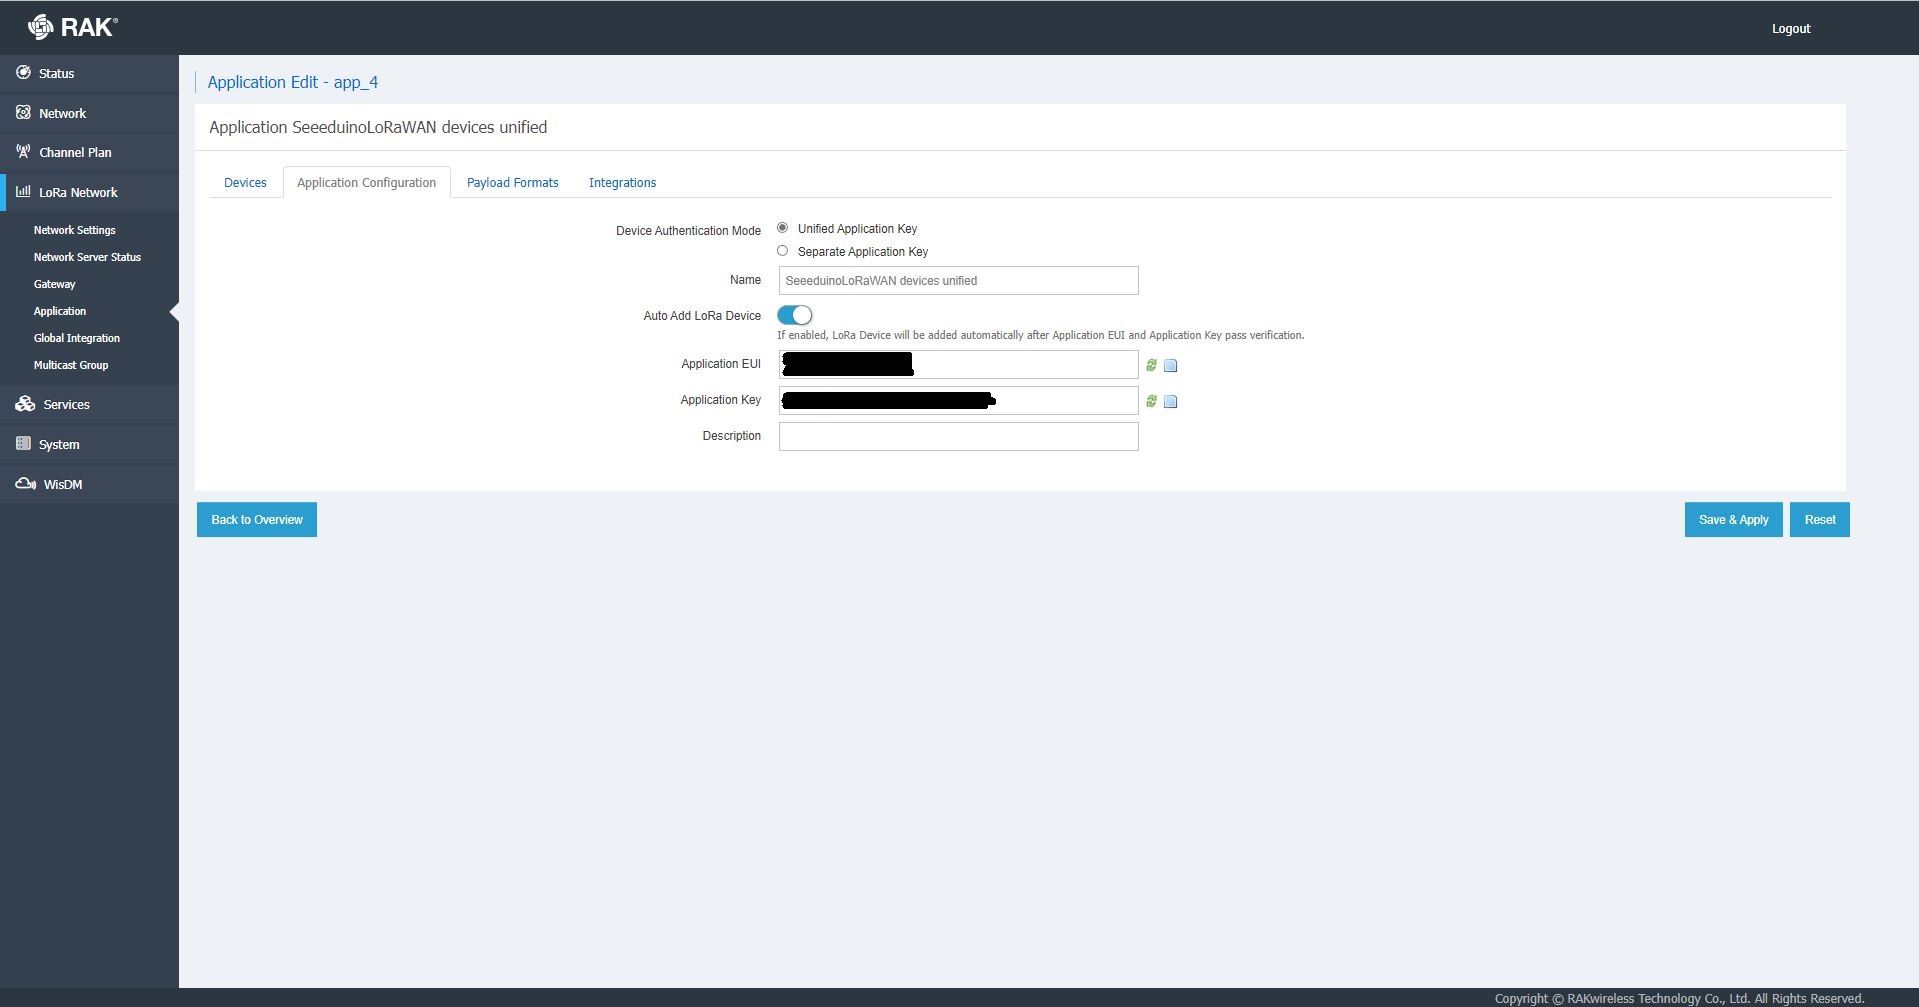
The network server software has “unified” and “separate” “Device authentication mode”s and will “auto Add LoRa Device”s if enabled.
RAK 7258 Network Server Separate Application basic setup
RAK 7258 Network Server Separate Application device basic setup
RAK 7258 Network Server Unified Application device basic setup
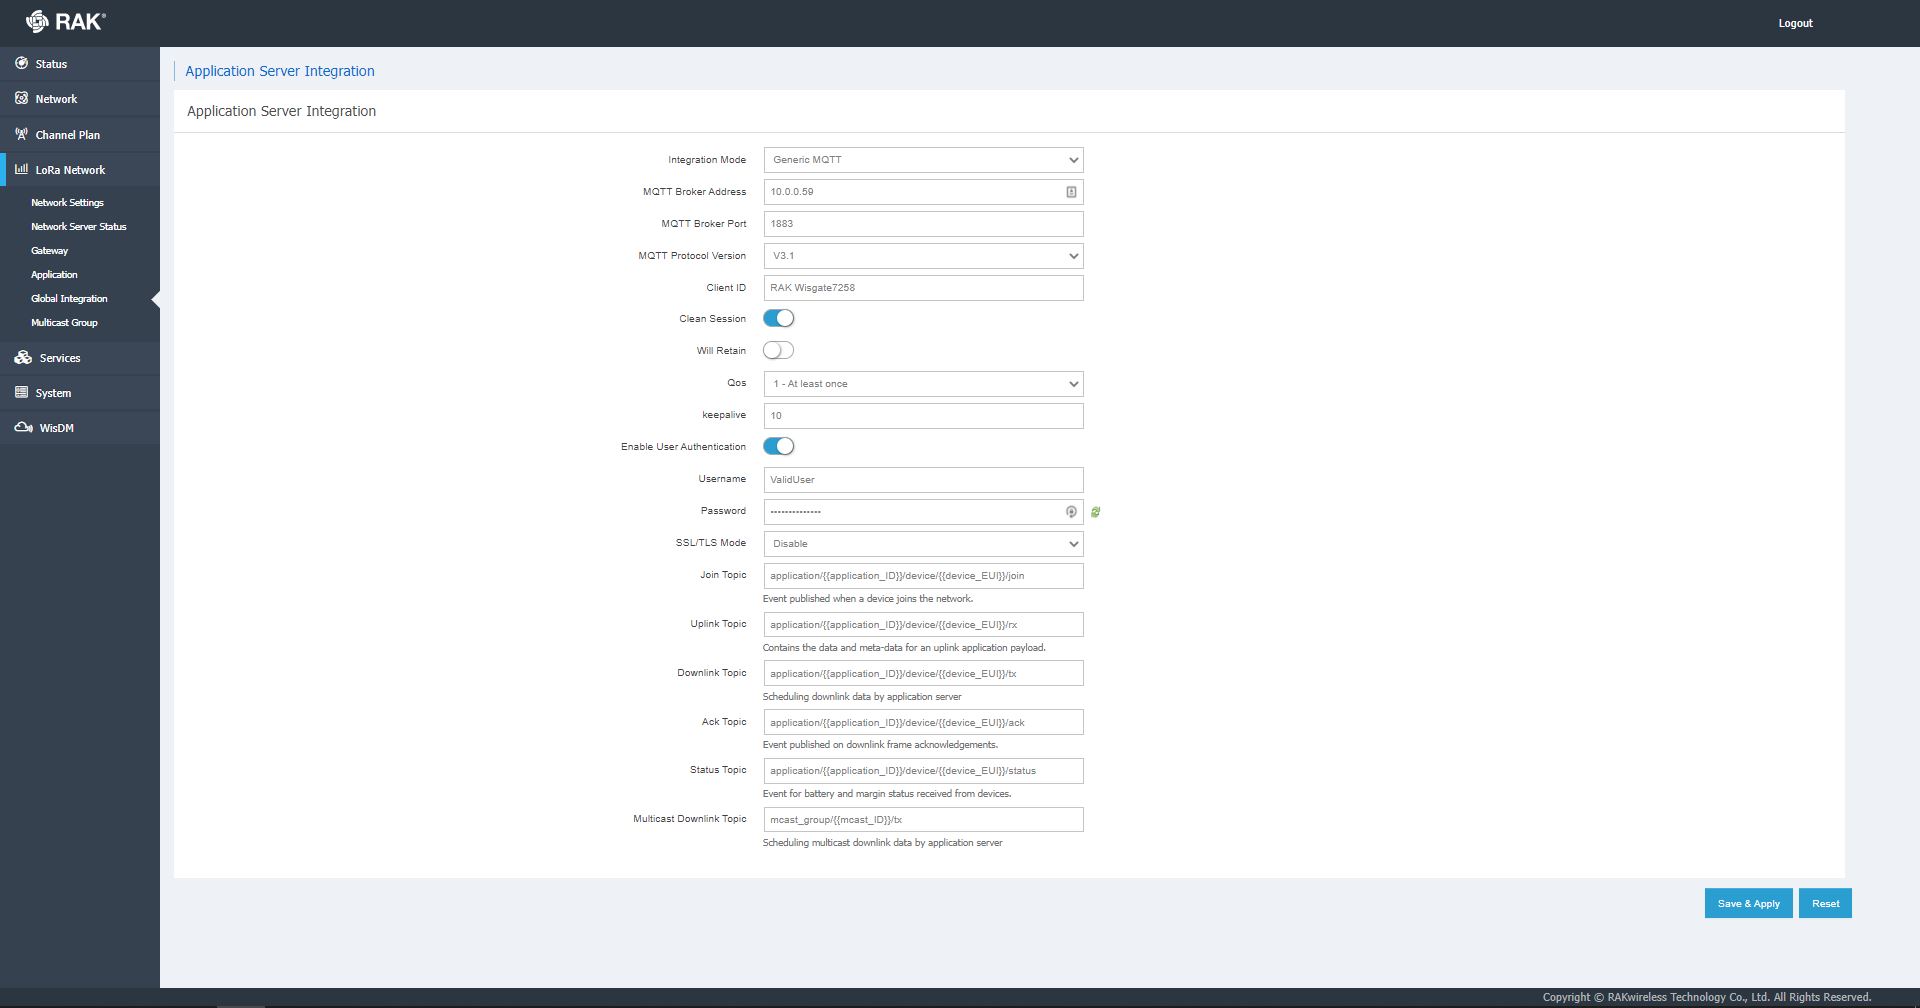
Applications also have configurable payload formats(raw & LPP) and integrations (uplink messages plus join, ack, and device notifications etc.)
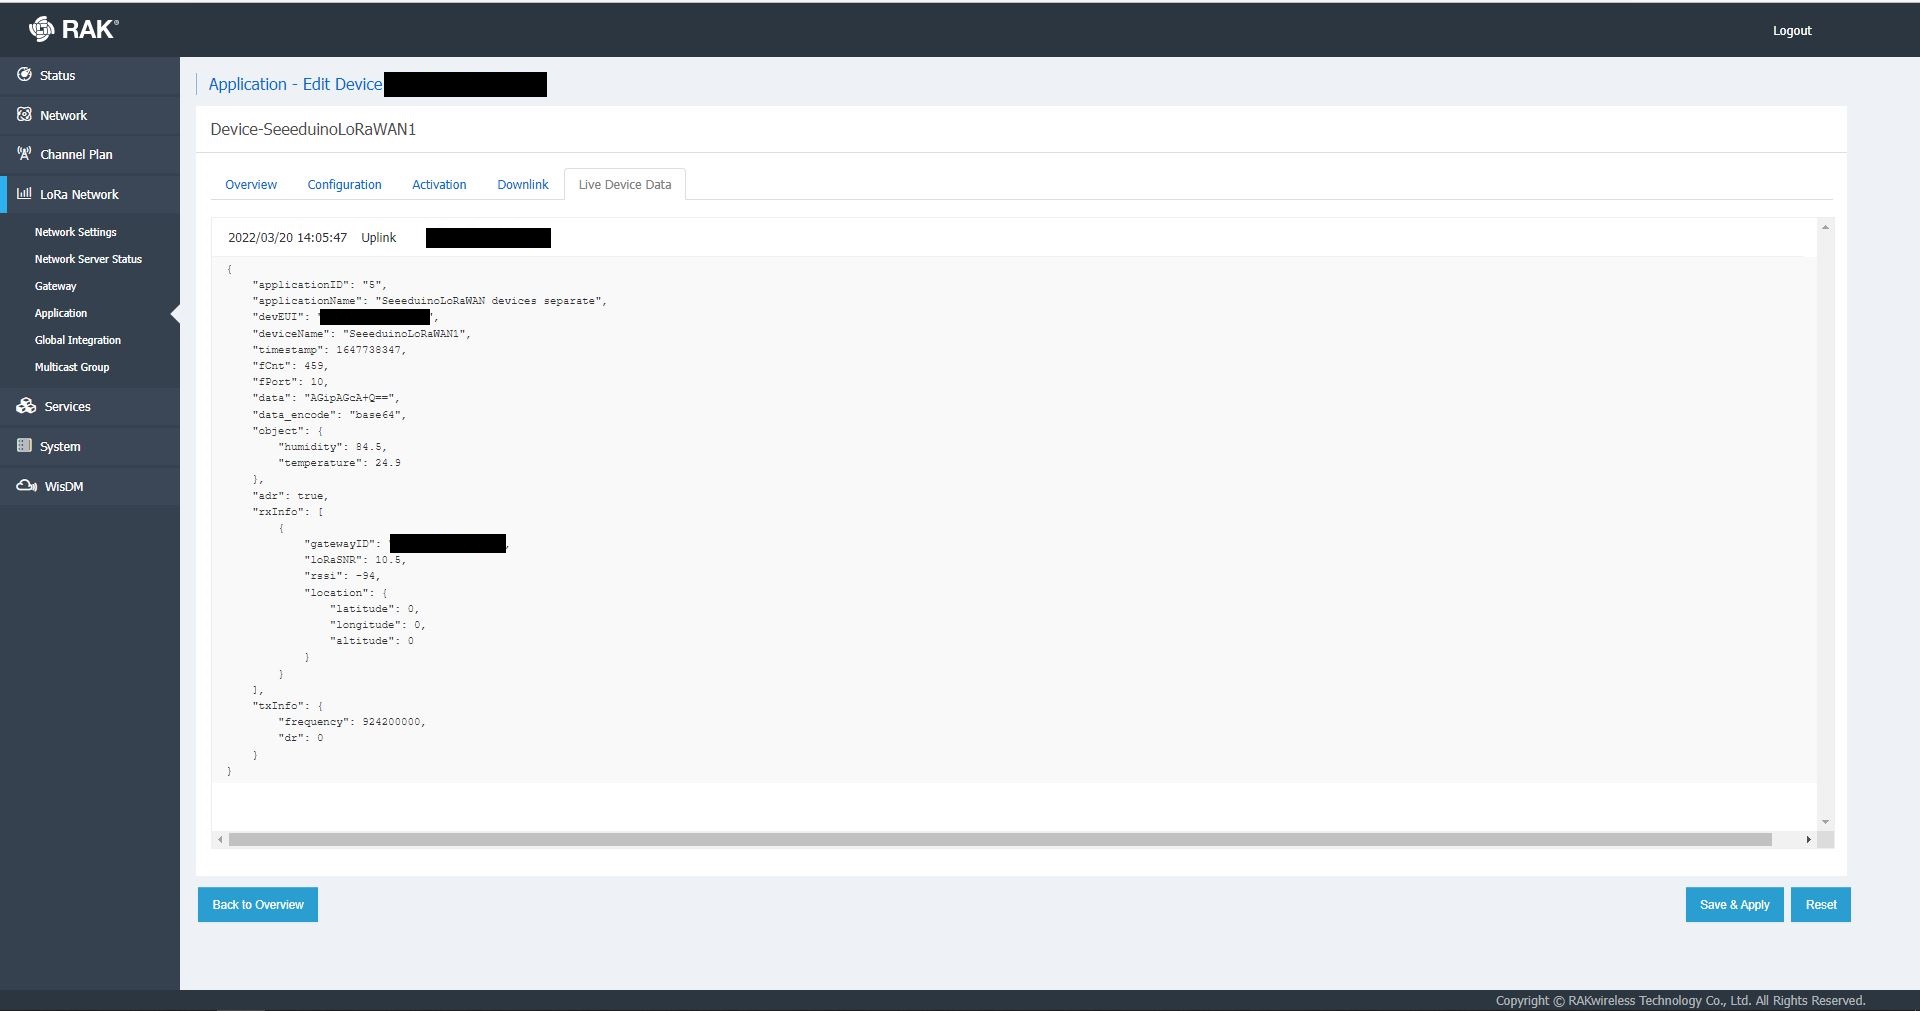
RAK7258 live device data display
In the sample server I could see how ValidatingConnectionAsync was used to check the clientID, username and password when a device connected. I just wanted to display messages and payloads without having to use an MQTT client and it looked like InterceptingPublishAsync was a possible solution.
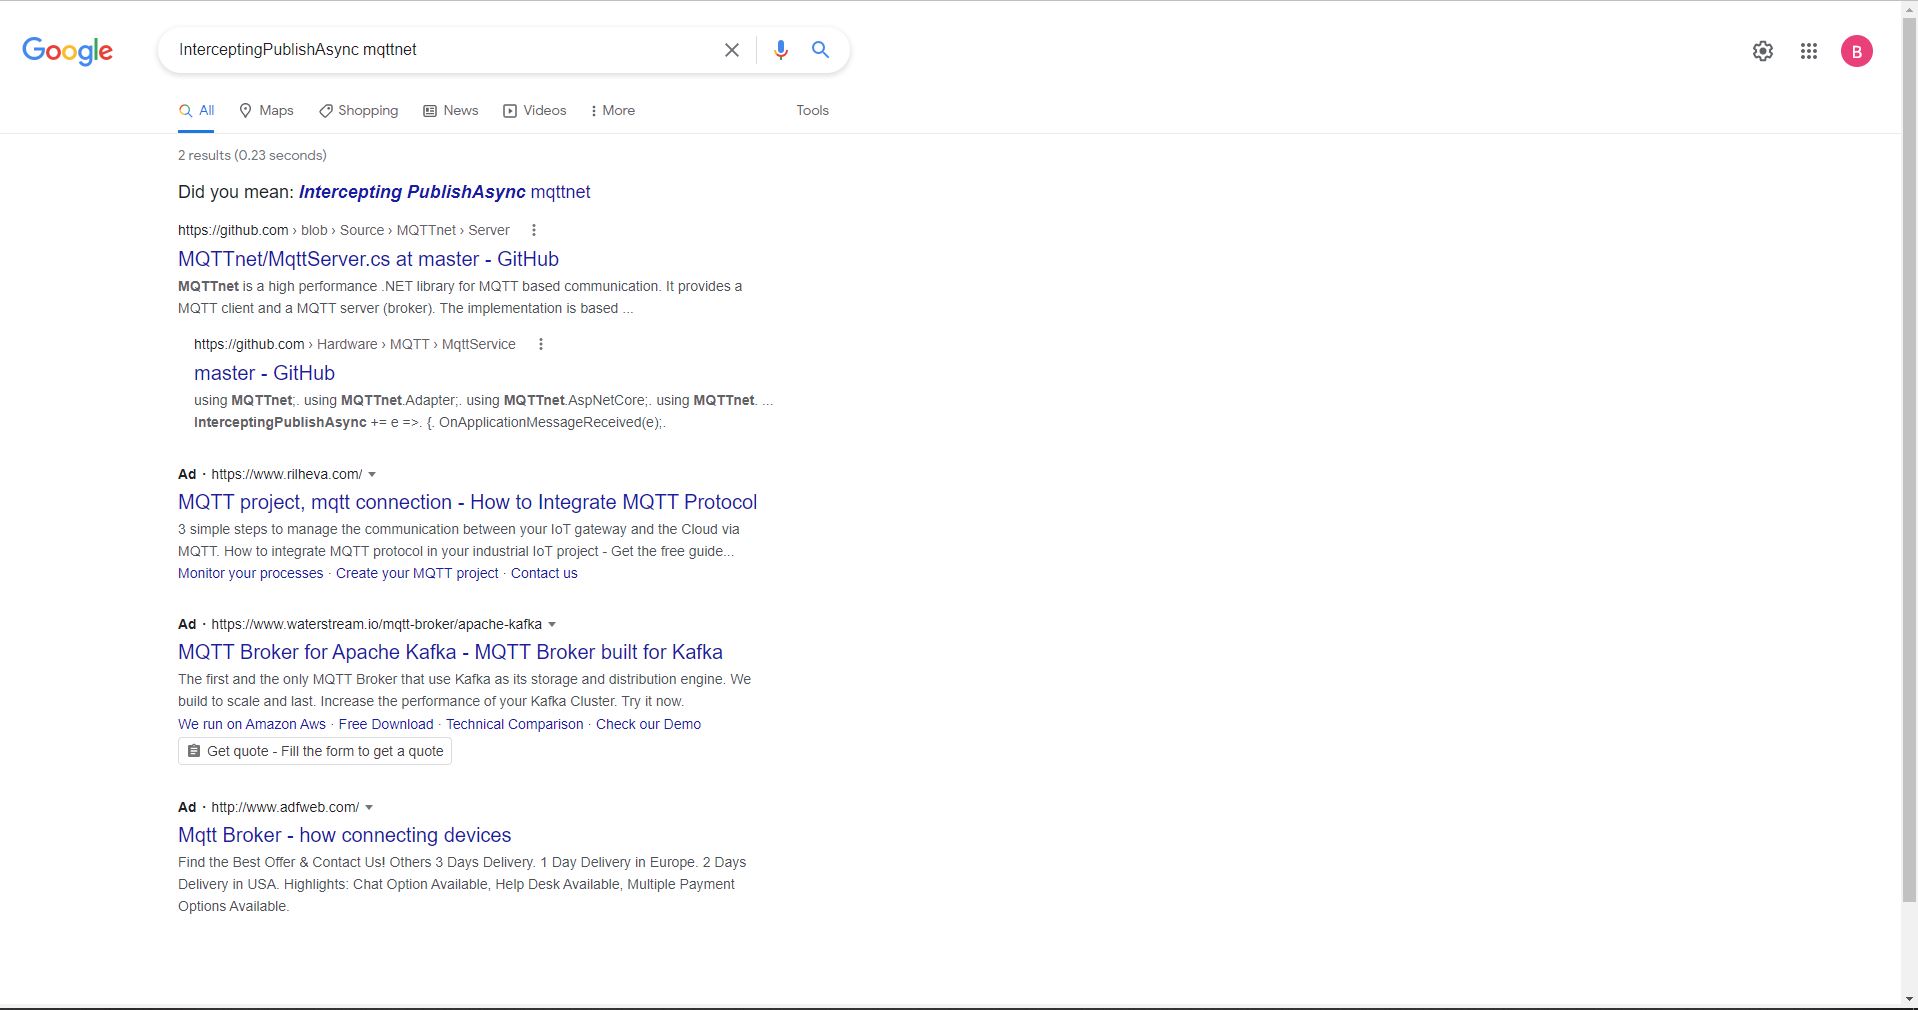
But the search results were a bit sparse…
InterceptingPublishAsync + MQTTNet search results
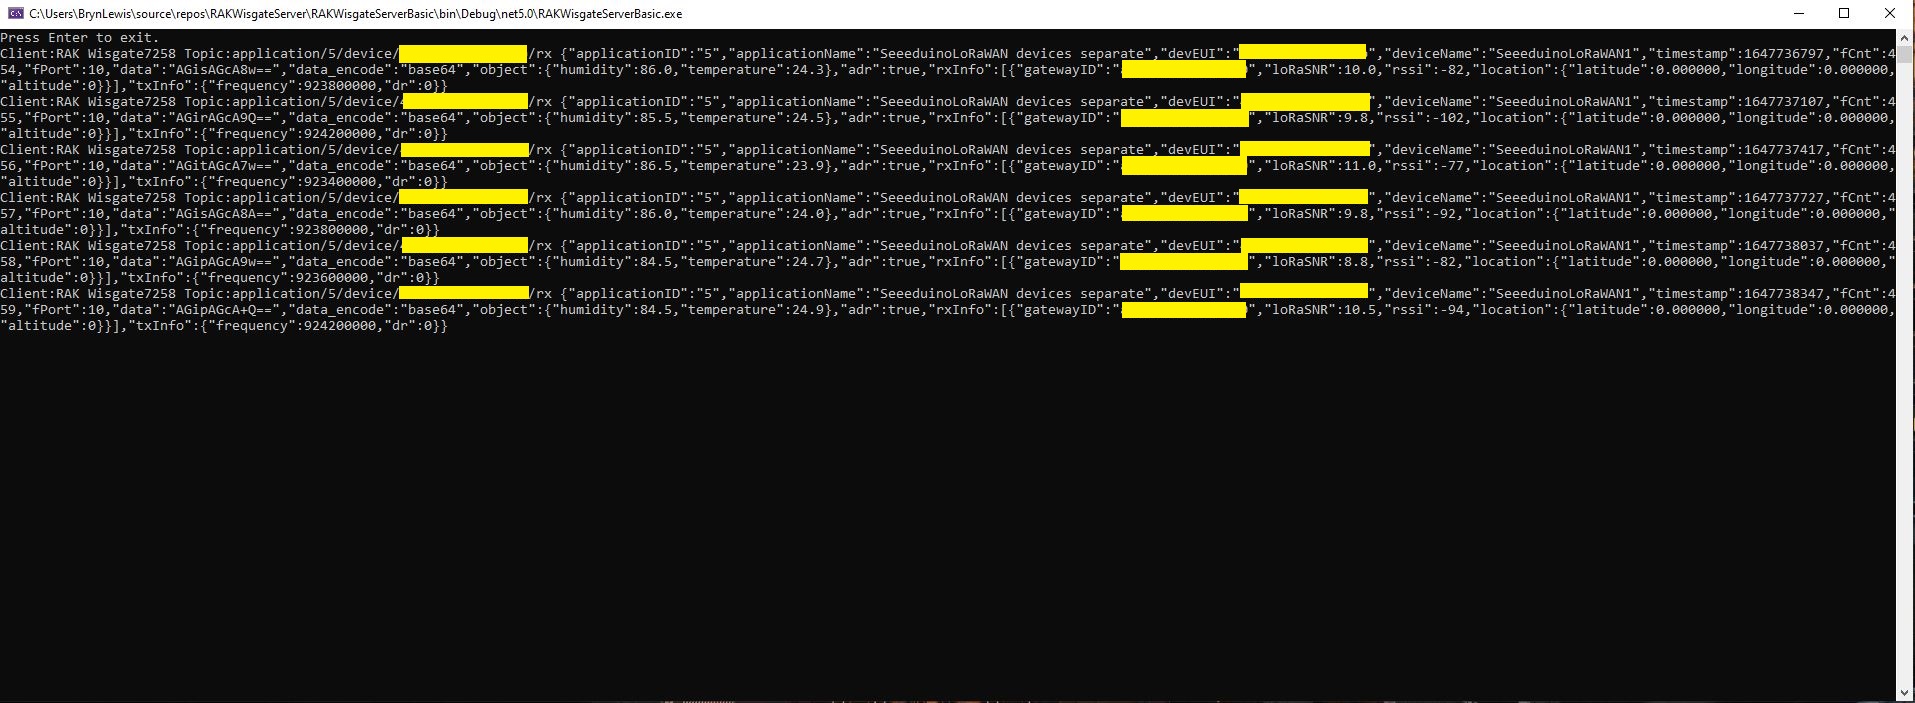
After some reading the MQTTNet documentation and some experimentation I could display the message payload (same as in the live device data display) in a “nasty” console application.
namespace devMobile.IoT.RAKWisgate.ServerBasic
{
using System;
using System.Threading.Tasks;
using MQTTnet;
using MQTTnet.Protocol;
using MQTTnet.Server;
public static class Program
{
static async Task Main(string[] args)
{
var mqttFactory = new MqttFactory();
var mqttServerOptions = new MqttServerOptionsBuilder()
.WithDefaultEndpoint()
.Build();
using (var mqttServer = mqttFactory.CreateMqttServer(mqttServerOptions))
{
mqttServer.InterceptingPublishAsync += e =>
{
Console.WriteLine($"Client:{e.ClientId} Topic:{e.ApplicationMessage.Topic} {e.ApplicationMessage.ConvertPayloadToString()}");
return Task.CompletedTask;
};
mqttServer.ValidatingConnectionAsync += e =>
{
if (e.ClientId != "RAK Wisgate7258")
{
e.ReasonCode = MqttConnectReasonCode.ClientIdentifierNotValid;
}
if (e.Username != "ValidUser")
{
e.ReasonCode = MqttConnectReasonCode.BadUserNameOrPassword;
}
if (e.Password != "TopSecretPassword")
{
e.ReasonCode = MqttConnectReasonCode.BadUserNameOrPassword;
}
return Task.CompletedTask;
};
await mqttServer.StartAsync();
Console.WriteLine("Press Enter to exit.");
Console.ReadLine();
await mqttServer.StopAsync();
}
}
}
}
MQTTNet based console application displaying device payloads
The process of provisioning Applications and Devices is quite different (The use of the AppEUI/JoinEUI is odd) to The Things Network(TTN) and other platforms I have used so I will explore this some more in future post(s).
Earlier in the year I built Things Network(TTN)V2 and V3 connectors and after using these in production applications I have learnt a lot about what I had got wrong, less wrong and what I had got right.
Using a TTN V3MQTTApplication integration wasn’t a great idea. The management of state was very complex. The storage of application keys in a app.settings file made configuration easy but was bad for security.
The use of Azure Key Vault in the TTNV2 connector was a good approach, but the process of creation and updating of the settings needs to be easier.
Using TTN device registry as the “single source of truth” was a good decision as managing the amount of LoRaWAN network, application and device specific configuration in an Azure IoT Hub would be non-trivial.
While debugging the connector on my desktop I had noticed that using a connection string was quite a bit faster than using DPS and I had assumed this was just happenstance. While doing some testing in the Azure North Europe data-center (Closer to TTI European servers) I grabbed some screen shots of the trace messages in Azure Application Insights as the TTI Connector Application was starting.
I only have six LoRaWAN devices configured in my TTI dev instance, but I repeated each test several times and the results were consistent so the request durations are reasonable. My TTI Connector application, IoT Hub, DPS and Application insights instances are all in the same Azure Region and Azure Resource Group so networking overheads shouldn’t be significant.
Using my own DPS instance to provide the connection string and then establishing a connection took between 3 and 7 seconds.
Azure IoT Central DPS
For my Azure IoT Central instance getting a connection string and establishing a connection took between 4 and 7 seconds.
The Azure DPS client code was copied from one of the sample applications so I have assumed it is “correct”.
using (var transport = new ProvisioningTransportHandlerAmqp(TransportFallbackType.TcpOnly))
{
ProvisioningDeviceClient provClient = ProvisioningDeviceClient.Create(
Constants.AzureDpsGlobalDeviceEndpoint,
deviceProvisiongServiceSettings.IdScope,
securityProvider,
transport);
DeviceRegistrationResult result;
if (!string.IsNullOrEmpty(modelId))
{
ProvisioningRegistrationAdditionalData provisioningRegistrationAdditionalData = new ProvisioningRegistrationAdditionalData()
{
JsonData = $"{{"modelId": "{modelId}"}}"
};
result = await provClient.RegisterAsync(provisioningRegistrationAdditionalData, stoppingToken);
}
else
{
result = await provClient.RegisterAsync(stoppingToken);
}
if (result.Status != ProvisioningRegistrationStatusType.Assigned)
{
_logger.LogError("Config-DeviceID:{0} Status:{1} RegisterAsync failed ", deviceId, result.Status);
return false;
}
IAuthenticationMethod authentication = new DeviceAuthenticationWithRegistrySymmetricKey(result.DeviceId, (securityProvider as SecurityProviderSymmetricKey).GetPrimaryKey());
deviceClient = DeviceClient.Create(result.AssignedHub, authentication, transportSettings);
}
I need to investigate why getting a connection string from the DPS then connecting take significantly longer (I appreciate that “behind the scenes” service calls maybe required). This wouldn’t be an issue for individual devices connecting from different locations but for my Identity Translation Cloud gateway which currently open connections sequentially this could be a problem when there are a large number of devices.
If the individual requests duration can’t be reduced (using connection pooling etc.) I may have to spin up multiple threads so multiple devices can be connecting concurrently.
The first step was to configure and Azure IoT Central enrollment group (ensure “Automatically connect devices in this group” is on) and copy the IDScope and Group Enrollment key to the appsettings.json file (see sample file below for more detail)
At startup the TTI Gateway enumerates through the devices in each application configured in the app.settings.json. The Azure Device Provisioning Service(DPS) is used to retrieve each device’s connection string and configure it in Azure IoT Central if required.
Azure IoT Central Device Group with no provisioned DevicesTTI Connector application connecting and provisioning EndDevices
Azure IoT Central devices mapped to an Azure IoT Central Template via the modelID
using (var transport = new ProvisioningTransportHandlerAmqp(TransportFallbackType.TcpOnly))
{
ProvisioningDeviceClient provClient = ProvisioningDeviceClient.Create(
Constants.AzureDpsGlobalDeviceEndpoint,
deviceProvisiongServiceSettings.IdScope,
securityProvider,
transport);
DeviceRegistrationResult result;
if (!string.IsNullOrEmpty(modelId))
{
ProvisioningRegistrationAdditionalData provisioningRegistrationAdditionalData = new ProvisioningRegistrationAdditionalData()
{
JsonData = $"{{\"modelId\": \"{modelId}\"}}"
};
result = await provClient.RegisterAsync(provisioningRegistrationAdditionalData, stoppingToken);
}
else
{
result = await provClient.RegisterAsync(stoppingToken);
}
if (result.Status != ProvisioningRegistrationStatusType.Assigned)
{
_logger.LogError("Config-DeviceID:{0} Status:{1} RegisterAsync failed ", deviceId, result.Status);
return false;
}
IAuthenticationMethod authentication = new DeviceAuthenticationWithRegistrySymmetricKey(result.DeviceId, (securityProvider as SecurityProviderSymmetricKey).GetPrimaryKey());
deviceClient = DeviceClient.Create(result.AssignedHub, authentication, transportSettings);
}
My implementation was “inspired” by TemperatureController project in the PnP Device Samples.
Azure IoT Central Dashboard with Seeeduino LoRaWAN devices around my house that were “automagically” provisioned
I need to do some testing to confirm my code works reliably with both DPS and user provided connection strings. The RegisterAsync call is currently taking about four seconds which could be an issue for TTI applications with many devices.