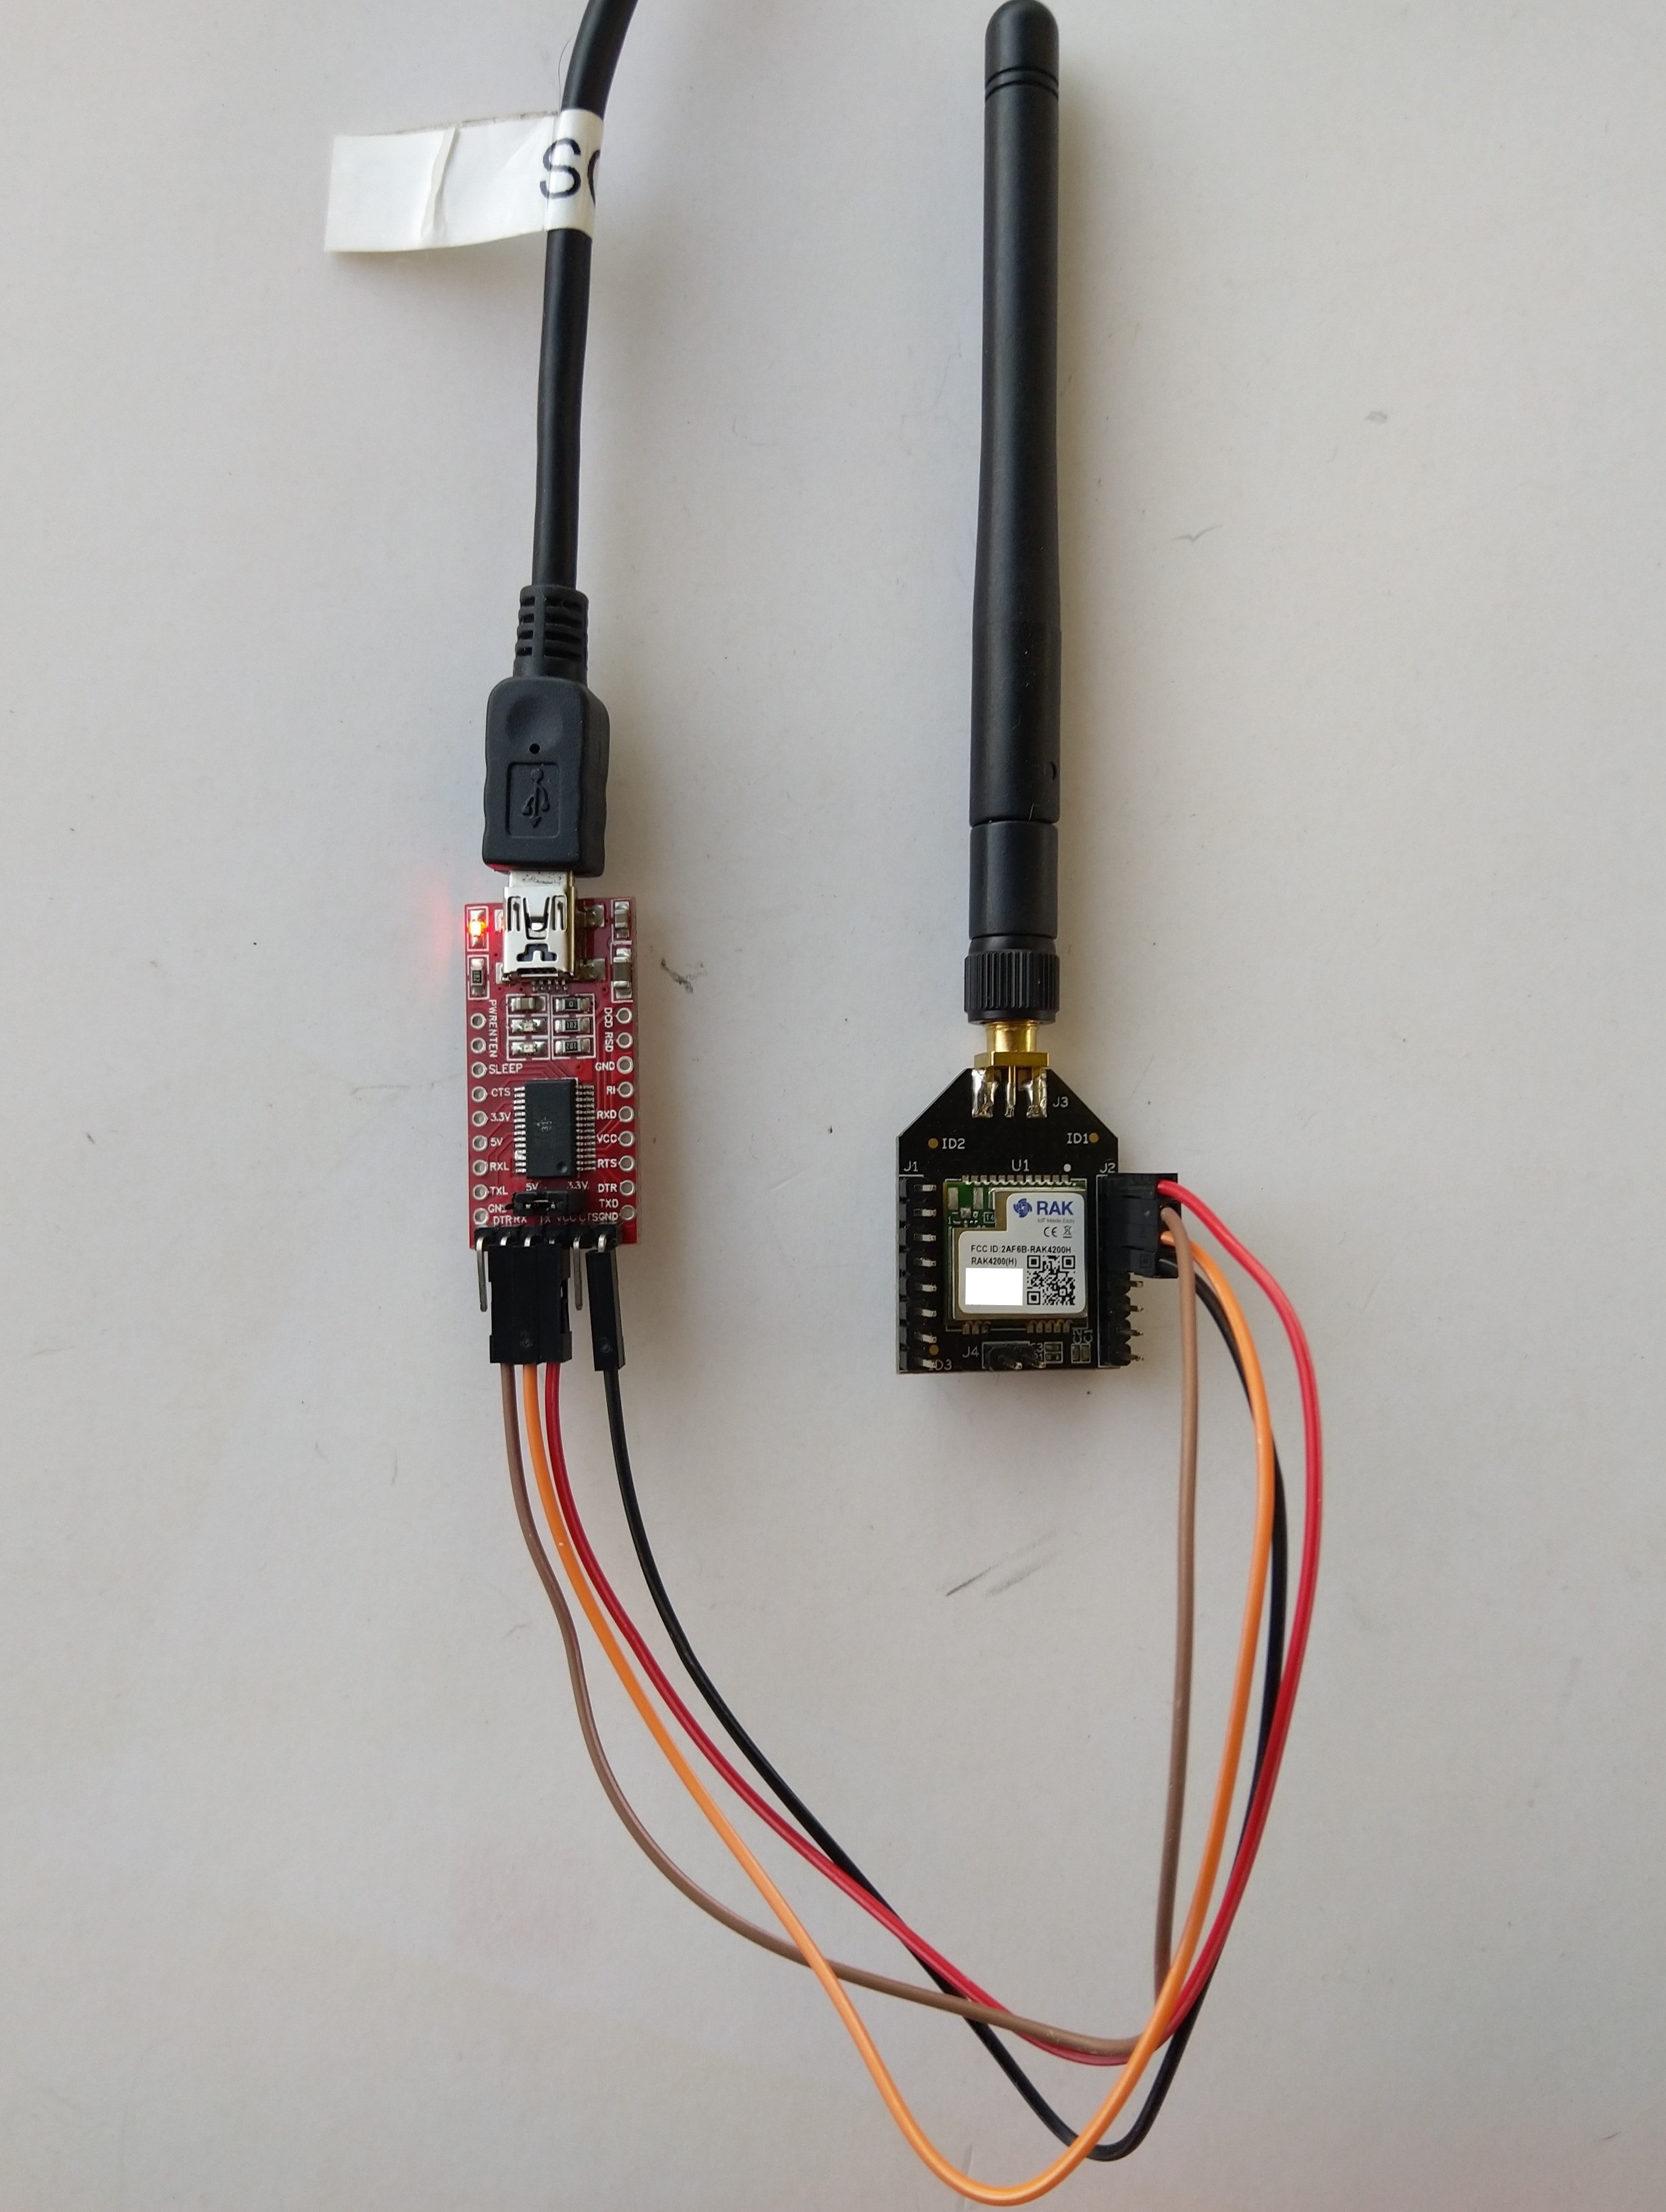
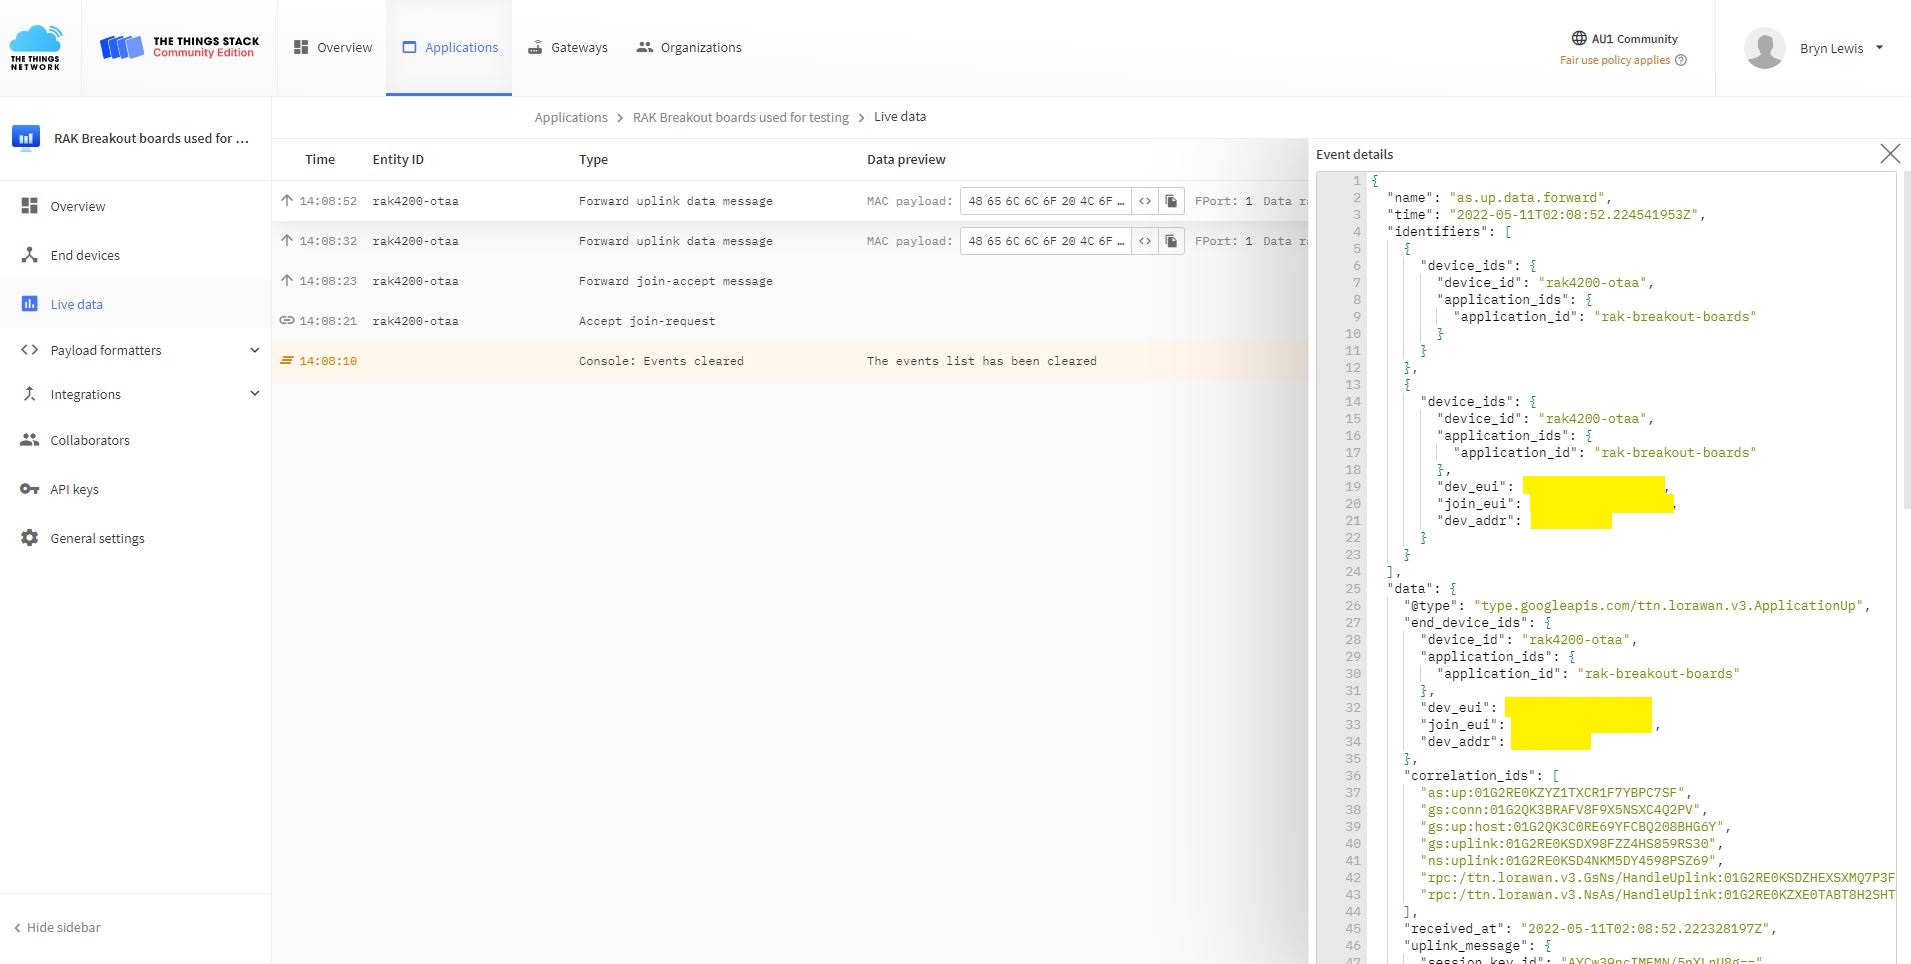
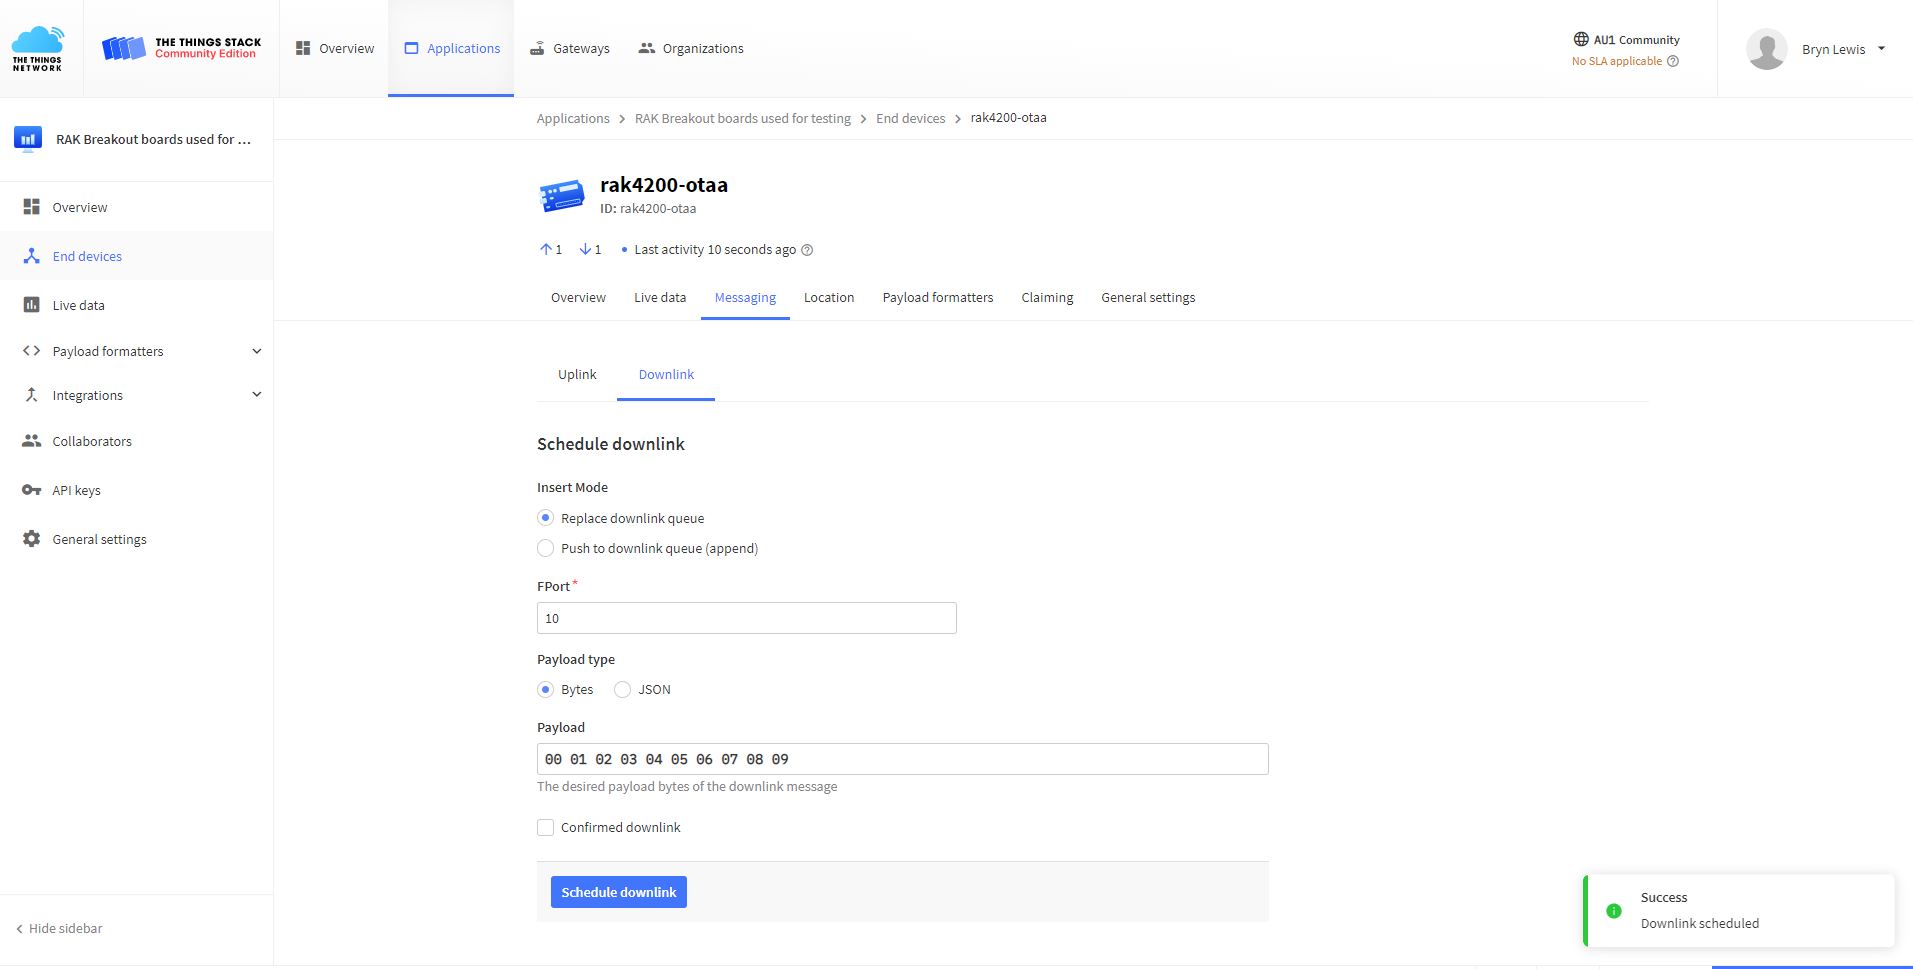
When I first tried Over The Air Activation(OTAA) to connect to The Things Network(TTN) with my RAKwireless RAK3172 module it didn’t work. I had flashed my Sparkfun Thing plus ESP32 WROOM with the ESP32 PSRAM binaries (Thanks AlbertK on the nanoFramework Discord).
nanoff --target ESP32_REV0 --serialport COM17 --update
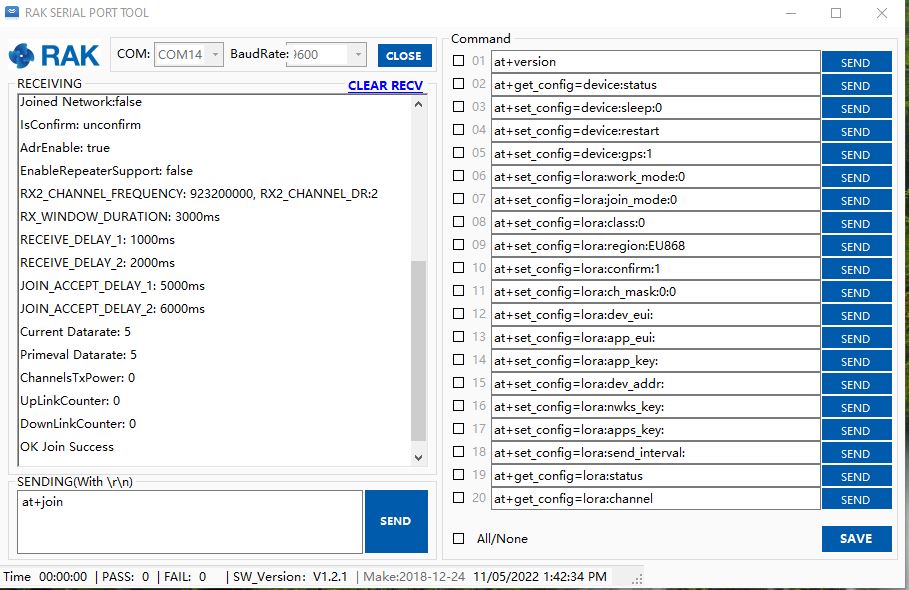
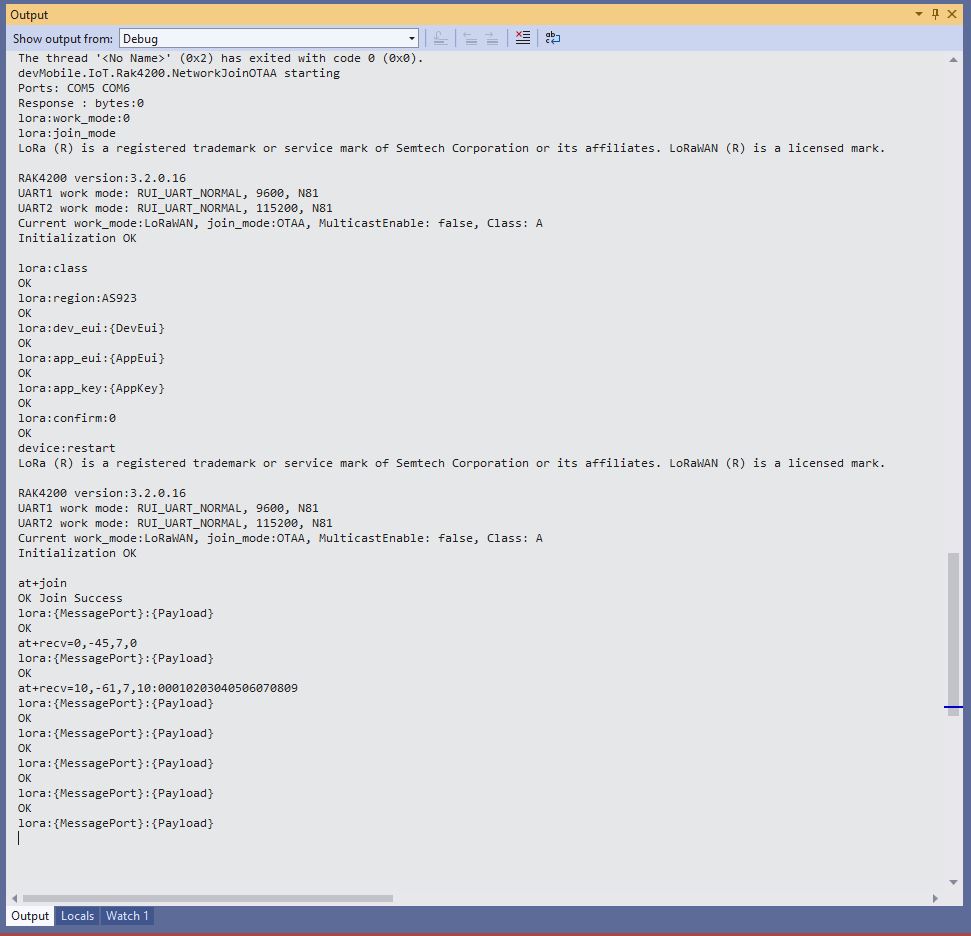
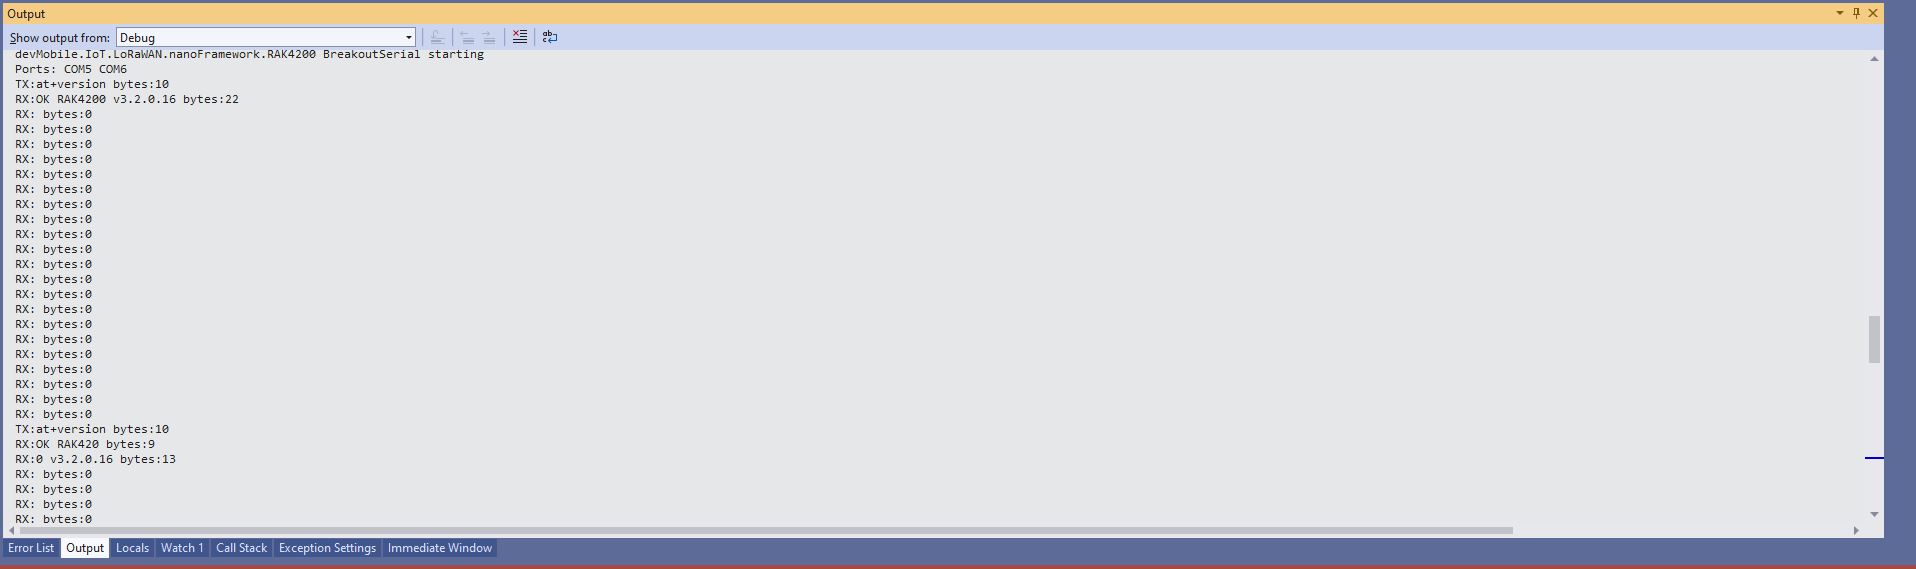
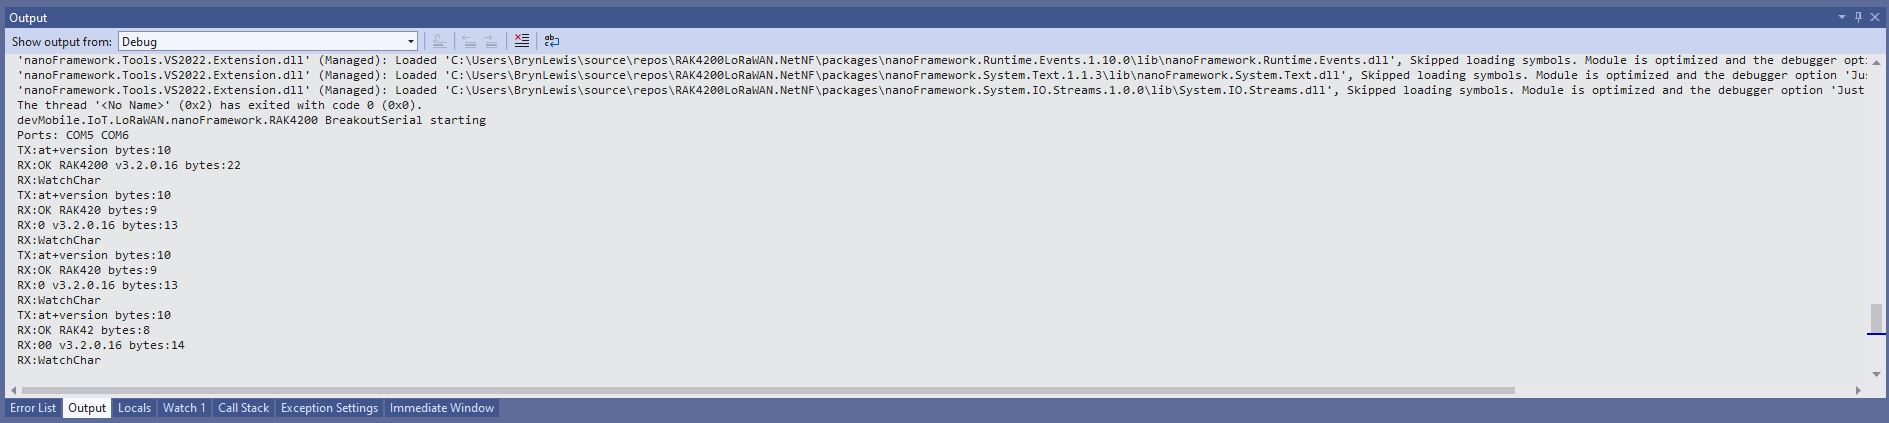
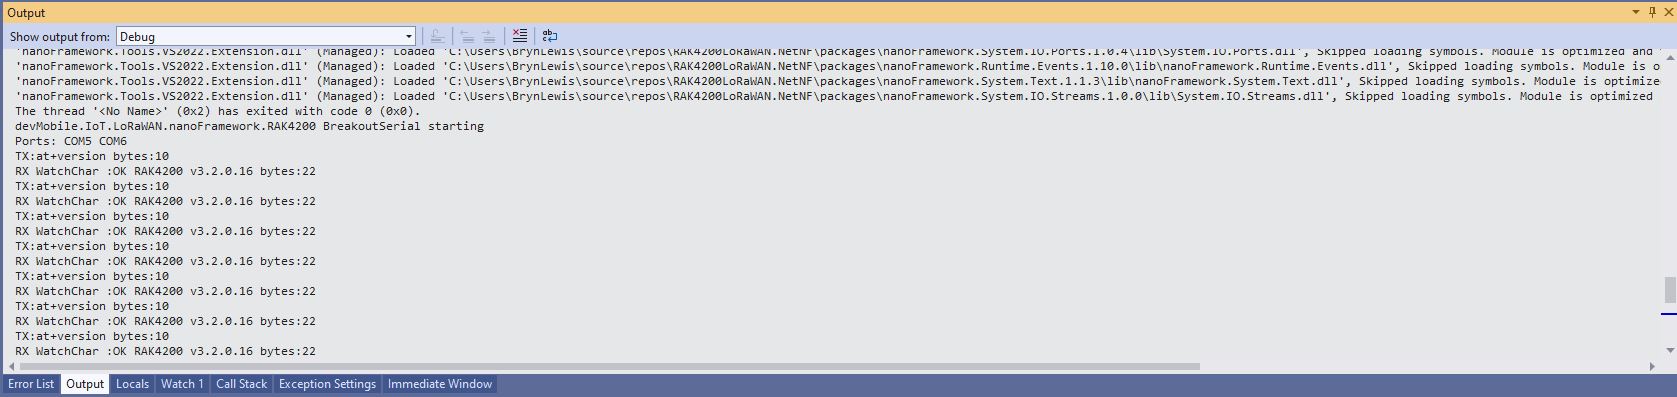
I modified the NetworkJoinOTAA sample (based on the asynchronous version of BreakOutSerial) to send the sequence of AT commands to join The Things Network(TTN) and display the responses.
#define ST_STM32F769I_DISCOVERY      // nanoff --target ST_STM32F769I_DISCOVERY --update
//#define ESP32_WROOM   //nanoff --target ESP32_REV0 --serialport COM17 --update

namespace devMobile.IoT.LoRaWAN.nanoFramework.RAK3172
{
	using System;
	using System.Diagnostics;
	using System.IO.Ports;
	using System.Threading;
#if ESP32_WROOM
	using global::nanoFramework.Hardware.Esp32; //need NuGet nanoFramework.Hardware.Esp32
#endif

	public class Program
	{
#if ESP32_WROOM
		private const string SerialPortId = "COM2";
#endif
#if ST_STM32F769I_DISCOVERY
		private const string SerialPortId = "COM6";
#endif
		private const string DevEui = "...";
		private const string AppEui = "...";
		private const string AppKey = "...";
		private const byte MessagePort = 1;
		private const string Payload = "A0EEE456D02AFF4AB8BAFD58101D2A2A"; // Hello LoRaWAN

		public static void Main()
		{
			Debug.WriteLine("devMobile.IoT.LoRaWAN.nanoFramework.RAK3172 NetworkJoinOTAA starting");

			try
			{
				// set GPIO functions for COM2 (this is UART1 on ESP32)
#if ESP32_WROOM
				Configuration.SetPinFunction(Gpio.IO17, DeviceFunction.COM2_TX);
				Configuration.SetPinFunction(Gpio.IO16, DeviceFunction.COM2_RX);
#endif

				Debug.Write("Ports:");
				foreach (string port in SerialPort.GetPortNames())
				{
					Debug.Write($" {port}");
				}
				Debug.WriteLine("");

				using (SerialPort serialPort = new SerialPort(SerialPortId))
				{
					// set parameters
					serialPort.BaudRate = 115200;
					serialPort.Parity = Parity.None;
					serialPort.DataBits = 8;
					serialPort.StopBits = StopBits.One;
					serialPort.Handshake = Handshake.None;
					serialPort.NewLine = "\r\n";
					serialPort.ReadTimeout = 1000;

					serialPort.DataReceived += SerialDevice_DataReceived;

					serialPort.Open();

					serialPort.WatchChar = '\n';

					serialPort.ReadExisting(); // Running at 115K2 this was necessary

					// Set the devEUI
					Console.WriteLine("Set Dev Eui");
					serialPort.WriteLine($"AT+DEVEUI={DevEui}");

					// Set the Working mode to LoRaWAN
					Console.WriteLine("Set Work mode");
					serialPort.WriteLine("AT+NWM=1");

					// Set the Region to AS923
					Console.WriteLine("Set Region");
					serialPort.WriteLine("AT+BAND=8");

					// Set the JoinMode
					Console.WriteLine("Set Join mode");
					serialPort.WriteLine("AT+NJM=1");

					// Set the appEUI
					Console.WriteLine("Set App Eui");
					serialPort.WriteLine($"AT+APPEUI={AppEui}");

					// Set the appKey
					Console.WriteLine("Set App Key");
					serialPort.WriteLine($"AT+APPKEY={AppKey}");

					// Set the Confirm flag
					Console.WriteLine("Set Confirm off");
					serialPort.WriteLine("AT+CFM=0");

					// Join the network
					Console.WriteLine("Start Join");
					serialPort.WriteLine("AT+JOIN=1:0:10:2");

					// Wait for the +EVT:JOINED

					while (true)
					{
						Console.WriteLine("Sending");
						serialPort.WriteLine($"AT+SEND={MessagePort}:{Payload}");

						Thread.Sleep(300000);
					}
				}
			}
			catch (Exception ex)
			{
				Debug.WriteLine(ex.Message);
			}
		}

		private static void SerialDevice_DataReceived(object sender, SerialDataReceivedEventArgs e)
		{
			SerialPort serialPort = (SerialPort)sender;

			switch (e.EventType)
			{
				case SerialData.Chars:
					break;

				case SerialData.WatchChar:
					string response = serialPort.ReadExisting();
					Debug.Write(response);
					break;
				default:
					Debug.Assert(false, $"e.EventType {e.EventType} unknown");
					break;
			}
		}
	}
}

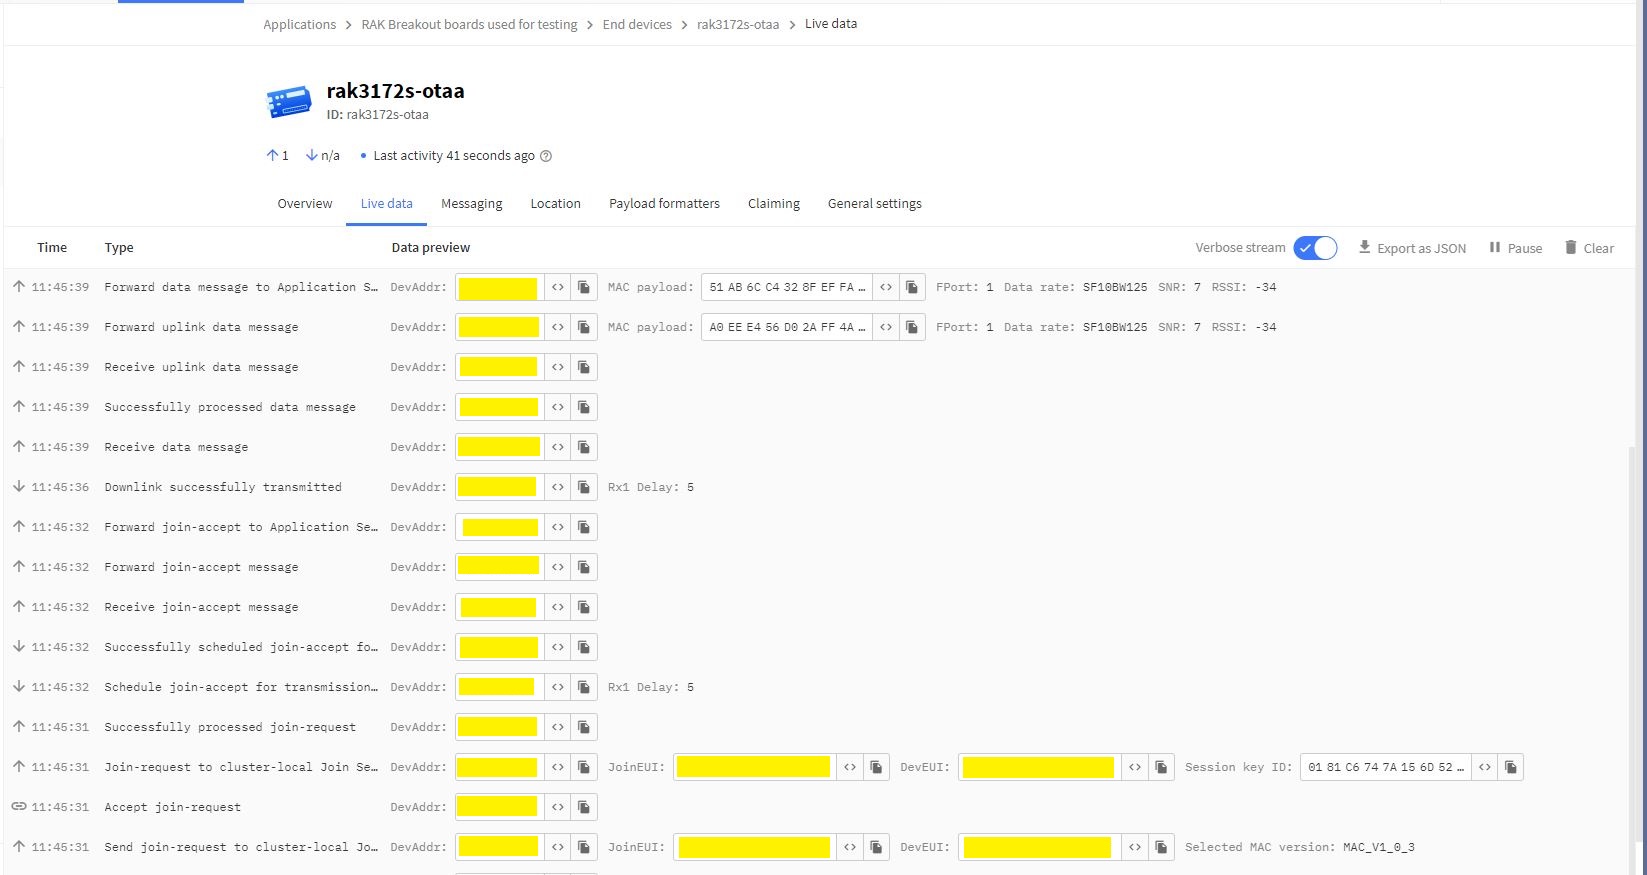
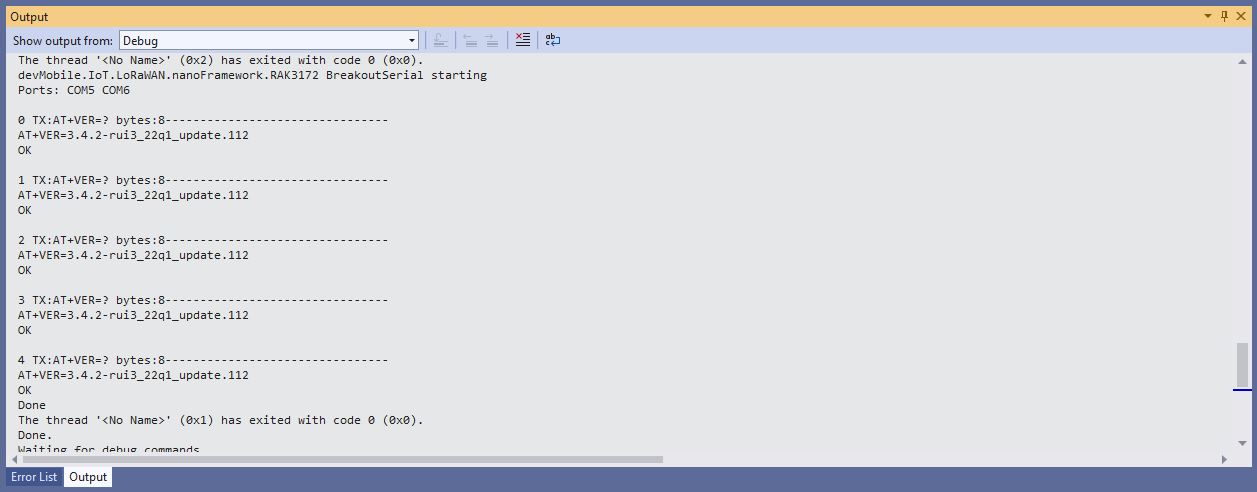
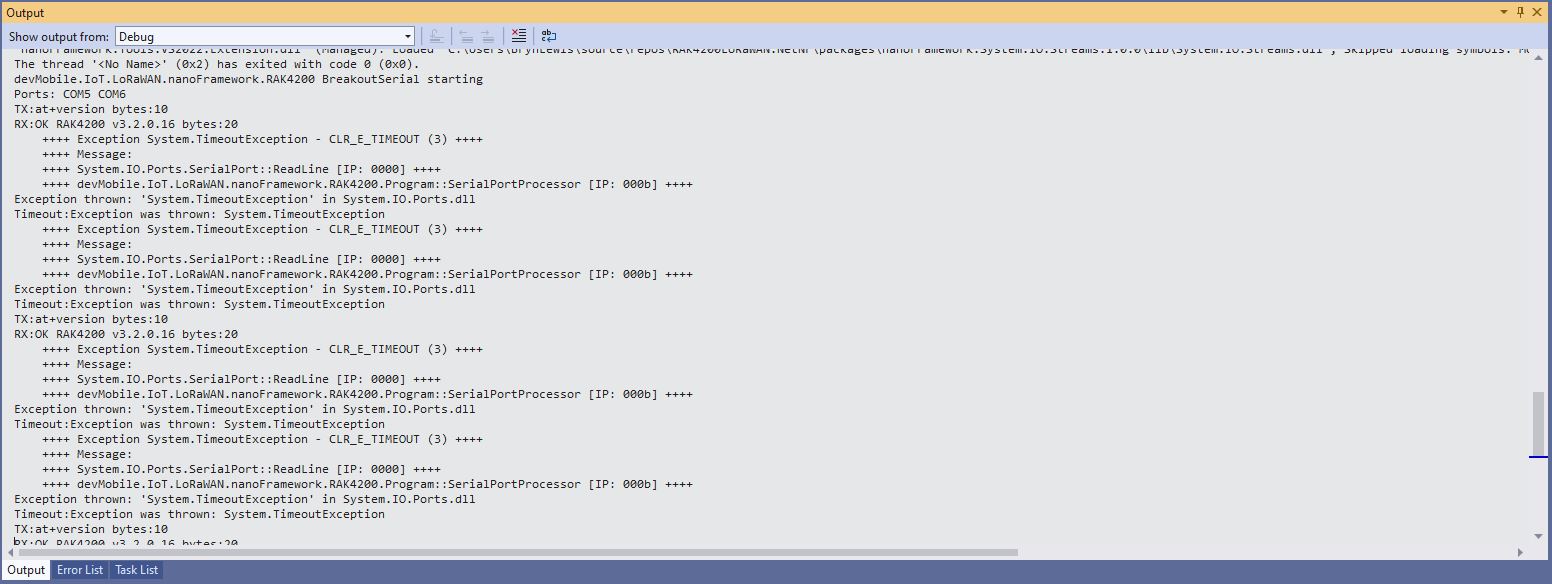
The NetworkJoinOTAA application assumes that all of the AT commands succeed. I usually step though the application in the debugger so I can monitor progress.