The source code of my .Net Core C# library for Seeed LoRa-E5 modules used in products like the LoRa-E5 Development Kit, LoRa-E5 mini and Grove-LoRa-E5 is now available on GitHub.
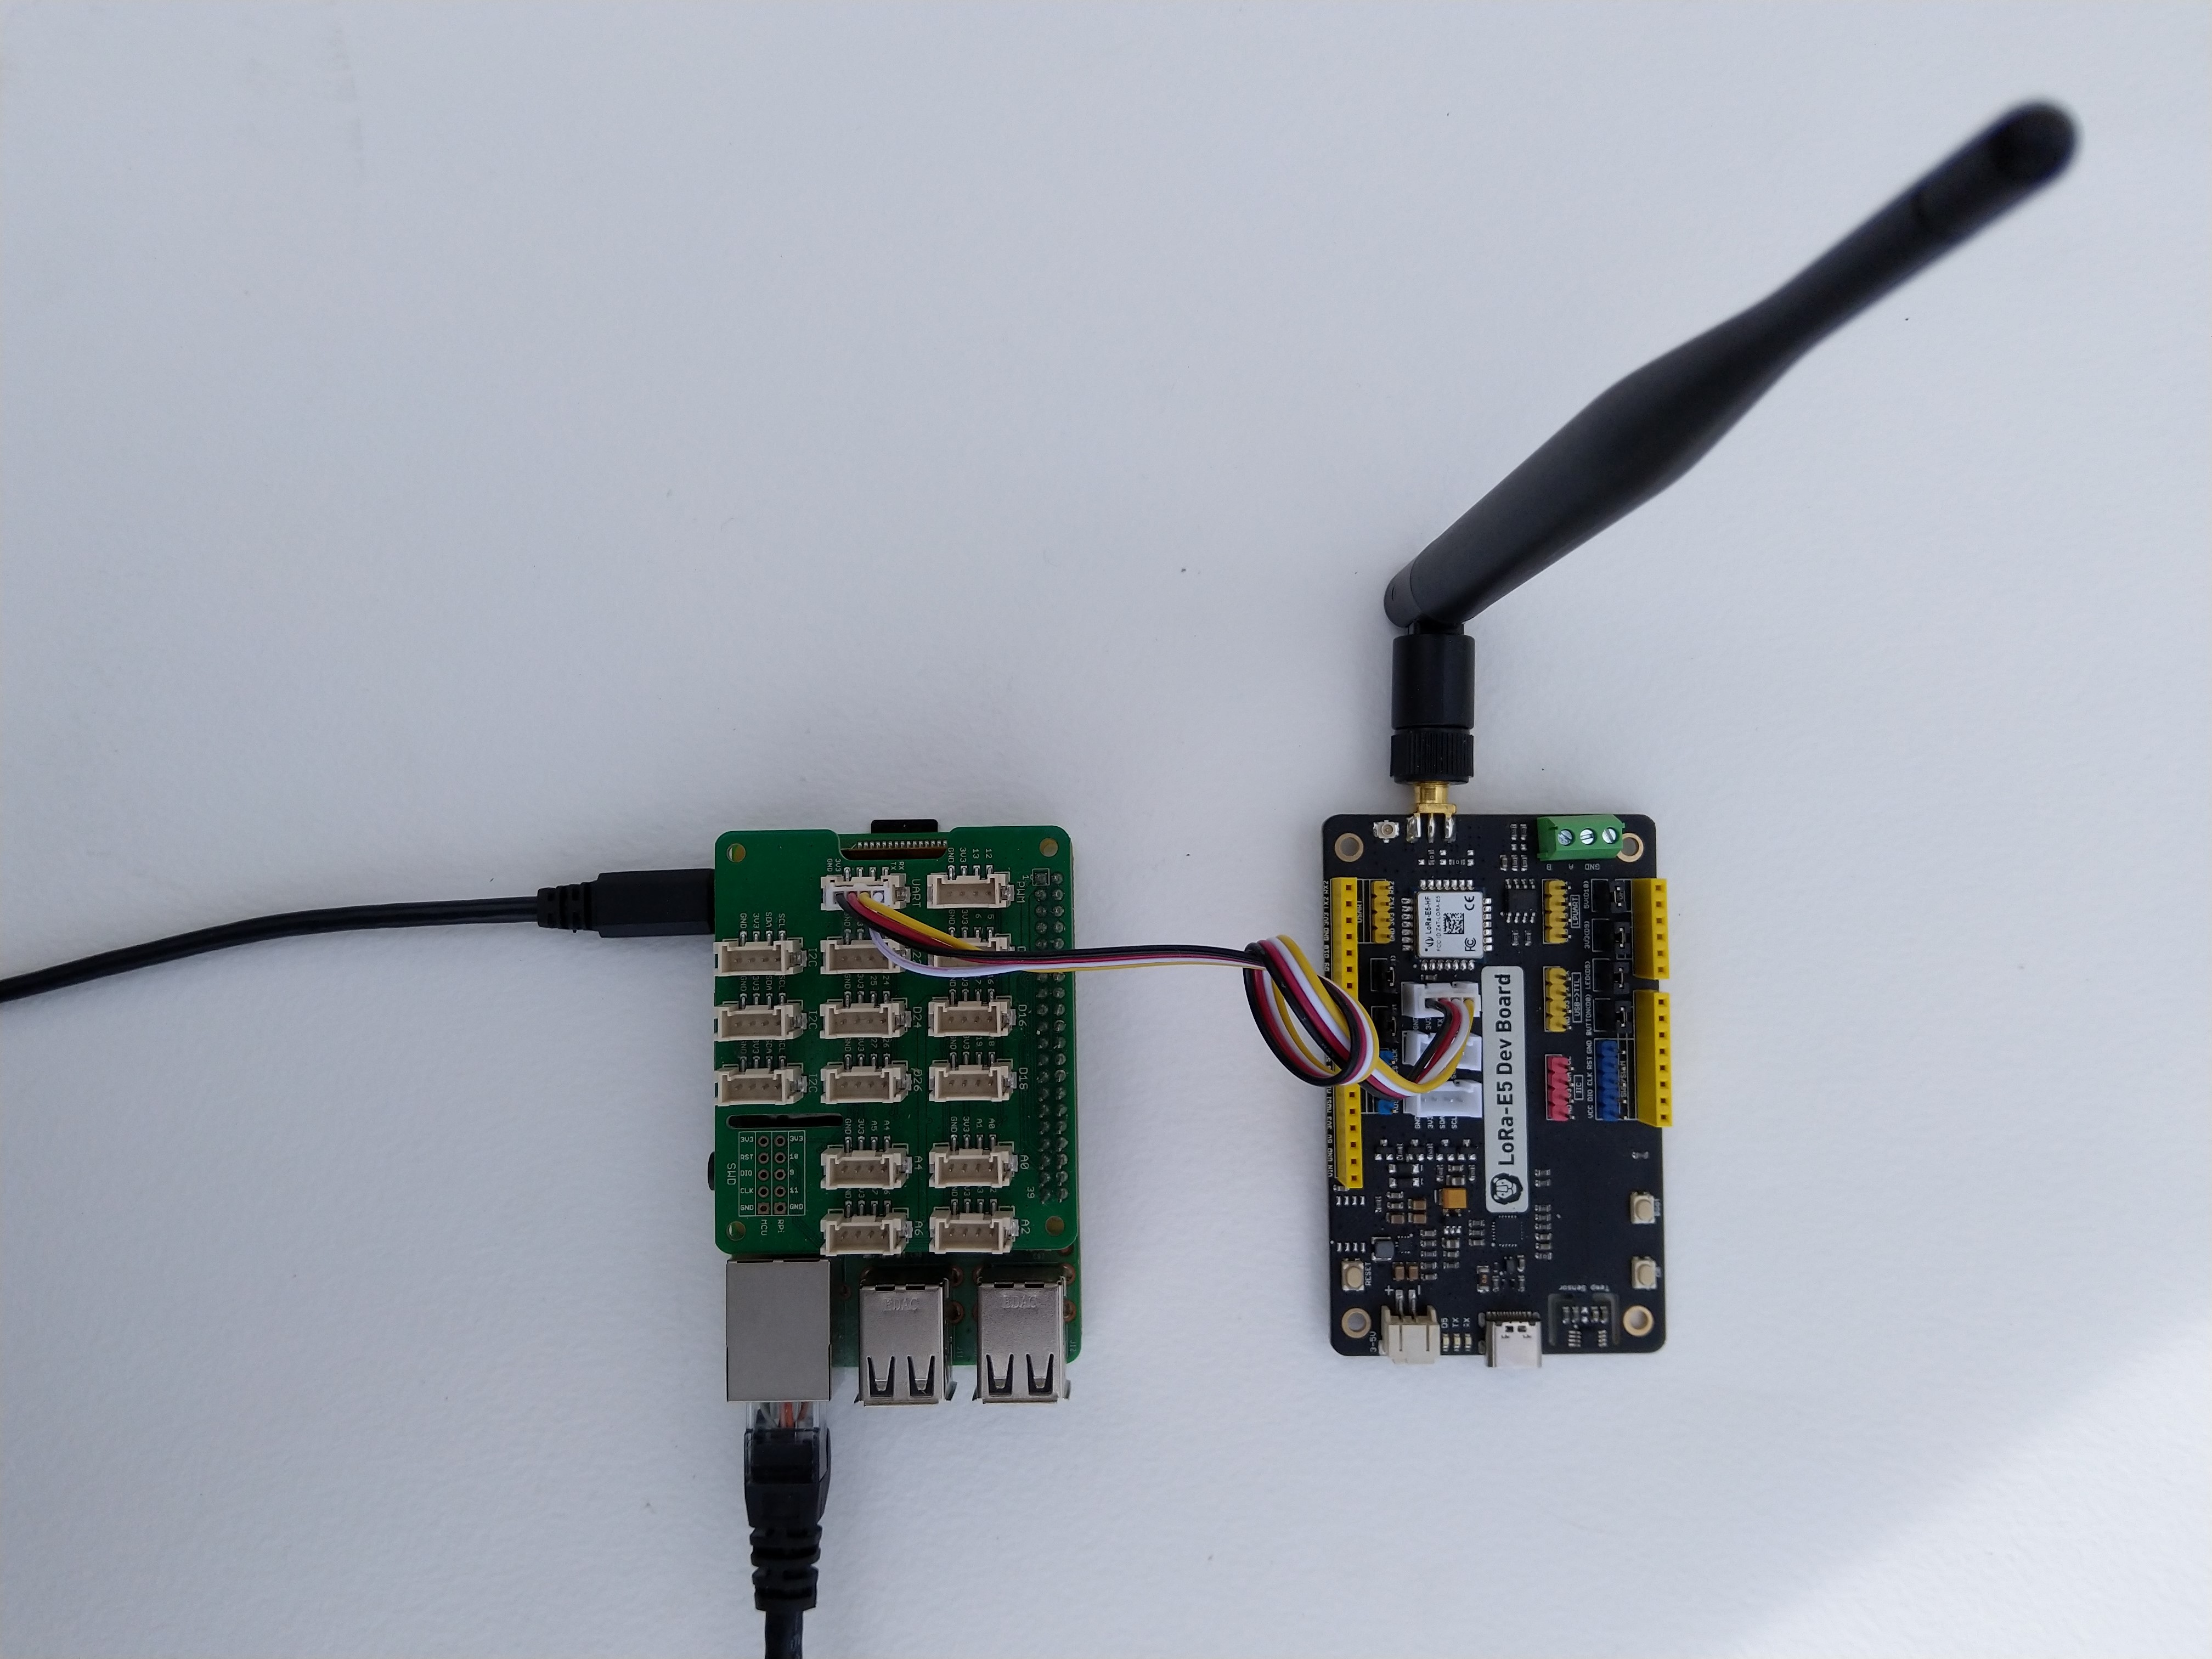
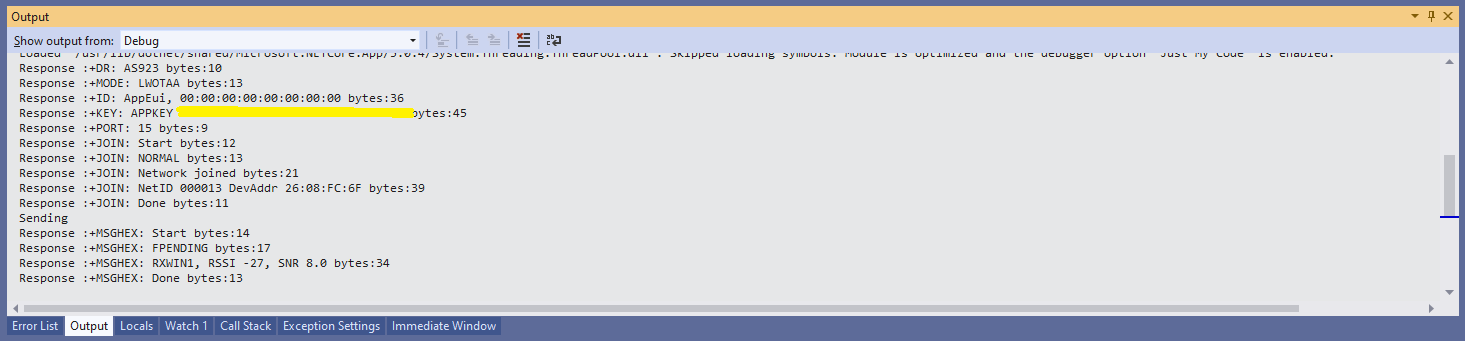
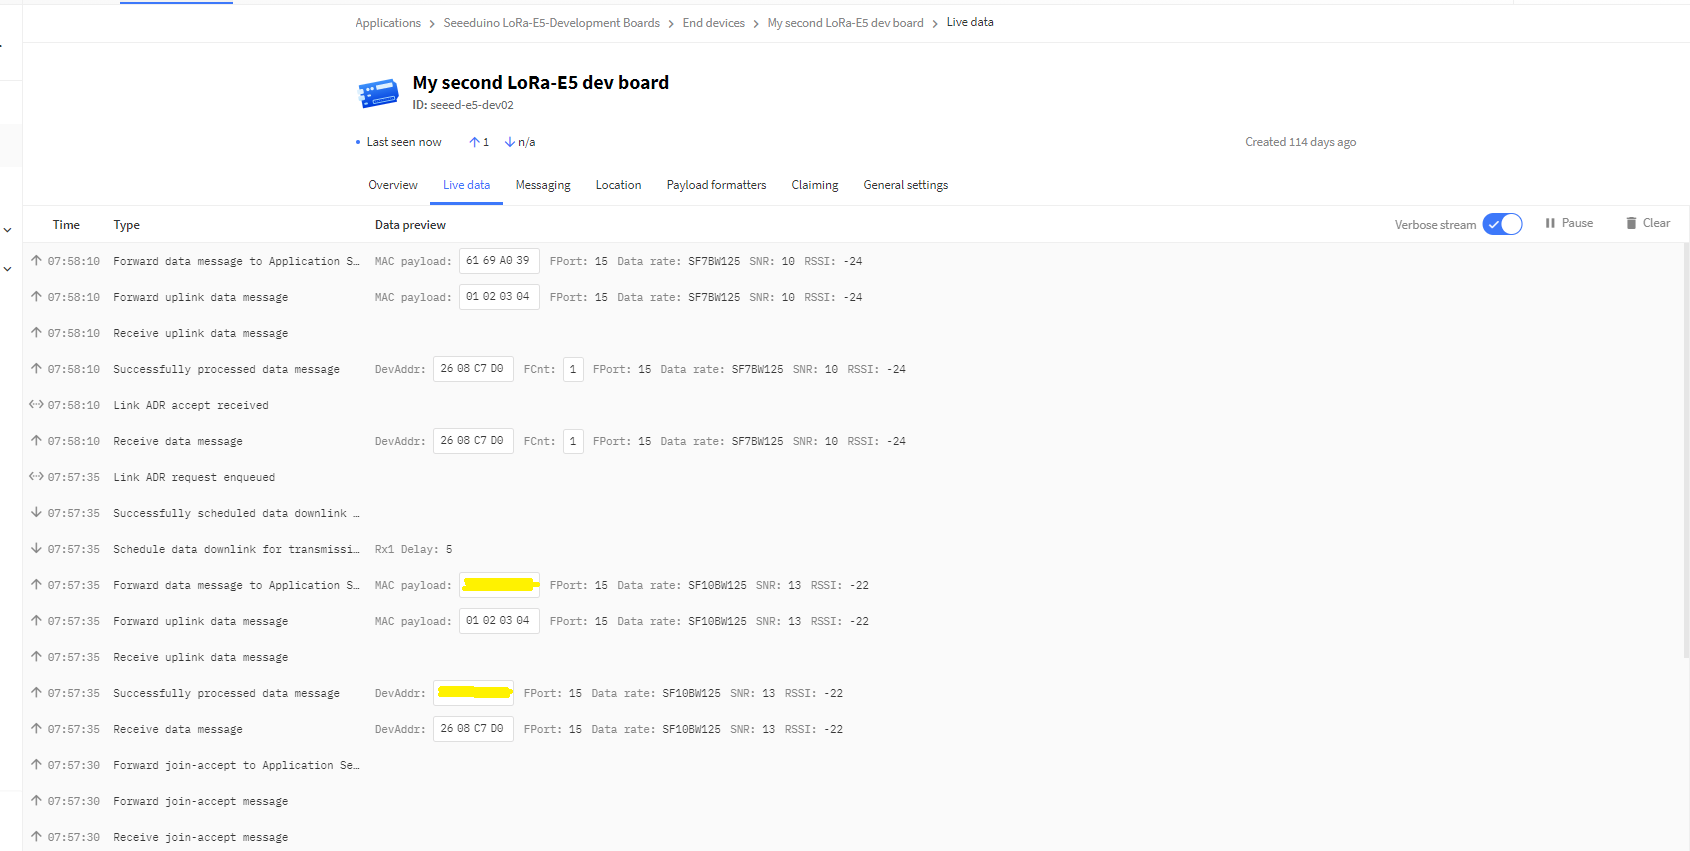
A sample application which shows how to connect using Over the Air Activation(OTAA) or Activation By Personalisation(ABP) then send and receive byte array/Binary Coded Decimal(BCD) messages .
//---------------------------------------------------------------------------------
// Copyright (c) September 2021, devMobile Software
//
// Licensed under the Apache License, Version 2.0 (the "License");
// you may not use this file except in compliance with the License.
// You may obtain a copy of the License at
//
// http://www.apache.org/licenses/LICENSE-2.0
//
// Unless required by applicable law or agreed to in writing, software
// distributed under the License is distributed on an "AS IS" BASIS,
// WITHOUT WARRANTIES OR CONDITIONS OF ANY KIND, either express or implied.
// See the License for the specific language governing permissions and
// limitations under the License.
//
// Must have one of following options defined in the nfproj file
// PAYLOAD_BCD or PAYLOAD_BYTES
// OTAA or ABP
//
// Optional definitions
// CONFIRMED For confirmed messages
// RESET for return device to factory settings
//
//---------------------------------------------------------------------------------
namespace devMobile.IoT.NetCore.SeeedE5LoRa.LoRaWanDeviceClient
{
using System;
using System.Diagnostics;
using System.Threading;
using devMobile.IoT.LoRaWan;
public class Program
{
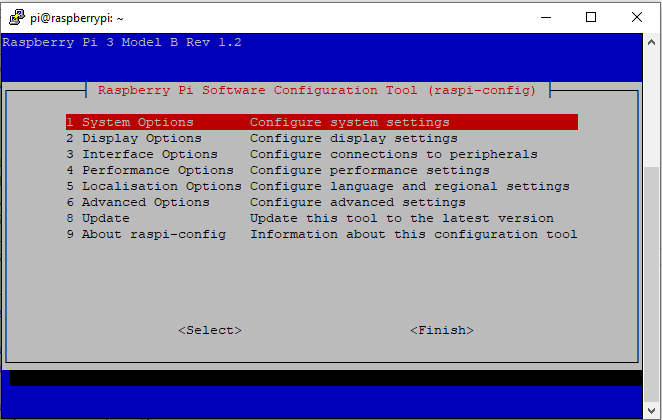
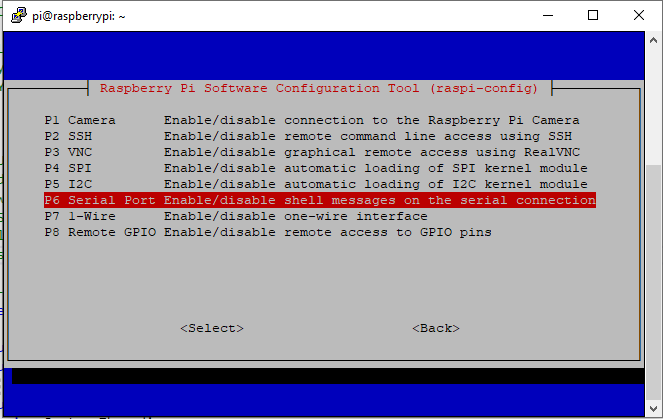
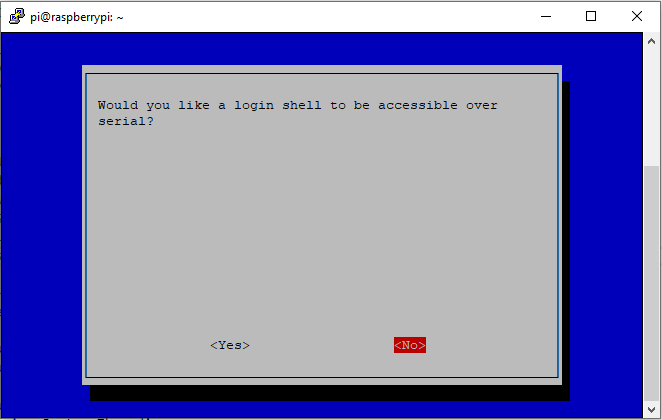
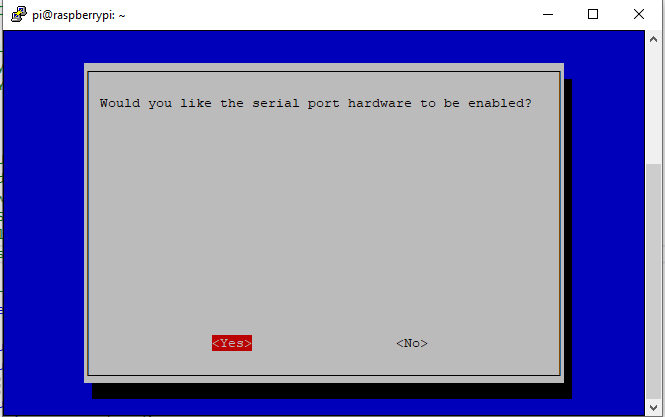
private const string SerialPortId = "/dev/ttyS0";
private const string Region = "AS923";
private static readonly TimeSpan JoinTimeOut = new TimeSpan(0, 0, 20);
private static readonly TimeSpan SendTimeout = new TimeSpan(0, 0, 15);
private const byte MessagePort = 15;
#if PAYLOAD_BCD
private const string PayloadBcd = "010203040506070809";
#endif
#if PAYLOAD_BYTES
private static readonly byte[] PayloadBytes = { 0x09, 0x08, 0x07, 0x06, 0x05, 0x04, 0x03, 0x02, 0x01 };
#endif
public static void Main()
{
Result result;
Debug.WriteLine("devMobile.IoT.SeeedE5LoRaWANDeviceClient starting");
try
{
using (SeeedE5LoRaWANDevice device = new SeeedE5LoRaWANDevice())
{
result = device.Initialise(SerialPortId, 9600);
if (result != Result.Success)
{
Debug.WriteLine($"Initialise failed {result}");
return;
}
#if CONFIRMED
device.OnMessageConfirmation += OnMessageConfirmationHandler;
#endif
device.OnReceiveMessage += OnReceiveMessageHandler;
#if RESET
Debug.WriteLine($"{DateTime.UtcNow:hh:mm:ss} Reset");
result = device.Reset();
if (result != Result.Success)
{
Debug.WriteLine($"Reset failed {result}");
return;
}
#endif
Debug.WriteLine($"{DateTime.UtcNow:hh:mm:ss} Region {Region}");
result = device.Region(Region);
if (result != Result.Success)
{
Debug.WriteLine($"Region failed {result}");
return;
}
Debug.WriteLine($"{DateTime.UtcNow:hh:mm:ss} ADR On");
result = device.AdrOn();
if (result != Result.Success)
{
Debug.WriteLine($"ADR on failed {result}");
return;
}
Debug.WriteLine($"{DateTime.UtcNow:hh:mm:ss} Port {MessagePort}");
result = device.Port(MessagePort);
if (result != Result.Success)
{
Debug.WriteLine($"Port on failed {result}");
return;
}
#if OTAA
Debug.WriteLine($"{DateTime.UtcNow:hh:mm:ss} OTAA");
result = device.OtaaInitialise(Config.AppEui, Config.AppKey);
if (result != Result.Success)
{
Debug.WriteLine($"OTAA Initialise failed {result}");
return;
}
#endif
#if ABP
Debug.WriteLine($"{DateTime.UtcNow:hh:mm:ss} ABP");
result = device.AbpInitialise(Config.DevAddress, Config.NwksKey, Config.AppsKey);
if (result != Result.Success)
{
Debug.WriteLine($"ABP Initialise failed {result}");
return;
}
#endif
Debug.WriteLine($"{DateTime.UtcNow:hh:mm:ss} Join start Timeout:{JoinTimeOut.TotalSeconds} Seconds");
result = device.Join(true, JoinTimeOut);
if (result != Result.Success)
{
Debug.WriteLine($"Join failed {result}");
return;
}
Debug.WriteLine($"{DateTime.UtcNow:hh:mm:ss} Join finish");
while (true)
{
#if PAYLOAD_BCD
Debug.WriteLine($"{DateTime.UtcNow:hh:mm:ss} Send Timeout:{SendTimeout.TotalSeconds} Seconds payload BCD:{PayloadBcd}");
#if CONFIRMED
result = device.Send(PayloadBcd, true, SendTimeout);
#else
result = device.Send(PayloadBcd, false, SendTimeout);
#endif
#endif
#if PAYLOAD_BYTES
Debug.WriteLine($"{DateTime.UtcNow:hh:mm:ss} Send Timeout:{SendTimeout.TotalSeconds} Seconds payload Bytes:{BitConverter.ToString(PayloadBytes)}");
#if CONFIRMED
result = device.Send(PayloadBytes, true, SendTimeout);
#else
result = device.Send(PayloadBytes, false, SendTimeout);
#endif
#endif
if (result != Result.Success)
{
Debug.WriteLine($"Send failed {result}");
}
#if LOW_POWER
Debug.WriteLine($"{DateTime.UtcNow:hh:mm:ss} Sleep");
result = device.Sleep();
if (result != Result.Success)
{
Debug.WriteLine($"Sleep failed {result}");
return;
}
#endif
Thread.Sleep(60000);
#if LOW_POWER
Debug.WriteLine($"{DateTime.UtcNow:hh:mm:ss} Wakeup");
result = device.Wakeup();
if (result != Result.Success)
{
Debug.WriteLine($"Wakeup failed {result}");
return;
}
#endif
}
}
}
catch (Exception ex)
{
Debug.WriteLine(ex.Message);
}
}
#if CONFIRMED
static void OnMessageConfirmationHandler(int rssi, double snr)
{
Debug.WriteLine($"{DateTime.UtcNow:hh:mm:ss} Send Confirm RSSI:{rssi} SNR:{snr}");
}
#endif
static void OnReceiveMessageHandler(int port, int rssi, double snr, string payloadBcd)
{
byte[] payloadBytes = SeeedE5LoRaWANDevice.BcdToByes(payloadBcd);
Debug.WriteLine($"{DateTime.UtcNow:hh:mm:ss} Receive Message RSSI:{rssi} SNR:{snr} Port:{port} Payload:{payloadBcd} PayLoadBytes:{BitConverter.ToString(payloadBytes)}");
}
}
}


