For code club one of the projects I had been considering was an MP3 player with a simple user interface (UI) based on a joystick providing track next/previous , volume up/down, and pause/play. I looked for suitable Arduino shields which had Netduino driver support. I narrowed the list down to (Prices as at April 2014) these VS1053 based shields
- Sparkfun MP3 Player Shield (USD29.95)
- Elecfreaks Freaduino MP3 Music Shield (USD 19.00)
- GE Tech Arduino MP3 Shield (USD 23.90)
- Adafruit Music Maker MP3 Shield (USD 29.95)
- Adafruit Music Maker MP3 Shield with 3W Stereo Amp (USD34.95)
- SeeedStudio Music Shield V2.0 (USD27.50)
For Code Club I purchased 5 of the Elecfreaks Freaduino shields as the price and on-board joystick made it ideal for our application. The Freaduino MP3 Shield wiki page indicated that the following pins were used by the SPI bus
D10 – Used for SPI Chip Select.
D11 – Used for SPI MOSI.
D12 – Used for SPI MISO.
D13 – Used for SPI SCK.
I initially tried the NetduinoVS1053 library from SoftElectoTech but found that no sound was produced. I tried different pin configurations, format and bitrate music files but nothing worked. I then had a look at the shield schematic and noticed that D11/D12/D13 were not connected to the VS1053, only D10 which is used for chip selected on the MicroSD card socket was connected.
I soldered some jumpers to the board and connected the SPI pins on the ICSP socket to the D11,D12 & D13 on the edge connector and the shield now works. It would be good if elecfreaks could make the pins the SPI bus uses configurable using jumpers or similar.
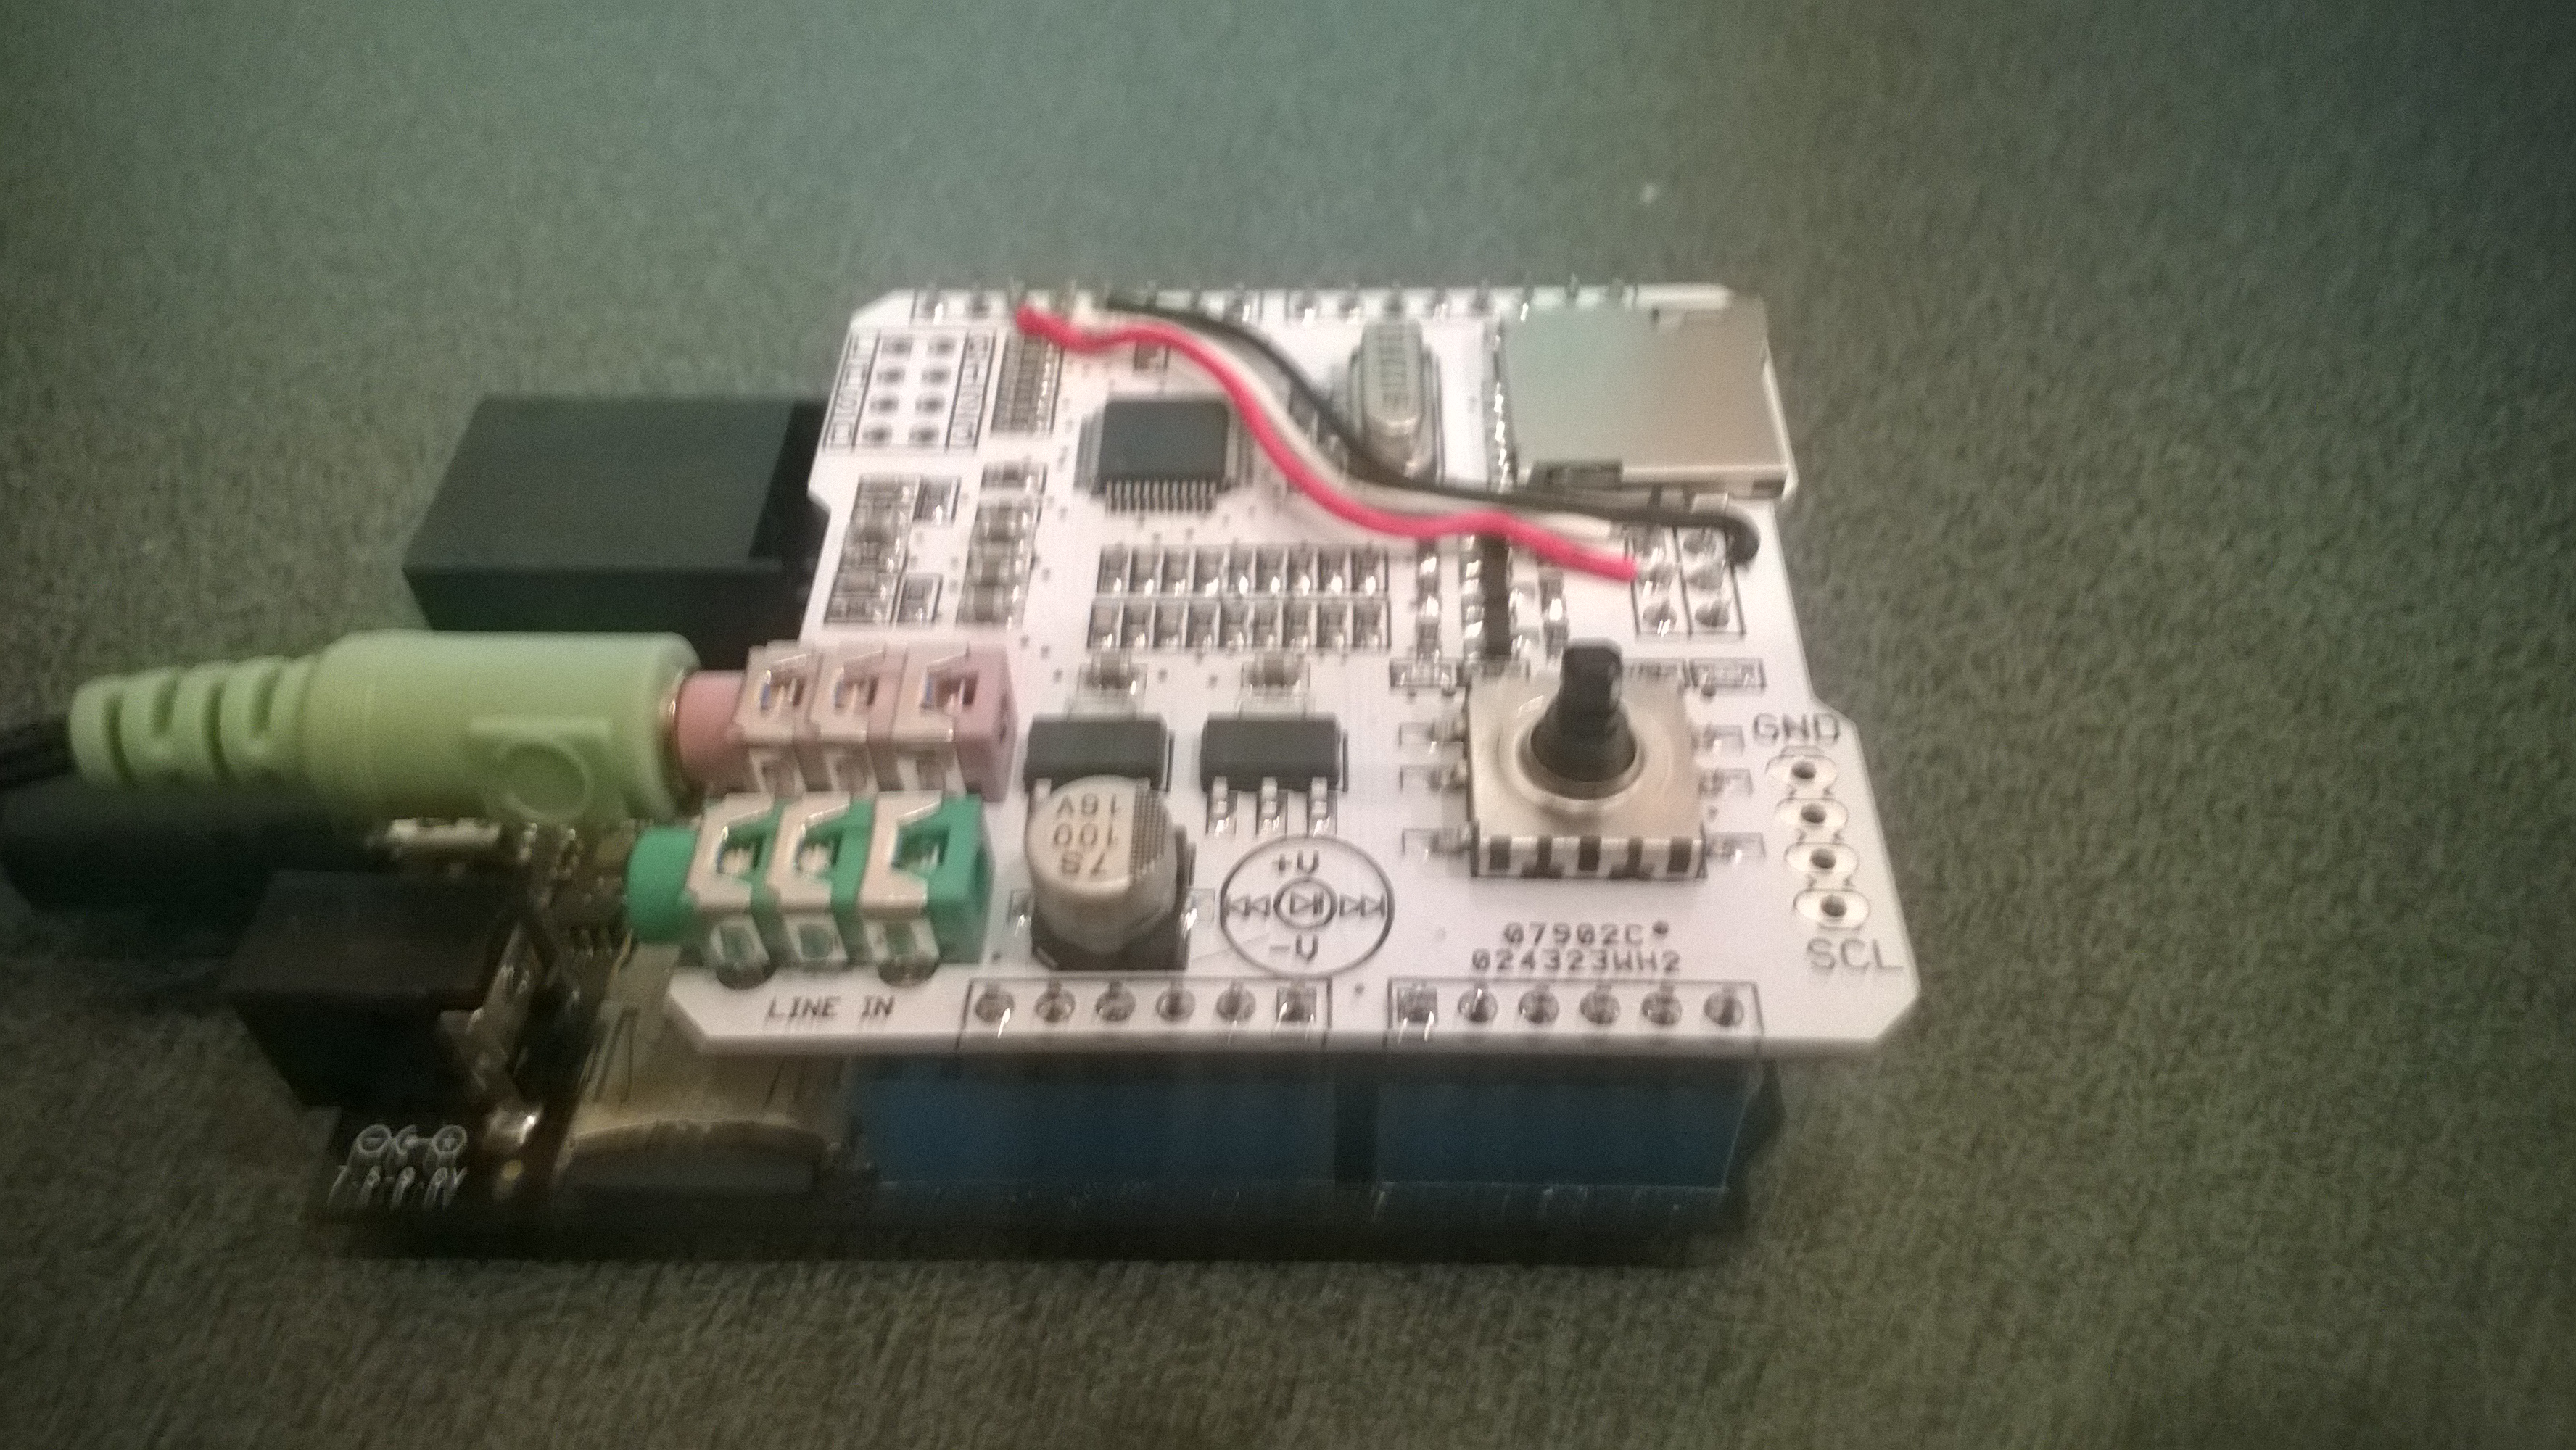
Modified Freaduino Music Shield
The library needs to be initialised with the following pins
Player = newVs1053B(Pins.GPIO_PIN_A1, Pins.GPIO_PIN_A3, Pins.GPIO_PIN_A2, Pins.GPIO_PIN_A0);
The joystick operations can be handled with Interrupts with the following configuration
InterruptPort volumeDownButton = newInterruptPort(Pins.GPIO_PIN_D7, false, Port.ResistorMode.PullUp, Port.InterruptMode.InterruptEdgeLow);
InterruptPort volumeUpButton = newInterruptPort(Pins.GPIO_PIN_D3, false, Port.ResistorMode.PullUp, Port.InterruptMode.InterruptEdgeLow);
InterruptPort nextSongButton = newInterruptPort(Pins.GPIO_PIN_D4, false, Port.ResistorMode.PullUp, Port.InterruptMode.InterruptEdgeLow);
InterruptPort previousSongButton = newInterruptPort(Pins.GPIO_PIN_D6, false, Port.ResistorMode.PullUp, Port.InterruptMode.InterruptEdgeLow);
InterruptPort playStopButton = newInterruptPort(Pins.GPIO_PIN_D5, false, Port.ResistorMode.PullUp, Port.InterruptMode.InterruptEdgeLow);
volumeUpButton.OnInterrupt += new NativeEventHandler(volumeUpButton_OnInterrupt);
volumeDownButton.OnInterrupt += new NativeEventHandler(volumeDownButton_OnInterrupt);
nextSongButton.OnInterrupt += new NativeEventHandler(nextSongButton_OnInterrupt);
previousSongButton.OnInterrupt += new NativeEventHandler(previousSongButton_OnInterrupt);
playStopButton.OnInterrupt += new NativeEventHandler(playStopButton_OnInterrupt);
I could now play MP3 files off the SD card on my Netduino Plus 2 but couldn’t adjust the volume or change the track being played. Using an interrupt based approached for the UI also highlighted some problems with the driver code which I will discuss in a future post.