EVolocity Innovation Challenge Parking Aids

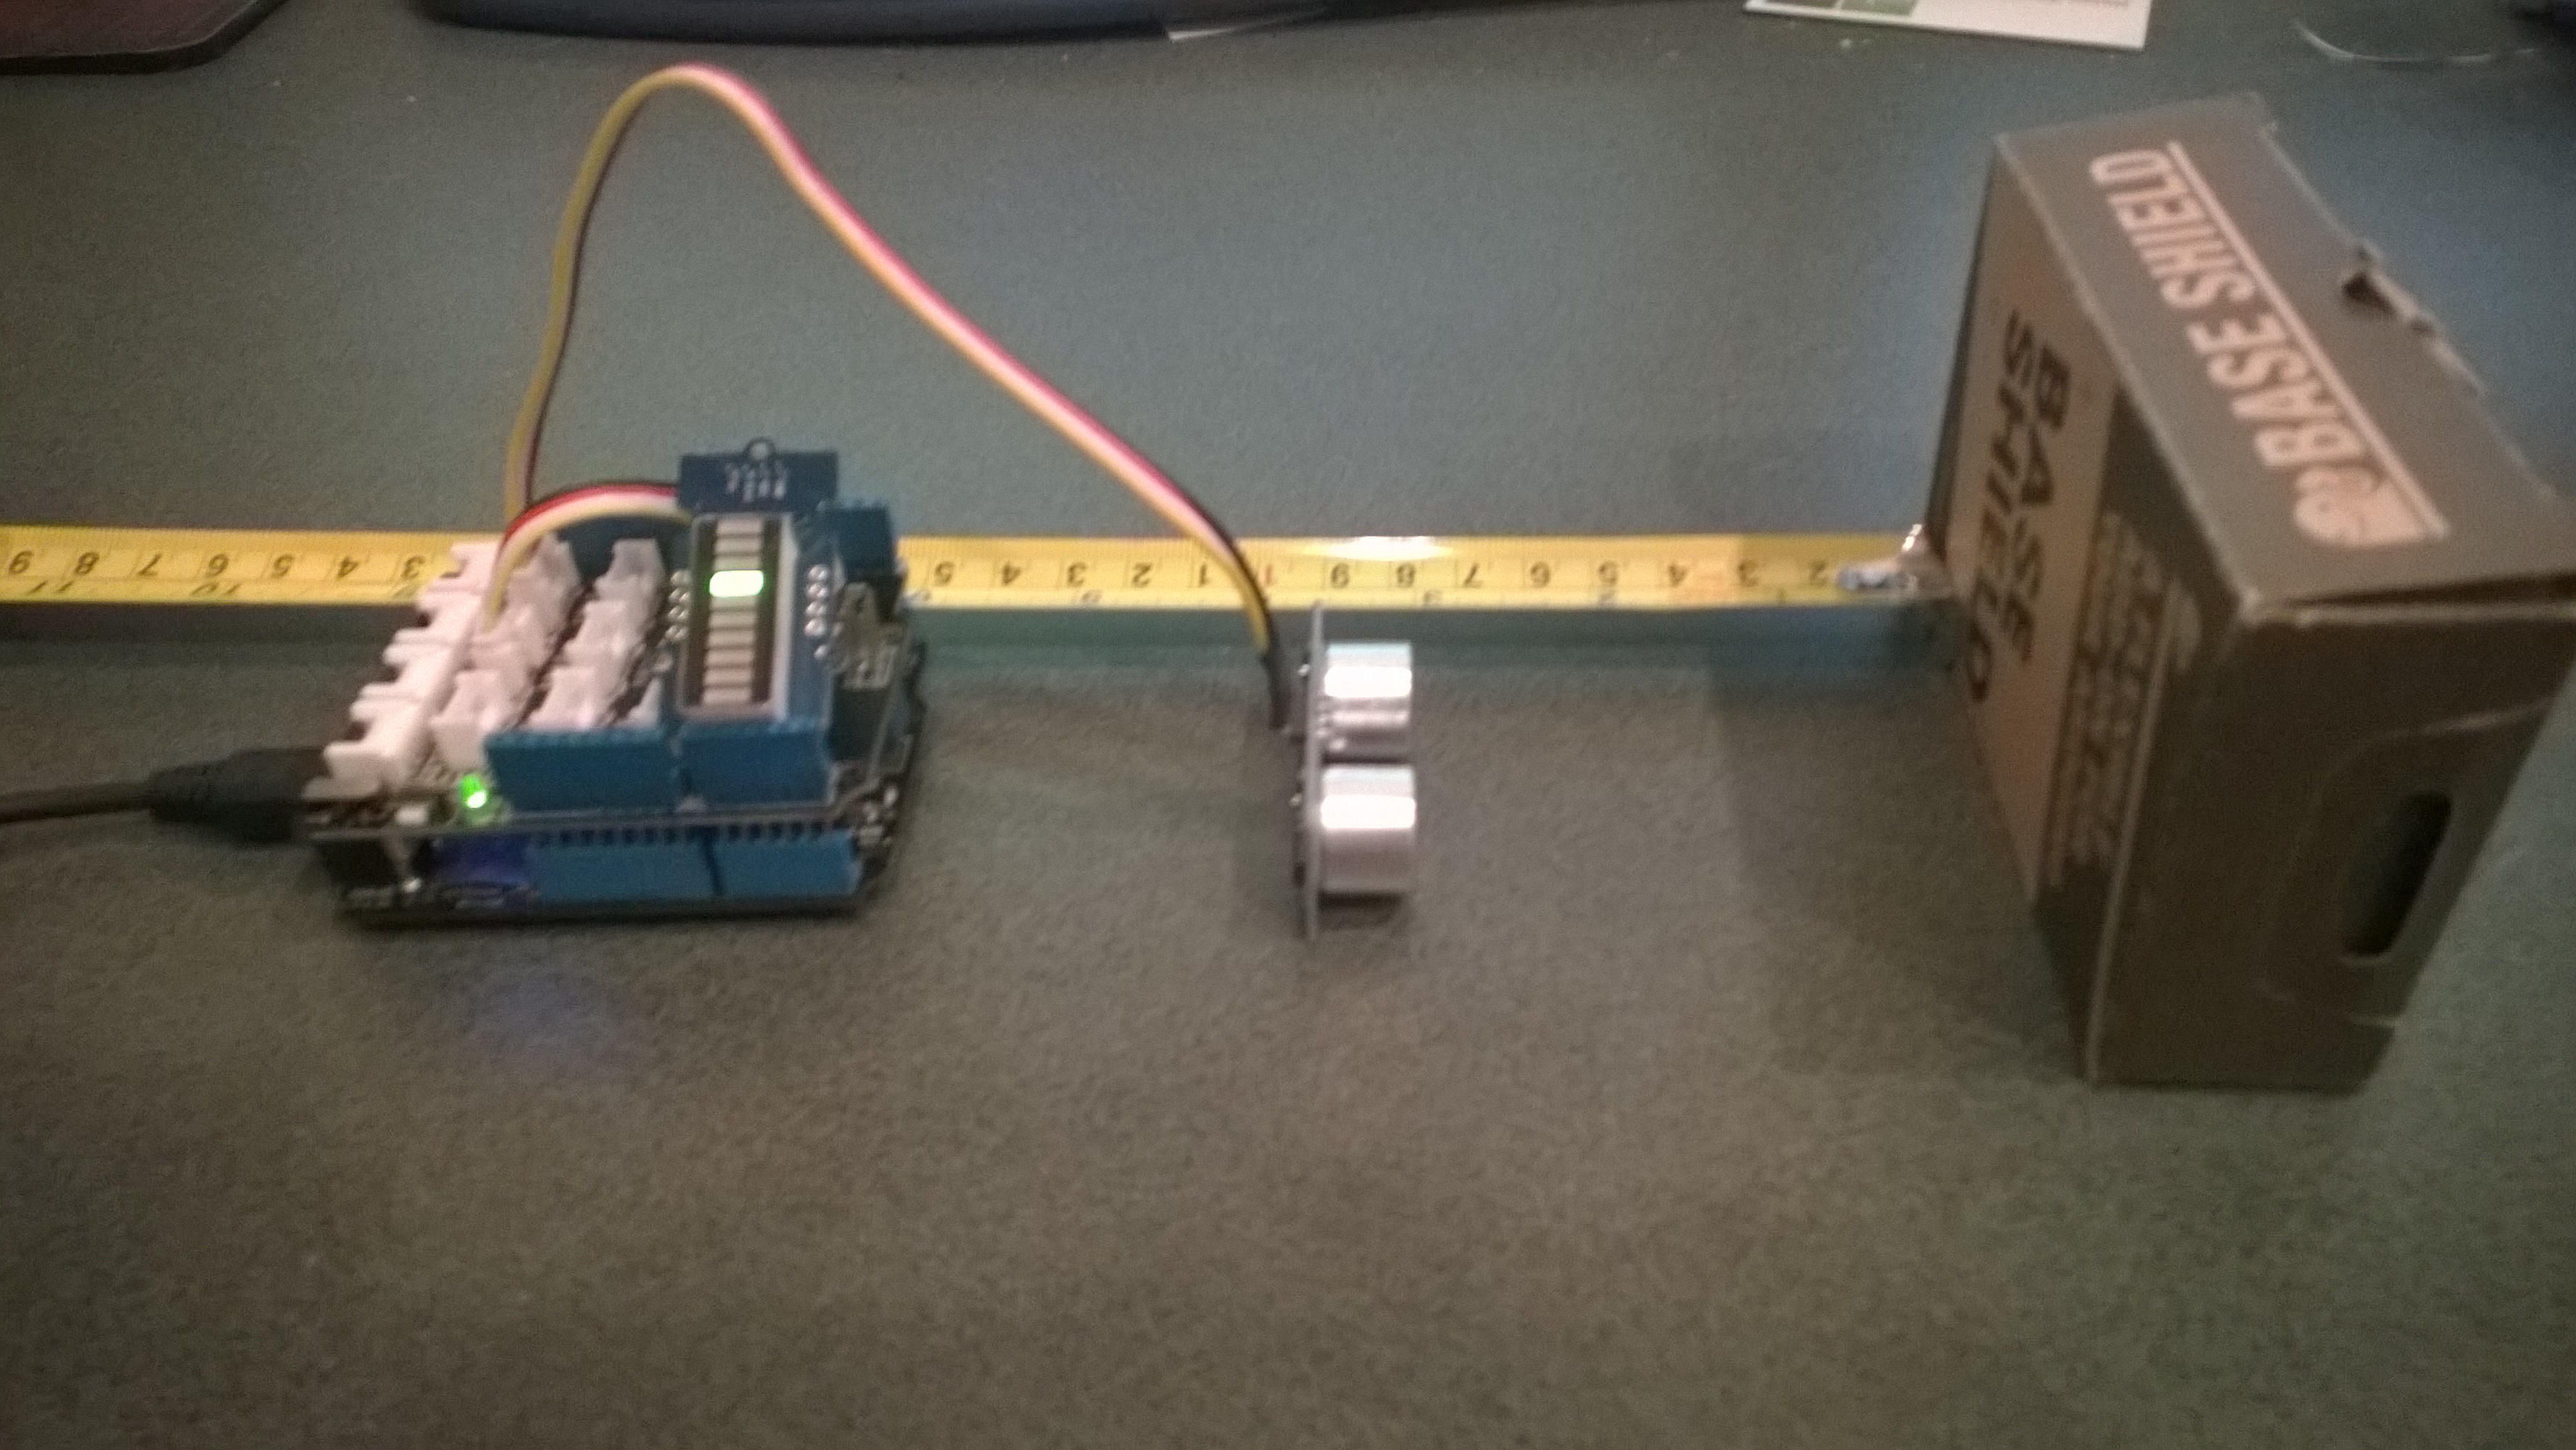
At evelocity boot camp on the 22nd of March we talked about aids for use in the parking challenge. For example, a Netduino and one or more ultrasonic rangers could be used to measure the distance to obstacles placed around the car park.

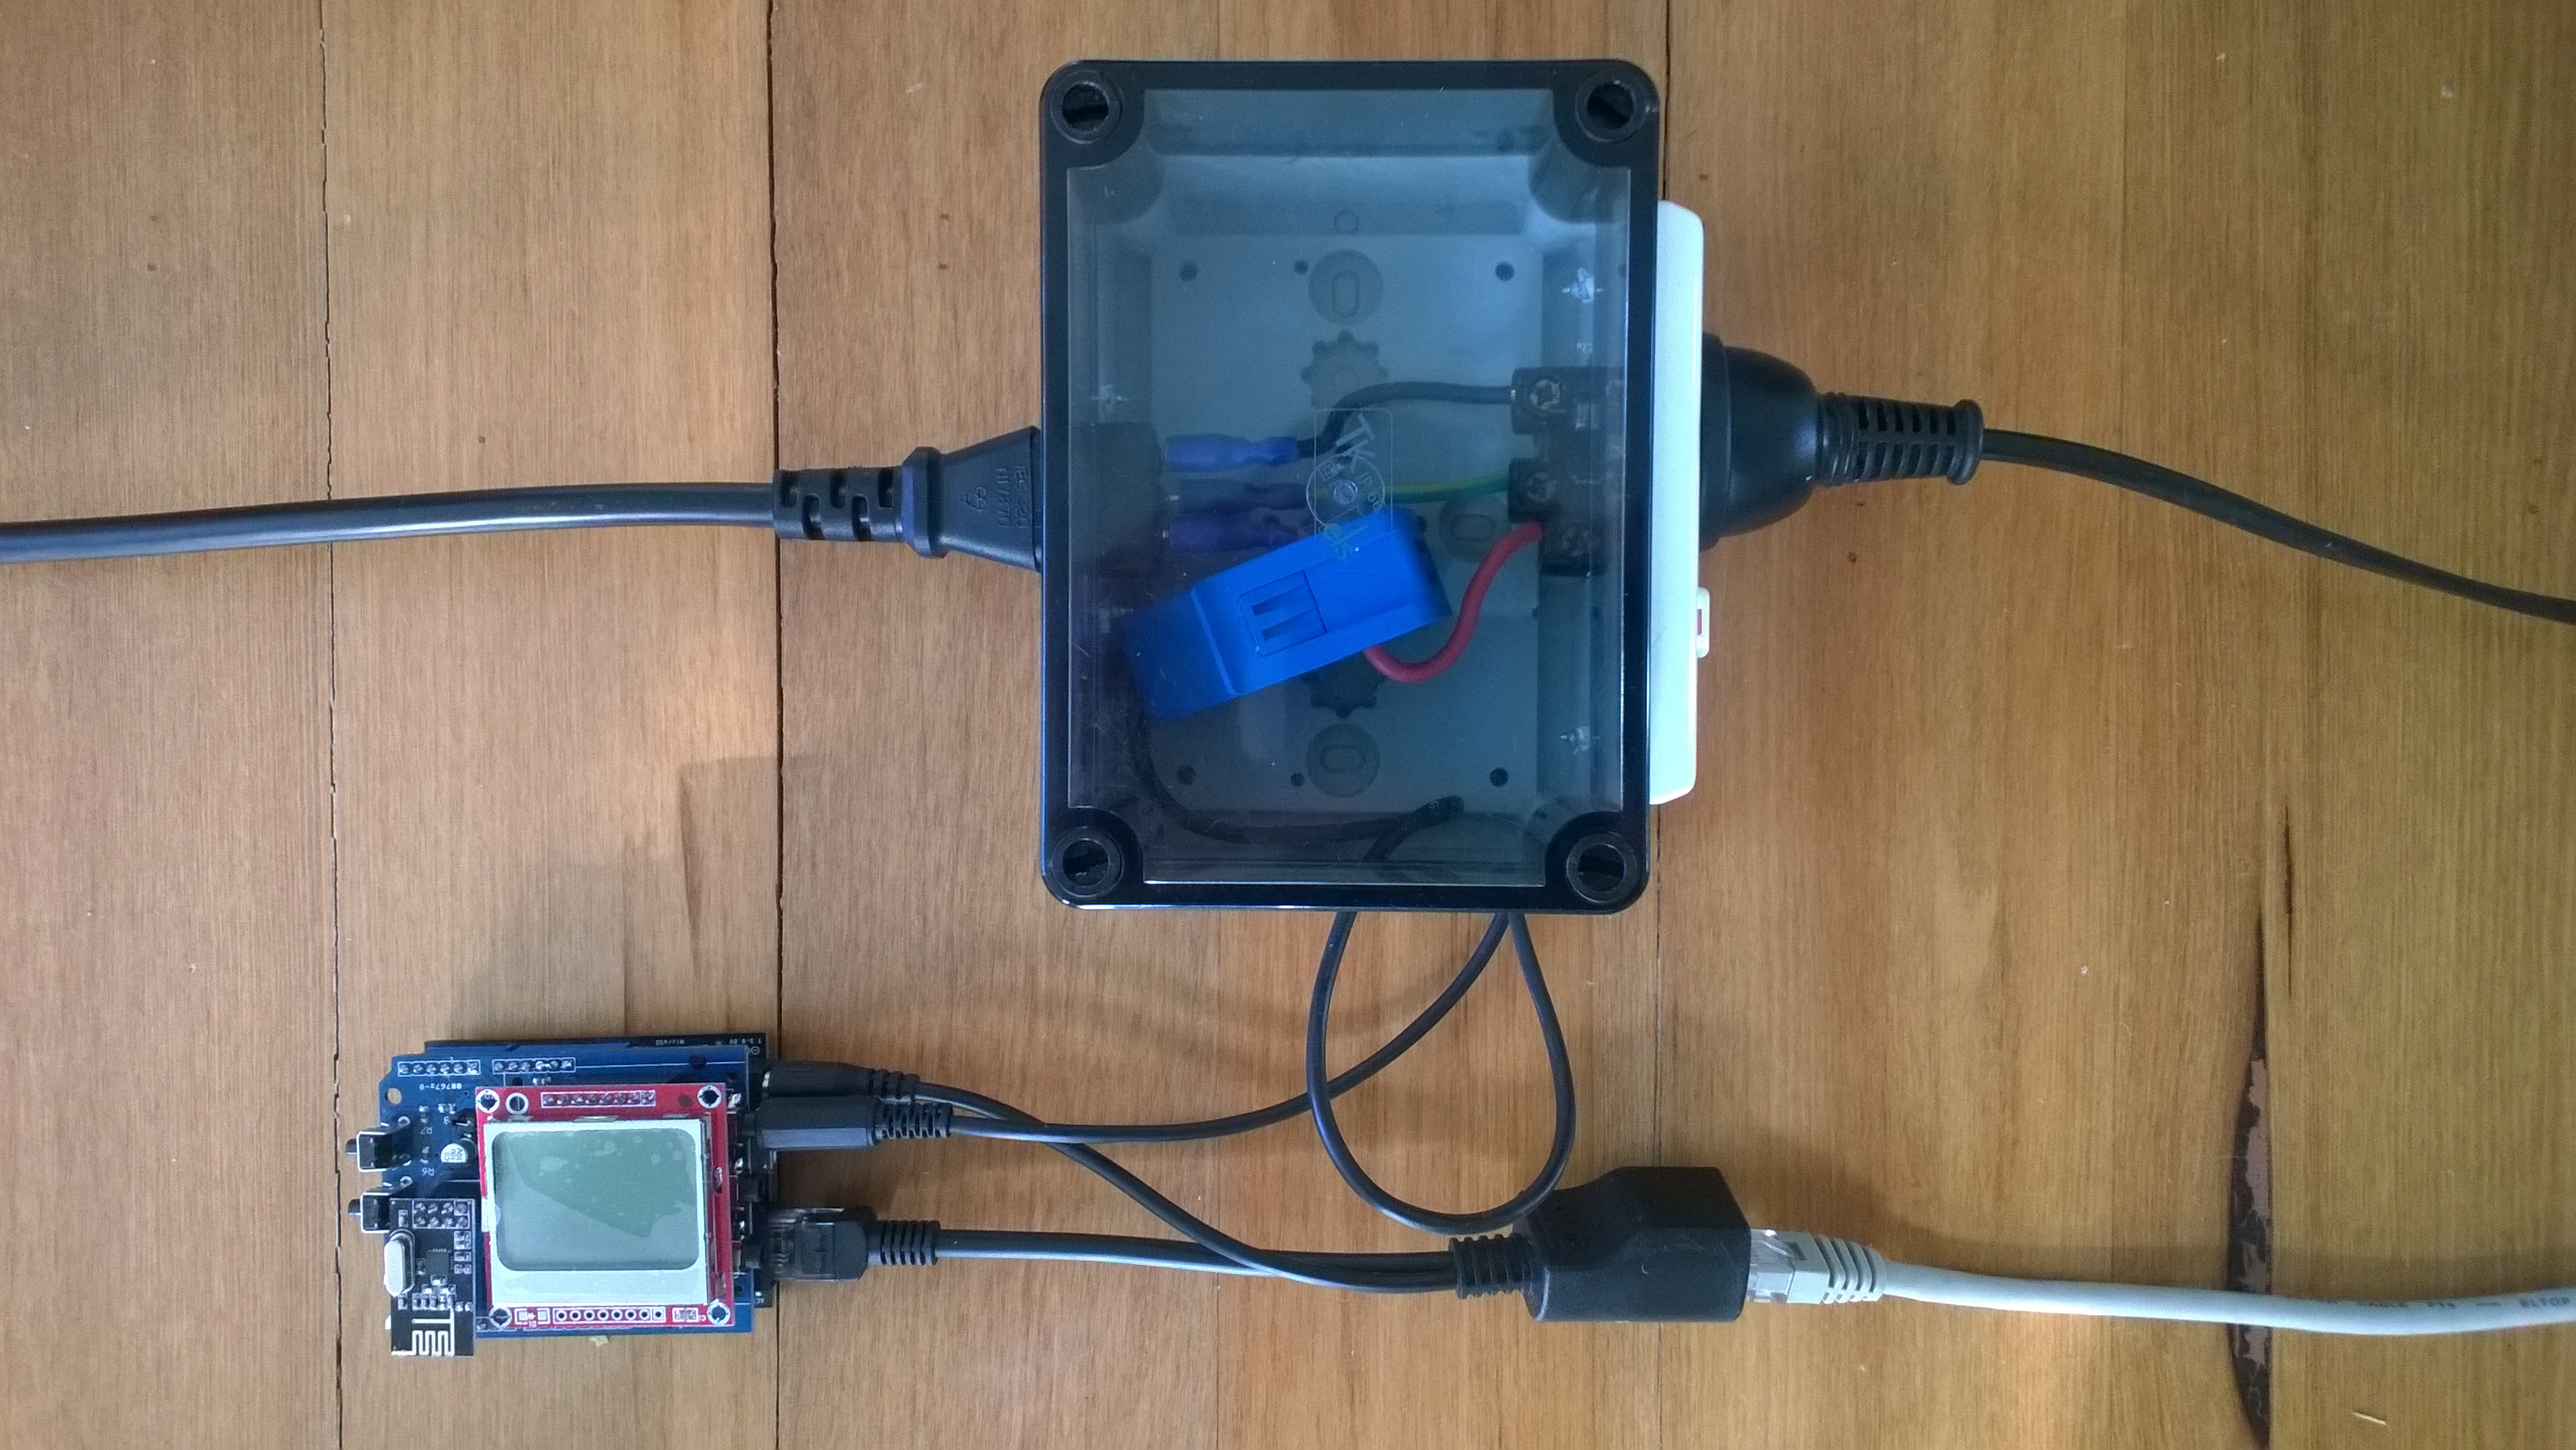
In the picture below the LED bar is displaying the distance to the base shield box with each LED segment representing 2cm.
Netduino based Park Distance Control

Bill of Materials for this project (Prices as at March 2015)

This code is just to illustrate how this could done and should not be used in production

public class Program
{
   private static OutputPort triggerOutput;
   private static InterruptPort echoInterrupt;
   private static long pulseStartTicks;
   private static GroveLedBarGraph distanceBar;
   private const int MillimetersPerBar = 20;

   public static void Main()
   {
      OutputPort distanceCin = new OutputPort(Pins.GPIO_PIN_D8, false);
      OutputPort distanceDin = new OutputPort(Pins.GPIO_PIN_D9, false);

      distanceBar = new GroveLedBarGraph(distanceCin, distanceDin);

      triggerOutput = new OutputPort(Pins.GPIO_PIN_D5, false);
      echoInterrupt = new InterruptPort(Pins.GPIO_PIN_D4,
         true,
         Port.ResistorMode.Disabled,
         Port.InterruptMode.InterruptEdgeBoth);

      echoInterrupt.OnInterrupt += new NativeEventHandler(echoInterruptPort_OnInterrupt);

      Timer distanceUpdate = new Timer(distanceUpdateCallbackProc, null, 0, 500);

      Thread.Sleep(Timeout.Infinite);
   }

   public static void distanceUpdateCallbackProc(object state)
   {
      triggerOutput.Write(false);
      Thread.Sleep(2);
      triggerOutput.Write(true);
      Thread.Sleep(10);
      triggerOutput.Write(false);
      Thread.Sleep(2);
   }

   static void echoInterruptPort_OnInterrupt(uint data1, uint data2, DateTime time)
   {
      long pulseWidthTicks;

      if (data2 == 1) // leading edge, start of pulse
      {
         pulseStartTicks = time.Ticks;
      }
      else
      {
         pulseWidthTicks = time.Ticks - pulseStartTicks;

         long distance = pulseWidthTicks / 58;

         Debug.Print("distance = " + distance.ToString() + "mm");

         uint ledBar = 1;
         ledBar = ledBar <<(int)(distance / MillimetersPerBar );
         distanceBar.setLED(ledBar);
      }
   }
}

Azure Event Hub Service Gateway V0.5

In a previous post I had developed a simple Microsoft Azure EventHubs Service Gateway for Arduino and Netduino devices which required Internet Information Server(IIS). Running IIS in some home environments could be a bit awkward so I have got a basic light weight version going which is hosted in a self installing Windows Service. The gateway supports four command line parameters.(The install and uninstall must be run as administrator otherwise the requested process will fail)

  • Install – install the service
  • Uninstall – uninstalls the service
  • Debug – runs the service in interactive mode
  • Name – allows you to specify the name of the service in the Services Manager.

The code does some basic logging to the Windows Event log and can be configured to start automatically when the computer starts.

The configuration file has two settings

<appSettings>
<add key="Microsoft.ServiceBus.ConnectionString" value="YourConnectionStringGoesHere" />
<add key="Microsoft.ServiceBus.EventHub" value="myhomemonitor" />
<add key="baseAddress" value="http://your.URL.goes.Here:8080/" />
</appSettings>

The code is based on the self installing service sample code that ships with the Wix# toolkit.

try
{
   string connectionString = ConfigurationManager.AppSettings["Microsoft.ServiceBus.ConnectionString"];
   string eventHubName = ConfigurationManager.AppSettings["Microsoft.ServiceBus.EventHub"];

   NamespaceManager namespaceManager = NamespaceManager.CreateFromConnectionString(connectionString);

   EventHubClient client = EventHubClient.Create(eventHubName);

   EventData data = new EventData(request.Content.ReadAsByteArrayAsync().Result);

   // Set user properties if needed
   data.Properties.Add("UploadedAtUTC", DateTime.UtcNow.ToString("yyyy-MM-dd HH:mm:ss"));
   data.Properties.Add("UploadedBy", "devMobileAzureEventHubGateway");

   client.Send(data);
}
catch (Exception ex)
{
   eventLog.WriteEntry(string.Format("Application initialisation failed {0}", ex.Message), EventLogEntryType.Error);
}

The Azure EventHub Service Gateway Code V0.5 is a bit rough but I will enhance it as time allows. First steps will be improving logging then creating a WIX# based installer.

Electric Longboard Annoying Squeak\Squeal

After a couple hours of riding my longboard it started making a high pitched squeak\squeal which sounded like it was coming from the brushless motor. After some investigation I found that a circlip on the end of my Turnigy Aerodrive SK3-6364-245kv Brushless motor was making the noise. The circlip usually rotates with the shaft of the motor but the motor bracket was stopping this from happening.

photo of circlip end of SK3 motor

Close up photo of circlip on the end of SK3 motor

I used the DIYElectricSkateboard.com website “support chat” and spoke with Dexter the very helpful owner of DIY Electric Skateboards and he suggested trying washers on the 4 x bolts which attach the motor to the bracket.

Longboard Motor Spacer

Longboard Motor with Spacers

I used 4 x M4 washers and the circlip now rotates freely which appears to have fixed the problem.

Electric Longboard devDuino V2 Controller

I really wanted to get the longboard working so I had a look at buying Wiiceiver from AustinDavid.com.

The source code is available on Github and I had a spare devicter devDuino Sensor Node V2 sitting on my desk. With some modification (changing pins numbers and removing all references to the second LED) I got the wiiceiver code running on my devDuino.

The Electronic Speed Controller(ESC) and the plastic lunch box (containing the batteries and devDuino) are attached to the deck with 3M Command adhesive strips. The first set of command adhesive strips I tried were for hanging pictures and had a Velcro quick release system. This approach was a failure and the ESC & electronics box fell off after 10-15 minutes use. The Velcro backing tape was getting pulled in the wrong direction so was unable to hold the weight of the electronics when vibration levels increased. I tried them because a “quick release” capability would be handy but I have gone back to using conventional 3M Command adhesive strips and these are working well.

devDuino V2 and ESC on longboard

devDuino based controller interfaced with ESC and wireless WiiChuk

Initial rides went well, though I need to recalibrate the acceleration and braking ramp up/down settings to suit my hardware and riding style.

Bill of Materials for this project (Prices as at Feb 2015)

  • Single Motor Mechanical Electric Longboard Kit USD223
  • Turnigy Aerodrive SK3-6364-245kv Brushless Outrunner Motor USD70.68
  • HobbyKing 150A High Performance Brushless Car ESC USD68.99
  • ZIPPY Flightmax 5000mAh battery X 2 USD31.99 each
  • HXT4mm Battery Harness 14AWG for 2 Packs in Series USD2.43
  • HXT 4mm Gold Connector with Protector (10pcs/set)
  • devDuino Sensor Node V2 USD15.99
  • Grove Nunchuck adaptor USD2.90
  • Grove Branch Cable for Servo USD4.90
  • Wireless Nunchuck NZD25.00
  • Moose 9.5×42 Longboard Flush Mount Deck Green Stain NZD57

WARNING – Disconnect the power supply pin on the Grove Branch Cable for Servos as the ESC will supply sufficient current to make the batteries on the devDuino go pop. Wrap some tape around the other servo connector so it can’t cause a short circuit.

Thanks to Austin David for making the code for the Wiiciever open source, if anyone is interested in my code I can tidy it up and share.

/*
 * Pin IDs -- NOT LOCATIONS !!!
 * don't change these ever; see &quot;pinLocation&quot; below for
 * actual locations
 */
#define RED_LED_ID   0
//#define GREEN_LED_ID 1

#define ESC_PPM_ID   2
//#define ESC2_PPM_ID   6
#define ESC_GROUND 00     // hard-wired

//#define WII_POWER_ID 3
//#define WII_GROUND 00     // hard-wired

#define WII_SCL_ID   4
#define WII_SDA_ID   5

I made my devDuino look like a V3 wiiceiver

int pinLocation(int pinID) {
  int pinMap[7][3] = {
  // v1, v2, v3
    {8,   8,  9},  // RED_LED     any digital pin
    {7,   6,  8},  // GREEN_LED   any digital pin
    {10,  9,  3},  // ESC_PPM     PWM required
    {9,  11,  5},  // WII_POWER   any digital pin
    {19, 19, 19}, // WII_SCL     A5, don't change
    {18, 18, 18}, // WII_SDA     A4, don't change
    {0,  10, 0}, // ESC2_PPM    PWM required
  };

The rest of my changes were commenting out all references to the Green LED as the devDuino only has one onboard LED.

Azure Event Hub Service Gateway V0.1

My Netduino and Arduino devices can’t do https so I had been looking at different approaches for uploading sensor data to a Microsoft Azure Event Hub. In a previous post I published the “simplest” possible useful program (a console application) which could upload data and this code builds on that.

In this proof of concept I have integrated the core of the console application code into an ASP.NET MVC WebAPI 2 project which acts as a service gateway. My Netduino clients now use a website hosted on my Essentials 2012 home server to forward the requests to a Microsoft Azure Event Hub .

For more detail about how to program the energy monitor shield see these posts about the Nokia 5110 display, nrf24L01 wireless link, and non invasive current sensor algorithm optimisations.

try
{
   using (HttpWebRequest request = (HttpWebRequest)WebRequest.Create( AzureGatewayUrl ))
   {
      string payload = @&quot;{&quot;&quot;DeviceId&quot;&quot;:&quot; + deviceId + @&quot;,&quot;&quot;Usage&quot;&quot;:&quot; + value + &quot;}&quot;;
      byte[] buffer = Encoding.UTF8.GetBytes(payload);
      request.Method = &quot;POST&quot;;
      request.ContentLength = buffer.Length;
      request.ContentType = &quot;text/csv&quot;;
      request.KeepAlive = false;
      request.Timeout = 5000;
      request.ReadWriteTimeout = 5000;

      using (Stream stream = request.GetRequestStream())
      {
         stream.Write(buffer, 0, buffer.Length);
      }
      using (var response = (HttpWebResponse)request.GetResponse())
      {
         Debug.Print(&quot;HTTP Status&quot; + response.StatusCode + &quot; : &quot; + response.StatusDescription);
      }
   }
}
catch (Exception ex)
{
   Debug.Print(ex.Message);
}
Netduino power consumption monitor

Netduino power consumption monitor

Azure Service Bus Explorer by  Paolo Salvatori is great for debugging and testing Service Bus applications like this.

ServiceBus Explorer Displaying event hub power consumption data

ServiceBus Explorer displaying power consumption data

Bill of materials (prices as at Feb 2015)

The Azure Event Hub Service GatewayV0.1 is pretty basic with, no security, doesn’t have a lot of logging. wouldn’t scale terribly well (Though most home systems wouldn’t have a lot of sensors) and is hosted in Internet Information Server(IIS),

In future posts I’ll fix these limitations and make the service gateway secure, easier to install, configure and operate. But, this proof of concept proves the approach is viable

// POST api/eventhub
 public void Post(HttpRequestMessage request)
      {
         try
         {
            string connectionString = ConfigurationManager.AppSettings["Microsoft.ServiceBus.ConnectionString"];
            string eventHubName = ConfigurationManager.AppSettings["Microsoft.ServiceBus.EventHub"];

            NamespaceManager namespaceManager = NamespaceManager.CreateFromConnectionString(connectionString);

            EventHubClient client = EventHubClient.Create(eventHubName);

            EventData data = new EventData(request.Content.ReadAsByteArrayAsync().Result);

            // Set user properties if needed
            data.Properties.Add("UploadedAtUTC", DateTime.UtcNow.ToString("yyyy-MM-dd HH:mm:ss"));
            data.Properties.Add("UploadedBy", "devMobileAzureEventHubGateway");

            client.Send(data);
         }
         catch (Exception ex)
         {
            Debug.WriteLine("Send failed " + ex.Message);
         }
      }

Azure Event Hubs “simplest” possible program

I want to connect several Netduino devices monitoring my house to a Microsoft Azure Event Hub, but the Netudino does not natively support https connections (required for the REST API) and AMQP looked a bit chunky.

The team at Kloud have some great posts about getting Arduino & NetMF devices connected using the Azure python SDK and an Application Request Routing based solution.

I’m going to build an ASP.NET MVC Web API 2 based Azure Event hub gateway. I aiming for a minimal install footprint and resource utilisation as I want to use my Essentials2012  home server or Windows 7 Media Centre box to host the gateway.

My first step is to create a the “simplest” possible program which connects to a Microsoft Azure Event Hub and uploads an event. (Minimal complexity, no async, no threads, and very flat), This console application uploads an event specified in a file to an Microsoft Azure Event Hub. The Azure service bus connection string is configured in the app.config file, the event hub name, file path and partition id are specified on the command line.

using System;
using System.IO;
using System.Configuration;
using Microsoft.ServiceBus;
using Microsoft.ServiceBus.Messaging;

static void Main(string[] args)
{
   if (args.Length != 3)
   {
      Console.WriteLine("Incorrect number of arguments. Expected 3 args <eventhubname> <datafilepath> <partionkey>");
      return;
   }

   string eventHubName = args[0];
   string dataFilePath = args[1];
   string partitionKey = args[2];
   Console.WriteLine("Sending file {0} to EventHub {1} Partition {2}", dataFilePath, eventHubName, partitionKey);

   try
   {
      string connectionString = ConfigurationManager.AppSettings["Microsoft.ServiceBus.ConnectionString"];
      NamespaceManager namespaceManager = NamespaceManager.CreateFromConnectionString(connectionString);

      EventHubClient client = EventHubClient.Create(eventHubName);

      using (var dataFileStream = File.Open(dataFilePath, FileMode.Open))
      {
         EventData data = new EventData(dataFileStream)
         {
            PartitionKey = partitionKey,
         };

         // Set user properties if needed
         data.Properties.Add("Acquired", DateTime.UtcNow.ToString("yyyy-MM-dd HH:mm:ss"));

         DateTime startUtc = DateTime.UtcNow;
         client.Send(data);
         DateTime finishUtc = DateTime.UtcNow;
         TimeSpan duration = finishUtc - startUtc;
         Console.WriteLine("Duration {0:F2} secs", duration.TotalSeconds);
      }
   }
   catch (Exception ex)
   {
      Console.WriteLine("Send failed {0}", ex.Message);
   }
   Console.WriteLine("Press <Enter> to exit");
   Console.ReadLine();
   }
}

Uploading an event takes roughly 2.5 seconds on my ADSL internet connection.

Electric Longboard First Assembly

My next project an electric motor powered longboard.

DIY longboard

Electric Longboard Parts

Bill of Materials for this project (Prices as at Jan 2014)

  • Single Motor Mechanical Electric Longboard Kit USD223
  • Turnigy Aerodrive SK3-6364-245kv Brushless Outrunner Motor USD70.68
  • HobbyKing 150A High Performance Brushless Car ESC USD68.99
  • ZIPPY Flightmax 5000mAh battery X 2 USD31.99 each
  • HXT4mm Battery Harness 14AWG for 2 Packs in Series USD2.43
  • HXT 4mm Gold Connector with Protector (10pcs/set) USD4.44
  • Netduino 2 Plus (may replace this with a Netduino) USD59.95
  • Grove Base Shield V2 USD 8.90
  • Grove Nunchuck Adaptor USD2.90
  • Wireless Nunchuck NZD25.00
  • Moose 9.5×42 Longboard Flush Mount Deck Green Stain NZ57

Initial trials of the Wireless Nunchuck have not been very positive. As the Netduino device starts the connection to the handset is dropped. Need to do some more investigation to see if I can get this to work otherwise I will have to use a wired Nunchuck.

Netduino Crazyflie Wii Nunchuk Remote Control V1.0

After flying the Crazyflie for a couple of days with the Joystick shield based remote control I figured an alternate user interface based on a Wii Nunchuk could be interesting. (It might also make the Crazyflie easier to operate for novice pilots). After a couple of hours coding I have a proof of concept Netduino based Crazyflie Nanocopter Wii Nunchck remote control unit.

Initially the nanocopter was difficult to fly, bouncing up and down (thrust control issues) and swaying side to side (roll & pitch control issues). After some digging I found that every so often the Wii nunchuk (my cheap clone) would return a buffer full of 0xFF or 0x00 bytes.  The 0xFF case had been handled but not the 0x00 one. I added a second test into the GetData  method (around line 335) to catch the 0x00 scenario and this appeared to fix the problem.

cnt = 0;
for (int i = 0; i &lt; inputBuffer.Length; i++)
   if (inputBuffer[i] == 0x0) cnt++;
if (cnt == inputBuffer.Length)
{
   return false;
}
CrazyFlie Netduino Wiichuck based Remote

CrazyFlie Netduino Wiichuck based Remote

Bill on Materials (Prices as at Jan 2014)

This software was built using tooling created and shared by others.

Big thanks to

Jakub Bartkowiak – Gralin.NETMF.Nordic.NRF24L01Plus

Szymon Kobalczyk – Wiichuck I2C driver

Antao Almada – HydraMF.BitConverter

The nunchuck accelerometer provides roll and pitch, the joystick is for thrust and yaw. The first version of the CrazyFlieWiiChuckV1.0 is pretty basic and I have intentionally reduced the maximum roll, pitch, thrust and yaw values to make it easier to fly. (Need to set the Grove Base Shield to 3V3 for my code to work)

Currently I only calculate offset values for thrust & yaw. After a couple of test flights some visual indication of the pitch and roll values from the nunchuk would be helpfull.

Netduino Crazyflie Joystick Shield Remote Control V1.0

Sometimes you start with a goal in mind then a couple of days later you have built something interesting but totally unrelated to what you originally intended to do….

I have several devices (both Netduino & Arduino) which I want to use to collect and upload data to the cloud so I can monitor the resource usage of my house.

I had read Clemens Vaster post on Service Assisted Communication and I was planning to use a Windows Server Essentials 2012 box I have running 24/7 in the hallway to forward updates to the cloud.

I wanted to connect the remote data acquisition nodes directly to the server using their baked in nRF24L01+ support. On the server end the Crazyradio 2.4 Hhz nRF24LU1 USB dongle looked ideal. After some initial positive results I found that the CrazyRadio firmware had been implemented in a way that made it not suitable for my application. (I even considered downloading the BitCraze development VM and building my own custom firmware)

After spending a few hours trying to get the CrazyRadio dongle working I looked at my Crazyflie Nano QuadCopter sitting on the bookshelf.

Then I realised what I really needed is a more portable Crazyflie remote control unit so I didn’t have to unpack my laptop. So two nights later I have a proof of concept Netduino based Crazyflie Nanocopter remote control unit.

CrazyFlie nano copter and Netduino Based Remote

CrazyFlie Netduino based Remote

Bill on Materials (Prices as at Jan 2014)

This software was built using tooling created and shared by others.

Big thanks to

Jakub Bartkowiak – Gralin.NETMF.Nordic.NRF24L01Plus

Antao Almada – HydraMF.BitConverter

Mike McCauley – NRF24 library for Arduino.

I used the NRF24 CrazyFlie emulator to debug my project. No doubt stopping me crashing my Crazyflie many times while debugging.

The Joystick shield has to be modified to work with the common Netduino nRF24L01 libraries which use interrupts rather than polling.

The joystick on the shield is for roll and pitch, the external joystick is for thrust and yaw. The first version of the JoystickShieldnRF24l01V1.0 is pretty basic but I’ll try and enhance it over the next couple of posts.

Netduino Water flow Sensor

A few months ago I purchased 1/2” and 3/4″ inch water flow sensors from SeeedStudio. My plan was to monitor our water and power consumption data to see what environmental impact my house has.

To see how the sensor works I built a simple proof of concept Netduino application which counted the pulses produced by the sensor and calculated the instantaneous water flow.

The next steps are to upload the water flow data to the cloud over a cabled then wireless connections.

public class Program
{
   private static int waterFlowCounter = 0;

   public static void Main()
   {
      InterruptPort flowCounterSensor = new InterruptPort(Pins.GPIO_PIN_D5, false, Port.ResistorMode.Disabled, Port.InterruptMode.InterruptEdgeHigh);
      flowCounterSensor.OnInterrupt += new NativeEventHandler(flowCounter_OnInterrupt);

      Timer waterFlowUpdate = new Timer(waterFlowUpdateProc, null, 0, 1000);
      Thread.Sleep(Timeout.Infinite);
   }

   static void flowCounter_OnInterrupt(uint data1, uint data2, DateTime time)
   {
      Interlocked.Increment(ref waterFlowCounter);
   }

   static void waterFlowUpdateProc(object status)
   {
      int flowCount = Interlocked.Exchange(ref waterFlowCounter, 0);
      double flowLitresMinute = flowCount / 5.5 ; // The q value from documentation
      Debug.Print(flowLitresMinute.ToString("F1") + "L/m";);
    }
}
Netduino based water flow sensor

water flow sensor

Bill of Materials (Prices as at 12-2014)

Netduino Plus 2 USD60 NZD108

Grove Base Shield V2 USD8.90

G3/4″ Water Flow Sensor USD14.90

G1/2″ Water Flow Sensor USD9.50 NZD8.30