Random wanderings through Microsoft Azure esp. PaaS plumbing, the IoT bits, AI on Micro controllers, AI on Edge Devices, .NET nanoFramework, .NET Core on *nix and ML.NET+ONNX
After some investigation I think the scaling of the image used for inferencing (based on the requirements on the model), then the scaling of the minimum bounding rectangles isn’t quite right.
public static class Function1
{
private static readonly InferenceSession session = new InferenceSession("resnet50.onnx");
[FunctionName("ImageClassification")]
public static IActionResult Run(
[HttpTrigger(AuthorizationLevel.Function, "post")] HttpRequest req,
ILogger log)
{
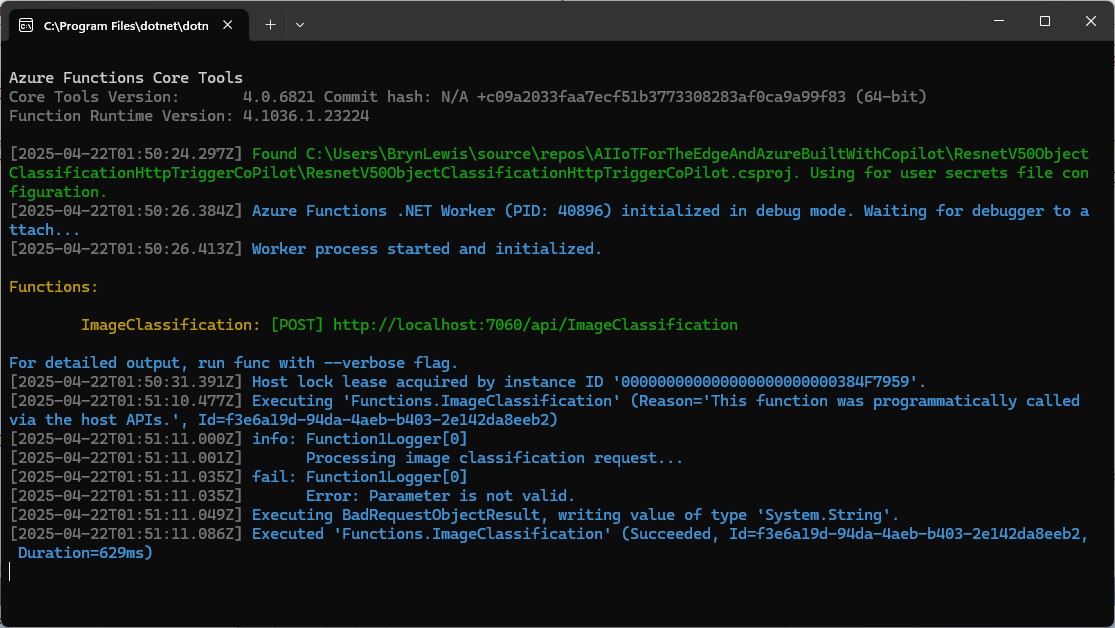
log.LogInformation("Processing image classification request...");
try
{
using var ms = new MemoryStream();
req.Body.CopyTo(ms);
using var image = Image.FromStream(ms);
var inputTensor = PreprocessImage(image);
var inputName = session.InputMetadata.Keys.First();
var outputName = session.OutputMetadata.Keys.First();
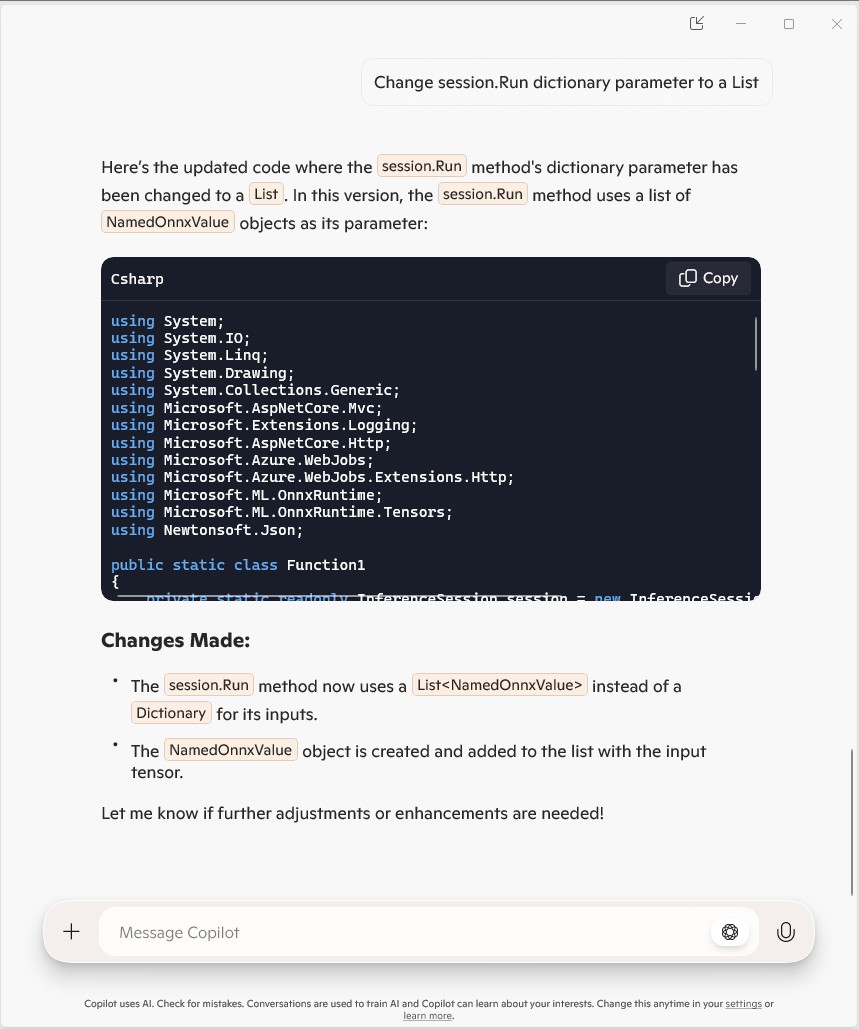
var result = session.Run(new Dictionary<string, NamedOnnxValue>
{
{ inputName, NamedOnnxValue.CreateFromTensor(inputName, inputTensor) }
});
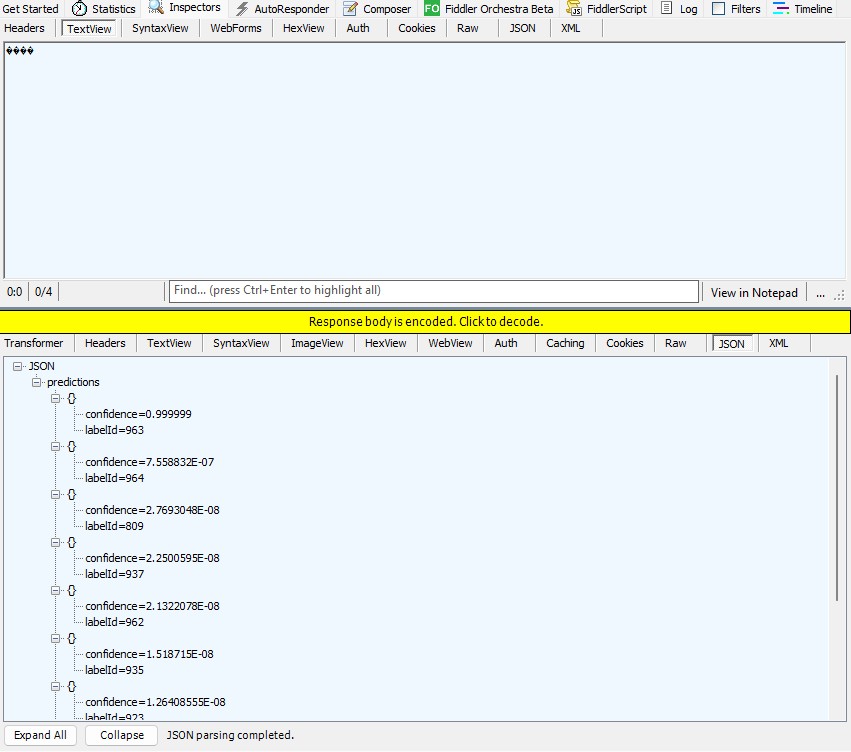
var predictions = result.First().AsTensor<float>().ToArray();
return new JsonResult(new { predictions });
}
catch (Exception ex)
{
log.LogError($"Error: {ex.Message}");
return new BadRequestObjectResult("Invalid image or request.");
}
}
...
}
public static class Function1
{
   private static readonly InferenceSession session = new InferenceSession("resnet50.onnx");

   [Function("ImageClassification")]
   public static IActionResult Run(
       [HttpTrigger(AuthorizationLevel.Function, "post")] HttpRequest req,
       ILogger log)
   {
      log.LogInformation("Processing image classification request...");

      try
      {
         using var ms = new MemoryStream();
         req.Body.CopyTo(ms);
         using var image = Image.FromStream(ms);

         var inputTensor = PreprocessImage(image);

         var inputName = session.InputMetadata.Keys.First();
         var outputName = session.OutputMetadata.Keys.First();
         var inputList = new List<NamedOnnxValue>
            {
                NamedOnnxValue.CreateFromTensor(inputName, inputTensor)
            };

         var result = session.Run(inputList);

         var predictions = result.First().AsTensor<float>().ToArray();

         return new JsonResult(new { predictions });
      }
      catch (Exception ex)
      {
         log.LogError($"Error: {ex.Message}");
         return new BadRequestObjectResult("Invalid image or request.");
      }
   }
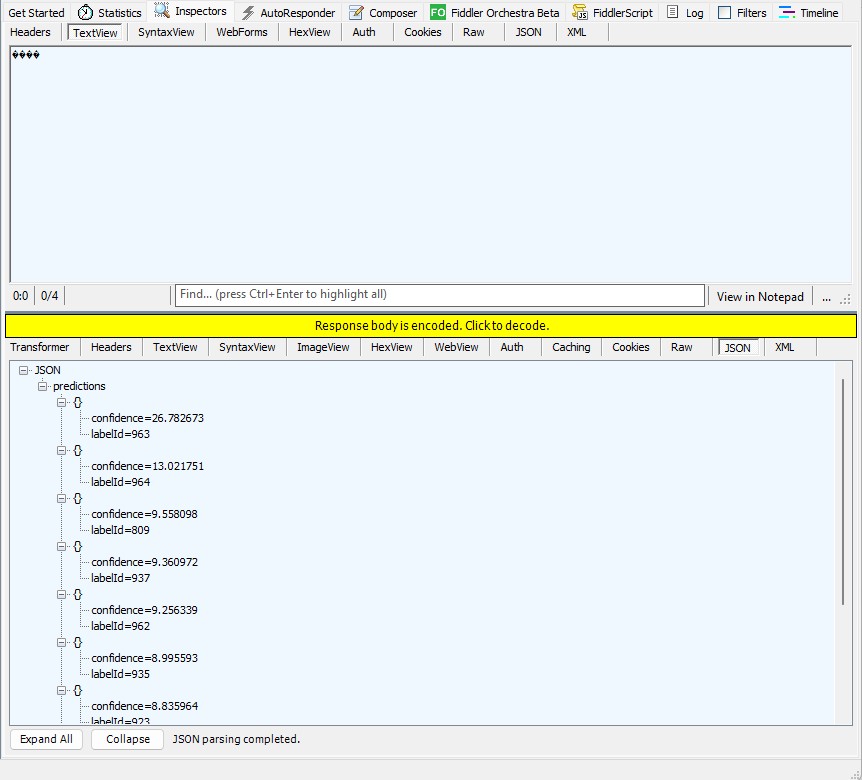
The image needs to be preprocessed before fed to the network. The first step is to extract a 224x224 crop from the center of the image. For this, the image is first scaled to a minimum size of 256x256, while keeping aspect ratio. That is, the shortest side of the image is resized to 256 and the other side is scaled accordingly to maintain the original aspect ratio. After that, the image is normalized with mean = 255*[0.485, 0.456, 0.406] and std = 255*[0.229, 0.224, 0.225]. Last step is to transpose it from HWC to CHW layout.
Postprocessing
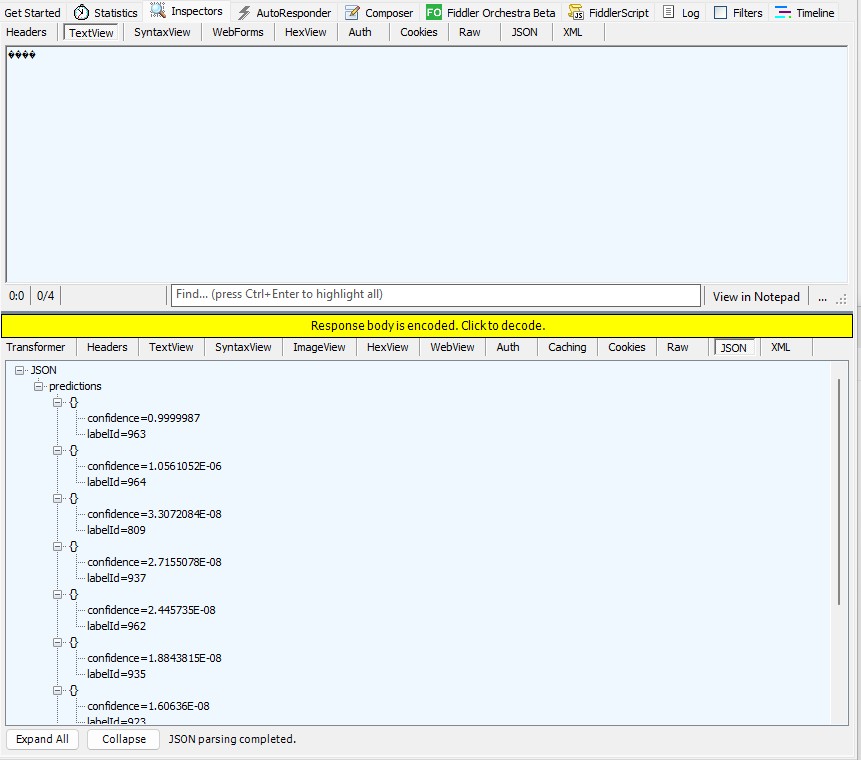
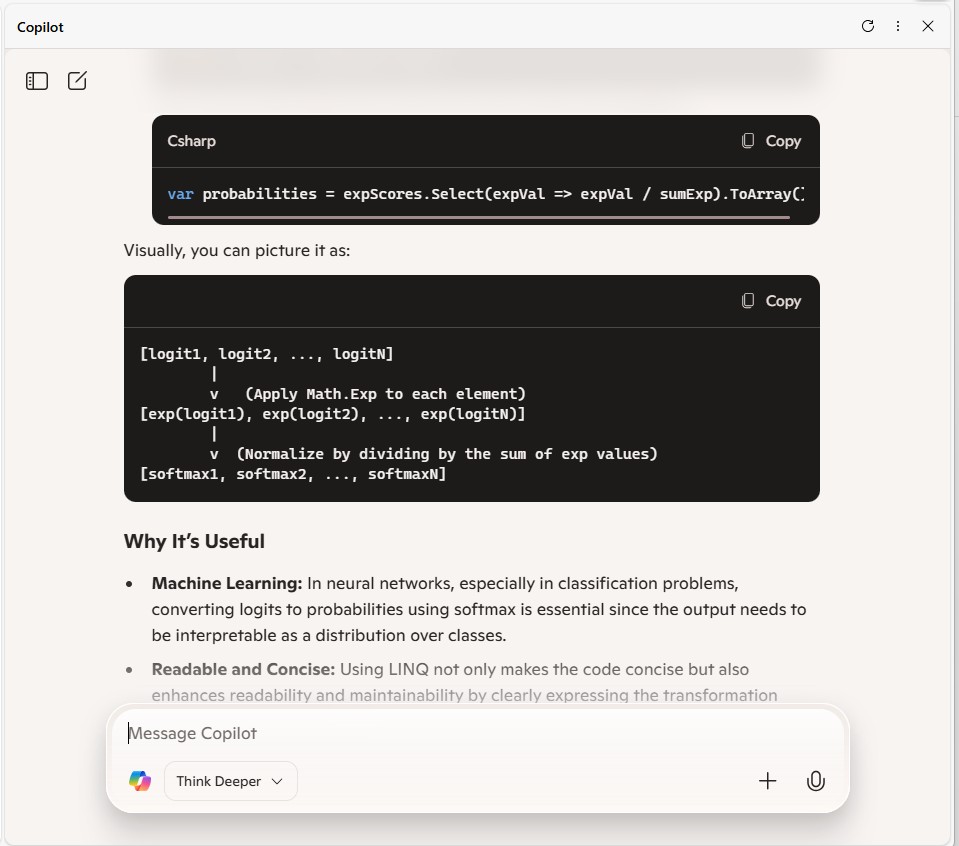
The post-processing involves calculating the softmax probability scores for each class. You can also sort them to report the most probable classes. Check imagenet_postprocess.py for code.
// Compute exponentials for all scores
var expScores = predictions.Select(MathF.Exp).ToArray();
// Compute sum of exponentials
float sumExpScores = expScores.Sum();
// Normalize scores into probabilities
var softmaxResults = expScores.Select(score => score / sumExpScores).ToArray();
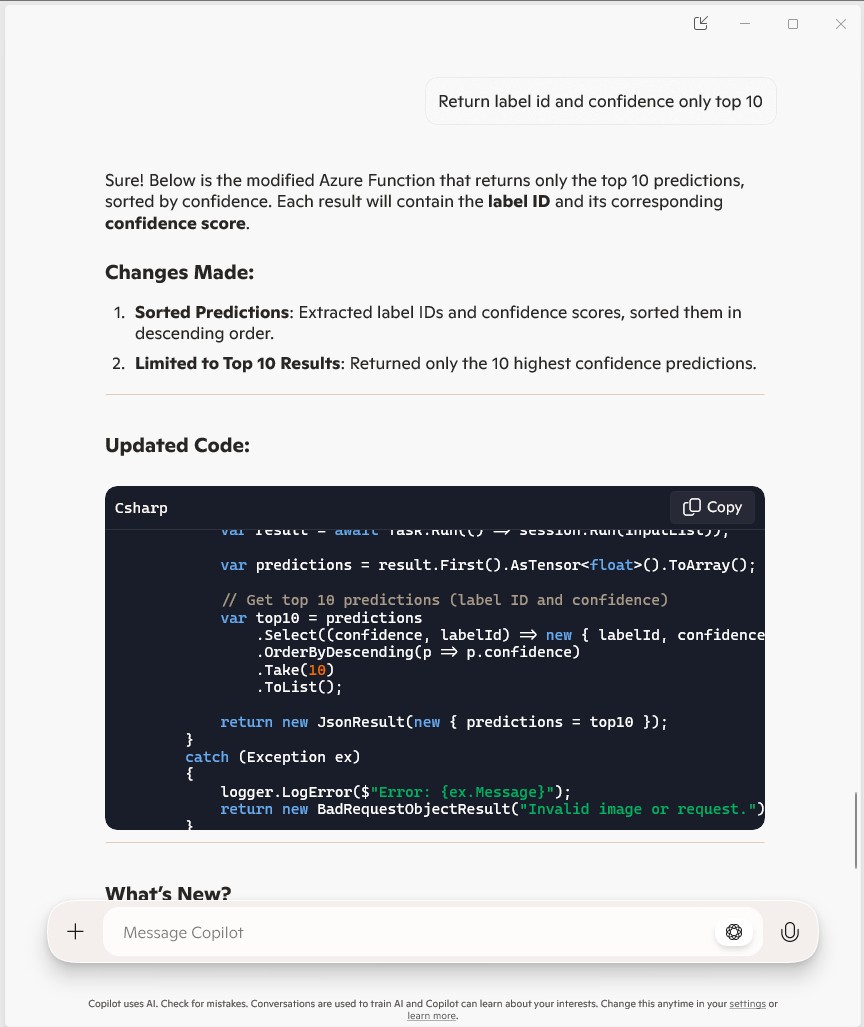
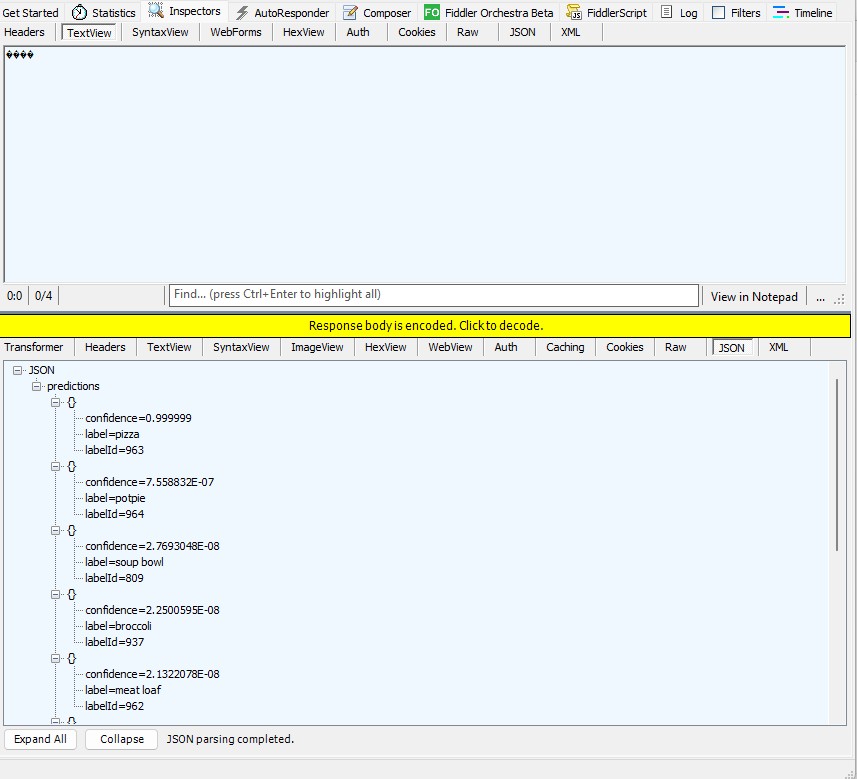
// Get top 10 predictions (label ID and confidence)
var top10 = softmaxResults
.Select((confidence, labelId) => new { labelId, confidence, label = labelId < labels.Count ? labels[labelId] : $"Unknown-{labelId}" })
.OrderByDescending(p => p.confidence)
.Take(10)
.ToList();
public static class Function1
{
private static readonly ILogger logger;
private static readonly InferenceSession session = new InferenceSession("resnet50-v2-7.onnx");
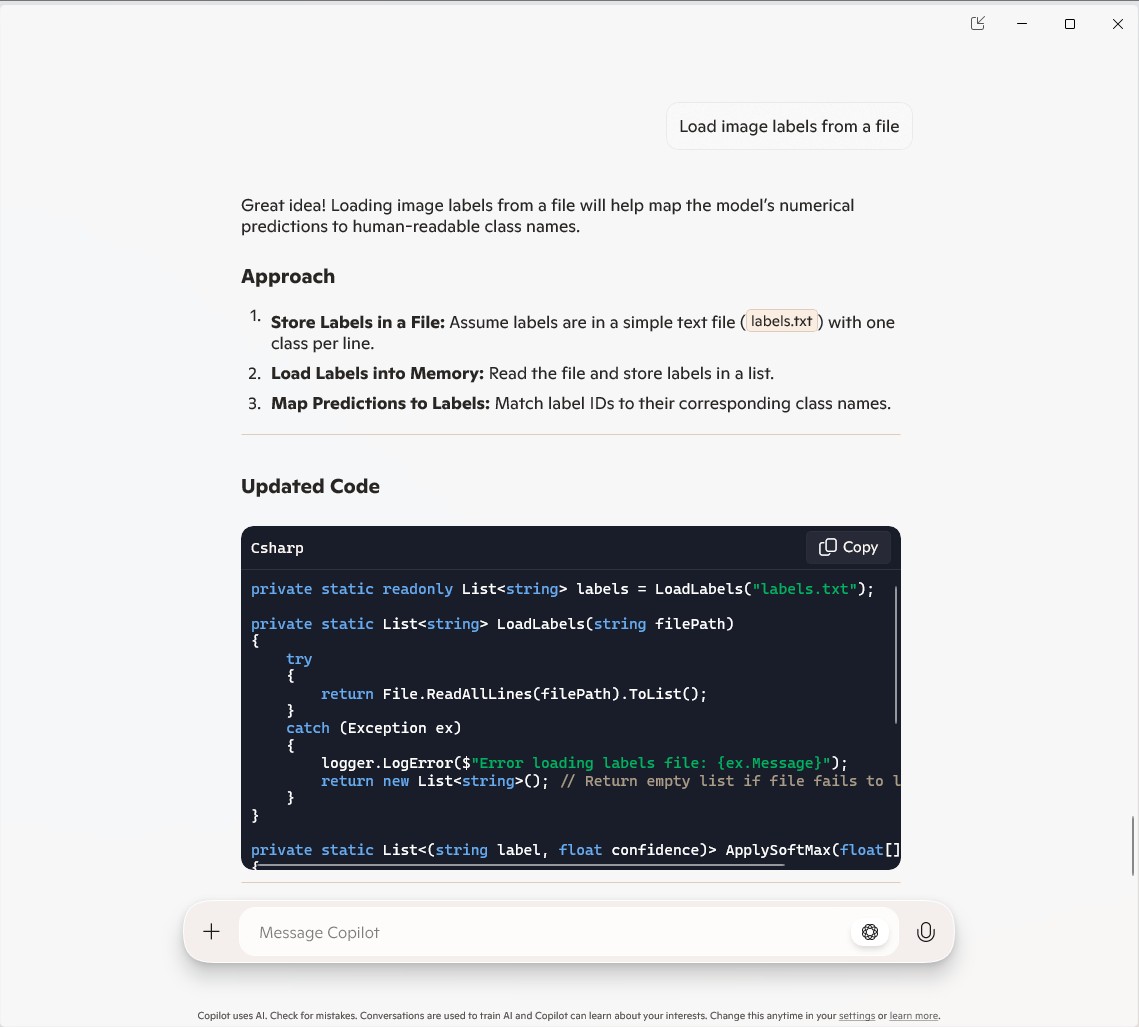
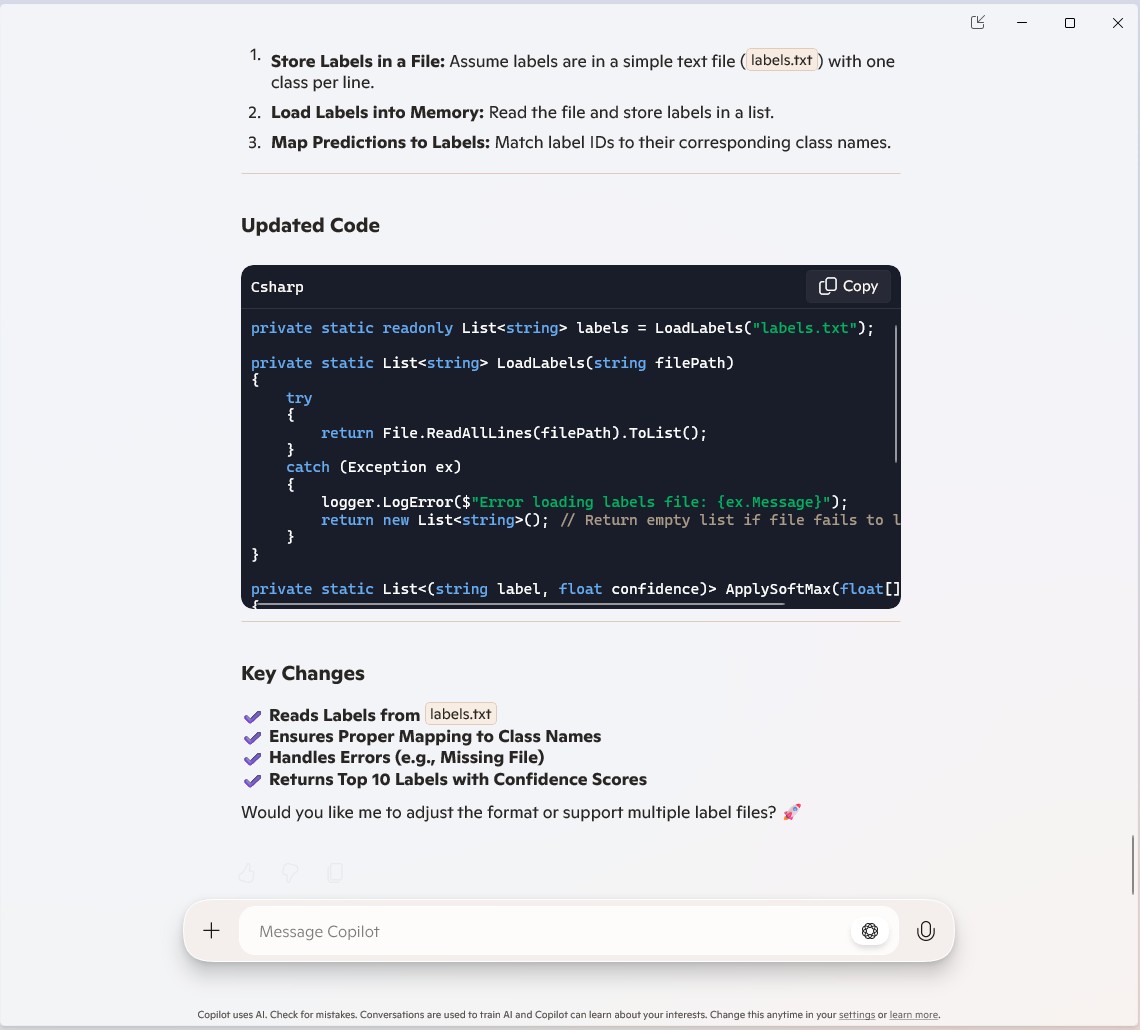
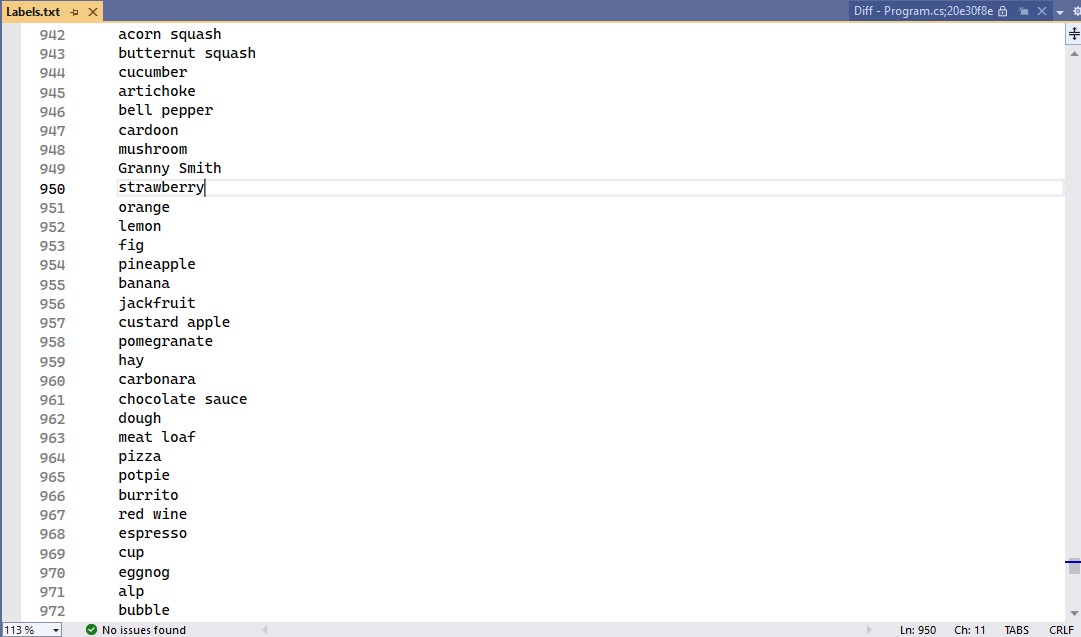
private static readonly List<string> labels = LoadLabels("labels.txt");
...
[Function("ImageClassification")]
public static async Task<IActionResult> Run(
[HttpTrigger(AuthorizationLevel.Function, "post")] HttpRequest req)
{
logger.LogInformation("Processing image classification request...");
try
{
...
// Get top 10 predictions (label ID and confidence)
var top10 = softmaxResults
.Select((confidence, labelId) => new { labelId, confidence, label = labelId < labels.Count ? labels[labelId] : $"Unknown-{labelId}" })
.OrderByDescending(p => p.confidence)
.Take(10)
.ToList();
return new JsonResult(new { predictions = top10 });
}
catch (Exception ex)
{
logger.LogError($"Error: {ex.Message}");
return new BadRequestObjectResult("Invalid image or request.");
}
}
...
private static List<string> LoadLabels(string filePath)
{
try
{
return File.ReadAllLines(filePath).ToList();
}
catch (Exception ex)
{
logger.LogError($"Error loading labels file: {ex.Message}");
return new List<string>(); // Return empty list if file fails to load
}
}
}
Summary
The Github Copilot generated code was okay but would be fragile and not scale terribly well. The confidence values changing very slightly when the code was updated for Sixlabors ImageSharp was disconcerting, but not surprising.
The Copilot generated code in this post is not suitable for production
Input
All pre-trained models expect input images normalized in the same way, i.e. mini-batches
of 3-channel RGB images of shape (N x 3 x H x W), where N is the batch size, and H and
W are expected to be at least 224. The inference was done using jpeg image.

Preprocessing
The image needs to be preprocessed before fed to the network. The first step is to
extract a 224x224 crop from the center of the image. For this, the image is first scaled
to a minimum size of 256x256, while keeping aspect ratio. That is, the shortest side
of the image is resized to 256 and the other side is scaled accordingly to maintain
the original aspect ratio.

After that, the image is normalized with mean = 255*[0.485, 0.456, 0.406] and std
= 255*[0.229, 0.224, 0.225]. Last step is to transpose it from HWC to CHW layout.
static void Main()
{
   string modelPath = "resnet50-v2-7.onnx"; // Path to your ONNX model
   string imagePath = "pizza.jpg"; // Path to the input image

   using var session = new InferenceSession(modelPath);
   var inputTensor = LoadAndPreprocessImage(imagePath);

   var inputs = new List<NamedOnnxValue>
   {
       NamedOnnxValue.CreateFromTensor("input", inputTensor)
   };

   using var results = session.Run(inputs);
   var output = results.First().AsTensor<float>().ToArray();

   Console.WriteLine("Predicted class index: " + Array.IndexOf(output, output.Max()));
}

static DenseTensor<float> LoadAndPreprocessImage(string imagePath)
{
   using Bitmap bitmap = new Bitmap(imagePath);
   int width = 224, height = 224; // ResNet50 expects 224x224 input
   using Bitmap resized = new Bitmap(bitmap, new Size(width, height));

   var tensor = new DenseTensor<float>(new[] { 1, 3, width, height });
   for (int y = 0; y < height; y++)
   {
      for (int x = 0; x < width; x++)
      {
         Color pixel = resized.GetPixel(x, y);
         tensor[0, 0, y, x] = pixel.R / 255f; // Normalize
         tensor[0, 1, y, x] = pixel.G / 255f;
         tensor[0, 2, y, x] = pixel.B / 255f;
      }
   }
   return tensor;
}
Input
All pre-trained models expect input images normalized in the same way, i.e. mini-batches
of 3-channel RGB images of shape (N x 3 x H x W), where N is the batch size, and H and
W are expected to be at least 224. The inference was done using jpeg image.

Preprocessing
The image needs to be preprocessed before fed to the network. The first step is to
extract a 224x224 crop from the center of the image. For this, the image is first scaled
to a minimum size of 256x256, while keeping aspect ratio. That is, the shortest side
of the image is resized to 256 and the other side is scaled accordingly to maintain
the original aspect ratio.

After that, the image is normalized with mean = 255*[0.485, 0.456, 0.406] and std
= 255*[0.229, 0.224, 0.225]. Last step is to transpose it from HWC to CHW layout.
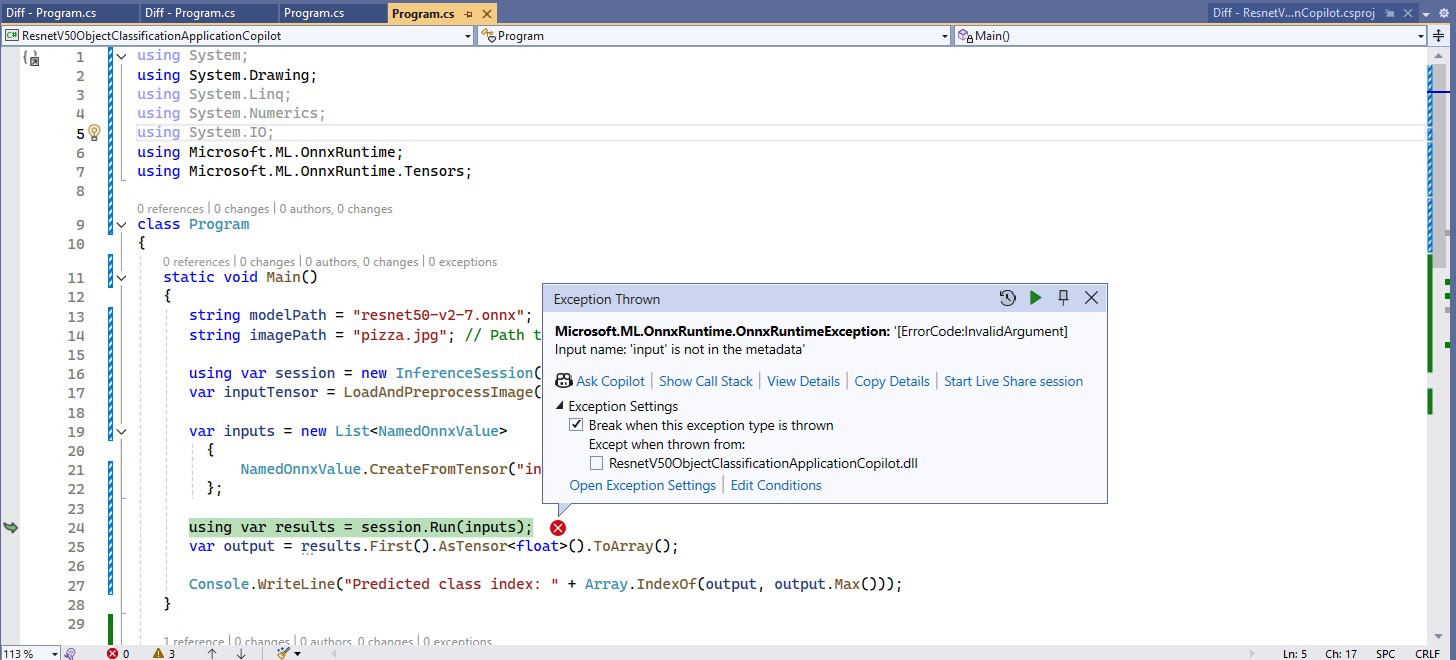
The Copilot generated code compiled and ran but the confidence values still didn’t look right, and the results tensor contained 1000 confidences values.
static void Main()
{
string modelPath = "resnet50-v2-7.onnx"; // Updated model path
string imagePath = "pizza.jpg"; // Updated image path
using var session = new InferenceSession(modelPath);
var inputTensor = LoadAndPreprocessImage(imagePath);
var inputs = new List<NamedOnnxValue>
{
NamedOnnxValue.CreateFromTensor("data", inputTensor) // Using "data" as the input tensor name
};
using var results = session.Run(inputs);
var output = results.First().AsTensor<float>().ToArray();
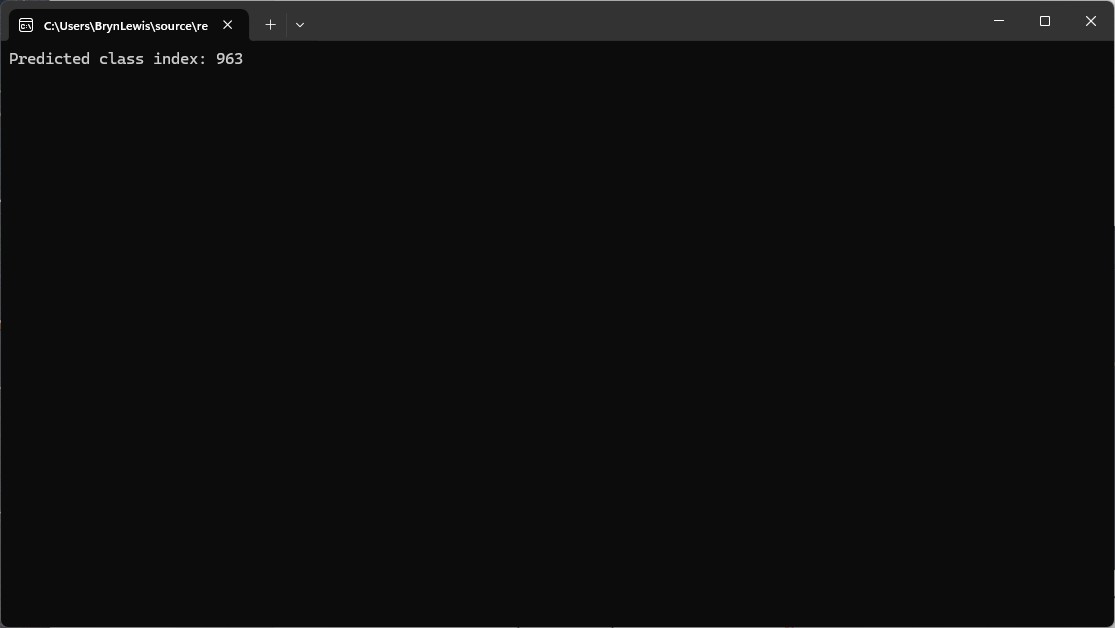
Console.WriteLine("Predicted class index: " + Array.IndexOf(output, output.Max()));
}
static DenseTensor<float> LoadAndPreprocessImage(string imagePath)
{
using Bitmap bitmap = new Bitmap(imagePath);
int width = 224, height = 224; // ResNet50 expects 224x224 input
using Bitmap resized = new Bitmap(bitmap, new Size(width, height));
var tensor = new DenseTensor<float>(new[] { 1, 3, width, height });
// ImageNet mean & standard deviation values
float[] mean = { 0.485f, 0.456f, 0.406f };
float[] stdev = { 0.229f, 0.224f, 0.225f };
for (int y = 0; y < height; y++)
{
for (int x = 0; x < width; x++)
{
Color pixel = resized.GetPixel(x, y);
// Normalize using mean and standard deviation
tensor[0, 0, y, x] = (pixel.R / 255f - mean[0]) / stdev[0]; // Red channel
tensor[0, 1, y, x] = (pixel.G / 255f - mean[1]) / stdev[1]; // Green channel
tensor[0, 2, y, x] = (pixel.B / 255f - mean[2]) / stdev[2]; // Blue channel
}
}
return tensor;
}
Output
The model outputs image scores for each of the 1000 classes of ImageNet.

Postprocessing
The post-processing involves calculating the softmax probability scores for each
class. You can also sort them to report the most probable classes. Check
imagenet_postprocess.py for code.
The Copilot generated code wouldn’t compile due to a syntax error.
static void Main()
{
string modelPath = "resnet50-v2-7.onnx"; // Updated model path
string imagePath = "pizza.jpg"; // Updated image path
using var session = new InferenceSession(modelPath);
var inputTensor = LoadAndPreprocessImage(imagePath);
var inputs = new List<NamedOnnxValue>
{
NamedOnnxValue.CreateFromTensor("data", inputTensor) // Using "data" as the input tensor name
};
using var results = session.Run(inputs);
var output = results.First().AsTensor<float>().ToArray();
// Calculate softmax
var probabilities = Softmax(output);
// Get the class index with the highest probability
int predictedClass = Array.IndexOf(probabilities, probabilities.Max());
Console.WriteLine($"Predicted class index: {predictedClass}");
Console.WriteLine($"Probabilities: {string.Join(", ", probabilities.Select(p => p.ToString("F4")))}");
}
...
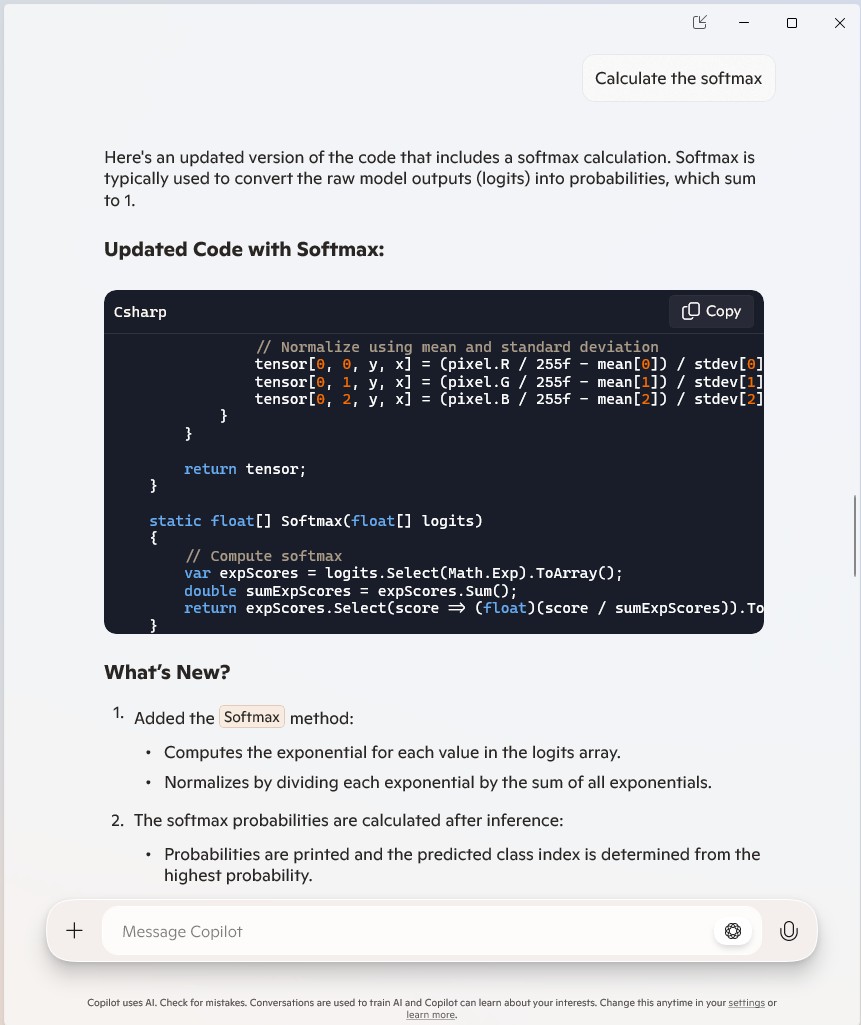
static float[] Softmax(float[] logits)
{
// Compute softmax
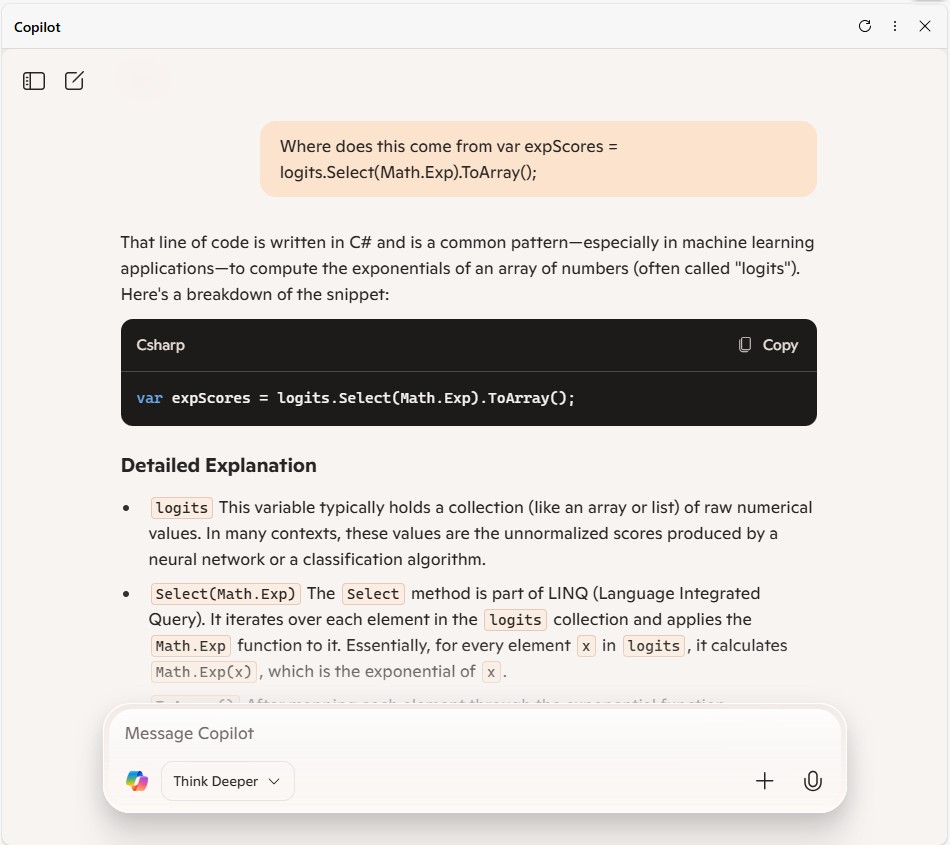
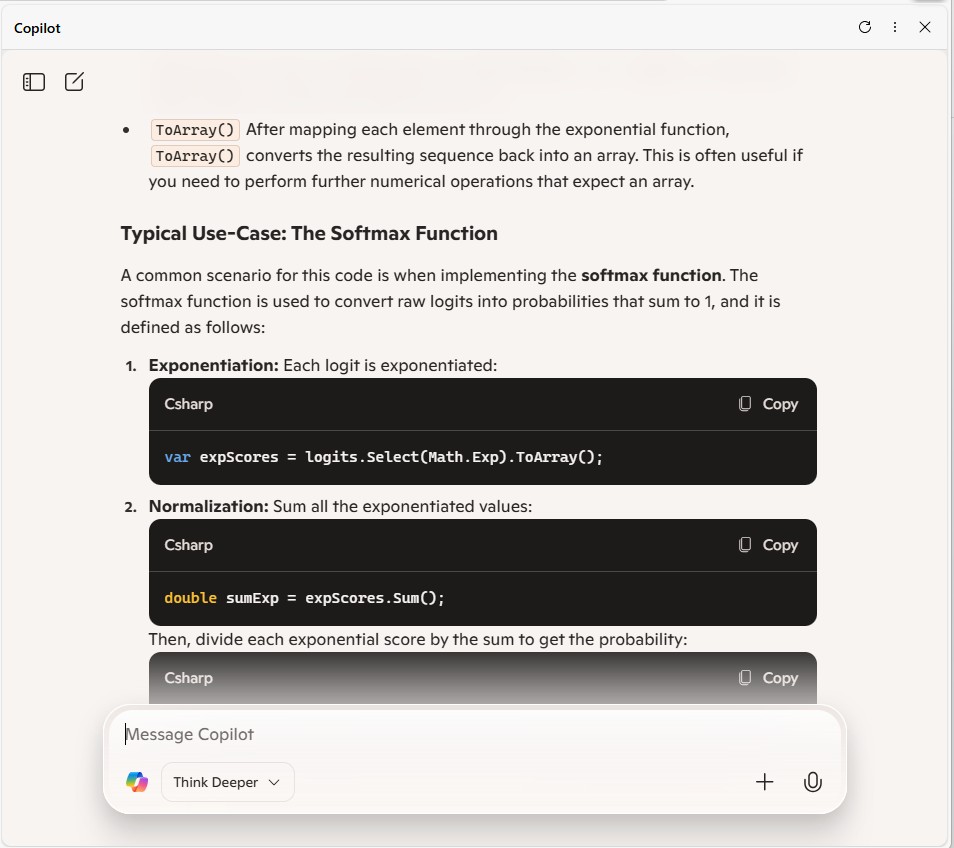
var expScores = logits.Select(Math.Exp).ToArray();
double sumExpScores = expScores.Sum();
return expScores.Select(score => (float)(score / sumExpScores)).ToArray();
}
Copilot was adamant that the generated code was correct.
After trying different Copilot prompts the code had to be manually fixed, before it would compile
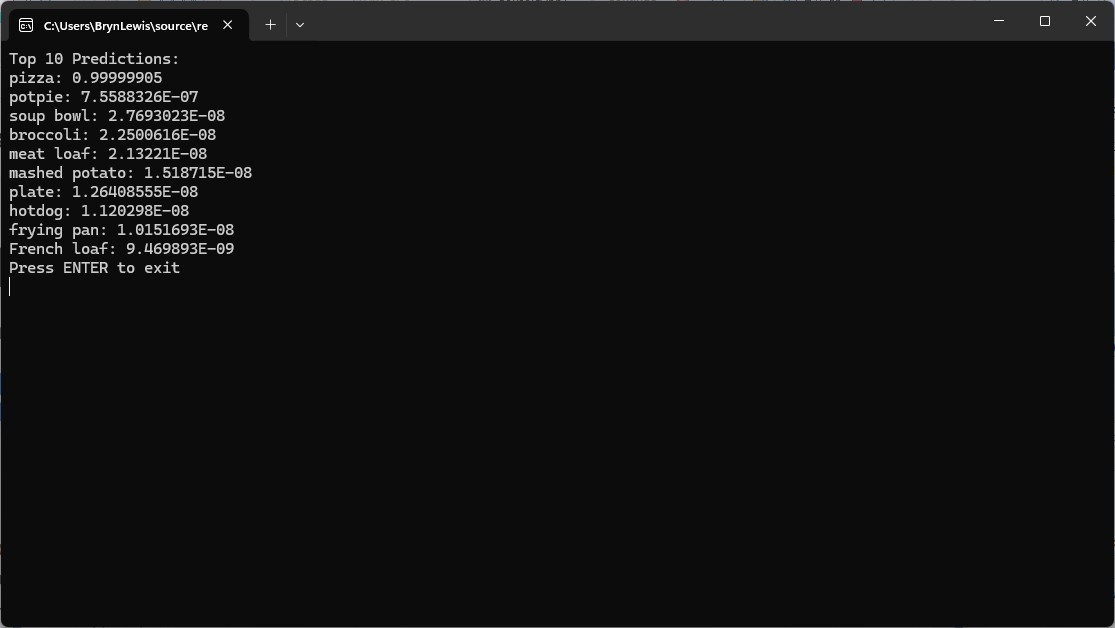
The Copilot generated code ran and the results for the top 10 confidence values looked reasonable
static void Main()
{
   string modelPath = "resnet50-v2-7.onnx"; // Updated model path
   string imagePath = "pizza.jpg"; // Updated image path
   string labelsPath = "labels.txt"; // Path to labels file

   using var session = new InferenceSession(modelPath);
   var inputTensor = LoadAndPreprocessImage(imagePath);

   var inputs = new List<NamedOnnxValue>
   {
       NamedOnnxValue.CreateFromTensor("data", inputTensor) // Using "data" as the input tensor name
   };

   using var results = session.Run(inputs);
   var output = results.First().AsTensor<float>().ToArray();

   // Calculate softmax
   var probabilities = Softmax(output);

   // Load labels
   var labels = File.ReadAllLines(labelsPath);

   // Find Top 10 labels and their confidence scores
   var top10 = probabilities
          .Select((prob, index) => new { Label = labels[index], Confidence = prob })
          .OrderByDescending(item => item.Confidence)
          .Take(10);

   Console.WriteLine("Top 10 Predictions:");
   foreach (var item in top10)
   {
      Console.WriteLine($"{item.Label}: {item.Confidence:F4}");
   }
}
...
static float[] Softmax(float[] logits)
{
   // Compute softmax
   float maxVal = logits.Max();
   var expScores = logits.Select(v => (float)Math.Exp(v - maxVal)).ToArray();
   double sumExpScores = expScores.Sum();
   return expScores.Select(score => (float)(score / sumExpScores)).ToArray();
}
using Microsoft.AspNetCore.Http;
using Microsoft.AspNetCore.Mvc;
using Microsoft.Azure.Functions.Worker;
using Microsoft.Extensions.Logging;

namespace YoloSharpxxxxxHttpTriggerFunction
{
    public class Function1
    {
        private readonly ILogger<Function1> _logger;

        public Function1(ILogger<Function1> logger)
        {
            _logger = logger;
        }

        [Function("Function1")]
        public IActionResult Run([HttpTrigger(AuthorizationLevel.Anonymous, "get", "post")] HttpRequest req)
        {
            _logger.LogInformation("C# HTTP trigger function processed a request.");
            return new OkObjectResult("Welcome to Azure Functions!");
        }
    }
}
[FunctionName("DetectObjects")]
public static async Task<IActionResult> Run(
     [HttpTrigger(AuthorizationLevel.Function, "post", Route = "detect")] HttpRequest req,
     ILogger log)
{
   log.LogInformation("DetectObjects function received a request for object detection.");
   ...
}
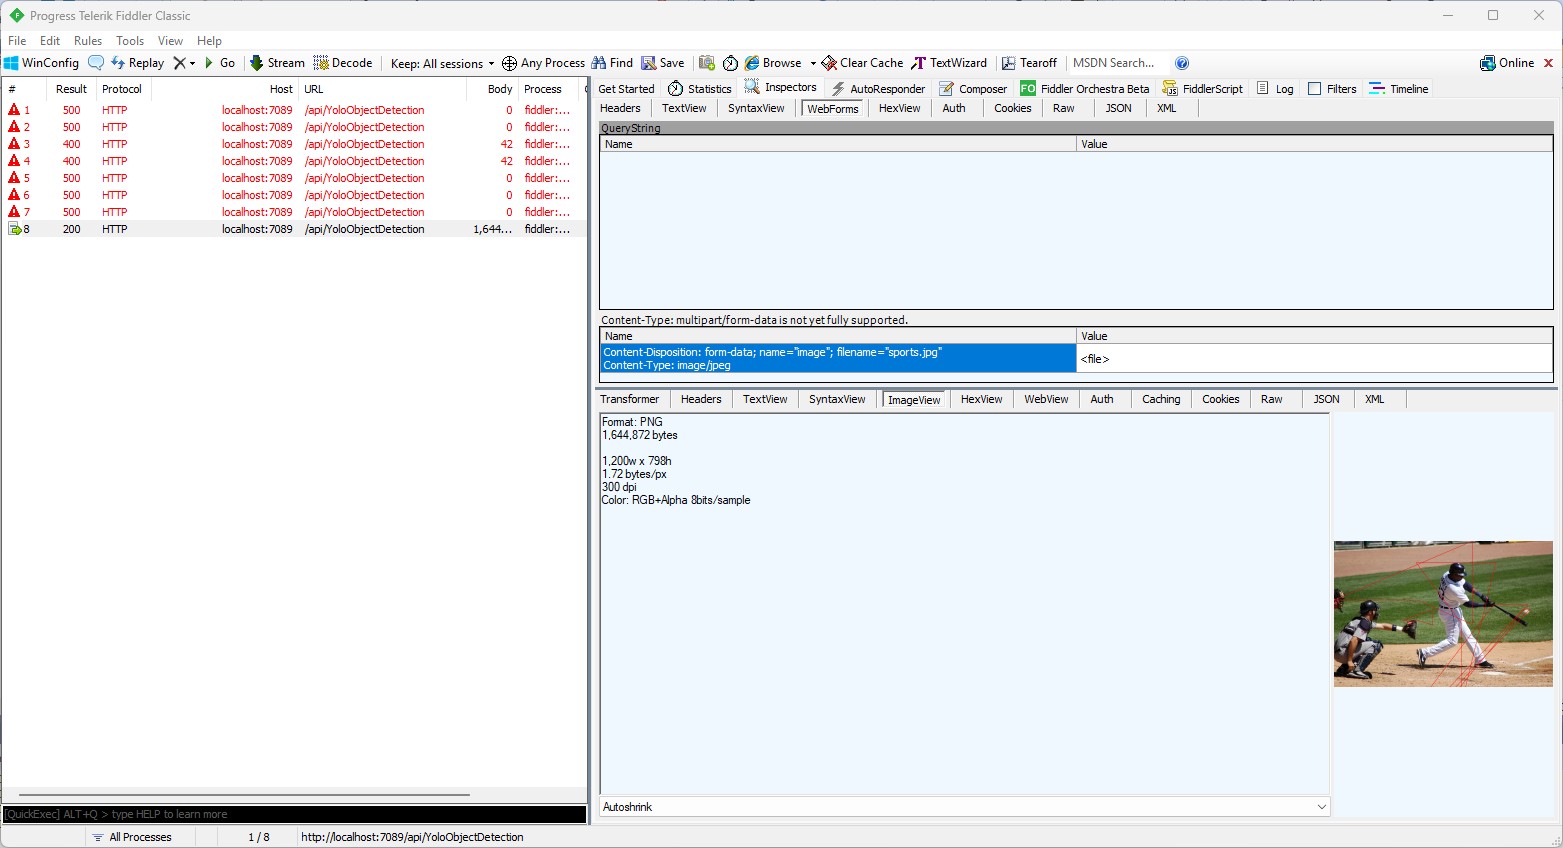
Every so often, when uploading more than one image at a time there was a “System.IO.InvalidData Exception: The stream exceeded the data limit 16384” error. In previous examples I had tried the batch processing of multiple images but had hit memory issues, so putting the image to be in the message body rather than Multipart Form Data for future development seems like a reasonable approach.
Image in the body of the request
Object Classification
I started with an object classification function because in previous examples Github Copilot was better at unpacking the results.
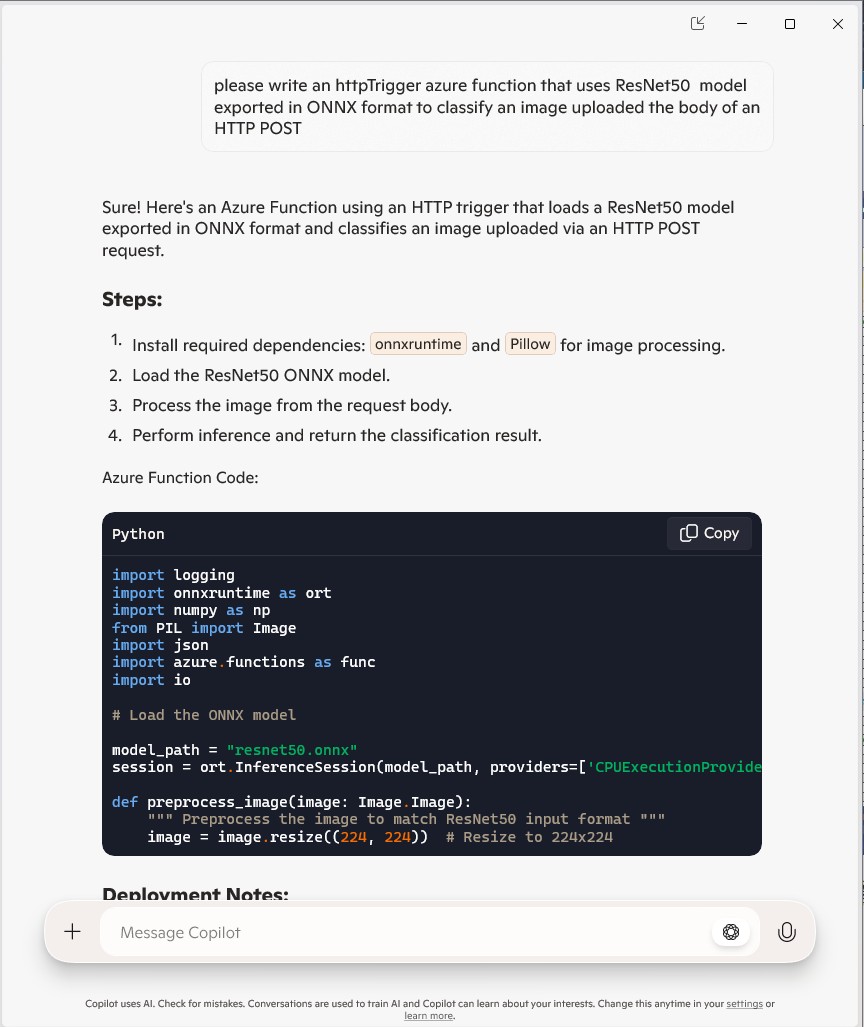
please write an httpTrigger azure function that uses YoloSharp and a Yolo image classification onnx model Image classification not object detection The image is in the form data The multipart/form-data check can be removed The YoloPredictor should be released after use Many image files could be uploaded in one request Only one image file can be uploaded in one request
[Function("YoloImageClassificationFunction")]
public async Task<IActionResult> Run([HttpTrigger(AuthorizationLevel.Function, "post", Route = null)] HttpRequest req)
{
   _logger.LogInformation("C# HTTP trigger function processed a request.");

   var form = await req.ReadFormAsync();
   var files = form.Files;

   if (files.Count == 0)
   {
      return new BadRequestObjectResult("No images uploaded.");
   }

   if (files.Count > 1)
   {
      return new BadRequestObjectResult("Only one image file can be uploaded in one request.");
   }

   var file = files[0];
   if (file.Length > 0)
   {
      using (var memoryStream = new MemoryStream())
      {
         await file.CopyToAsync(memoryStream);
         var imageBytes = memoryStream.ToArray();

         using (var yoloModel = new YoloPredictor("yolov8s-cls.onnx"))
         {
            var classifications = yoloModel.Classify(imageBytes);

            return new OkObjectResult(new { file.FileName, classifications });
         }
      }
   }

   return new BadRequestObjectResult("Invalid image file.");
}
Image in the form data of the request
When I compared the results with previous applications, they were the same. I should have added code which discarded any result with less that a specified confidence to reduce the size of the results.
Object Detection
please write an azure function with an http trigger that uses yolosharp and an onnx file to detect objects in an image The image is not in the body it is in the form Image.Load is not used yolo.Detect can process an image file stream The YoloPredictor should be released after use Many image files could be uploaded in one request Only one image per request Add multipart/form-data content type check Add check that there are headers — Didn’t get this right Add check that req.Headers is not null Add check that request has ContentType and it is multipart/form-data
[Function("ObjectDetectionFunction")]
public async Task<IActionResult> Run( [HttpTrigger(AuthorizationLevel.Function, "post", Route = null)] HttpRequest req)
{
   _logger.LogInformation("C# HTTP trigger function processed a request.");

   // Intellisense fix
   if (req.Headers == null || !req.Headers.TryGetValue("Content-Type", out Microsoft.Extensions.Primitives.StringValues value) || !value.ToString().Contains("multipart/form-data"))
   {
      return new BadRequestObjectResult("The request must have a Content-Type header with multipart/form-data.");
   }

   // Read the images from the form data
   var form = await req.ReadFormAsync();
   var files = form.Files;
   if (files.Count == 0)
   {
      return new BadRequestObjectResult("No image files uploaded.");
   }

   if (files.Count > 1)
   {
      return new BadRequestObjectResult("Only one image file is allowed per request.");
   }

   var file = files[0];
   if (file.Length == 0)
   {
      return new BadRequestObjectResult("The uploaded image file is empty.");
   }

   // Load the YOLOv8 model
   using (var yolo = new YoloPredictor("yolov8s.onnx"))
   {
      // Perform object detection
      using (var stream = file.OpenReadStream())
      {
         var items = yolo.Detect(stream);
         var result = new { FileName = file.FileName, Detections = items };

         // Return the detection results
         return new OkObjectResult(result);
      }
   }
}
After a couple of manual fixes the function ran in the desktop emulator
When I compared the results with previous applications, they were the same.
Pose Estimation
I forgot the ILogger initialisation so had to do it at the end
please write an azure function with an http trigger that uses yolosharp to estimate the pose of humans in an uploaded image. Yolo v8 pose estimation model and yolosharp library Make into azure function The image files are in the form of the request Modify the code so more than one image per request can be processed Initialise ILogger in the constructor
//[FunctionName("PoseEstimation")]
[Function("PoseEstimation")]
public async Task<IActionResult> Run([HttpTrigger(AuthorizationLevel.Function, "post", Route = null)] HttpRequest req)
{
   _log.LogInformation("Pose estimation function processed a request.");

   if (!req.HasFormContentType || !req.Form.Files.Any())
   {
      return new BadRequestObjectResult("Please upload image files.");
   }

   var results = new List<object>();

   foreach (var file in req.Form.Files)
   {
      using var memoryStream = new MemoryStream();
      await file.CopyToAsync(memoryStream);
      memoryStream.Position = 0;

      using var image = Image.Load<Rgba32>(memoryStream);

      // Initialize the YOLO model
      //using var predictor = new YoloPredictor("path/to/model.onnx");
      using var predictor = new YoloPredictor("yolov8s-pose.onnx");

      // Perform pose estimation
      var result = await predictor.PoseAsync(image);

      // Format the results
      //var poses = result.Poses.Select(pose => new
      var poses = result.Select(pose => new
      {
         //Keypoints = pose.Keypoints.Select(k => new { k.X, k.Y }),
         Keypoints = pose.Select(k => new { k.Point.X, k.Point.Y }),
         Confidence = pose.Confidence
      });

      results.Add(new
      {
         Image = file.FileName,
         Poses = poses
      });
   }

   return new OkObjectResult(new { results });
}
After a couple of manual fixes including changing the way the results were generated the function ran in the desktop emulator.
Summary
The generated code worked but required manual fixes and was pretty ugly
The Github Copilot generated code in this post is not suitable for production
To better understand how Copilot and Github Copilot generated code was impacted by the wording and order of prompts I re-played one of my previous sessions.
The generated code looked “reasonable” and vaguely familiar.
static void Main(string[] args)
{
    // Paths to the ONNX model and the image file (adjust these paths as needed)
    string modelPath = @"..\\..\\..\\..\\Models\\FasterRCNN-10.onnx";
    string imagePath = "sports.jpg";

    // Create the OnnxInference session
    using var session = new InferenceSession(modelPath);

    // Load the image from disk using ImageSharp
    using var image = Image.Load<Rgb24>(imagePath);

    // Resize the image to fit within the range and adjust dimensions to be divisible by 32
    ResizeImage(image);

    // Extract tensor data from the image (with shape [3, height, width])
    var inputTensor = ExtractTensorFromImage(image);

    // Create NamedOnnxValue input (ensure that the input name "image" matches your model's input)
    var inputs = new List<NamedOnnxValue>
    {
        NamedOnnxValue.CreateFromTensor("image", inputTensor)
    };

    // Run the model inference
    using IDisposableReadOnlyCollection<DisposableNamedOnnxValue> results = session.Run(inputs);

    // Process and display the outputs (bounding boxes, labels, and confidences)
    ProcessOutput(results);

    Console.WriteLine("Press Enter to exit");
    Console.ReadLine();
}

/// <summary>
/// Resizes the input image such that both width and height are within the range [800, 1333]
/// and ensures the dimensions are divisible by 32.
/// </summary>
private static void ResizeImage(Image<Rgb24> image)
{
   const int minSize = 800;
   const int maxSize = 1333;
   int originalWidth = image.Width;
   int originalHeight = image.Height;

   // Determine the scaling factor so that the smallest side is at least minSize and the largest does not exceed maxSize.
   float scale = Math.Min((float)maxSize / Math.Max(originalWidth, originalHeight),
                                   (float)minSize / Math.Min(originalWidth, originalHeight));

   // Compute the new dimensions based on the scale
   int newWidth = (int)(originalWidth * scale);
   int newHeight = (int)(originalHeight * scale);

   // Adjust dimensions to be divisible by 32
   newWidth = (newWidth / 32) * 32;
   newHeight = (newHeight / 32) * 32;

   image.Mutate(x => x.Resize(newWidth, newHeight));
}

/// <summary>
/// Converts the resized image into a DenseTensor<float> with shape [3, height, width].
/// The image is processed to subtract the Faster‑RCNN channel means (B, G, R order).
/// </summary>
private static DenseTensor<float> ExtractTensorFromImage(Image<Rgb24> image)
{
   int width = image.Width;
   int height = image.Height;

   // Create a tensor with shape [channels, height, width]
   var tensor = new DenseTensor<float>(new[] { 3, height, width });

   // Faster‑RCNN channel means (order: blue, green, red)
   float[] mean = { 102.9801f, 115.9465f, 122.7717f };

   // Process each pixel row; ImageSharp provides efficient pixel row access.
   image.ProcessPixelRows(accessor =>
   {
      for (int y = 0; y < height; y++)
      {
         var pixelRow = accessor.GetRowSpan(y);
         for (int x = 0; x < width; x++)
         {
             // Subtract the channel mean value (ensuring B, G, R order)
             tensor[0, y, x] = pixelRow[x].B - mean[0];
             tensor[1, y, x] = pixelRow[x].G - mean[1];
             tensor[2, y, x] = pixelRow[x].R - mean[2];
         }
      }
   });

return tensor;
}

/// <summary>
/// Processes the model output, extracting bounding boxes, labels, and confidences.
/// Only detections with confidence scores above a defined threshold are printed.
/// </summary>
private static void ProcessOutput(IDisposableReadOnlyCollection<DisposableNamedOnnxValue> output)
{
    // Note: The output node names ("6379", "6381", "6383") are model-specific.
    // They correspond, respectively, to boxes, labels, and confidence scores.
    var boxesTensor = output.First(x => x.Name == "6379").AsTensor<float>();
    var labelsTensor = output.First(x => x.Name == "6381").AsTensor<long>();
    var confidencesTensor = output.First(x => x.Name == "6383").AsTensor<float>();

    float[] boxes = boxesTensor.ToArray();
    long[] labels = labelsTensor.ToArray();
    float[] confidences = confidencesTensor.ToArray();

    const float minConfidence = 0.7f;

    // Each bounding box is represented by 4 values: x1, y1, x2, y2.
    for (int i = 0; i < boxes.Length; i += 4)
    {
        int detectionIndex = i / 4;
        if (confidences[detectionIndex] >= minConfidence)
        {
           long label = labels[detectionIndex];
           float confidence = confidences[detectionIndex];
           float x1 = boxes[i];
           float y1 = boxes[i + 1];
           float x2 = boxes[i + 2];
           float y2 = boxes[i + 3];
           Console.WriteLine($"Label: {label}, Confidence: {confidence}, Bounding Box: [{x1}, {y1}, {x2}, {y2}]");
        }
    }
}
The Copilot generated code had the names of the output tensors (6379,6381, 6383), the mean calculation and the order of the colours (B,G,R) correct. The name of the image file and the path to the model file in The Explanation and Additional information looked a lot like mine.
static void Main(string[] args)
{
// Path to the ONNX model and input image
string modelPath = "FasterRCNN-10.onnx";
string imagePath = "sports.jpg";
// Load the image
Bitmap image = new Bitmap(imagePath);
var inputTensor = PreprocessImage(image);
// Load the ONNX model
using var session = new InferenceSession(modelPath);
// Create input data
var inputName = session.InputMetadata.Keys.First();
var inputs = new List<NamedOnnxValue>
{
NamedOnnxValue.CreateFromTensor(inputName, inputTensor)
};
//// Run inference
using IDisposableReadOnlyCollection<DisposableNamedOnnxValue> results = session.Run(inputs);
// Process output
foreach (var result in results)
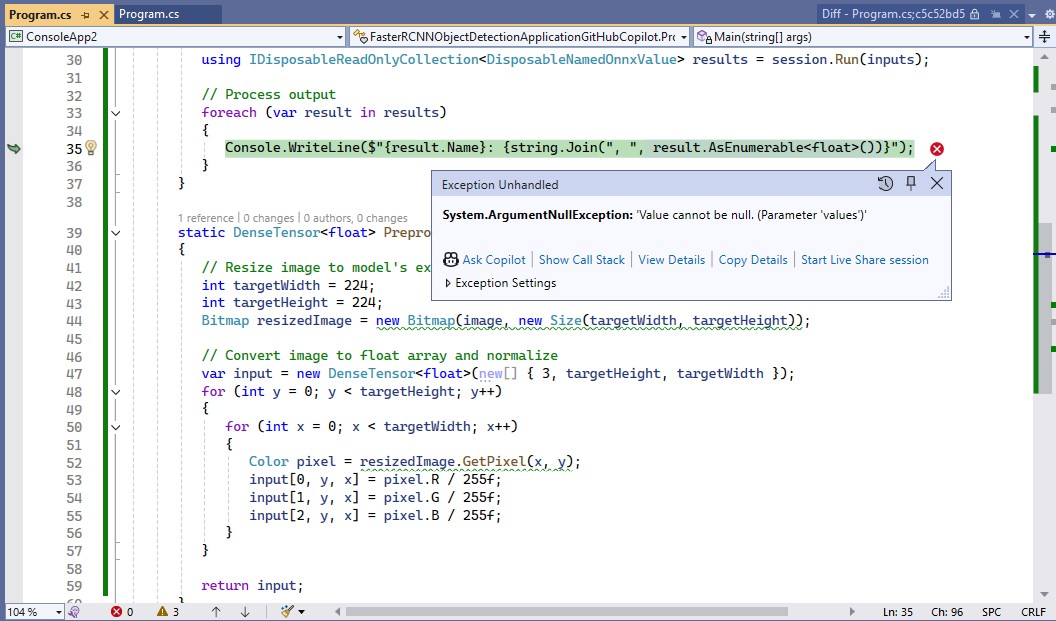
{
Console.WriteLine($"{result.Name}: {string.Join(", ", result.AsEnumerable<float>())}");
}
}
static DenseTensor<float> PreprocessImage(Bitmap image)
{
// Resize image to model's expected input size (e.g., 224x224)
int targetWidth = 224;
int targetHeight = 224;
Bitmap resizedImage = new Bitmap(image, new Size(targetWidth, targetHeight));
// Convert image to float array and normalize
var input = new DenseTensor<float>(new[] { 1, 3, targetHeight, targetWidth });
for (int y = 0; y < targetHeight; y++)
{
for (int x = 0; x < targetWidth; x++)
{
Color pixel = resizedImage.GetPixel(x, y);
input[0, 0, y, x] = pixel.R / 255f;
input[0, 1, y, x] = pixel.G / 255f;
input[0, 2, y, x] = pixel.B / 255f;
}
}
return input;
}
I fixed the paths to the ONNX model and image file, so the application ran but there was an error.
The dimensions of the input tensor were wrong based on the Faster R-CNN documentation because the declaration had an extra dimension.
Change dimensions of tensor by removing batch from declaration
static DenseTensor<float> PreprocessImage(Bitmap image)
{
   // Resize image to model's expected input size (e.g., 224x224)
   int targetWidth = 224;
   int targetHeight = 224;
   Bitmap resizedImage = new Bitmap(image, new Size(targetWidth, targetHeight));

   // Convert image to float array and normalize
   var input = new DenseTensor<float>(new[] { 3, targetHeight, targetWidth });
   for (int y = 0; y < targetHeight; y++)
   {
      for (int x = 0; x < targetWidth; x++)
      {
         Color pixel = resizedImage.GetPixel(x, y);
         input[0, y, x] = pixel.R / 255f;
         input[1, y, x] = pixel.G / 255f;
         input[2, y, x] = pixel.B / 255f;
      }
   }

   return input;
}
GitHub Copilot fixed the tensor declaration by removing the batch id, then the application ran but there was an error.
resize the image such that both height and width are within the range of [800, 1333], such that both height and width are divisible by 32
static Bitmap ResizeImageForModel(Bitmap image)
{
   // Define the target range and divisibility
   const int minSize = 800;
   const int maxSize = 1333;
   const int divisor = 32;

   // Get original dimensions
   int originalWidth = image.Width;
   int originalHeight = image.Height;

   // Calculate scale factor to fit within the range while maintaining aspect ratio
   float scale = Math.Min((float)maxSize / Math.Max(originalWidth, originalHeight),
                          (float)minSize / Math.Min(originalWidth, originalHeight));

   // Calculate new dimensions
   int newWidth = (int)(originalWidth * scale);
   int newHeight = (int)(originalHeight * scale);

   // Ensure dimensions are divisible by 32
   newWidth = (newWidth / divisor) * divisor;
   newHeight = (newHeight / divisor) * divisor;

   // Resize the image
   return new Bitmap(image, new Size(newWidth, newHeight));
}
GitHub Copilot fixed the image resizing, so the application ran but there was still an error.
I also manually added the using directive for System.Drawing.Drawing2D
static void ProcessOutput(IDisposableReadOnlyCollection<DisposableNamedOnnxValue> results, Bitmap image)
{
   // Extract output tensors
   var boxes = results.First(r => r.Name == "boxes").AsEnumerable<float>().ToArray();
   var labels = results.First(r => r.Name == "labels").AsEnumerable<long>().ToArray();
   var scores = results.First(r => r.Name == "scores").AsEnumerable<float>().ToArray();

   using Graphics graphics = Graphics.FromImage(image);
   graphics.SmoothingMode = SmoothingMode.AntiAlias;

   for (int i = 0; i < labels.Length; i++)
   {
      if (scores[i] < 0.5) continue; // Filter low-confidence detections

      // Extract bounding box coordinates
      float x1 = boxes[i * 4];
      float y1 = boxes[i * 4 + 1];
      float x2 = boxes[i * 4 + 2];
      float y2 = boxes[i * 4 + 3];

      // Draw bounding box
      RectangleF rect = new RectangleF(x1, y1, x2 - x1, y2 - y1);
      graphics.DrawRectangle(Pens.Red, rect.X, rect.Y, rect.Width, rect.Height);

      // Display label and confidence
      string label = $"Label: {labels[i]}, Confidence: {scores[i]:0.00}";
      graphics.DrawString(label, new Font("Arial", 12), Brushes.Yellow, new PointF(x1, y1 - 20));
   }

   // Save the image with annotations
   image.Save("output.jpg");
   Console.WriteLine("Output image saved as 'output.jpg'.");
}
The application ran but there was an error because the output tensor names were wrong.
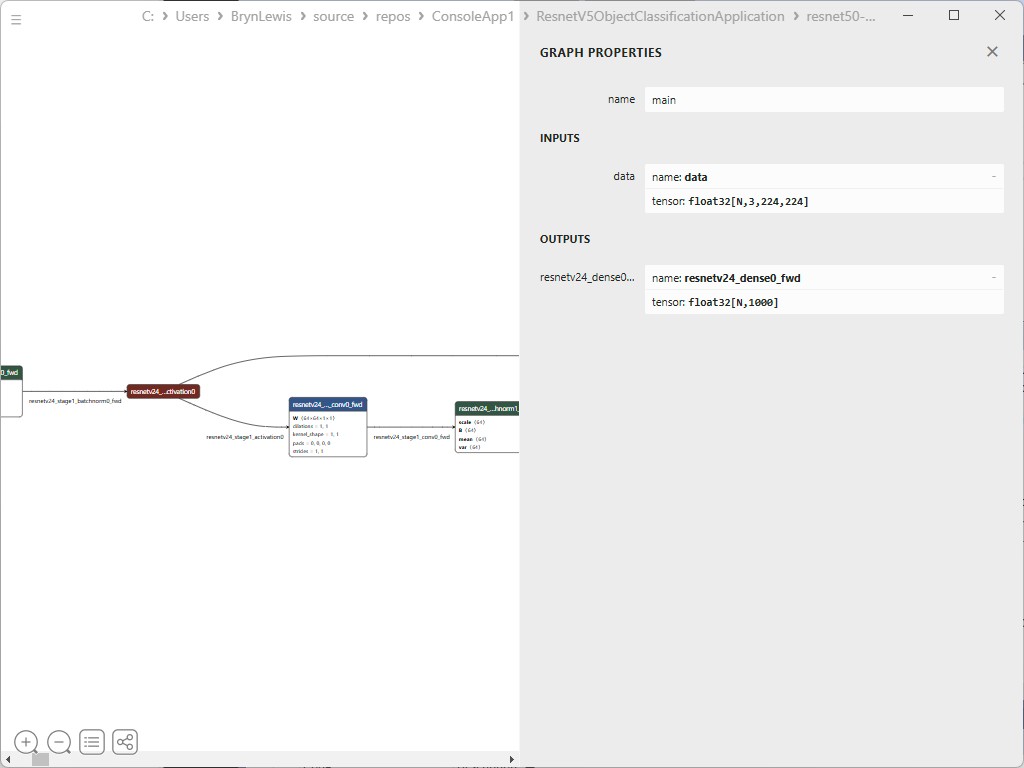
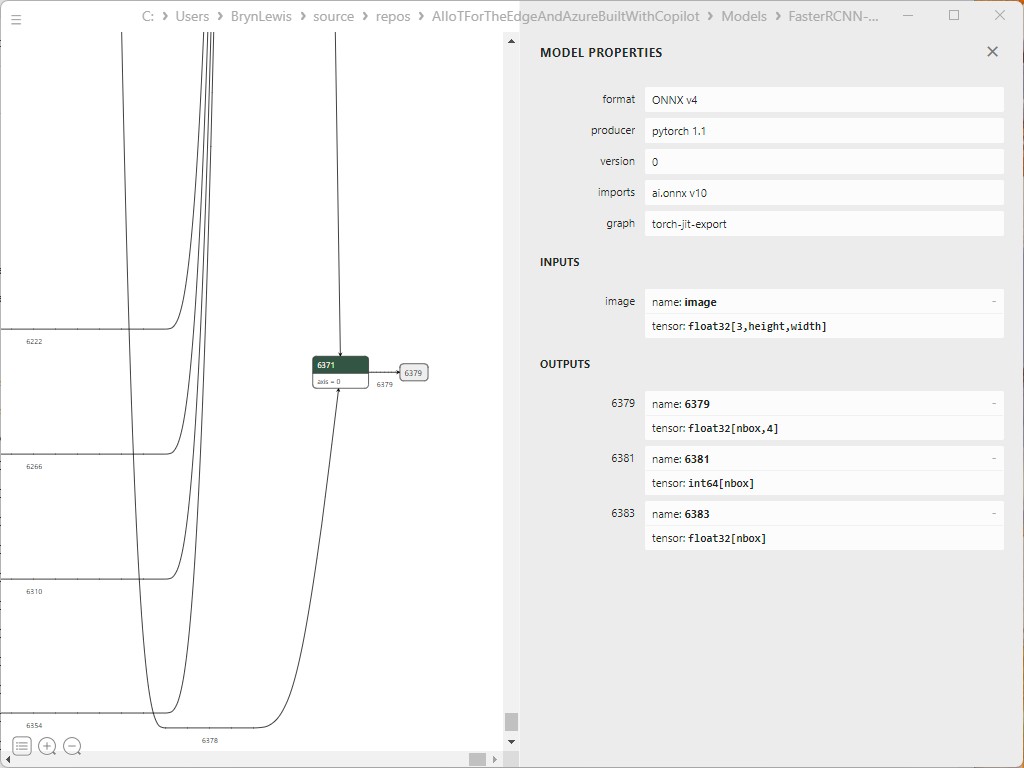
I used Netron to determine the correct output tensor names.
It was quicker to manually fix the output tensor names
static void ProcessOutput(IDisposableReadOnlyCollection<DisposableNamedOnnxValue> results, Bitmap image)
 {
    // Extract output tensors
    var boxes = results.First(r => r.Name == "6379").AsEnumerable<float>().ToArray();
    var labels = results.First(r => r.Name == "6381").AsEnumerable<long>().ToArray();
    var scores = results.First(r => r.Name == "6383").AsEnumerable<float>().ToArray();

    using Graphics graphics = Graphics.FromImage(image);
    graphics.SmoothingMode = SmoothingMode.AntiAlias;

    for (int i = 0; i < labels.Length; i++)
    {
       if (scores[i] < 0.5) continue; // Filter low-confidence detections

       // Extract bounding box coordinates
       float x1 = boxes[i * 4];
       float y1 = boxes[i * 4 + 1];
       float x2 = boxes[i * 4 + 2];
       float y2 = boxes[i * 4 + 3];

       // Draw bounding box
       RectangleF rect = new RectangleF(x1, y1, x2 - x1, y2 - y1);
       graphics.DrawRectangle(Pens.Red, rect.X, rect.Y, rect.Width, rect.Height);

       // Display label and confidence
       string label = $"Label: {labels[i]}, Confidence: {scores[i]:0.00}";
       graphics.DrawString(label, new Font("Arial", 12), Brushes.Yellow, new PointF(x1, y1 - 20));
    }

    // Save the image with annotations
    image.Save("output.jpg");
    Console.WriteLine("Output image saved as 'output.jpg'.");
 }
The application ran but the results were bad, so I checked format of the input tensor and figured out the mean adjustment was missing.
Apply mean to each channel
I used GitHub Copilot to add code for the mean adjustment for each pixel
static DenseTensor<float> PreprocessImage(Bitmap image)
{
   // Resize image to model's expected input size
   Bitmap resizedImage = ResizeImageForModel(image);

   // Apply FasterRCNN mean values to each channel
   float[] mean = { 102.9801f, 115.9465f, 122.7717f };

   // Convert image to float array and normalize
   var input = new DenseTensor<float>(new[] { 3, resizedImage.Height, resizedImage.Width });
   for (int y = 0; y < resizedImage.Height; y++)
   {
      for (int x = 0; x < resizedImage.Width; x++)
      {
         Color pixel = resizedImage.GetPixel(x, y);
         input[0, y, x] = (pixel.R - mean[0]) / 255f;
         input[1, y, x] = (pixel.G - mean[1]) / 255f;
         input[2, y, x] = (pixel.B - mean[2]) / 255f;
      }
   }

   return input;
}
The application ran but the results were still bad, so I checked format of the input tensor and figured out the mean adjustment was wrong. It was quicker to manually fix up the mean calculation.
static DenseTensor<float> PreprocessImage(Bitmap image)
{
   // Resize image to model's expected input size
   Bitmap resizedImage = ResizeImageForModel(image);

   // Apply FasterRCNN mean values to each channel
   float[] mean = { 102.9801f, 115.9465f, 122.7717f };

   // Convert image to float array and normalize
   var input = new DenseTensor<float>(new[] { 3, resizedImage.Height, resizedImage.Width });
   for (int y = 0; y < resizedImage.Height; y++)
   {
      for (int x = 0; x < resizedImage.Width; x++)
      {
         Color pixel = resizedImage.GetPixel(x, y);

         input[0, y, x] = pixel.R - mean[0];
         input[1, y, x] = pixel.G - mean[1];
         input[2, y, x] = pixel.B - mean[2];
      }
   }

   return input;
}
The application ran but the results were still bad, so I checked format of the input tensor and figured out the input tensor was BGR rather than RGB.
Change to B,G,R
static DenseTensor<float> PreprocessImage(Bitmap image)
{
   // Resize image to model's expected input size
   Bitmap resizedImage = ResizeImageForModel(image);

   // Apply FasterRCNN mean values to each channel
   float[] mean = { 102.9801f, 115.9465f, 122.7717f };

   // Convert image to float array and normalize
   var input = new DenseTensor<float>(new[] { 3, resizedImage.Height, resizedImage.Width });
   for (int y = 0; y < resizedImage.Height; y++)
   {
      for (int x = 0; x < resizedImage.Width; x++)
      {
         Color pixel = resizedImage.GetPixel(x, y);
         input[0, y, x] = pixel.B - mean[0] ;
         input[1, y, x] = pixel.G - mean[1] ;
         input[2, y, x] = pixel.R - mean[2] ;
      }
   }

   return input;
}
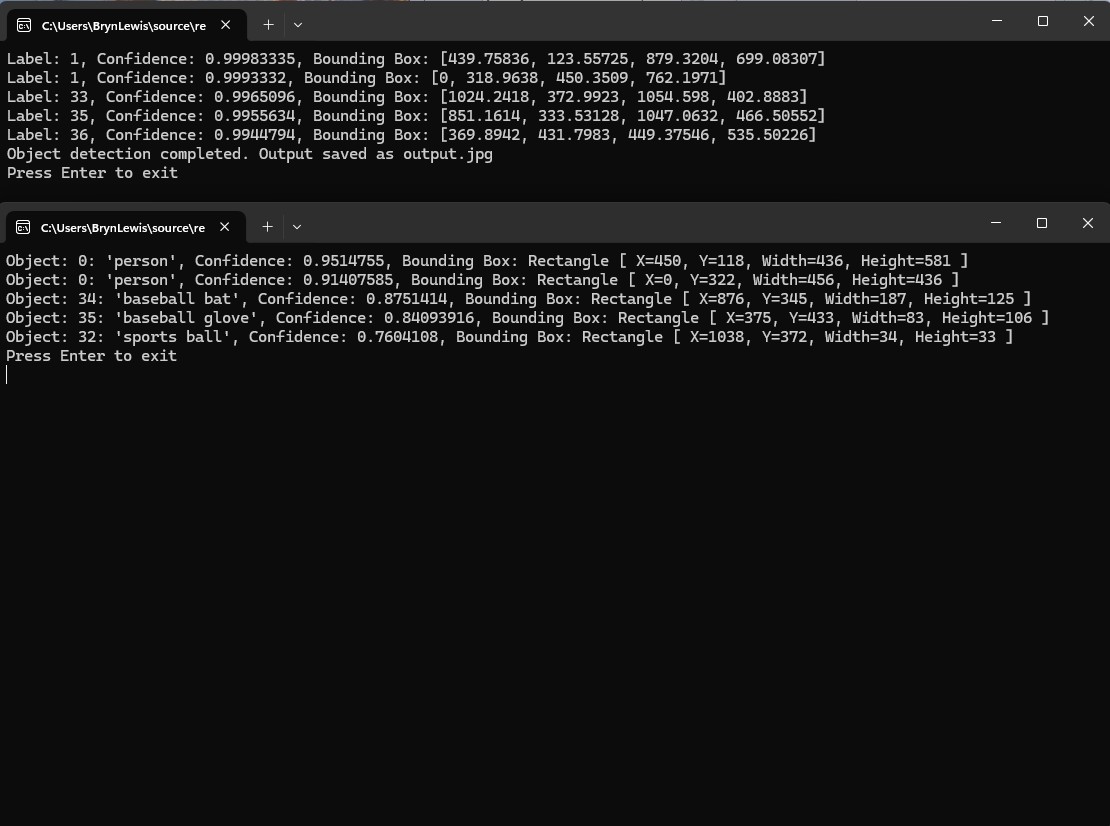
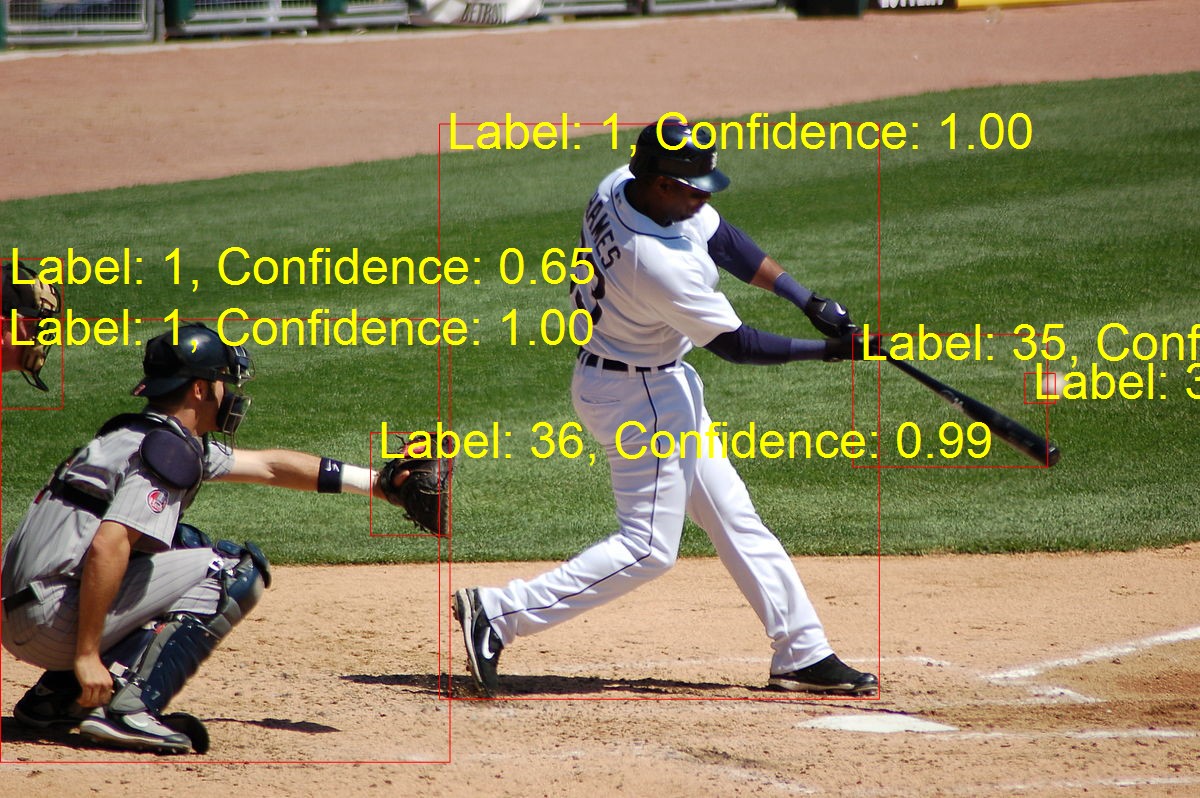
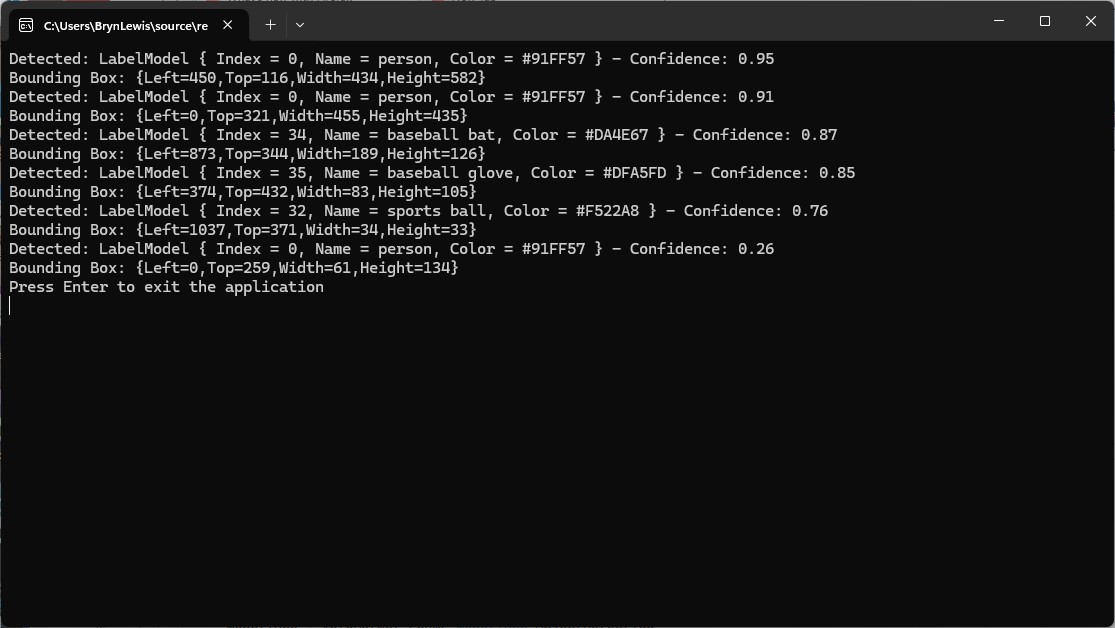
Finally, the application minimum bounding rectangles (MBRs), labels and confidences looked correct.
The additional code for marking up the image in the ProcessOutput was unexpected and I wonder if there wasn’t a Sixlabors.ImageSharp example for “inspiration”
The Copilot generated code in this post is not suitable for production
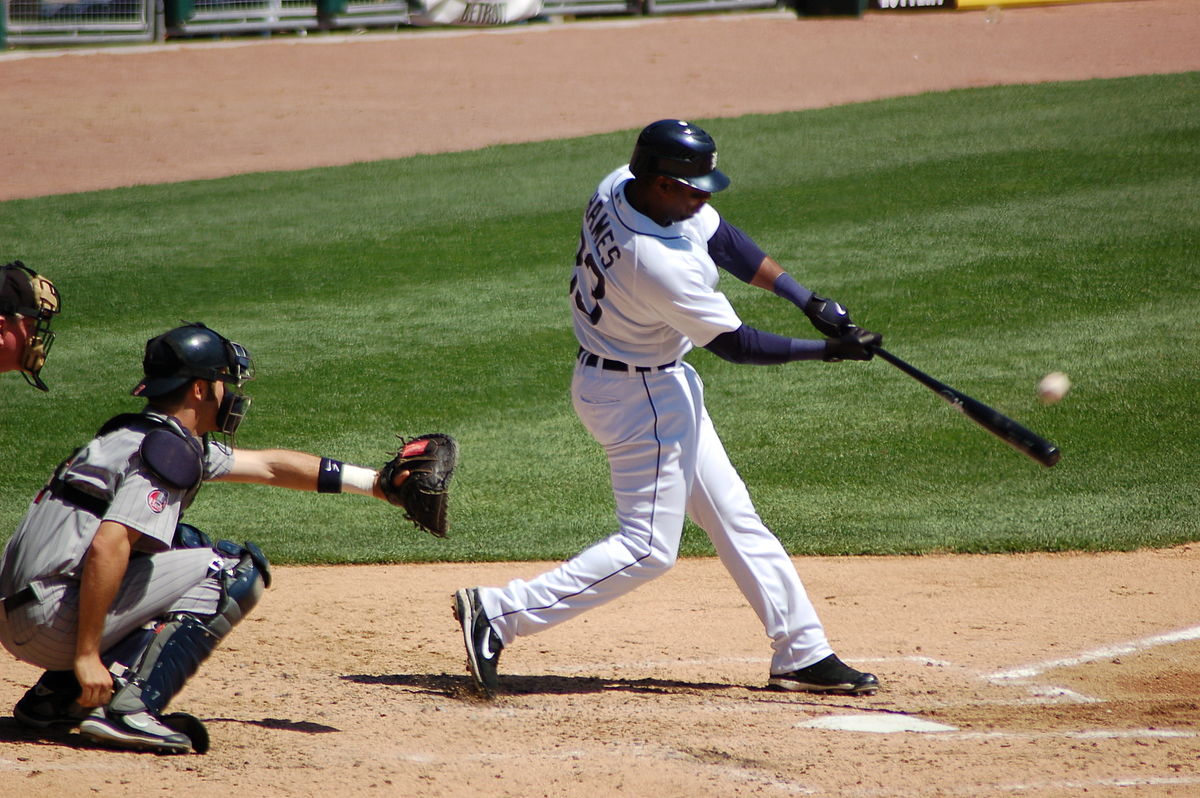
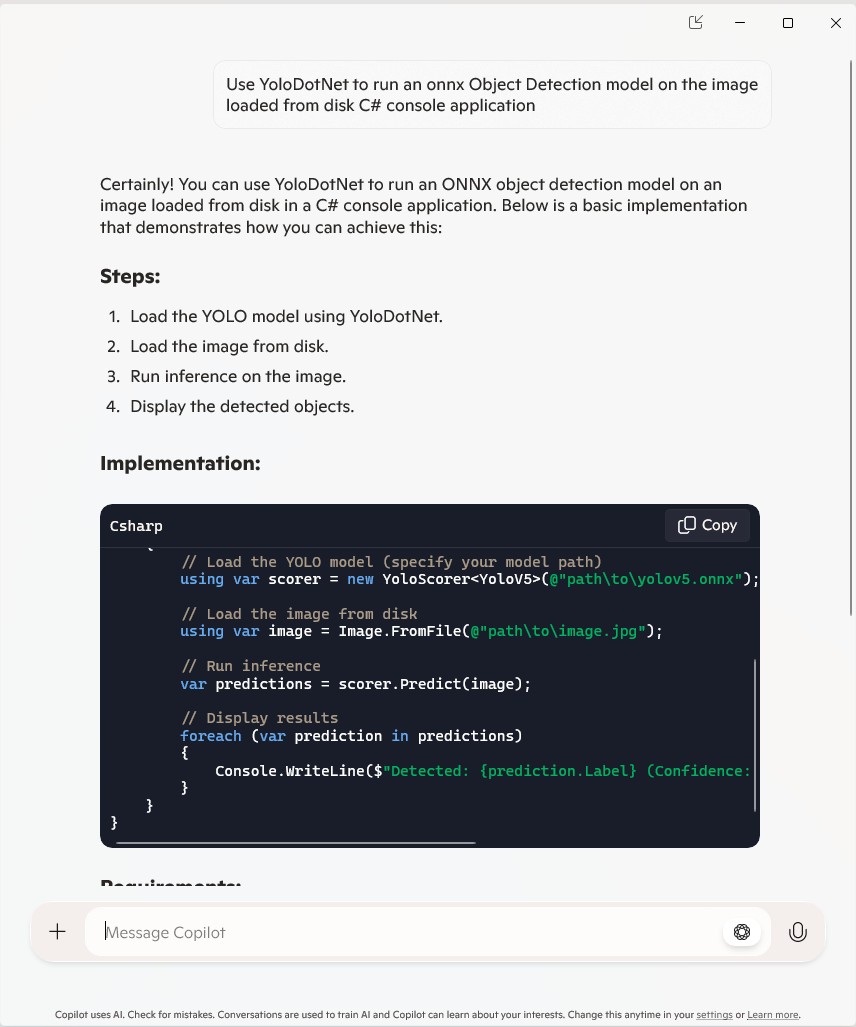
For this post I’ll be using GitHub Copilot to generate code for a console application that uses a Faster R-CNNONNX model to process an image loaded from disk.
please write a C# console application that uses Onnx to run a ONNX Faster-RCNN object detection model on an image loaded from disk
static void Main(string[] args)
{
   string modelPath = "FasterRCNN-10.onnx";
   string imagePath = "sports.jpg";

   using var session = new InferenceSession(modelPath);
   using var image = new Bitmap(imagePath);

   var inputTensor = ExtractTensorFromImage(image);
   var inputs = new List<NamedOnnxValue>
   {
       NamedOnnxValue.CreateFromTensor("image", inputTensor)
   };

   using IDisposableReadOnlyCollection<DisposableNamedOnnxValue> results = session.Run(inputs);
   var output = results.First().AsEnumerable<float>().ToArray();

   // Process the output (e.g., draw bounding boxes on the image)
   ProcessOutput(output, image);

   image.Save("output.jpg", ImageFormat.Jpeg);
   Console.WriteLine("Object detection completed. Output saved as output.jpg");
}

private static DenseTensor<float> ExtractTensorFromImage(Bitmap image)
{
   int width = image.Width;
   int height = image.Height;
   var tensor = new DenseTensor<float>(new[] { 1, 3, height, width });

   for (int y = 0; y < height; y++)
   {
      for (int x = 0; x < width; x++)
      {
         Color pixel = image.GetPixel(x, y);
         tensor[0, 0, y, x] = pixel.R / 255.0f;
         tensor[0, 1, y, x] = pixel.G / 255.0f;
         tensor[0, 2, y, x] = pixel.B / 255.0f;
      }
   }

   return tensor;
}

private static void ProcessOutput(float[] output, Bitmap image)
{
   // Implement the logic to process the output and draw bounding boxes on the image
   // This is a placeholder for the actual implementation
}
I fixed the paths to the ONNX model and image files, so the application ran but there was an error.
The dimensions of the input tensor were wrong because the declaration included a batch id.
Change dimensions of tensor by removing batch from declaration
private static DenseTensor<float> ExtractTensorFromImage(Bitmap image)
{
   int width = image.Width;
   int height = image.Height;
   var tensor = new DenseTensor<float>(new[] { 3, height, width });

   for (int y = 0; y < height; y++)
   {
      for (int x = 0; x < width; x++)
      {
         Color pixel = image.GetPixel(x, y);
         tensor[0, y, x] = pixel.R / 255.0f;
         tensor[1, y, x] = pixel.G / 255.0f;
         tensor[2, y, x] = pixel.B / 255.0f;
      }
   }

   return tensor;
 }
GitHub Copilot fixed the tensor declaration by removing the batch id. The application also used System.Drawing which is not supported on my target embedded platforms.
Use ImageSharp to resize the image such that both height and width are within the range of [800, 1333], such that both height and width are divisible by 32.
 private static void ResizeImage(Image<Rgb24> image)
 {
    const int minSize = 800;
    const int maxSize = 1333;

    int originalWidth = image.Width;
    int originalHeight = image.Height;

    float scale = Math.Min((float)maxSize / Math.Max(originalWidth, originalHeight), (float)minSize / Math.Min(originalWidth, originalHeight));
    int newWidth = (int)(originalWidth * scale);
    int newHeight = (int)(originalHeight * scale);

    // Ensure dimensions are divisible by 32
    newWidth = (newWidth / 32) * 32;
    newHeight = (newHeight / 32) * 32;

    image.Mutate(x => x.Resize(newWidth, newHeight));
 }
The application ran but the results were bad, so I checked format of the input tensor and figured out the R,G,B values need to be adjusted.
Apply mean to each channel
private static DenseTensor<float> ExtractTensorFromImage(Image<Rgb24> image)
{
   int width = image.Width;
   int height = image.Height;
   var tensor = new DenseTensor<float>(new[] { 3, height, width });

   // Mean values for each channel
   float[] mean = { 0.485f, 0.456f, 0.406f };

   image.ProcessPixelRows(accessor =>
   {
      for (int y = 0; y < height; y++)
      {
         var pixelRow = accessor.GetRowSpan(y);
         for (int x = 0; x < width; x++)
         {
            tensor[0, y, x] = (pixelRow[x].R / 255.0f) - mean[0];
            tensor[1, y, x] = (pixelRow[x].G / 255.0f) - mean[1];
            tensor[2, y, x] = (pixelRow[x].B / 255.0f) - mean[2];
         }
      }
   });

   return tensor;
 }
The application ran but the results were still bad, so I checked format of the input tensor and figured out the Resnet50 means had be used and the input tensor was BGR rather than RGB
Use FasterRCNN means not resnet ones Change to B,G,R
private static DenseTensor<float> ExtractTensorFromImage(Image<Rgb24> image)
{
   int width = image.Width;
   int height = image.Height;
   var tensor = new DenseTensor<float>(new[] { 3, height, width });

   // Mean values for each channel for FasterRCNN
   float[] mean = { 102.9801f, 115.9465f, 122.7717f };

   image.ProcessPixelRows(accessor =>
   {
      for (int y = 0; y < height; y++)
      {
         var pixelRow = accessor.GetRowSpan(y);
         for (int x = 0; x < width; x++)
         {
            tensor[0, y, x] = pixelRow[x].B - mean[0];
            tensor[1, y, x] = pixelRow[x].G - mean[1];
            tensor[2, y, x] = pixelRow[x].R - mean[2];
         }
      }
   });

   return tensor;
}
When I inspected the values in the output tensor in the debugger they looked “reasonable” so got GitHub Copilot to add the code required to display the results.
Display label, confidence and bounding box
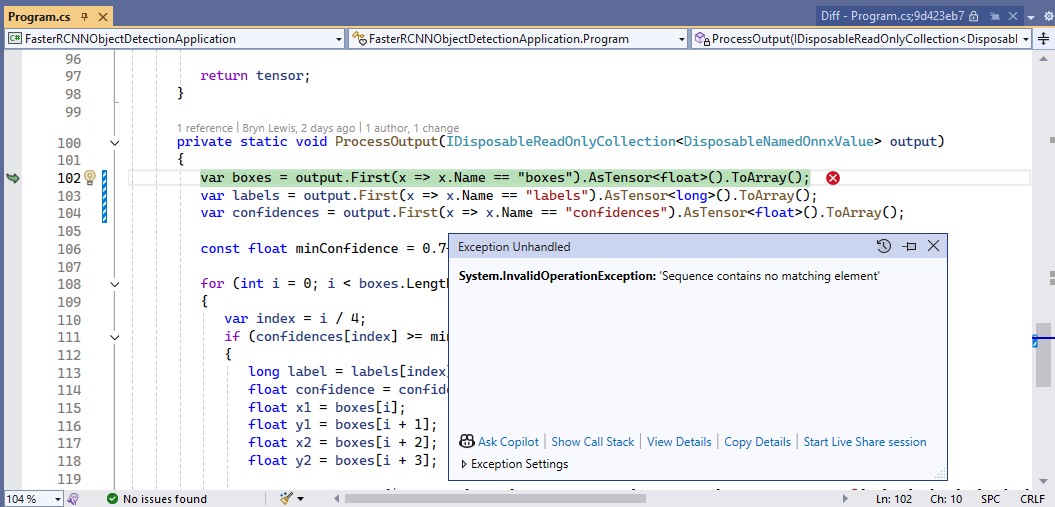
The application ran but there was an exception because the names of the output tensor “dimensions” were wrong.
I used Netron to get the correct output tensor “dimension” names.
I then manually fixed the output tensor “dimension” names
private static void ProcessOutput(IDisposableReadOnlyCollection<DisposableNamedOnnxValue> output)
{
   var boxes = output.First(x => x.Name == "6379").AsTensor<float>().ToArray();
   var labels = output.First(x => x.Name == "6381").AsTensor<long>().ToArray();
   var confidences = output.First(x => x.Name == "6383").AsTensor<float>().ToArray();

   const float minConfidence = 0.7f;

   for (int i = 0; i < boxes.Length; i += 4)
   {
      var index = i / 4;
      if (confidences[index] >= minConfidence)
      {
         long label = labels[index];
         float confidence = confidences[index];
         float x1 = boxes[i];
         float y1 = boxes[i + 1];
         float x2 = boxes[i + 2];
         float y2 = boxes[i + 3];

         Console.WriteLine($"Label: {label}, Confidence: {confidence}, Bounding Box: [{x1}, {y1}, {x2}, {y2}]");
      }
   }
}
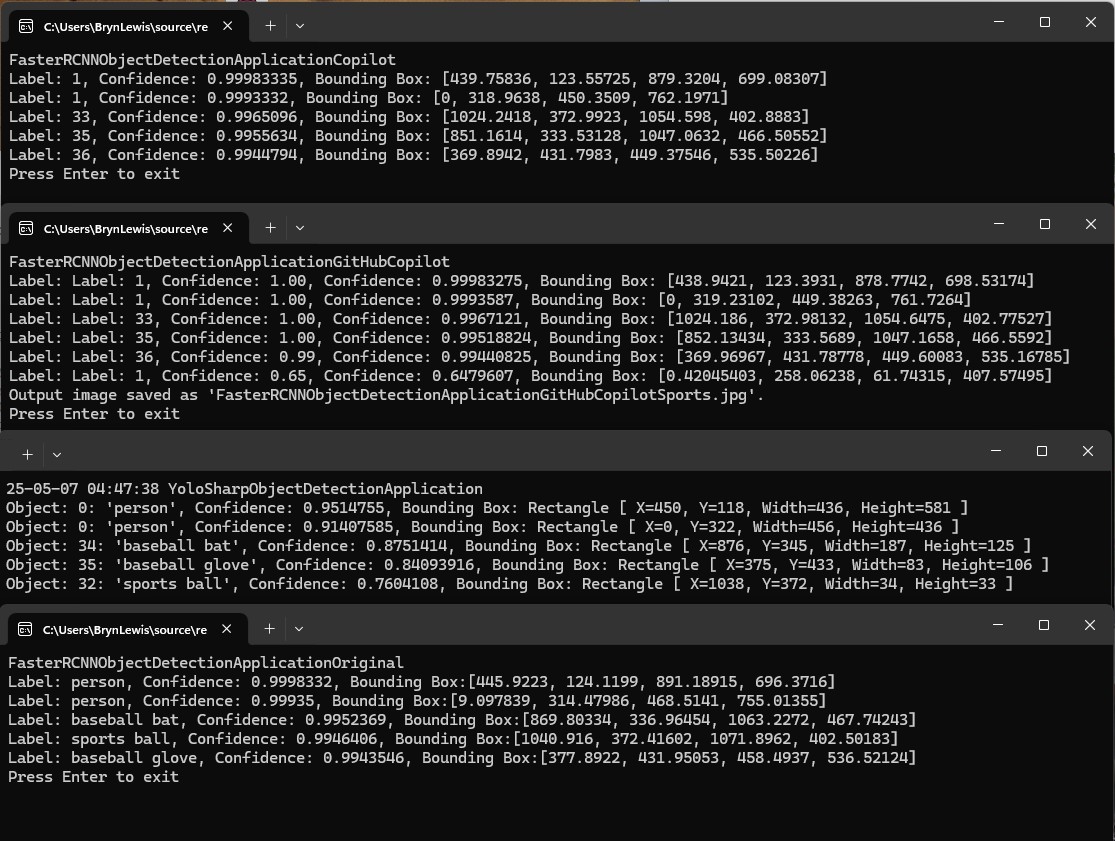
I manually compared the output of the console application with equivalent YoloSharp application output and the results looked close enough.
Summary
The Copilot prompts required to generate code were significantly more complex than previous examples and I had to regularly refer to the documentation to figure out what was wrong. The code wasn’t great and Copilot didn’t add much value
The Copilot generated code in this post is not suitable for production
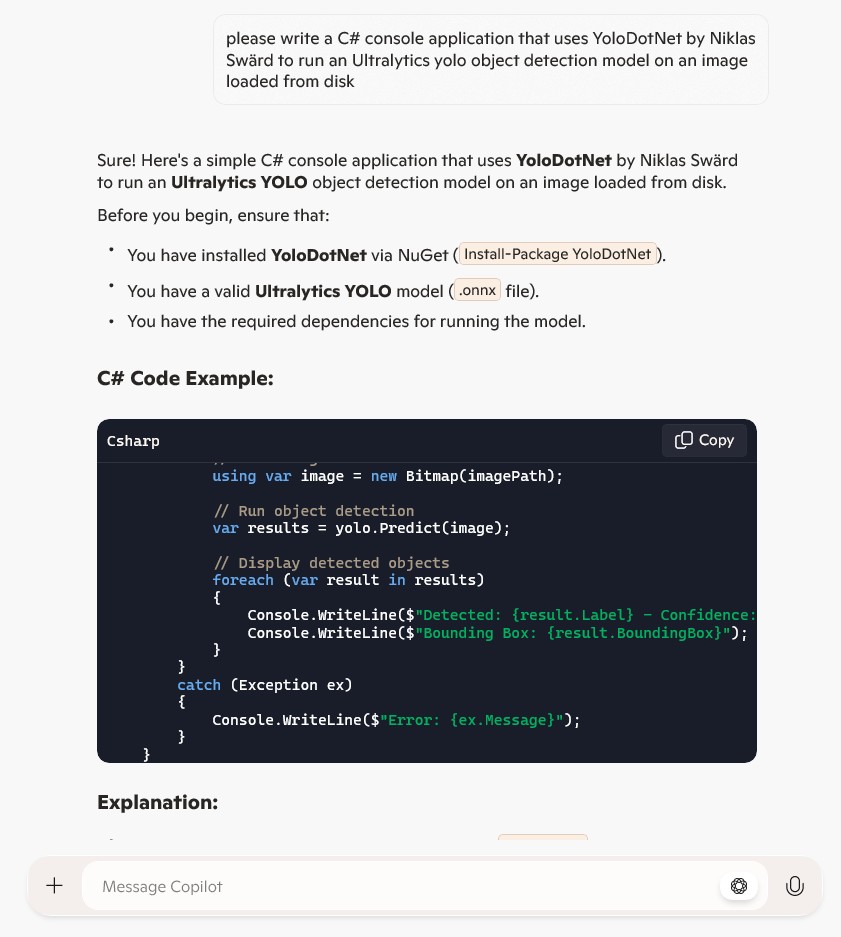
static void Main(string[] args)
{
   string modelPath = "path/to/yolo_model.onnx";  // Update with actual model path
   string imagePath = "path/to/image.jpg";        // Update with actual image path

   // Load YOLO model
   var yolo = new YoloModel(modelPath);

   // Load image
   using Bitmap image = new Bitmap(imagePath);

   // Run classification
   var results = yolo.Predict(image);

   // Display results
   foreach (var result in results)
   {
      Console.WriteLine($"Detected: {result.Label} with confidence {result.Confidence:P}");
   }
}
The code didn’t compile so I tried a different prompt
This didn’t compile and looked like it was based on https://github.com/techwingslab/yolov5-net. The generated code also added code to check that the model and image files existed.
static void Main(string[] args)
{
   string modelPath = "yolov8.onnx"; // Replace with your actual model path
   string imagePath = "image.jpg"; // Replace with your actual image path

   if (!File.Exists(modelPath))
   {
      Console.WriteLine("Error: Model file not found!");
      return;
   }

   if (!File.Exists(imagePath))
   {
      Console.WriteLine("Error: Image file not found!");
      return;
   }

   try
   {
      // Load the YOLO model
      using var yolo = new Yolo(modelPath);

      // Load image from disk
      using var image = new Bitmap(imagePath);

      // Run object detection
      var results = yolo.Predict(image);

      // Display detected objects
      foreach (var result in results)
      {
         Console.WriteLine($"Detected: {result.Label} - Confidence: {result.Confidence}");
         Console.WriteLine($"Bounding Box: {result.BoundingBox}");
      }
   }
   catch (Exception ex)
   {
      Console.WriteLine($"Error: {ex.Message}");
   }
}
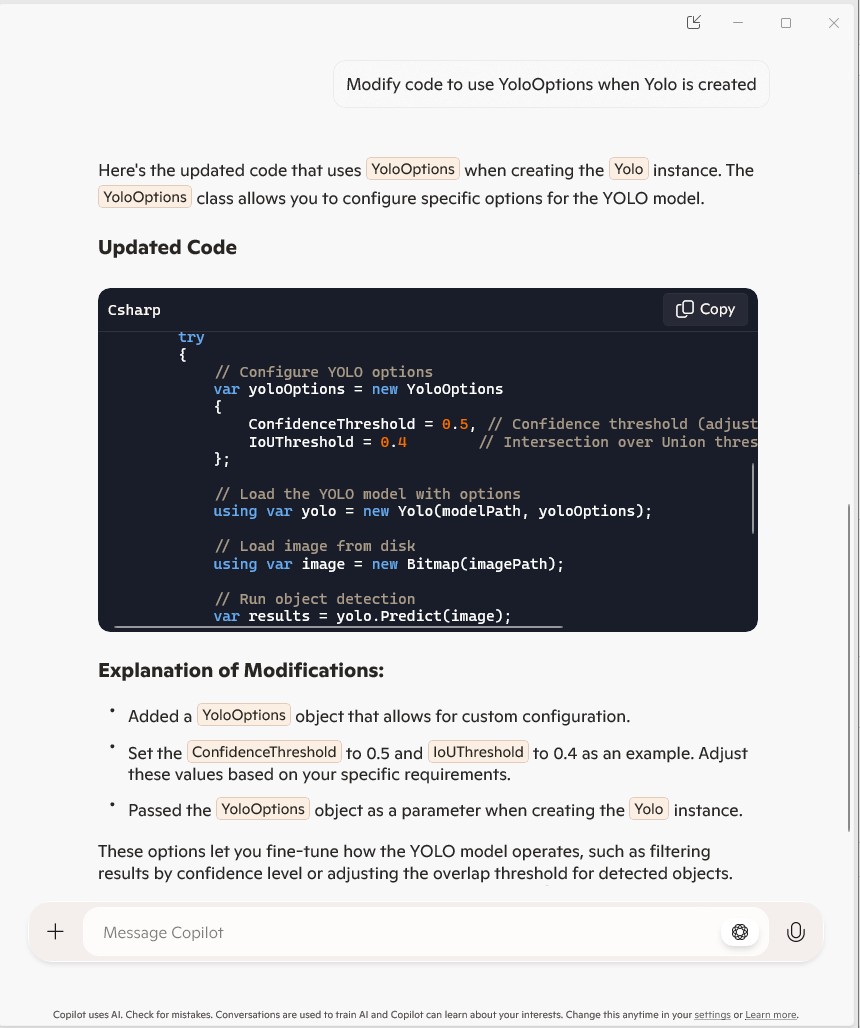
This didn’t compile so tried again
static void Main(string[] args)
{
   string modelPath = "yolov8.onnx"; // Replace with your actual model path
   string imagePath = "image.jpg"; // Replace with your actual image path
...
   try
   {
      var yoloOptions = new YoloOptions
      {
         ConfidenceThreshold = 0.5, // Confidence threshold (adjust as needed)
         IoUThreshold = 0.4        // Intersection over Union threshold
      };

      // Load the YOLO model
      //using var yolo = new Yolo(modelPath);
      using var yolo = new Yolo(yoloOptions);

      // Load image from disk
      using var image = new Bitmap(imagePath);

      // Run object detection
      //var results = yolo.Predict(image);
      var results = yolo.RunObjectDetection(image);

      // Display detected objects
      foreach (var result in results)
      {
         Console.WriteLine($"Detected: {result.Label} - Confidence: {result.Confidence}");
         Console.WriteLine($"Bounding Box: {result.BoundingBox}");
      }
   }
   catch (Exception ex)
   {
      Console.WriteLine($"Error: {ex.Message}");
   }
}
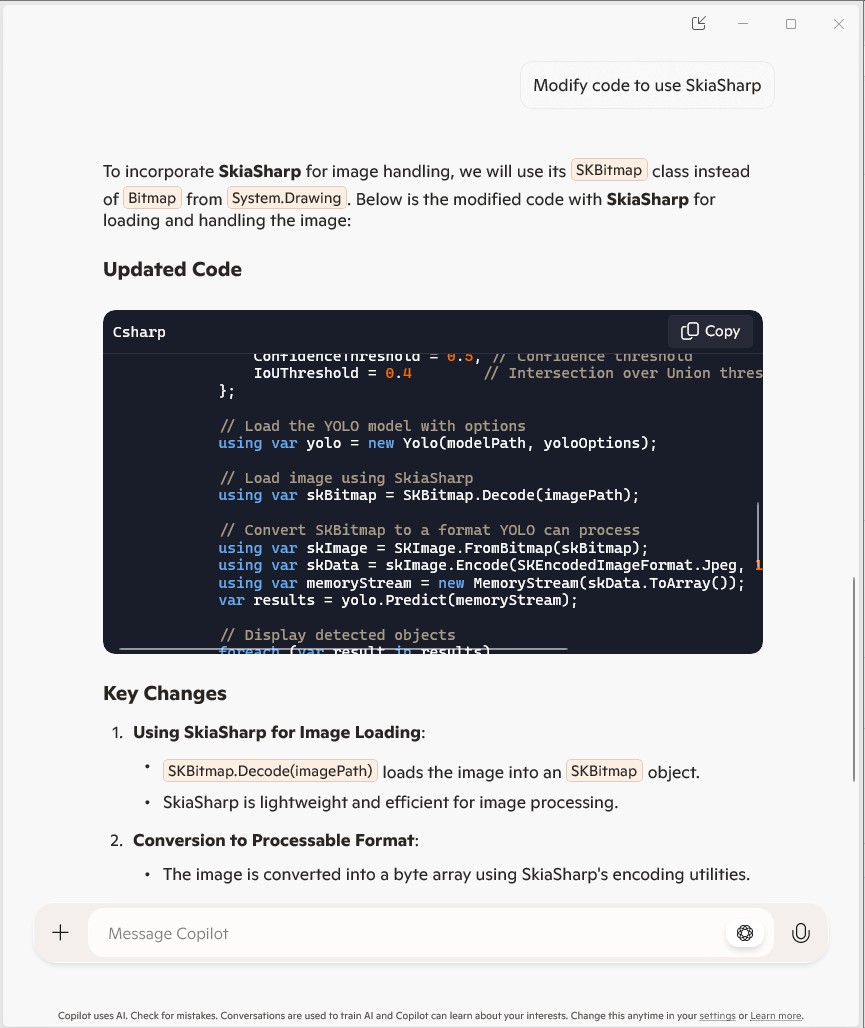
This didn’t compile so tried a different approach
I manually modified the code removing ConfidenceThreshold and IoUThreshold, then used intellisense to “discover” then add ModelType & modelPath
static void Main(string[] args)
{
   string modelPath = "yolov8.onnx"; // Replace with your actual model path
   string imagePath = "image.jpg"; // Replace with your actual image path
...
   try
   {
      var yoloOptions = new YoloOptions
      {
         ModelType = ModelType.ObjectDetection,
         OnnxModel = modelPath
      };

      // Load the YOLO model
      //using var yolo = new Yolo(modelPath);
      //using var yolo = new Yolo(yoloOptions);
      //using var yolo = new Yolo(modelPath, yoloOptions);
      using var yolo = new Yolo(yoloOptions);

      // Load image using SkiaSharp
      using var skBitmap = SKBitmap.Decode(imagePath);

      // Convert SKBitmap to a format YOLO can process
      using var skImage = SKImage.FromBitmap(skBitmap);
      using var skData = skImage.Encode(SKEncodedImageFormat.Jpeg, 100);
      using var memoryStream = new MemoryStream(skData.ToArray());
      //var results = yolo.Predict(memoryStream);
      var results = yolo.RunObbDetection(skImage);

      // Display detected objects
      foreach (var result in results)
      {
         Console.WriteLine($"Detected: {result.Label} - Confidence: {result.Confidence}");
         Console.WriteLine($"Bounding Box: {result.BoundingBox}");
      }
   }
   catch (Exception ex)
   {
      Console.WriteLine($"Error: {ex.Message}");
   }
}
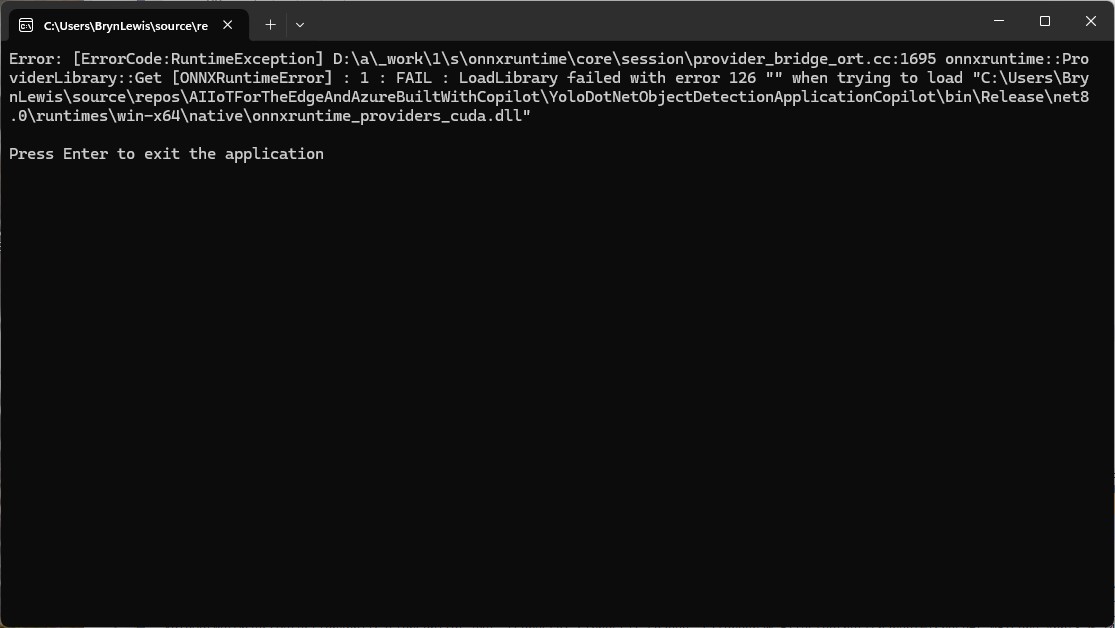
The code compiled and ran but didn’t work because YoloDoNet assumed that my computer had CUDA support
static void Main(string[] args)
{
   string modelPath = "yolov8.onnx"; // Replace with your actual model path
   string imagePath = "image.jpg"; // Replace with your actual image path
...
         try
         {
            var yoloOptions = new YoloOptions
            {
               ModelType = ModelType.ObjectDetection,
               OnnxModel = modelPath,
               Cuda = false
            };

            // Load the YOLO model
            //using var yolo = new Yolo(modelPath);
            //using var yolo = new Yolo(yoloOptions);
            //using var yolo = new Yolo(modelPath, yoloOptions);
            using var yolo = new Yolo(yoloOptions);

            // Load image using SkiaSharp
            using var skBitmap = SKBitmap.Decode(imagePath);

            // Convert SKBitmap to a format YOLO can process
            using var skImage = SKImage.FromBitmap(skBitmap);
            using var skData = skImage.Encode(SKEncodedImageFormat.Jpeg, 100);
            using var memoryStream = new MemoryStream(skData.ToArray());
            //var results = yolo.Predict(memoryStream);
            var results = yolo.RunObbDetection(skImage);

            // Display detected objects
            foreach (var result in results)
            {
               Console.WriteLine($"Detected: {result.Label} - Confidence: {result.Confidence}");
               Console.WriteLine($"Bounding Box: {result.BoundingBox}");
            }
         }
         catch (Exception ex)
         {
            Console.WriteLine($"Error: {ex.Message}");
         }
      }
   }
}
I was getting sick of prompts so manually fixed SKImage loading, RunObjectDetection and then removed the “cruft”.
static void Main(string[] args)
{
   string modelPath = "yolov8s.onnx"; // Replace with your actual model path
   string imagePath = "sports.jpg"; // Replace with your actual image path
...
   try
   {
      var yoloOptions = new YoloOptions
      {
         ModelType = ModelType.ObjectDetection,
         OnnxModel = modelPath,
         Cuda = false
      };

      using var yolo = new Yolo(yoloOptions);

     using var skImage = SKImage.FromEncodedData(imagePath);

      var results = yolo.RunObjectDetection(skImage);

      foreach (var result in results)
      {
         Console.WriteLine($"Detected: {result.Label} - Confidence: {result.Confidence:F2}");
         Console.WriteLine($"Bounding Box: {result.BoundingBox}");
      }
   }
   catch (Exception ex)
   {
      Console.WriteLine($"Error: {ex.Message}");
   }

   Console.WriteLine("Press Enter to exit the application");
   Console.ReadLine();
}
Don’t understand why reference to OpenCV was included
static void Main(string[] args)
{
   string modelPath = "path/to/yolo_model.onnx"; // Update with actual model path
   string imagePath = "path/to/image.jpg"; // Update with actual image path

   // Load YOLO model
   var yolo = new YoloModel(modelPath);

   // Load image
   using Bitmap image = new Bitmap(imagePath);

   // Run classification
   var results = yolo.Predict(image);

   // Display results
  foreach (var result in results)
  {
      Console.WriteLine($"Detected: {result.Label} with confidence {result.Confidence:P}");
   }
}
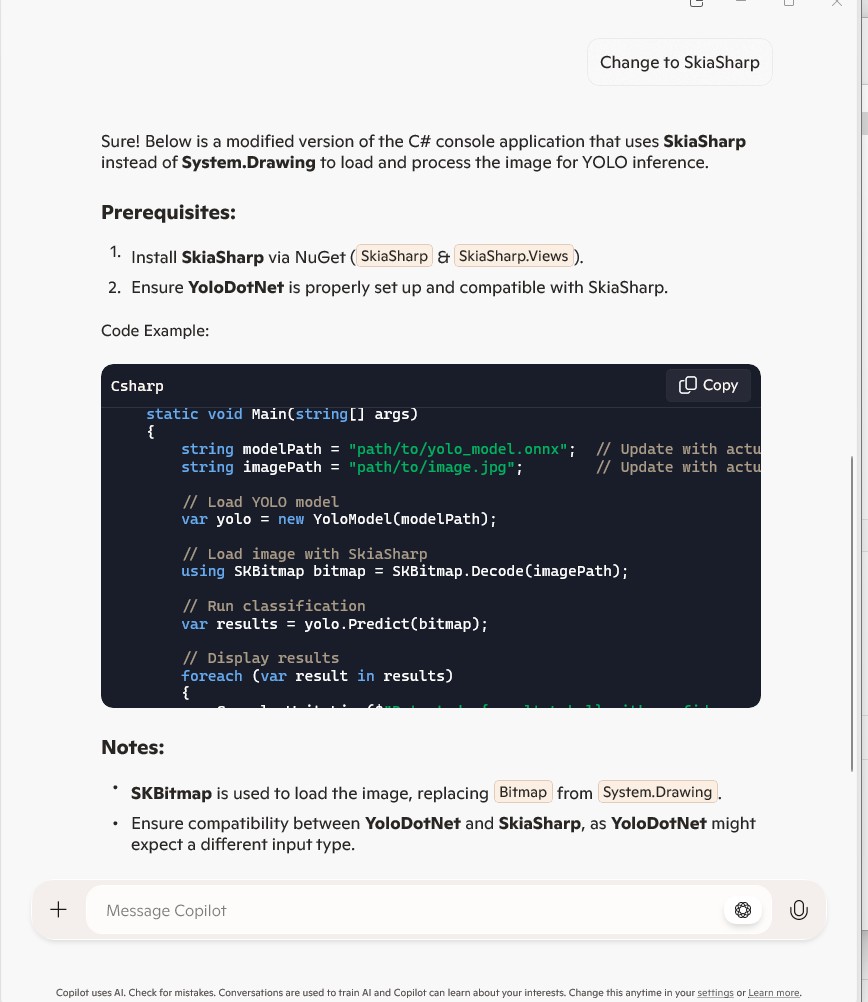
The code didn’t compile so I prompted the code be modified to use SkiaSharp which is used by YoloDoNet
This was a bit strange, so I tried again
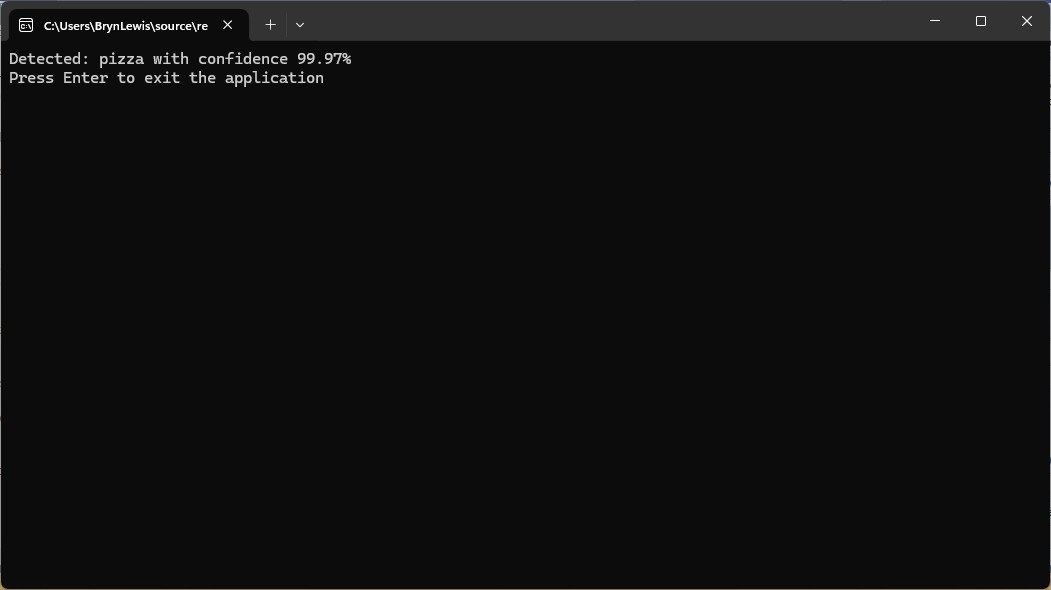
I was getting sick of prompts so manually fixed SKImage loading, RunClassification and then removed the “cruft”.
static void Main(string[] args)
{
   string modelPath = "yolov8s-cls.onnx";  // Update with actual model path
   string imagePath = "pizza.jpg";        // Update with actual image path

   var yolo = new Yolo(new YoloOptions()
   {
      ModelType = ModelType.Classification,
      OnnxModel = modelPath,
      Cuda = false
   });

   // Load image
   using SKImage image = SKImage.FromEncodedData(imagePath);

   // Run classification
   var results = yolo.RunClassification(image);

   // Display results
   foreach (var result in results)
   {
      Console.WriteLine($"Detected: {result.Label} with confidence {result.Confidence:P}");
   }

   Console.WriteLine("Press Enter to exit the application");
   Console.ReadLine();
}
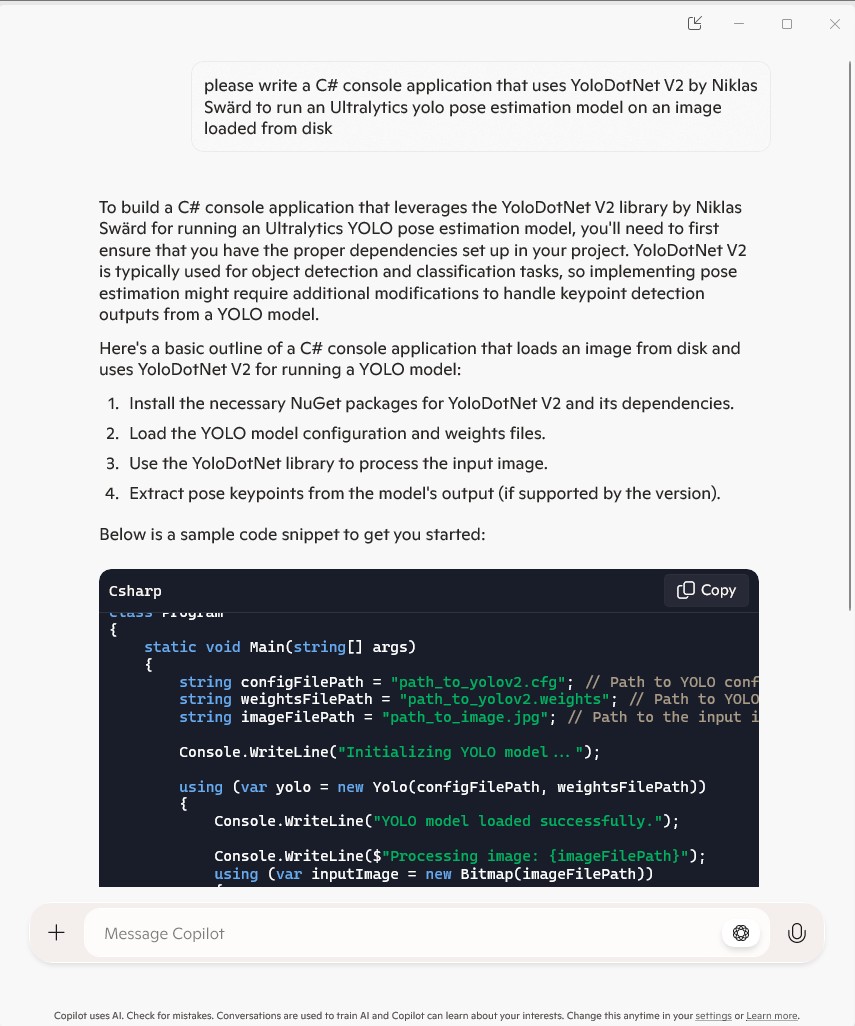
Replace, path/to/yolo_model.onnx, and path/to/image.jpg with the actual paths to your model files and input image

This example assumes that YoloDotNet V2 supports the loaded YOLO model. Verify compatibility with the YOLO ObjectDetection variant.
Copilot had “assumed” I meant Ultralytics Yolo V2 and the code didn’t compile. So, I tried again without V2.
using Microsoft.AspNetCore.Http;
using Microsoft.AspNetCore.Mvc;
using Microsoft.Azure.Functions.Worker;
using Microsoft.Extensions.Logging;

namespace YoloObjectDetectionFunction
{
    public class Function1
    {
        private readonly ILogger<Function1> _logger;

        public Function1(ILogger<Function1> logger)
        {
            _logger = logger;
        }

        [Function("Function1")]
        public IActionResult Run([HttpTrigger(AuthorizationLevel.Function, "get", "post")] HttpRequest req)
        {
            _logger.LogInformation("C# HTTP trigger function processed a request.");
            return new OkObjectResult("Welcome to Azure Functions!");
        }
    }
}
I then generated the first version of the code with Copilot desktop
The code looked “okay” but had lots of extra “usings”, used FunctionName vs Function attributes etc. so didn’t compile.
using System.IO;
using System.Linq;
using System.Net;
using System.Net.Http;
using System.Threading.Tasks;
using Microsoft.AspNetCore.Mvc;
using Microsoft.Azure.WebJobs;
using Microsoft.Azure.WebJobs.Extensions.Http;
using Microsoft.Extensions.Logging;
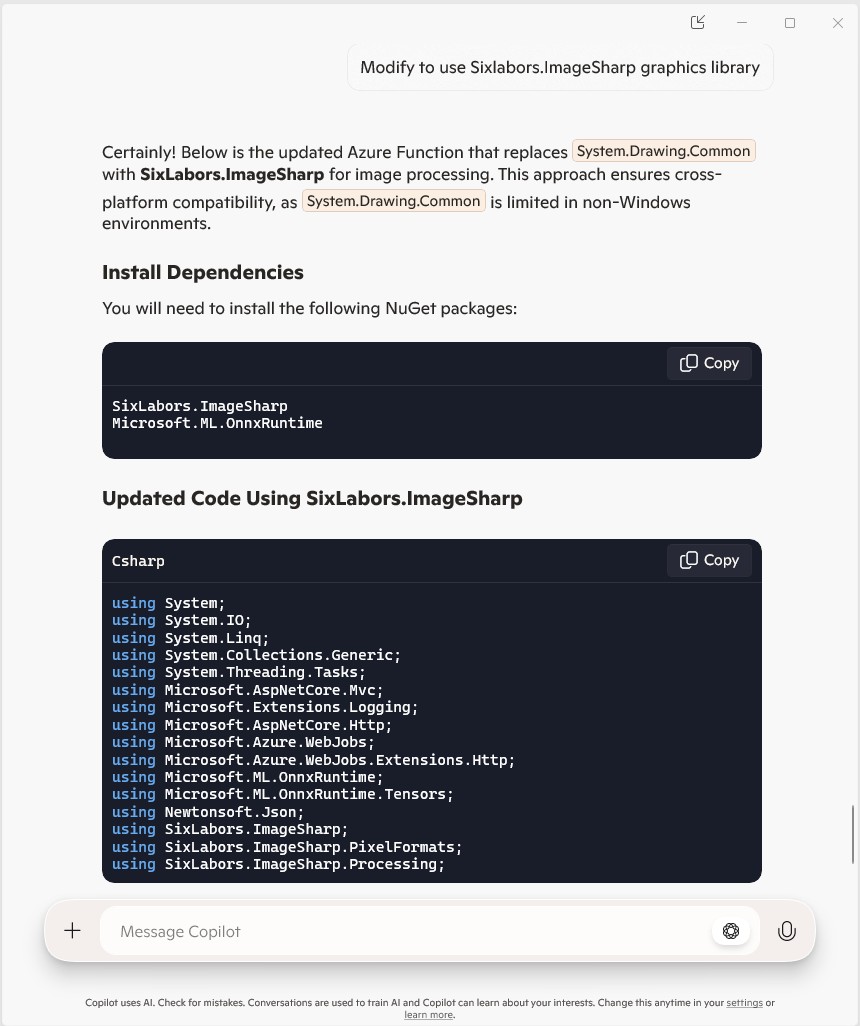
using SixLabors.ImageSharp;
using SixLabors.ImageSharp.PixelFormats;
using SixLabors.ImageSharp.Processing;
using YoloSharp;
using YoloSharp.DataStructures;
public static class YoloObjectDetectionFunction
{
private static readonly string modelPath = "path/to/your/yolo-model.onnx";
[FunctionName("YoloObjectDetection")]
public static async Task<IActionResult> Run(
[HttpTrigger(AuthorizationLevel.Function, "post", Route = null)] HttpRequestMessage req,
ILogger log)
{
log.LogInformation("Yolo Object Detection function processed a request.");
// Read the image from the request
byte[] imageBytes = await req.Content.ReadAsByteArrayAsync();
using (Image<Rgba32> image = Image.Load<Rgba32>(imageBytes))
{
// Initialize YoloSharp
using (var yolo = new Yolo(modelPath))
{
// Detect objects in the image
var detections = yolo.Predict(image);
// Process the detections
foreach (var detection in detections)
{
// Draw bounding boxes on the image
image.Mutate(ctx => ctx.DrawPolygon(Rgba32.Red, 2, detection.BoundingBox.ToPolygon()));
}
// Save the modified image to a memory stream
using (var ms = new MemoryStream())
{
image.SaveAsPng(ms);
ms.Seek(0, SeekOrigin.Begin);
// Return the modified image as a response
var result = new HttpResponseMessage(HttpStatusCode.OK)
{
Content = new StreamContent(ms)
};
result.Content.Headers.ContentType = new System.Net.Http.Headers.MediaTypeHeaderValue("image/png");
return new FileStreamResult(ms, "image/png");
}
}
}
}
}
using System.Net;

using Microsoft.AspNetCore.Mvc;
using Microsoft.Azure.Functions.Worker;
using Microsoft.Extensions.Logging;

using SixLabors.ImageSharp;
using SixLabors.ImageSharp.PixelFormats;
using SixLabors.ImageSharp.Processing;
using SixLabors.ImageSharp.Drawing.Processing;

//using YoloSharp;
//using YoloSharp.DataStructures;
using Compunet.YoloSharp;


public static class YoloObjectDetectionFunction
{
   //private static readonly string modelPath = "path/to/your/yolo-model.onnx";
   private static readonly string modelPath = "yolov8s.onnx";

   //[FunctionName("YoloObjectDetection")]
   [Function("YoloObjectDetection")]
   public static async Task<IActionResult> Run(
       [HttpTrigger(AuthorizationLevel.Function, "post", Route = null)] HttpRequestMessage req,
       ILogger log)
   {
      log.LogInformation("Yolo Object Detection function processed a request.");

      // Read the image from the request
      byte[] imageBytes = await req.Content.ReadAsByteArrayAsync();
      using (Image<Rgba32> image = Image.Load<Rgba32>(imageBytes))
      {
         // Initialize YoloSharp
         //using (var yolo = new Yolo(modelPath))
         using (var yolo = new YoloPredictor(modelPath))
         {
            // Detect objects in the image
            //var detections = yolo.Predict(image);
            var detections = yolo.Detect(image);

            // Process the detections
            foreach (var detection in detections)
            {
               // Draw bounding boxes on the image
               //image.Mutate(ctx => ctx.DrawPolygon(Rgba32.Red, 2, detection.BoundingBox.ToPolygon()));

               var rectangle = new PointF[] {new Point(detection.Bounds.Bottom, detection.Bounds.Left), new Point(detection.Bounds.Bottom, detection.Bounds.Right), new Point(detection.Bounds.Right, detection.Bounds.Top), new Point(detection.Bounds.Left, detection.Bounds.Top)};

               image.Mutate(ctx => ctx.DrawPolygon(Rgba32.ParseHex("FF0000"), 2, rectangle));
            }

            // Save the modified image to a memory stream
            using (var ms = new MemoryStream())
            {
               image.SaveAsPng(ms);
               ms.Seek(0, SeekOrigin.Begin);

               // Return the modified image as a response
               var result = new HttpResponseMessage(HttpStatusCode.OK)
               {
                  Content = new StreamContent(ms)
               };
               result.Content.Headers.ContentType = new System.Net.Http.Headers.MediaTypeHeaderValue("image/png");
               return new FileStreamResult(ms, "image/png");
            }
         }
      }
   }
}
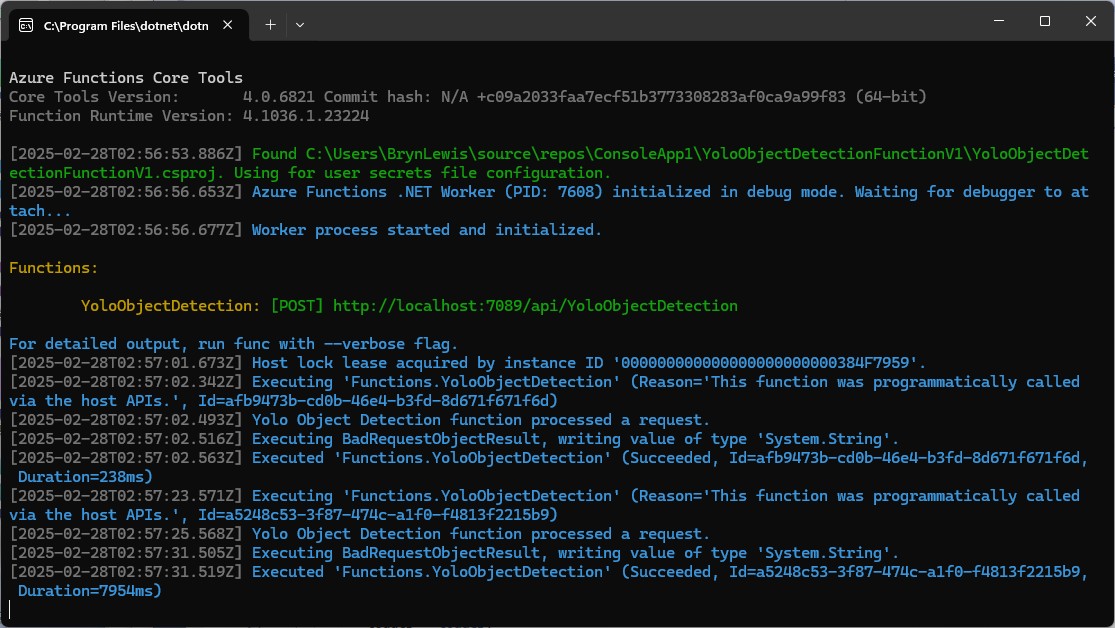
When I posted an image to the function with Telerik Fiddler Classic it threw an exception, because the ILogger injected into the Run method was null.
I then asked Github Copilot to “Modify code so the ILogger is parameter of constructor”
using System.Net;

using Microsoft.AspNetCore.Mvc;
using Microsoft.Azure.Functions.Worker;
using Microsoft.Extensions.Logging;

using SixLabors.ImageSharp;
using SixLabors.ImageSharp.PixelFormats;
using SixLabors.ImageSharp.Processing;
using SixLabors.ImageSharp.Drawing.Processing;

//using YoloSharp;
//using YoloSharp.DataStructures;
using Compunet.YoloSharp;


//public static class YoloObjectDetectionFunction
public class YoloObjectDetectionFunction
{
   private static readonly ILogger _log;
   //private static readonly string modelPath = "path/to/your/yolo-model.onnx";
   private static readonly string modelPath = "yolov8s.onnx";

   public YoloObjectDetectionFunction(ILogger<YoloObjectDetectionFunction> log)
   {
      _log = log;
   }

   //[FunctionName("YoloObjectDetection")]
   [Function("YoloObjectDetection")]
   //public static async Task<IActionResult> Run( [HttpTrigger(AuthorizationLevel.Function, "post", Route = null)] HttpRequestMessage req, ILogger log)
   public static async Task<IActionResult> Run([HttpTrigger(AuthorizationLevel.Function, "post", Route = null)] HttpRequestMessage req)
   {
      _log.LogInformation("Yolo Object Detection function processed a request.");

      // Read the image from the request
      byte[] imageBytes = await req.Content.ReadAsByteArrayAsync();
      using (Image<Rgba32> image = Image.Load<Rgba32>(imageBytes))
      {
         // Initialize YoloSharp
         //using (var yolo = new Yolo(modelPath))
         using (var yolo = new YoloPredictor(modelPath))
         {
            // Detect objects in the image
            //var detections = yolo.Predict(image);
            var detections = yolo.Detect(image);

            // Process the detections
            foreach (var detection in detections)
            {
               // Draw bounding boxes on the image
               //image.Mutate(ctx => ctx.DrawPolygon(Rgba32.Red, 2, detection.BoundingBox.ToPolygon()));

               var rectangle = new PointF[] {new Point(detection.Bounds.Bottom, detection.Bounds.Left), new Point(detection.Bounds.Bottom, detection.Bounds.Right), new Point(detection.Bounds.Right, detection.Bounds.Top), new Point(detection.Bounds.Left, detection.Bounds.Top)};

               image.Mutate(ctx => ctx.DrawPolygon(Rgba32.ParseHex("FF0000"), 2, rectangle));
            }

            // Save the modified image to a memory stream
            using (var ms = new MemoryStream())
            {
               image.SaveAsPng(ms);
               ms.Seek(0, SeekOrigin.Begin);

               // Return the modified image as a response
               var result = new HttpResponseMessage(HttpStatusCode.OK)
               {
                  Content = new StreamContent(ms)
               };
               result.Content.Headers.ContentType = new System.Net.Http.Headers.MediaTypeHeaderValue("image/png");
               return new FileStreamResult(ms, "image/png");
            }
         }
      }
   }
}
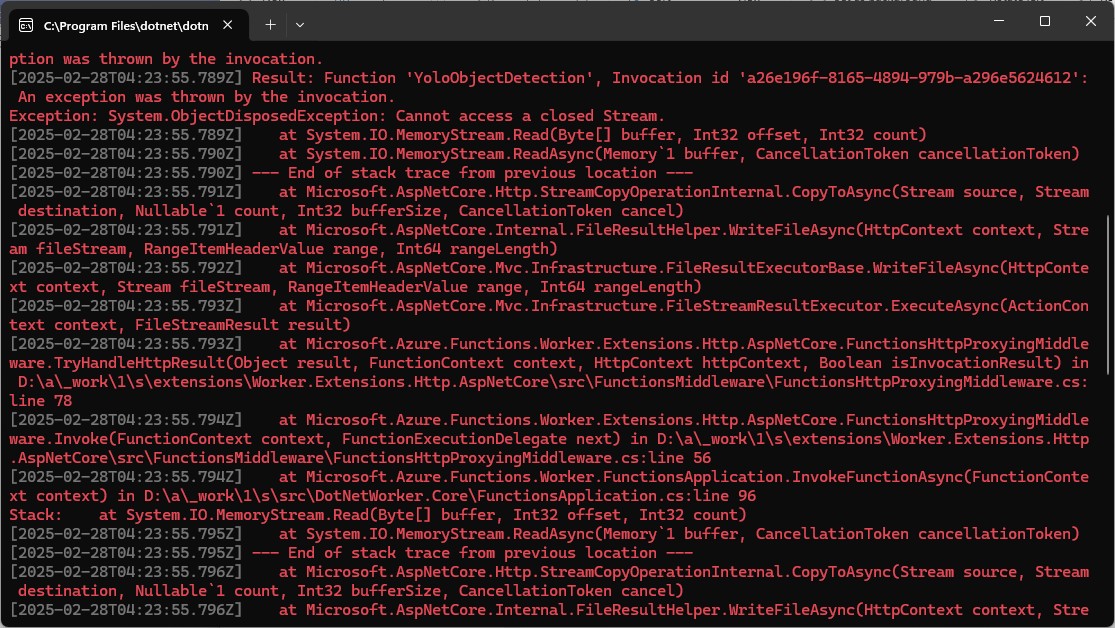
When I posted an image to the function it threw an exception, because content of the HttpRequestMessage was null.
I then asked Github Copilot to “Modify the code so that the image is read from the form”
// Read the image from the form
var form = await req.ReadFormAsync();
var file = form.Files["image"];
if (file == null || file.Length == 0)
{
   return new BadRequestObjectResult("Image file is missing or empty.");
}
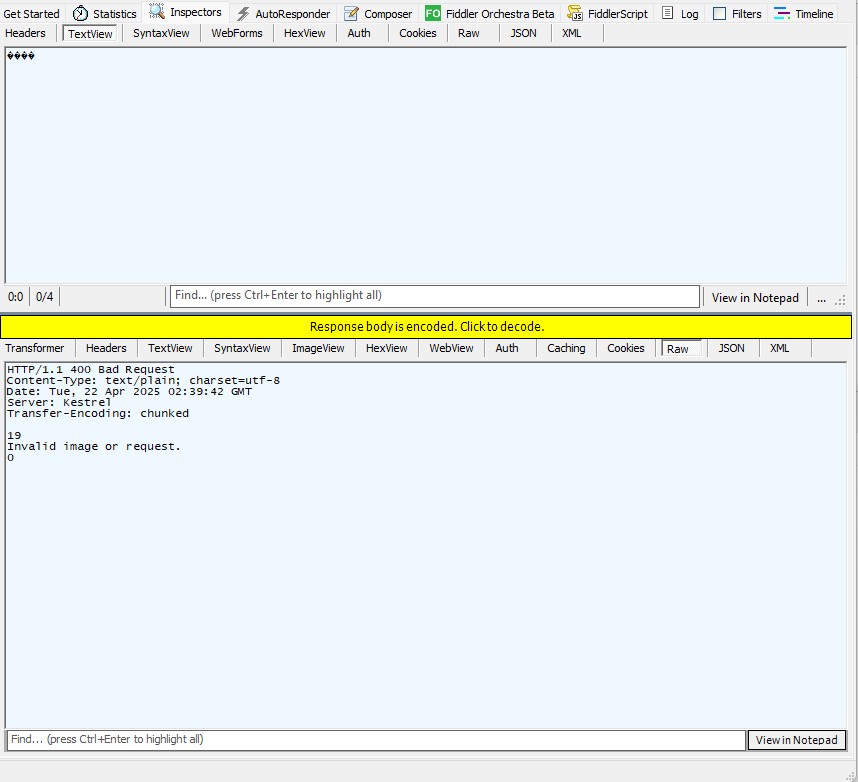
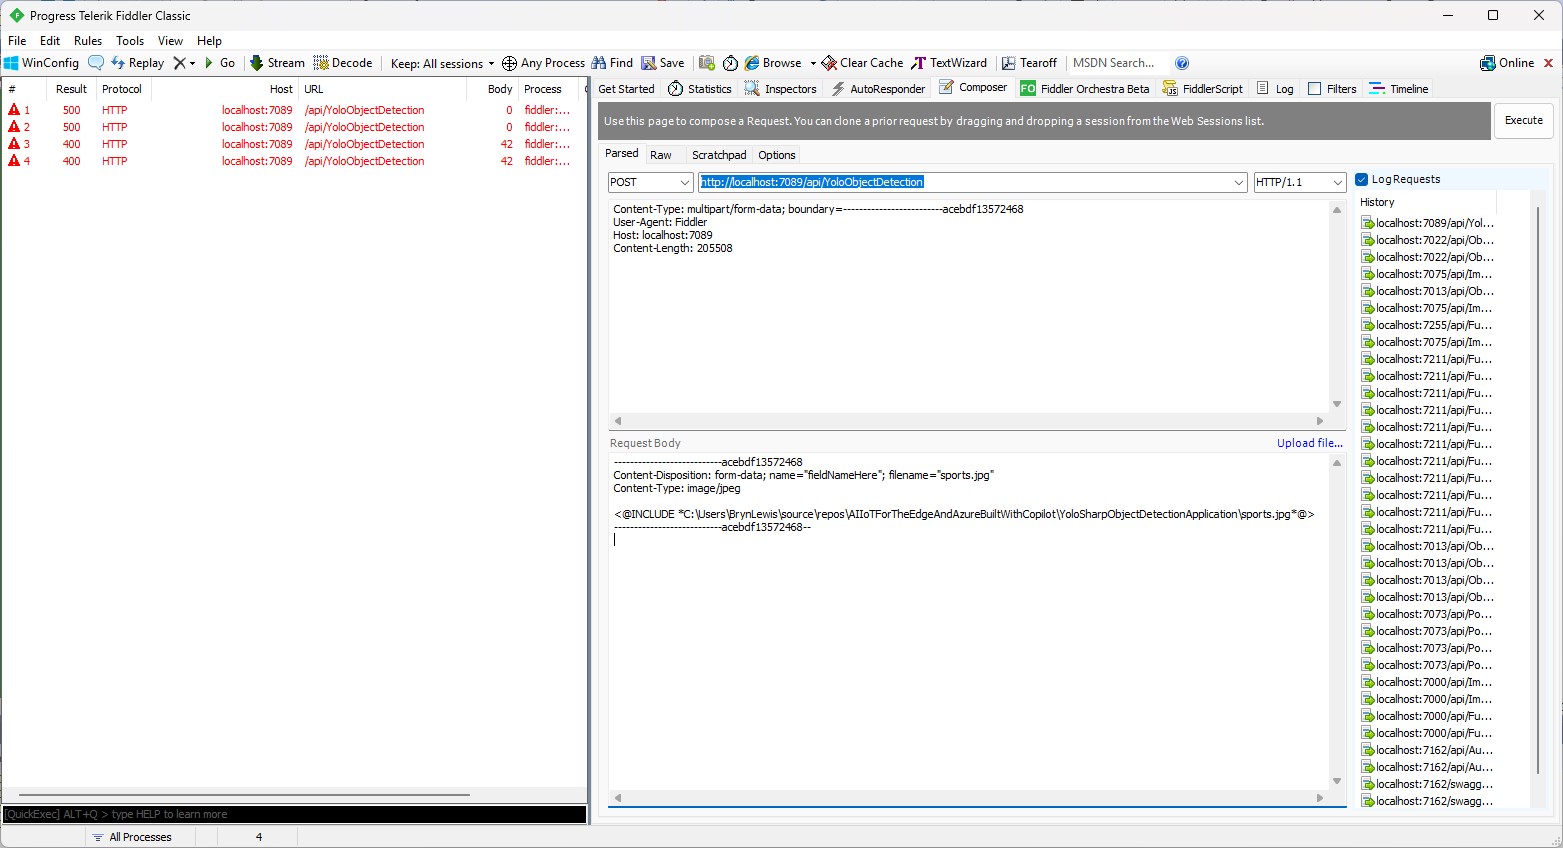
When I posted an image to the function it returned a 400 Bad Request Error.
After inspecting the request I realized that the name field was wrong, as the generated code was looking for “image”
using (var ms = new MemoryStream())
{
   image.SaveAsJpeg(ms);

   return new FileContentResult(ms.ToArray(), "image/jpg");
}
Then, when I posted an image to the function it succeeded
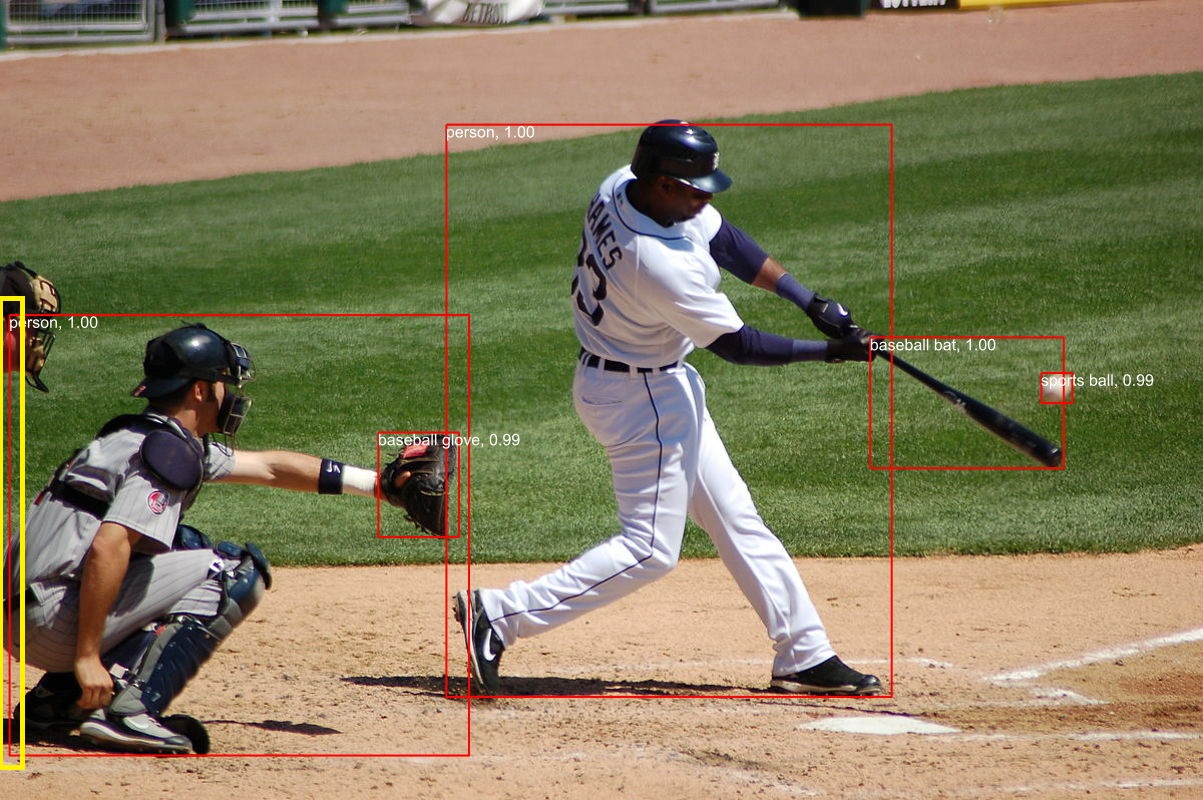
But, the bounding boxes around the detected objects were wrong.
I then manually fixed up the polygon code so the lines for each bounding box were drawn in the correct order.
// Process the detections
foreach (var detection in detections)
{
   var rectangle = new PointF[] {
      new Point(detection.Bounds.Left, detection.Bounds.Bottom),
      new Point(detection.Bounds.Right, detection.Bounds.Bottom),
      new Point(detection.Bounds.Right, detection.Bounds.Top),
      new Point(detection.Bounds.Left, detection.Bounds.Top)
 };
Then, when I posted an image to the function it succeeded
The bounding boxes around the detected objects were correct.
I then “refactored” the code, removing all the unused “using”s, removed any commented out code, changed ILogger to be initialised using a Primary Constructor etc.
using Microsoft.AspNetCore.Http;
using Microsoft.AspNetCore.Mvc;
using Microsoft.Azure.Functions.Worker;
using Microsoft.Extensions.Logging;

using SixLabors.ImageSharp;
using SixLabors.ImageSharp.PixelFormats;
using SixLabors.ImageSharp.Processing;
using SixLabors.ImageSharp.Drawing.Processing;

using Compunet.YoloSharp;

public class YoloObjectDetectionFunction(ILogger<YoloObjectDetectionFunction> log)
{
   private readonly ILogger<YoloObjectDetectionFunction> _log = log;
   private readonly string modelPath = "yolov8s.onnx";

   [Function("YoloObjectDetection")]
   public async Task<IActionResult> Run([HttpTrigger(AuthorizationLevel.Function, "post", Route = null)] HttpRequest req)
   {
      _log.LogInformation("Yolo Object Detection function processed a request.");

      // Read the image from the form
      var form = await req.ReadFormAsync();
      var file = form.Files["image"];
      if (file == null || file.Length == 0)
      {
         return new BadRequestObjectResult("Image file is missing or empty.");
      }

      using (var stream = file.OpenReadStream())
      using (Image<Rgba32> image = Image.Load<Rgba32>(stream))
      {
         // Initialize YoloSharp
         using (var yolo = new YoloPredictor(modelPath))
         {
            // Detect objects in the image
            var detections = yolo.Detect(image);

            // Process the detections
            foreach (var detection in detections)
            {
               var rectangle = new PointF[] {
                  new Point(detection.Bounds.Left, detection.Bounds.Bottom),
                  new Point(detection.Bounds.Right, detection.Bounds.Bottom),
                  new Point(detection.Bounds.Right, detection.Bounds.Top),
                  new Point(detection.Bounds.Left, detection.Bounds.Top)
               };

               image.Mutate(ctx => ctx.DrawPolygon(Rgba32.ParseHex("FF0000"), 2, rectangle));
            }

            // Save the modified image to a memory stream
            using (var ms = new MemoryStream())
            {
               image.SaveAsJpeg(ms);

              return new FileContentResult(ms.ToArray(), "image/jpg");
            }
         }
      }
   }
}
Summary
The initial code generated by Copilot was badly broken but with the assistance of Visual Studio 2022 Intellisense was fixed fairly quickly. The ILogger not being initialised, me using the “wrong” upload file name were easy to debug, but the FileContentResult exception was a bit more difficult.
It took me a quite a bit longer to write the function with Copilot desktop/Github Copilot than what it would have taken me normally. But, I think a lot of this was due to having to take screen shots, writing this blog post as I went, and having already written several Azure HTTP Trigger function for processing uploaded images.
The Copilot generated code in this post is not suitable for production
using System;
using System.Drawing;
using YOLOSharp;

class Program
{
    static void Main(string[] args)
    {
        string modelPath = "path/to/yolov8.onnx"; // Replace with the path to your YOLOv8 model
        string imagePath = "path/to/image.jpg"; // Replace with the path to your image

        // Load the YOLOv8 model
        var yolo = new YOLO(modelPath);

        // Load the image from disk
        using (var image = Image.FromFile(imagePath))
        {
            // Run the YOLOv8 model on the image
            var results = yolo.Predict(image);

            // Display the results
            foreach (var result in results)
            {
                Console.WriteLine($"Label: {result.Label}, Confidence: {result.Confidence}, BoundingBox: {result.BoundingBox}");
            }
        }
    }
}
In this example:

Replace path/to/yolov8.onnx with the actual path to your YOLOv8 model file.

Replace path/to/image.jpg with the actual path to your image file.

This application loads the YOLOv8 model using YOLOSharp, loads an image from disk, runs the model on the image, and displays the results, including the label, confidence, and bounding box for each detected object.

Happy coding! 🚀
After some minor fixes and shifting the configuration to an appsettings file the application compiled.
using Compunet.YoloSharp;
using Microsoft.Extensions.Configuration;
using SixLabors.ImageSharp;

class Program
{
   static void Main(string[] args)
   {
      Model.ApplicationSettings applicationSettings;

      Console.WriteLine($"{DateTime.UtcNow:yy-MM-dd HH:mm:ss} 0.3.CameraHTTPClient starting");
#if RELEASE
       Console.WriteLine("RELEASE");
#else
      Console.WriteLine("DEBUG");
#endif
      // load the app settings into configuration
      var configuration = new ConfigurationBuilder()
           .AddJsonFile("appsettings.json", false, true)
      .Build();

      applicationSettings = configuration.GetSection("ApplicationSettings").Get<Model.ApplicationSettings>();

      // Load the YOLOv8 model
      var yolo = new YoloPredictor(applicationSettings.ModelPath);

      // Load the image from disk
      using (var image = Image.Load(applicationSettings.ImagePath))
      {
         // Run the YOLOv8 model on the image
         var results = yolo.Detect(image);

         // Display the results
         foreach (var result in results)
         {
            Console.WriteLine($"Label: {result.Name}, Confidence: {result.Confidence}, BoundingBox: {result.Bounds}");
         }
      }
   }
}
please write a C# console application that uses Compunet YoloSharp to run a yolov8 pose model on an image loaded from disk
using Compunet.YoloSharp;
using Microsoft.Extensions.Configuration;
using SixLabors.ImageSharp;

class Program
{
   static void Main(string[] args)
   {
      Model.ApplicationSettings applicationSettings;

      Console.WriteLine($"{DateTime.UtcNow:yy-MM-dd HH:mm:ss} 0.3.CameraHTTPClient starting");
#if RELEASE
       Console.WriteLine("RELEASE");
#else
      Console.WriteLine("DEBUG");
#endif
      // load the app settings into configuration
      var configuration = new ConfigurationBuilder()
           .AddJsonFile("appsettings.json", false, true)
      .Build();

      applicationSettings = configuration.GetSection("ApplicationSettings").Get<Model.ApplicationSettings>();

      // Load the YOLOv8 pose model
      var yolo = new YoloPredictor(applicationSettings.ModelPath);

      // Load the image from disk
      using (var image = Image.Load(applicationSettings.ImagePath))
      {
         // Run the YOLOv8 pose model on the image
         var results = yolo.Pose(image);

         // Display the results
         foreach (var result in results)
         {
            Console.WriteLine($"Label: {result.Name.Name}, Confidence: {result.Confidence}, BoundingBox: {result.Bounds}");
            Console.WriteLine("Keypoints:");
            foreach (var keypoint in result)
            {
               Console.WriteLine($"  - {keypoint.Point}");
            }
         }
      }
   }
}
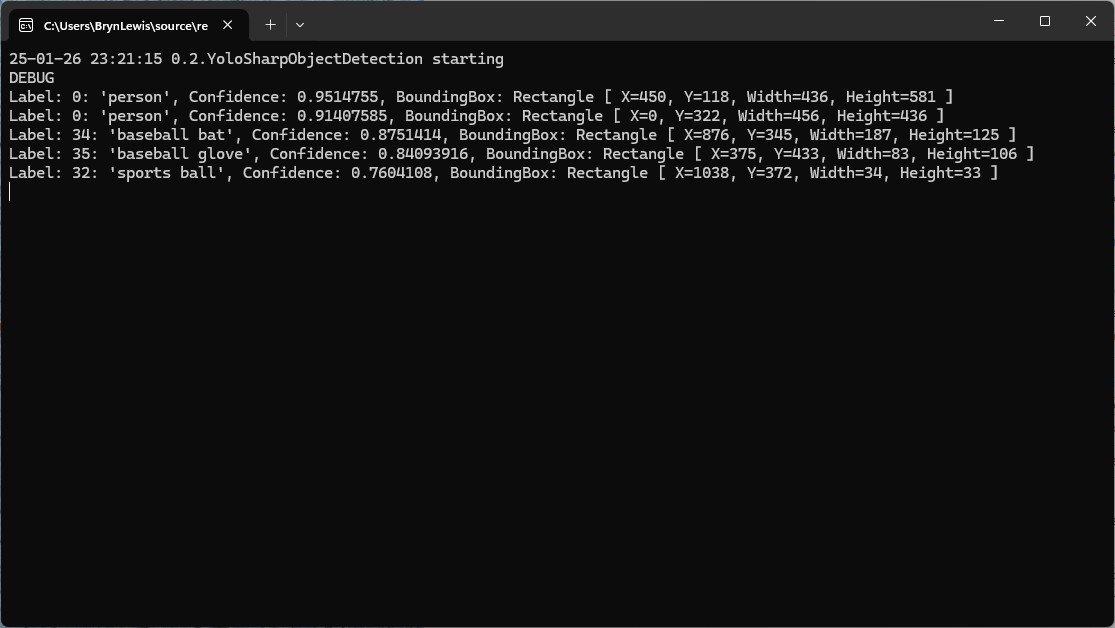
After some minor fixes and shifting the configuration to an appsettings file the application compiled. I tested the implementation with sample “sports” image from the YoloSharp Github repository
The console application output looked reasonable
I manually compared the output of the console application with the Ultralytics Hub model preview tab and the results were reasonable
please write a C# console application that uses Compunet YoloSharp to run a yolov8 pose model on an image loaded from disk
using Compunet.YoloSharp;
using Microsoft.Extensions.Configuration;
using SixLabors.ImageSharp;

class Program
{
   static void Main(string[] args)
   {
      Model.ApplicationSettings applicationSettings;

      Console.WriteLine($"{DateTime.UtcNow:yy-MM-dd HH:mm:ss} 0.3.CameraHTTPClient starting");
#if RELEASE
       Console.WriteLine("RELEASE");
#else
      Console.WriteLine("DEBUG");
#endif

      // load the app settings into configuration
      var configuration = new ConfigurationBuilder()
           .AddJsonFile("appsettings.json", false, true)
      .Build();

      applicationSettings = configuration.GetSection("ApplicationSettings").Get<Model.ApplicationSettings>();

      // Load the YOLOv8 classification model
      var yolo = new YoloPredictor(applicationSettings.ModelPath);

      // Load the image from disk
      using (var image = Image.Load(applicationSettings.ImagePath))
      {
         // Run the YOLOv8 classification model on the image
         var results = yolo.Classify(image);

         // Display the results
         foreach (var result in results)
         {
             Console.WriteLine($"Label: {result.Name.Name}, Confidence: {result.Confidence}");
         }
      }
   }
}
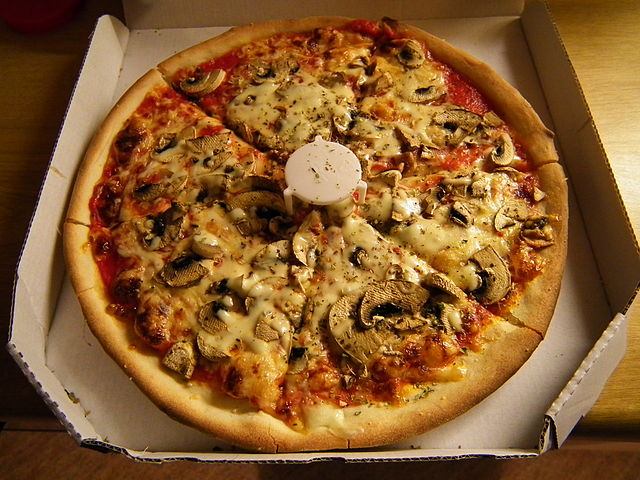
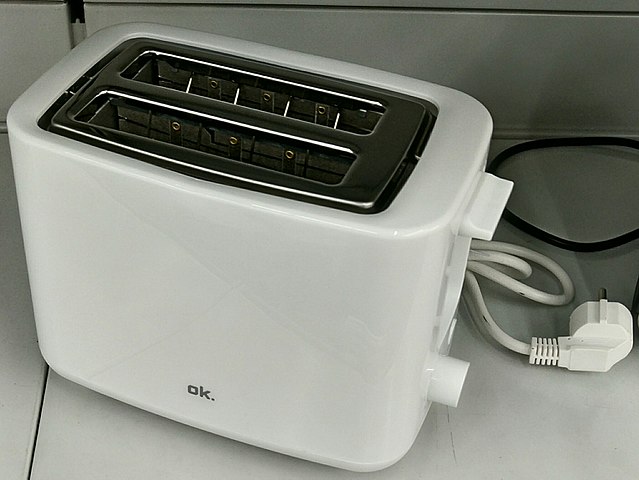
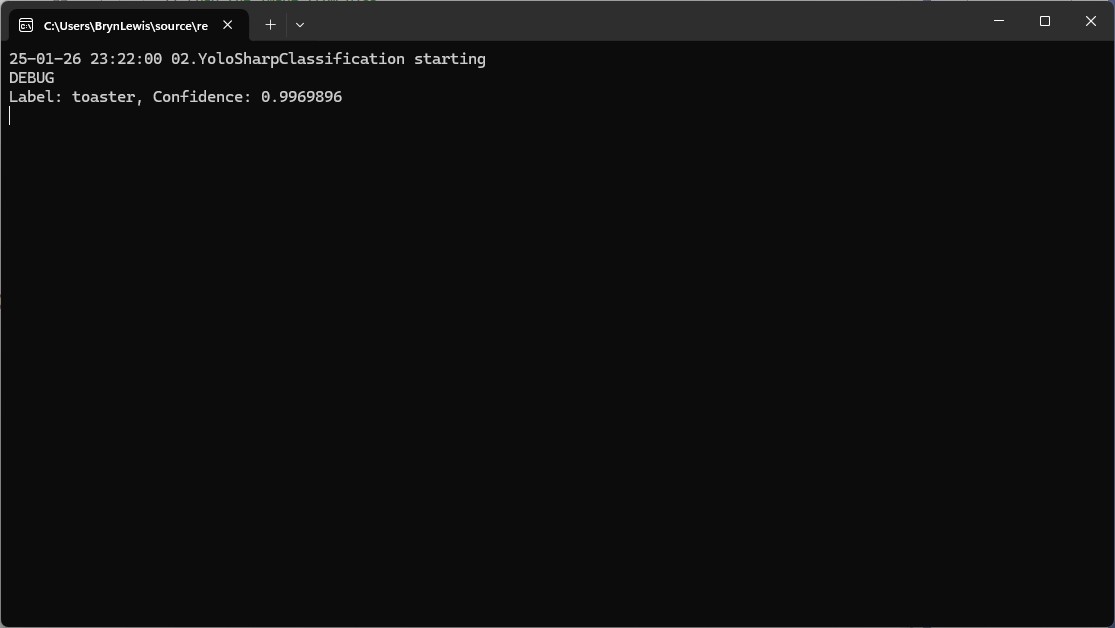
After some minor fixes and shifting the configuration to an appsettings file the application compiled. I tested the implementation with sample “toaster” image from the YoloSharp Github repository
The console application output looked reasonable
I’m pretty confident the input image was a toaster.