This is the second in a series of posts from my session at the Agent Camp – Christchurch about using Open Neural Network Exchange(ONNX) for processing Moving Picture Experts Group (MPEG) video and Pulse Code Modulation(PCM) audio streams.
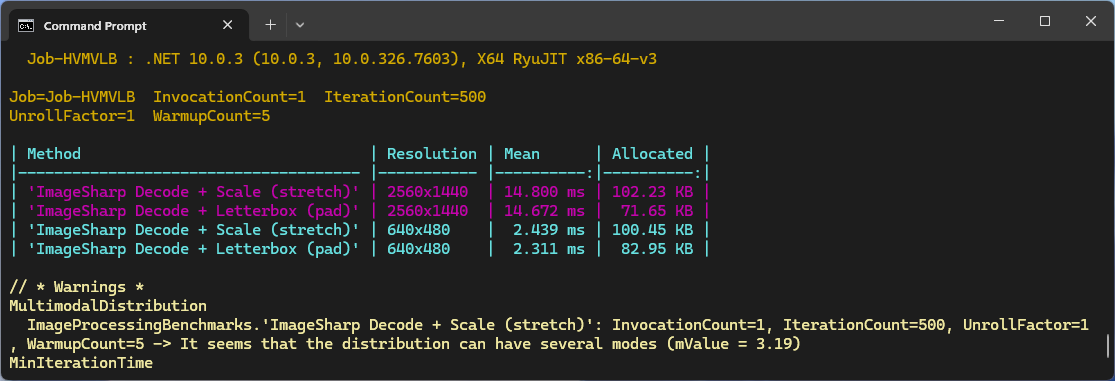
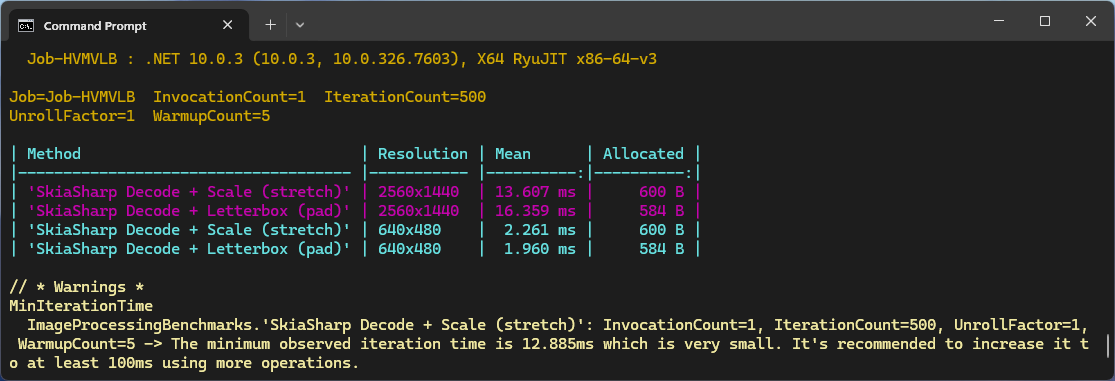
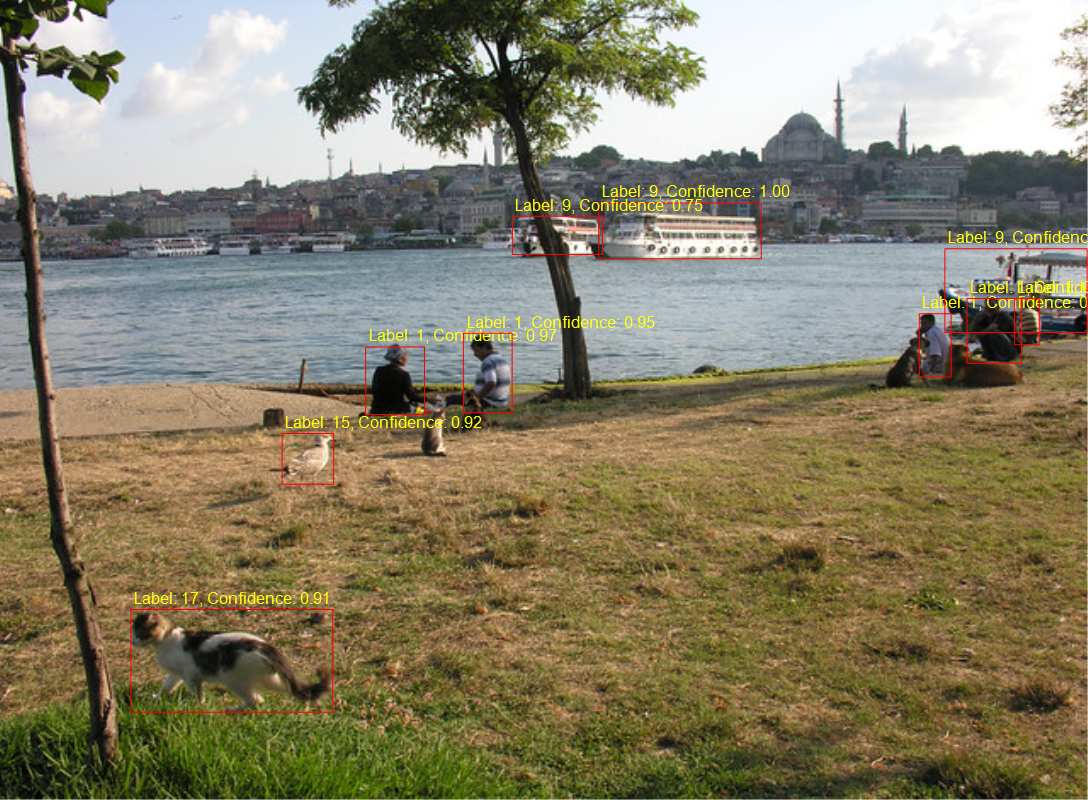
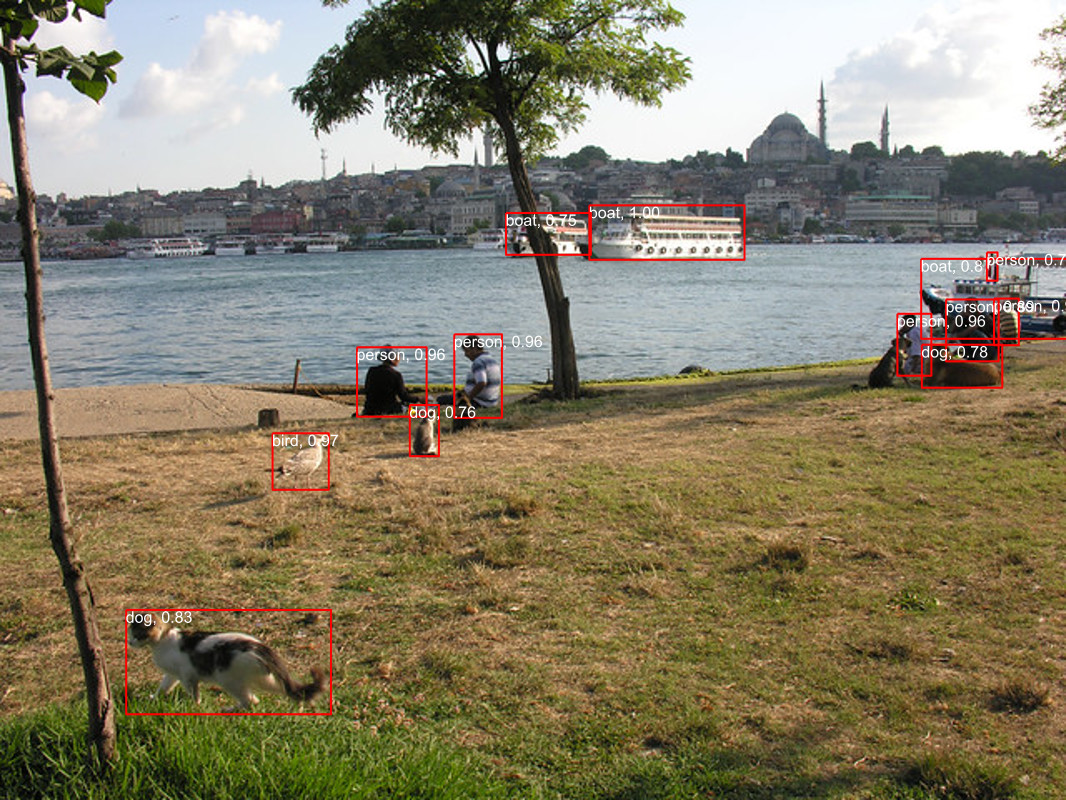
These benchmarks use Ultralytics Yolo26 standard object detection model input image size of 640*640pixels.
var _tensor= new DenseTensor<float>(new[] { 1, 3, modelH, modelW });
The original nested loop: multi-dimensional [0,c,y,x] indexer, with divide by 255f. This is the baseline to measure all other implementations against.
[Benchmark(Baseline = true, Description = "Baseline: indexer + / 255f")]
public void Baseline()
{
   for (int y = 0; y < modelH; y++)
      for (int x = 0; x < modelW; x++)
      {
          var c = _letterboxed.GetPixel(x, y);

         _tensor[0, 0, y, x] = px.Red / 255f;
         _tensor[0, 1, y, x] = px.Green / 255f;
         _tensor[0, 2, y, x] = px.Blue / 255f;
      }
}
The implementation bypasses the multi-dimensional [0,c,y,x] indexer entirely with Span<> over the tensor’s backing buffer. Channel planes are at offsets 0, planeSize, and 2*planeSize. Then a single loop reads each pixel once; writes to all three planes interleaved.
[Benchmark(Description = "Buffer span: flat index, interleaved")]
public void BufferSpan()
{
   SKColor[] pixels = _letterboxed.Pixels;
   const float scaler = 1 / 255f;
   int planeSize = _modelW* _modelW;
   Span<float> buf = _tensor.Buffer.Span;

   for (int i = 0; i < planeSize; i++)
   {
      SKColor px = pixels[i];
      buf[i] = px.Red * scaler;
      buf[planeSize + i] = px.Green * scaler;
      buf[2 * planeSize + i] = px.Blue * scaler;
   }
}
This implementation slices the flat buffer into three non-overlapping channel spans, it then runs three separate sequential loops, one for each colour. This Combines the benefits of span (no indexer overhead, JIT can also auto-vectorise) and with split loops which the JIT can eliminate per-element bounds checks after the slice.
   [Benchmark(Description = "Buffer span split: 3× sequential flat loops")]
   public void BufferSpanSplit()
   {
      SKColor[] pixels = _letterboxed.Pixels;
      const float scaler = 1 / 255f;
      int planeSize = _modelW* _modelH;
      Span<float> buf = _tensor.Buffer.Span;

      Span<float> rPlane = buf.Slice(0, planeSize);
      Span<float> gPlane = buf.Slice(planeSize, planeSize);
      Span<float> bPlane = buf.Slice(2 * planeSize, planeSize);

      for (int i = 0; i < planeSize; i++) rPlane[i] = pixels[i].Red * scaler;
      for (int i = 0; i < planeSize; i++) gPlane[i] = pixels[i].Green * scaler;
      for (int i = 0; i < planeSize; i++) bPlane[i] = pixels[i].Blue * scaler;
   }
The minimal difference in performance of the two fastest implementations of the benchmark suite running on my development box was a surprise. It will be interesting to see how the performance of the different implementations changes on my Seeedstudio EdgeBox RPi 200 which has a different instruction set (esp. ARM NEON Single Instruction, Multiple Data (SIMD) extensions) and memory caching model
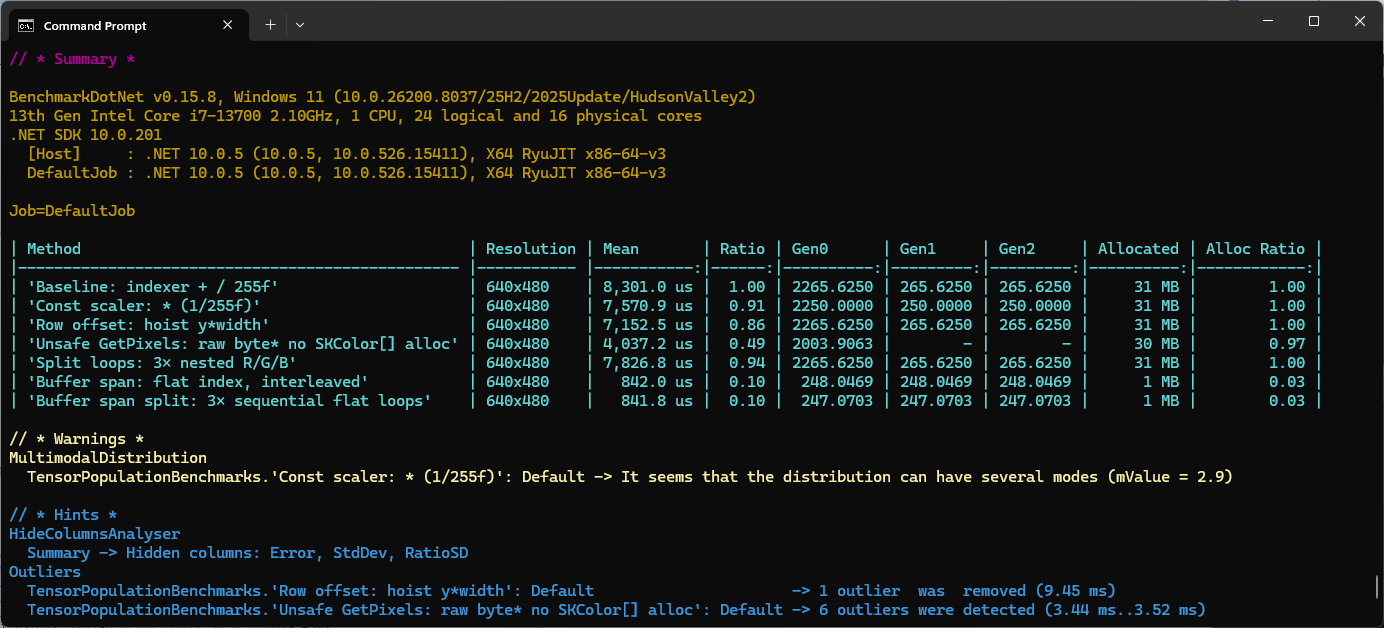
These benchmarks should be treated as indicative not authoritative